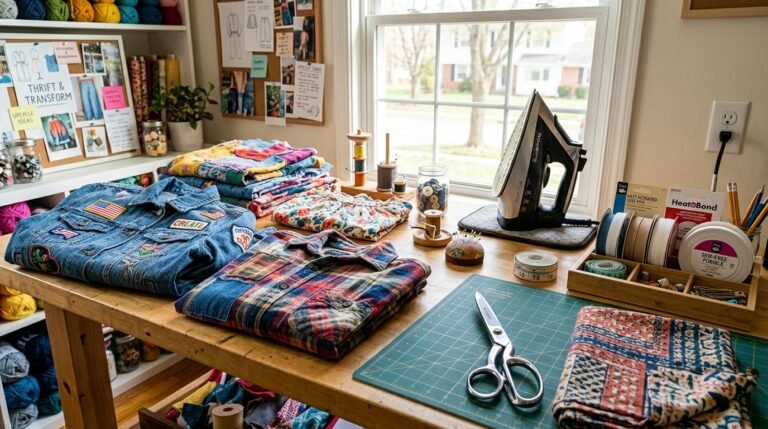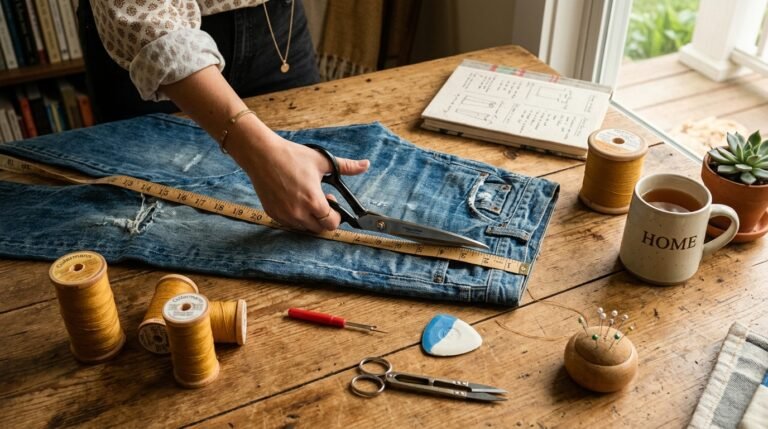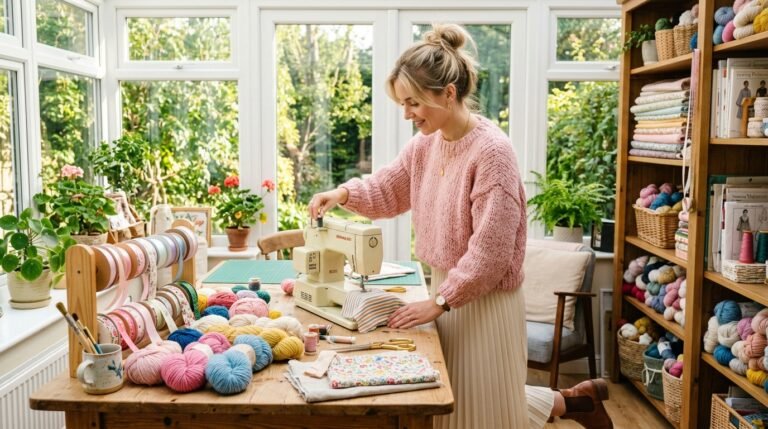
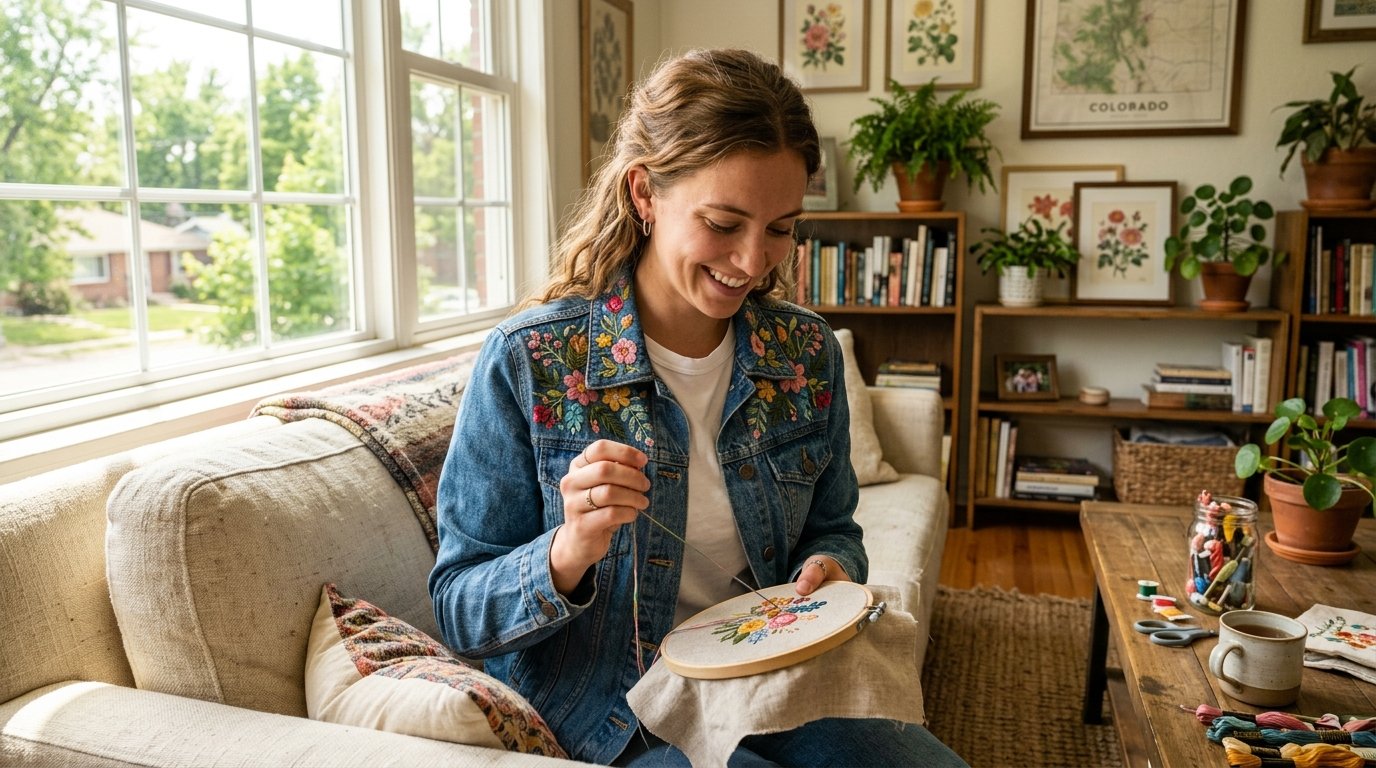
Transforming a plain wardrobe into a personalized collection feels incredibly rewarding when you master basic needlework. Many people stare at their blank garments, wondering how to add that unique touch without spending a fortune. Starting your journey with diy clothes embroidery opens up a world of creative possibilities right at your fingertips. You do not need expensive machines or years of tailoring experience to create beautiful apparel. A simple needle, vibrant thread, and a little patience can completely breathe new life into forgotten shirts, jackets, or jeans sitting idly in the back of your dark closet.
I have noticed that adding small details completely shifts how you feel wearing an everyday outfit. This comprehensive guide walks you through stunning design concepts that anyone can learn quickly. You will discover practical methods for customizing fabrics, preventing common puckering mistakes, and ensuring your artwork survives the washing machine. We will explore everything from delicate floral collars to bold jacket statements that demand attention on the street. Grab your favorite comfortable sweater, set up a bright workspace, and prepare to elevate your personal style through the therapeutic, timeless art of customizing garments with beautiful thread.
Key Transformations & Expectations
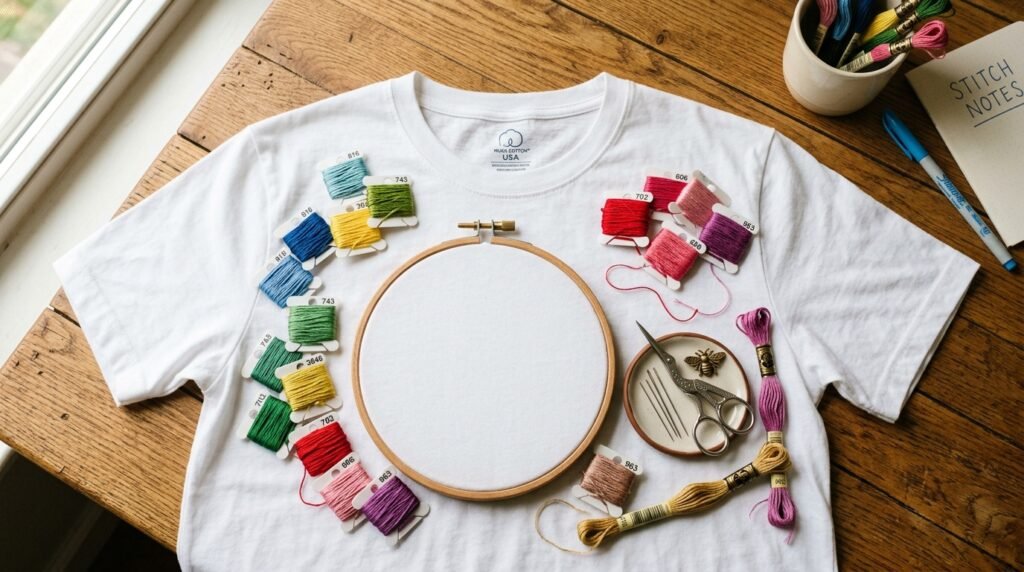
Customizing your wardrobe through needle and thread offers an empowering way to express your unique personality. This guide delivers actionable steps for transforming basic apparel into stunning statement pieces using simple techniques. We break down the exact tools required, typical costs involved, and realistic timelines for finishing your very first project. You will gain insider knowledge about stabilizing stretchy fabrics, choosing the right needles, and avoiding the frustrating thread tangles that discourage many eager beginners. In my experience, understanding these foundational rules saves hours of frustration and guarantees your artwork remains intact through countless laundry cycles.
Mastering these foundational techniques allows you to tackle ambitious projects with absolute confidence. We cover exciting diy clothes embroidery ideas, ranging from minimalist pocket accents to intricate floral patterns on heavy denim. You will learn how to troubleshoot common tension issues and seamlessly transition between different fabric weights without damaging the material. This comprehensive resource also answers your most pressing questions about colorfastness, hoop placement, and pattern transferring. By following these tested strategies, you will quickly develop the practical skills necessary to craft professional-looking, durable, and highly personalized garments that perfectly reflect your individual aesthetic vision.
1. Minimalist Pocket Accents
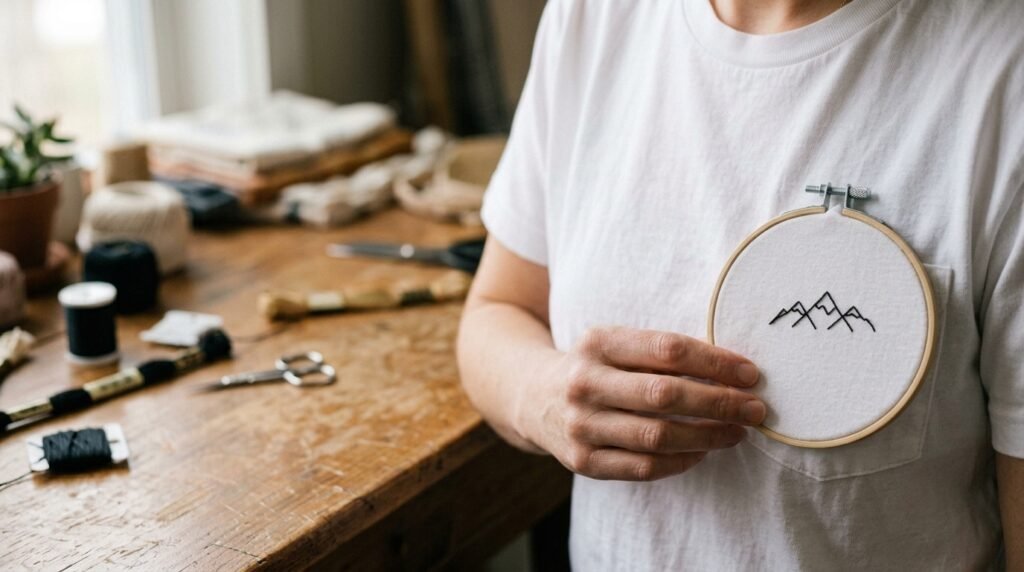
Starting with a small pocket area provides the perfect low pressure environment for nervous beginners. Cotton blend shirts offer a smooth canvas for delicate line work, making them ideal for practicing basic backstitches. I always recommend sketching a simple sunburst or tiny mountain range directly onto water soluble stabilizer before you begin. This method guarantees clean lines and prevents the stretchy cotton fabric from puckering awkwardly under your hoop tension. Keep your thread count low, using perhaps two or three strands, to maintain that delicate, refined aesthetic that looks incredibly chic on modern, casual everyday streetwear apparel.
I have seen many beginners rush this process, resulting in messy knots that irritate the skin underneath. To prevent this, secure your thread tails flatly against the fabric backing using tiny, careful anchor stitches. This technique ensures your diy clothes hand sewing remains comfortable against bare skin all day long. A crisp white tee with a tiny black geometric mountain on the pocket instantly elevates a standard jeans outfit. It takes less than two hours to complete this subtle transformation, delivering instant gratification while building the essential muscle memory required for tackling much larger design concepts.
2. Floral Denim Jacket Collars
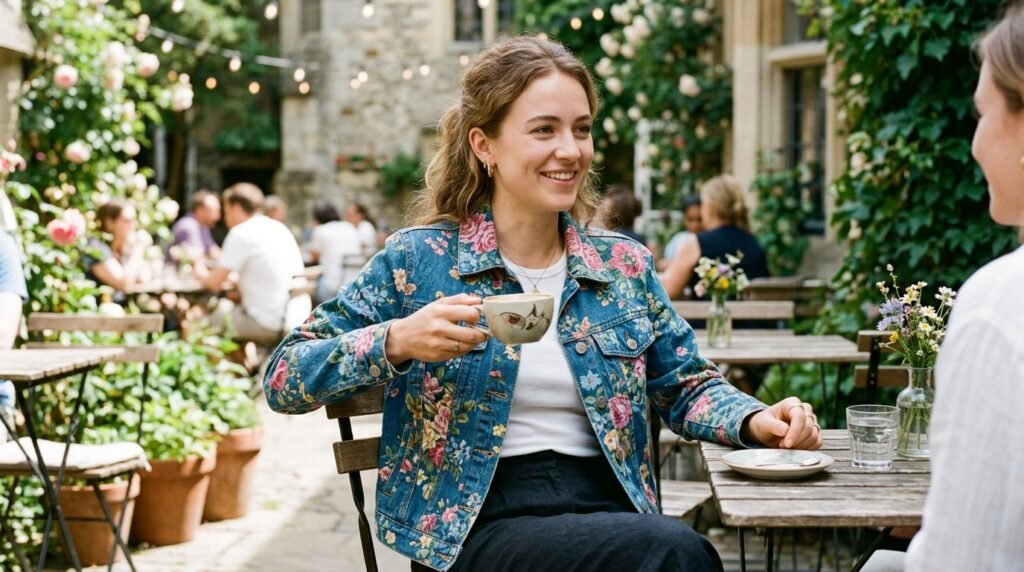
Heavy denim requires significantly more finger strength, but it provides unmatched durability for intricate floral designs. When tackling a jacket collar, you must invest in specialized sharp needles designed specifically for thick fabrics. I learned the hard way that using standard needles on vintage denim usually results in broken metal and incredible frustration. Position your hoop carefully near the collar edge, ensuring the hardware does not crush the existing bulky seams. Choose robust cotton threads that can withstand heavy friction, as collars constantly rub against your neck, backpack straps, and various harsh outdoor environmental elements.
Beginner Daisy Chain Stitches
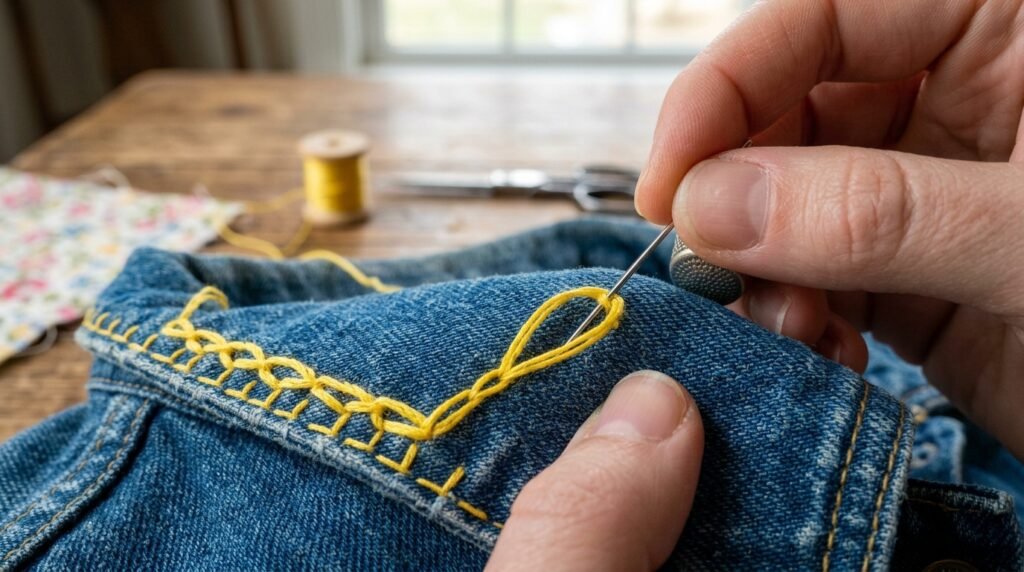
Creating a continuous daisy chain along the collar edge introduces a beautiful, feminine contrast to rugged blue denim. You simply utilize the classic lazy daisy technique, pulling the loop gently to form perfectly rounded petals. I have noticed that mixing three shades of yellow adds unexpected depth to the flower centers. Make sure to space your blossoms evenly, leaving tiny gaps to prevent the thick fabric from becoming overly stiff. This straightforward pattern requires minimal planning but yields a visually striking result that transforms a thrifted, inexpensive jacket into a highly coveted, personalized boutique fashion piece.
Advanced Rose Patchwork Design
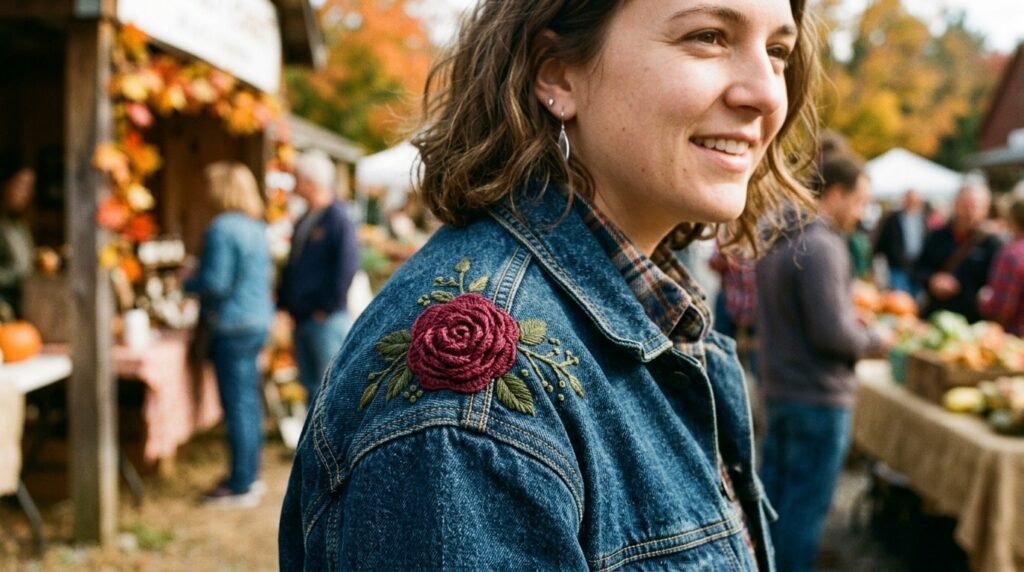
For a more dramatic statement, building a three dimensional rose pattern directly onto the collar corner creates breathtaking texture. This requires mastering the woven wheel technique, which layers thread tightly to simulate lush, blooming petals. Crafting these diy clothes patches directly onto the garment requires patience and careful tension management. You must anchor the foundational spokes deeply into the heavy denim weave for maximum security. Blending rich burgundy and vibrant crimson threads gives the roses a realistic, shadowed appearance. The resulting tactile artwork withstands daily wear beautifully while generating countless compliments from curious strangers admiring your jacket.
3. Hidden Cuff Secret Messages
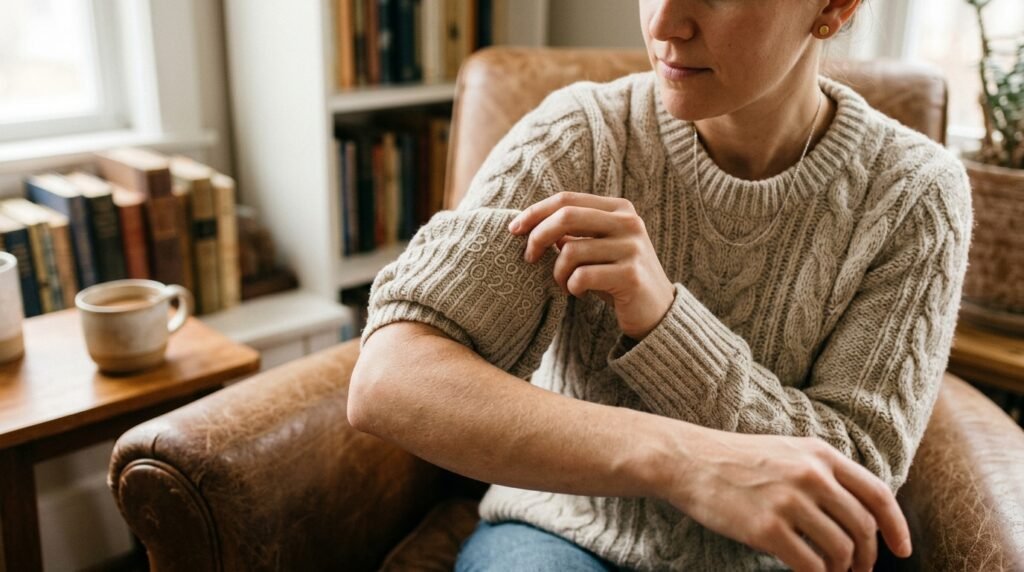
Adding concealed text inside the cuffs of a favorite sweater introduces a deeply personal, intimate element to your wardrobe. This subtle placement means the artwork remains entirely private unless you intentionally roll up your sleeves to reveal it. I often recommend stitching a favorite motivational quote, an important anniversary date, or a loved one initials. Because cuffs stretch constantly over your hands, you must employ a flexible stem stitch that moves naturally with the ribbing. Using a thread color that closely matches the garment creates an elegant, embossed effect that looks incredibly sophisticated and surprisingly professional.
Properly executing this hidden detail requires stabilizing the stretchy cuff material without adding bulky stiffness. A lightweight, wash away stabilizer provides the perfect temporary foundation for your delicate lettering. I have tried multiple methods, and pinning the stabilizer tightly prevents the letters from distorting when the fabric relaxes. Keep your stitches very short, especially around the curved edges of cursive letters, to maintain legibility. Once washed, the stabilizer vanishes completely, leaving behind a beautifully soft, meaningful message that serves as a secret daily source of personal motivation and joy whenever you glance down at your resting wrists.
4. Upcycled Sweatshirt Star Patterns
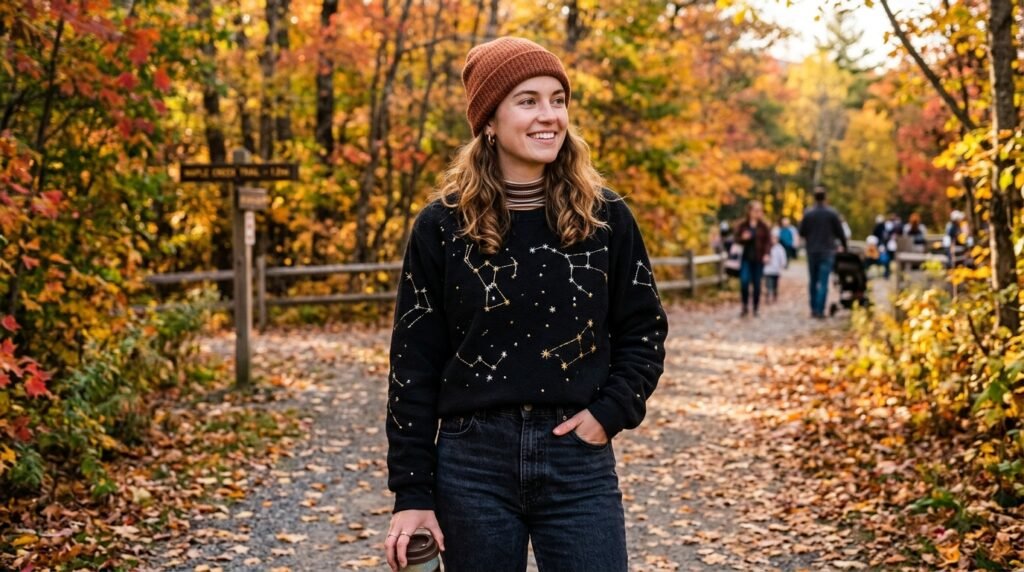
Transforming an old, stained sweatshirt into a trendy celestial masterpiece saves money while significantly reducing textile waste. Strategically placing scattered stars across the chest easily hides minor imperfections, grease spots, or tiny moth holes. You should utilize metallic or glow in the dark threads to make the constellation pattern genuinely pop against dark fleece materials. Working with fleece requires a slightly looser tension, because pulling too tightly creates unsightly dimples that ruin the relaxed drape of the cozy sweater. I always mark my star placements randomly using a chalk pencil, ensuring the final arrangement feels organic and naturally scattered.
Incorporating tiny French knots among the larger stars adds brilliant texture and mimics a realistic night sky. Securing these knots on thick fleece takes practice, as the thread easily slips straight through the loose knit backing. I suggest using a small scrap of iron on interfacing on the reverse side to anchor your work permanently. This protective barrier also prevents the metallic threads from scratching your chest. The finished garment transitions seamlessly from cozy loungewear to a stylish conversation starter. Upcycling your comfortable basics this way completely revitalizes your relationship with clothes you previously considered completely ruined.
5. Custom Pet Portrait Silhouettes
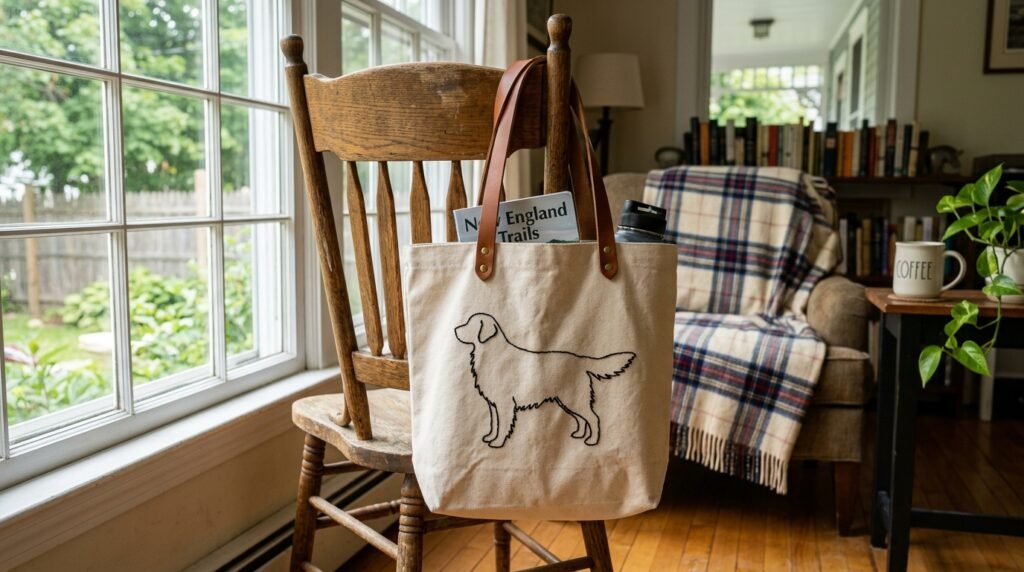
Immortalizing a beloved furry companion on your favorite apparel creates a treasured keepsake that carries massive sentimental value. Capturing the precise shape of your dog or cat requires careful observation and a minimalist approach to line art. Rather than attempting overwhelming hyper realistic shading, focus entirely on the defining curves of their distinct ears, snout, and posture. A simple, single color outline stitched onto a sturdy canvas tote bag or a thick cotton hoodie looks incredibly modern. I have found that solid black or dark charcoal thread provides the best contrast, giving the portrait a striking, professional illustrative quality.
Tracing Your Reference Photo
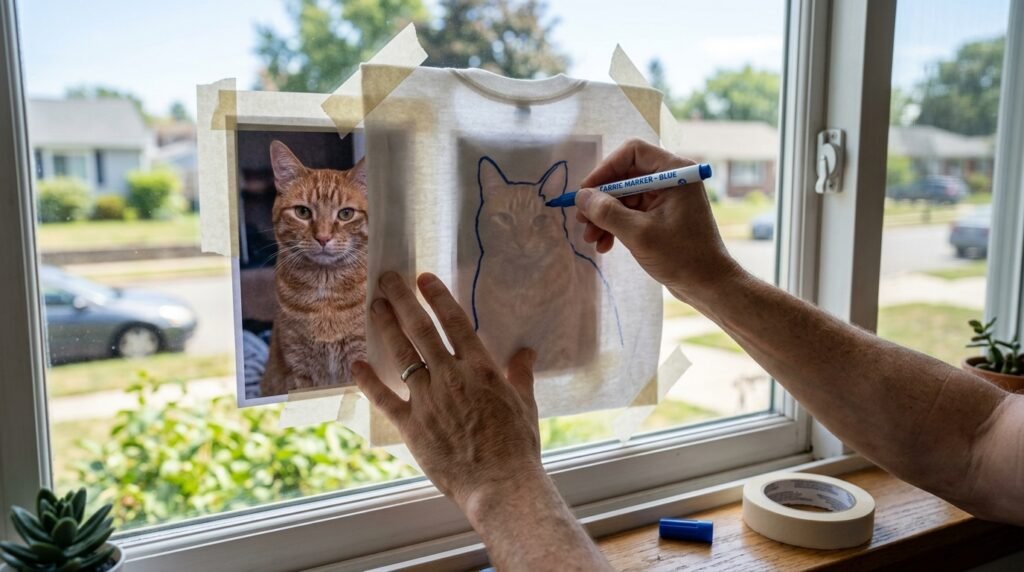
Transferring the image accurately dictates the entire success of this highly personalized project. You must first increase the contrast of your favorite pet photograph using a basic smartphone editing app. Print this adjusted image and tape it securely against a brightly lit windowpane. Place your light colored garment directly over the paper and trace the boldest outlines using a fine tipped, water soluble fabric marker. I have noticed that simplifying the fur texture into smooth, continuous lines makes the stitching process significantly easier. This direct tracing method eliminates guesswork, guaranteeing the final silhouette remains instantly recognizable as your specific pet.
Selecting Proper Thread Colors
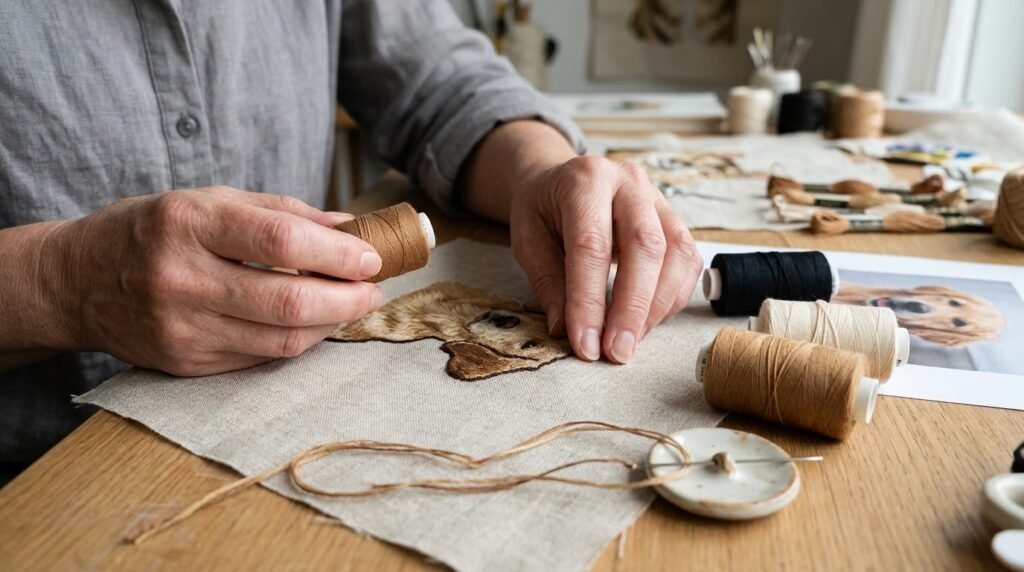
While stark black outlines work beautifully, sometimes matching your pet actual coat color adds a wonderful touch of warmth. If you choose this route, select a thread that is two shades darker than the fabric to ensure the silhouette remains highly visible. Blending two closely related colors on the needle simultaneously creates a subtle, heathered effect that perfectly mimics the natural variation in animal fur. I recommend avoiding overly shiny polyester threads for this specific design. Matte cotton thread absorbs light naturally, lending a much softer, highly artistic quality to the completed, deeply meaningful animal tribute piece.
6. Abstract Geometric Sleeve Details
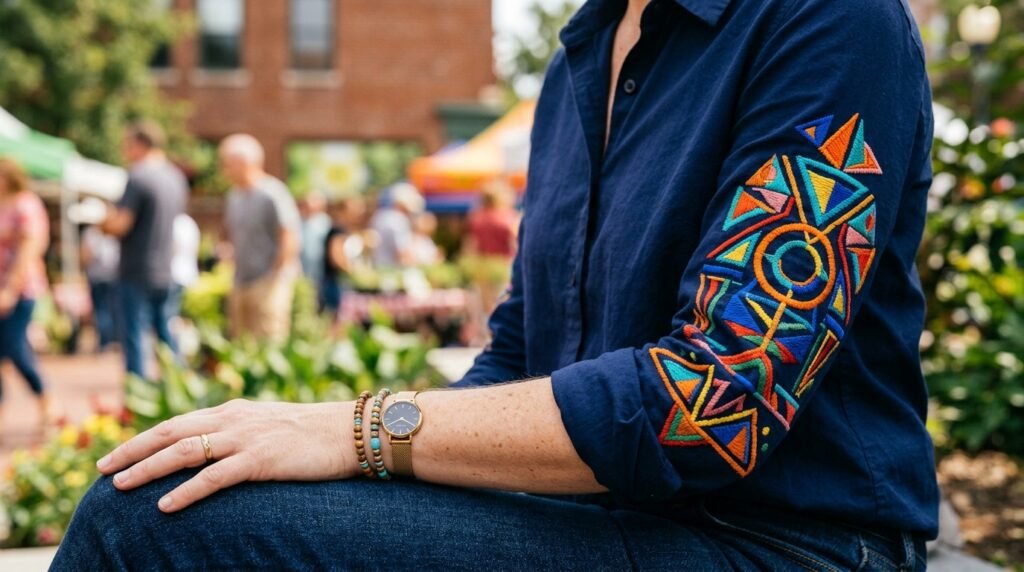
Applying bold, modern geometric shapes down the length of a sleeve completely modernizes an otherwise boring button down shirt. Triangles, interlocking circles, and sharp chevrons create a fascinating visual rhythm that draws the eye downward. You can utilize the satin stitch to fill these precise shapes with vibrant, highly saturated colors. Achieving perfectly smooth edges requires laying your threads exactly parallel to one another without any overlapping. I have seen many designers recommend outlining the shape first with a tiny backstitch, which provides a raised, crisp boundary that guides your filling stitches and guarantees razor sharp outer corners.
Working along a narrow sleeve presents unique physical challenges regarding hoop placement and fabric manipulation. You often cannot fit a standard wooden hoop inside the restrictive tubular space of a tailored cuff. Instead, I suggest using a tiny, three inch plastic spring hoop, moving it frequently as you progress down the arm. Always keep your non dominant hand inside the sleeve to prevent accidentally sewing the front and back panels together. This striking geometric design technique beautifully merges traditional handcraft with contemporary fashion, resulting in a stunning, wearable art piece that perfectly reflects your bold, unconventional personal style.
7. Vintage Botanical Hemline Borders
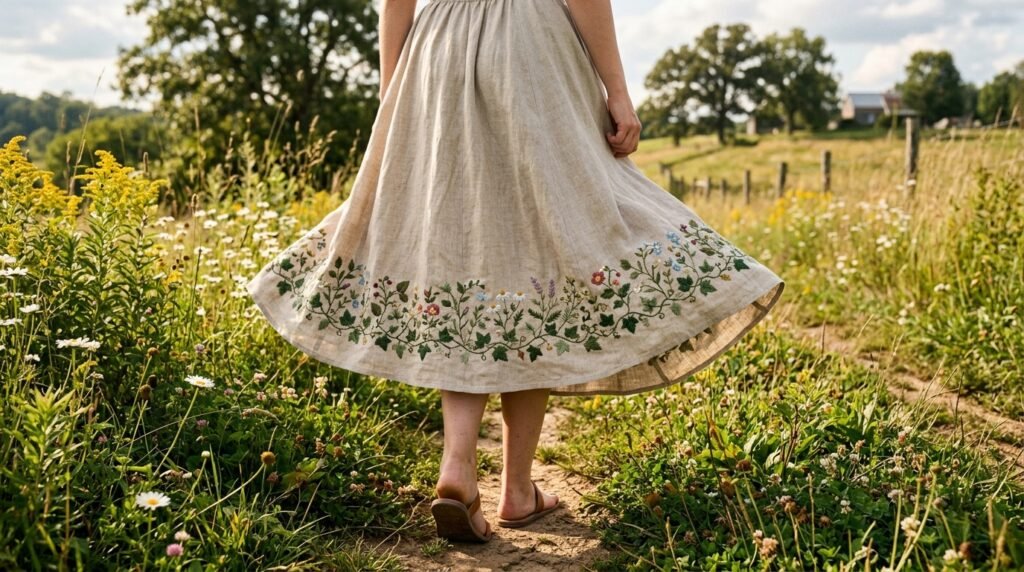
Creating a sweeping, continuous botanical border along the bottom hem of a flowing skirt adds incredible romantic charm. Vines, trailing ivy, and tiny blooming wildflowers look stunning when stitched slightly above the finished edge. This placement protects the delicate artwork from dragging on the floor while remaining highly visible as you walk. Utilizing varied shades of sage, olive, and forest green introduces wonderful dimension to the sprawling foliage. I always advocate for using the split stitch for winding stems, as it creates a thick, textured line that curves beautifully without leaving awkward, jagged gaps in the design.
Managing the sheer volume of fabric involved in a skirt hem requires excellent organizational skills and immense patience. You must carefully roll and clip the excess material out of your way to prevent frustrating tangles. Maintaining consistent spacing across a wide circumference proves challenging, so marking equidistant anchor points with tailor chalk keeps your pattern perfectly aligned. The heavy thread adds subtle weight to the hem, improving how the skirt drapes and swings in the breeze. This elaborate project requires significant time, but the breathtaking, heirloom quality result absolutely justifies every single hour spent meticulously crafting it.
8. Hand-Sewn Canvas Sneaker Art
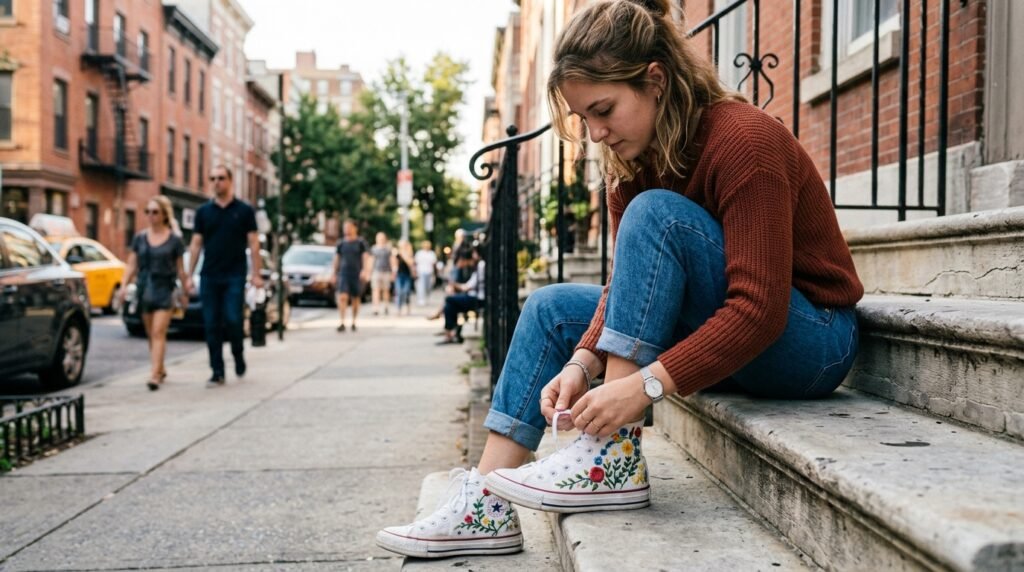
Customizing high top canvas sneakers transforms mass produced footwear into completely exclusive, highly sought after wearable street art. The thick, rigid canvas material easily supports dense, heavy stitching without requiring any additional stabilizers. You should utilize small, sharp needles and a sturdy metal thimble to push through the tough, glue reinforced sections near the rubber soles. I have seen this work incredibly well with vibrant floral motifs wrapping around the iconic ankle logos. Securing your knots tightly remains critical here, as the interior of the shoe constantly experiences heavy friction from your socks during intense, everyday urban walking activities.
Navigating the tight, curved interior of a sneaker demands patience and strategic, careful needle angles. You cannot utilize a traditional hoop, so you must rely entirely on the shoe natural structural stiffness. Pulling the tongue completely forward provides maximum access to the vulnerable side panels. I recommend coating the finished interior stitches with a thin layer of specialized fabric glue to prevent abrasive rubbing against your sensitive heels. Sporting hand stitched sneakers instantly elevates any casual outfit, proudly showcasing your unique creative talents while providing a durable, highly personalized alternative to expensive, limited edition designer footwear releases.
Frequently Asked Questions
How do I wash my newly stitched garments safely? Preserving your beautiful artwork requires a gentle approach to laundry day. You should always turn the garment completely inside out to protect the delicate threads from catching on zippers or rough buttons. Use cold water and a mild, bleach free detergent to prevent vibrant colors from bleeding or fading prematurely. I always advise placing the item inside a mesh lingerie bag for an additional layer of security during the machine cycle. Never throw these customized pieces into a hot tumble dryer. Instead, lay them perfectly flat on a clean towel, allowing them to air dry naturally.
What is the best fabric for absolute beginners? Starting your needlework journey on the right material prevents massive frustration and ruined garments. Medium weight, non stretch cotton or linen blends provide the absolute best foundation for novices learning proper tension. Denim jackets also offer incredible stability, though they require slightly more finger strength to penetrate. You should actively avoid thin silk, slippery satin, or highly elastic athletic wear until you gain significant experience. I have noticed that old cotton button down shirts from a local thrift store serve as excellent, inexpensive practice canvases. They hold the hoop securely without warping, allowing you to focus entirely on perfecting stitches.
How do I prevent my fabric from puckering awkwardly? Puckering remains the most common issue plaguing enthusiastic beginners, but it is entirely preventable with proper preparation. The primary culprit is pulling your working thread way too tightly, which brutally forces the delicate fabric fibers together. You must keep your fabric stretched tightly across the wooden hoop, mimicking the rigid surface of a drum. If the material feels loose or bouncy, carefully tighten the hardware screw and pull the edges gently. I also highly recommend using a high quality stabilizer backing for thinner shirts, which provides necessary structural integrity and permanently stops unsightly bunching around your designs.
Can I use regular sewing thread for these projects? While technically possible in a massive emergency, standard sewing machine thread is generally far too thin and weak for decorative handwork. It lacks the beautiful, lustrous sheen and necessary thickness that makes raised designs truly pop off the fabric. You should invest in proper six strand cotton floss, which allows you to easily separate and customize the exact thickness of your lines. I have tried using regular thread for small details, but it easily tangles and snaps under manual tension. Dedicated floss yields a much smoother, vastly superior, and highly professional looking finish that remains incredibly durable over time.
How long does a standard pocket design usually take? Time commitments vary wildly based on the intricate complexity of your chosen pattern and your personal experience level. A simple, minimalist outline of a flower or mountain on a shirt pocket typically takes a beginner around two hours to complete fully. As you develop crucial muscle memory, this time drops significantly. Dense, heavily filled designs utilizing satin stitches will easily demand four to six hours of focused attention. I always suggest breaking these longer sessions into manageable thirty minute chunks. This prevents painful hand cramping, reduces eye strain, and keeps the creative process feeling relaxing and highly enjoyable.
Do I absolutely need to use a wooden hoop? While not strictly mandatory for every single project, utilizing a hoop dramatically improves the final quality of your work. The hoop maintains consistent, even tension across the fibers, preventing the material from distorting as you repeatedly pull thread through it. For thick, rigid materials like heavy denim jackets or canvas sneakers, you can safely skip the hoop entirely. However, for stretchy shirts or soft sweaters, working without a hoop almost guarantees a messy, terribly puckered disaster. I strongly suggest keeping a versatile four inch plastic or wooden hoop in your kit, as it accommodates most standard apparel projects beautifully.
What needle size should I purchase first? Navigating the overwhelming needle aisle at a craft store confuses many beginners, but keeping it simple is key. You should purchase a multi pack of standard needles, specifically sizes three through nine. These feature a longer eye, making it incredibly easy to thread multiple strands of thick cotton floss simultaneously. They possess a sharp tip that effortlessly pierces tightly woven apparel fabrics without snagging. I have noticed that using a size five works perfectly for standard six strand floss on medium weight cotton. Always switch to a specialized, heavy duty needle when attempting to customize thick denim or tough canvas.
How do I transfer a pattern onto dark clothing? Transferring designs onto black or navy garments requires specific tools, as standard pencils completely vanish against dark backgrounds. You should utilize a white, water soluble tailor chalk pencil or a specialized white gel pen designed exclusively for fabrics. Another highly effective method involves using a white carbon transfer paper placed directly between your printed pattern and the dark shirt. Simply trace firmly over your design using a dull stylus. I have found this technique leaves a crisp, bright outline that stays visible while you work but easily washes away completely with a quick splash of cold tap water.
Are there specific knots I should use for clothing? Securing your threads properly is absolutely vital when creating wearable art that undergoes frequent, aggressive machine washing. A standard bulky knot easily unties itself or creates an uncomfortable, scratchy bump against your bare skin. Instead, I heavily rely on the incredibly secure waste knot technique, followed by three tiny anchor stitches hidden directly underneath the main design. When finishing a thread, weave the needle back and forth securely through the backside of your existing stitches. This flat, knotless finishing method guarantees your beautiful artwork survives decades of wear without ever unravelling, snagging, or causing uncomfortable skin irritation.
Can I cover a permanent stain with a design? Absolutely! Covering unsightly stains or tiny holes is arguably the most satisfying, practical application for this incredible craft. You completely rescue a damaged garment from the landfill while simultaneously upgrading its aesthetic value. Simply center your chosen design directly over the blemish, ensuring the stitched area extends slightly past the damaged borders for maximum security. I often recommend using densely packed satin stitches or clusters of textured French knots to fully conceal dark ink spots or stubborn grease stains. This sustainable, highly creative approach transforms your most frustrating wardrobe accidents into stunning, completely intentional bespoke fashion statements.
Will the colors bleed when I wash the shirt? Dye bleeding ruins hours of meticulous labor, making colorfastness a massive priority for any wearable project. You must strictly purchase high quality, reputable thread brands, as cheap alternatives frequently shed their vibrant dye during the first wash. If you remain unsure about a specific spool, test it first by soaking a small piece in warm water and pressing it firmly against a white paper towel. I have seen many tragic disasters avoided by taking this simple precaution. Always wash your newly customized garments in completely cold water, avoiding harsh chemical bleaches that quickly strip away those beautiful, vibrant hues.
How do I fix a mistake if I sew wrong? Making errors is an inevitable, entirely normal part of the creative learning process, and correcting them is usually quite simple. If you misplace a stitch, carefully remove your needle and gently pull the thread backward through the exact same hole. For larger, more complicated tangled messes, do not panic and aggressively yank the fabric. Instead, use a specialized seam ripper or tiny, sharp scissors to carefully snip the problematic threads from the backside. I have noticed that taking your time during removal prevents accidental holes, allowing you to easily restart the section with fresh thread and renewed confidence.
Your Next Creative Steps
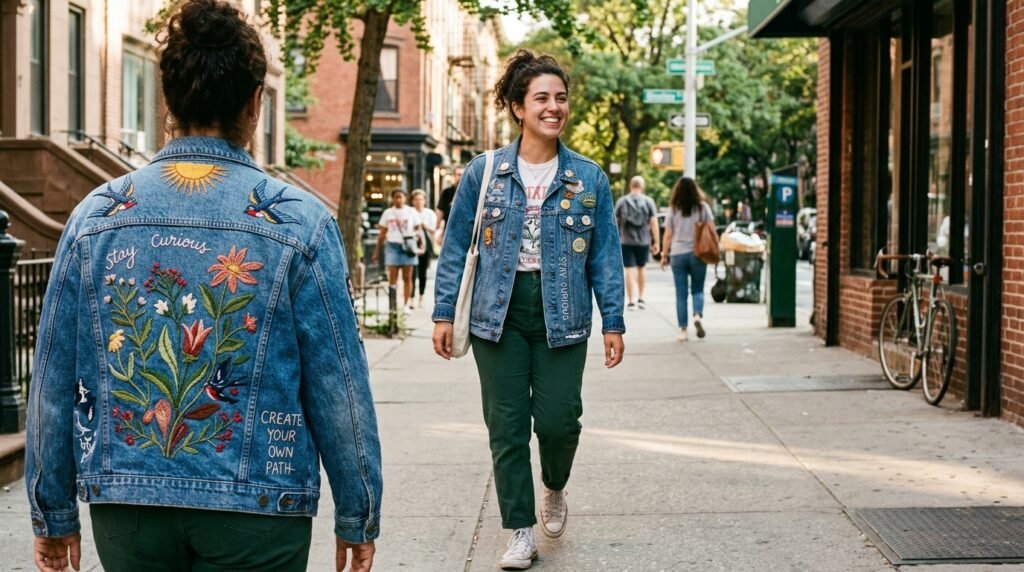
Elevating your wardrobe through the timeless art of needlework offers unparalleled creative freedom and profound personal satisfaction. You now possess the strategic knowledge, technical skills, and troubleshooting confidence necessary to transform ordinary basics into breathtaking statement pieces. Remember to embrace the inevitable learning curve, allowing yourself grace as you master crucial tension control and complex stitching patterns. I encourage you to save this comprehensive guide on Pinterest for quick visual reference during your next creative session. Grab your favorite comfortable denim jacket, thread your needle boldly, and start bringing your completely unique, highly personalized fashion visions to life today.

Amelia leads HavenlyStyle’s editorial vision with a passion for elegant interiors and practical home living. With years of experience in home décor and lifestyle content, she ensures every article is accurate, inspiring, and easy to follow. From timeless decorating ideas to the latest interior design trends, Amelia is committed to helping readers create beautiful, functional spaces while maintaining HavenlyStyle’s trusted and welcoming voice.