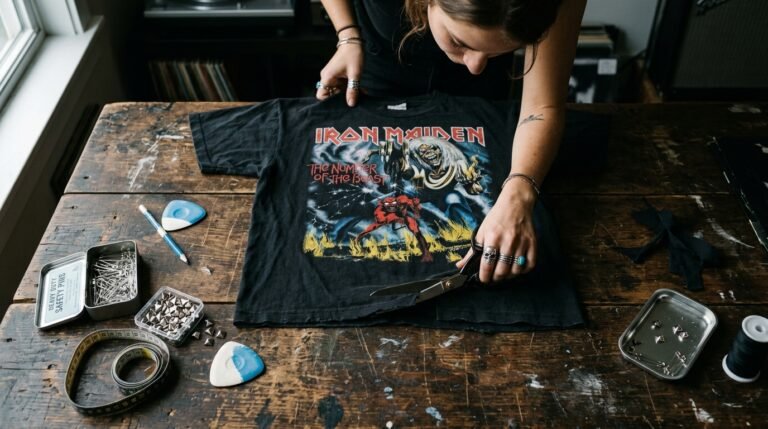
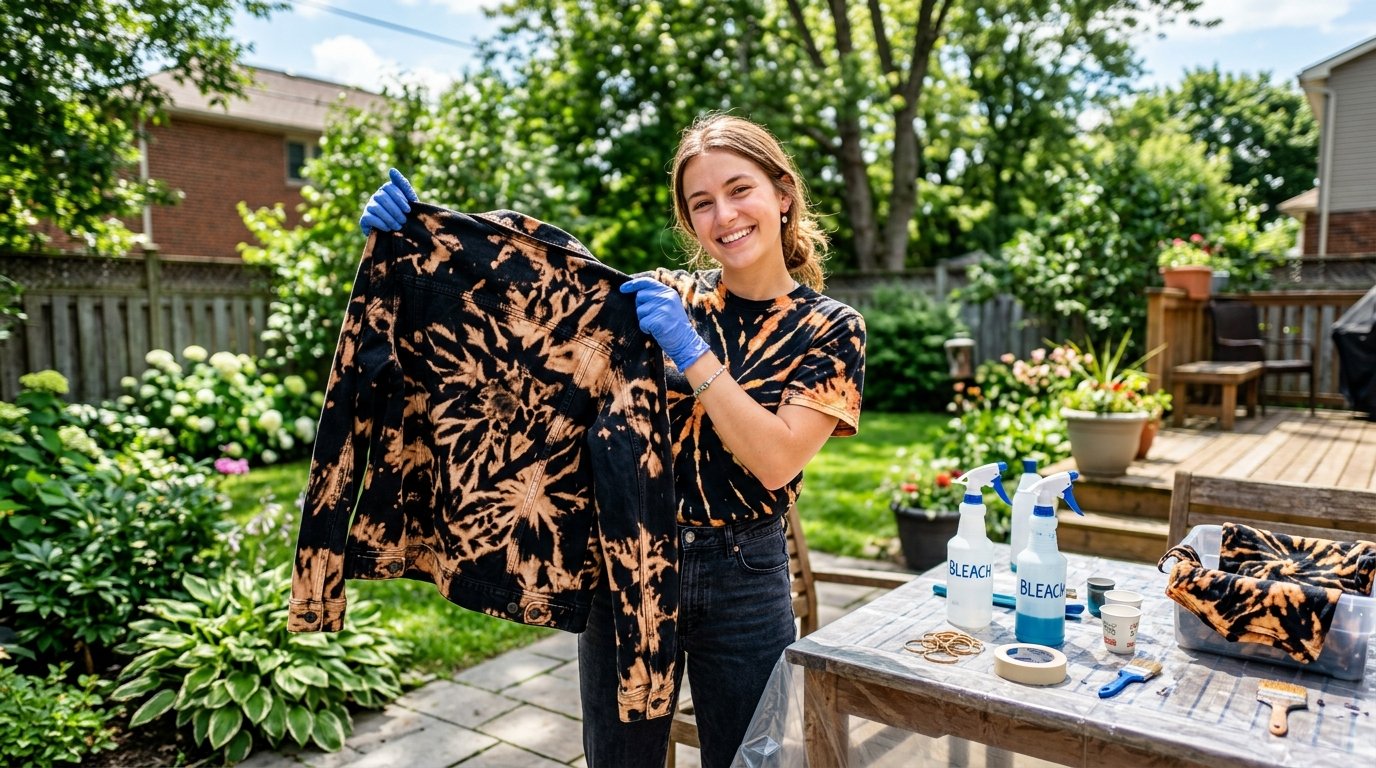
Have you ever looked at a boring dark shirt and wished for something more exciting? Plain basics often lose their appeal after just a few wears. You do not need to throw them away or buy expensive replacements. I have transformed countless dull garments into stunning statement pieces using household supplies. This process brings fresh life to tired fabrics without breaking the bank. The secret lies in learning how to manipulate chemical reactions creatively. Today we will explore how diy clothes bleach ideas can completely revitalize your entire wardrobe. You will save money while wearing truly unique handmade designs.
Creating custom apparel at home feels incredibly rewarding and surprisingly simple. Many people fear ruining their favorite shirts with harsh chemicals. In my experience following basic safety rules eliminates almost all risks. You only need a well ventilated space and some inexpensive protective gear. I once ruined a lovely black hoodie by guessing the dilution ratios. That failure taught me the exact measurements needed for perfect results every time. This guide shares my tested methods for creating beautiful wearable art. Get ready to turn those forgotten closet basics into your new favorite everyday outfits.
Executive Summary
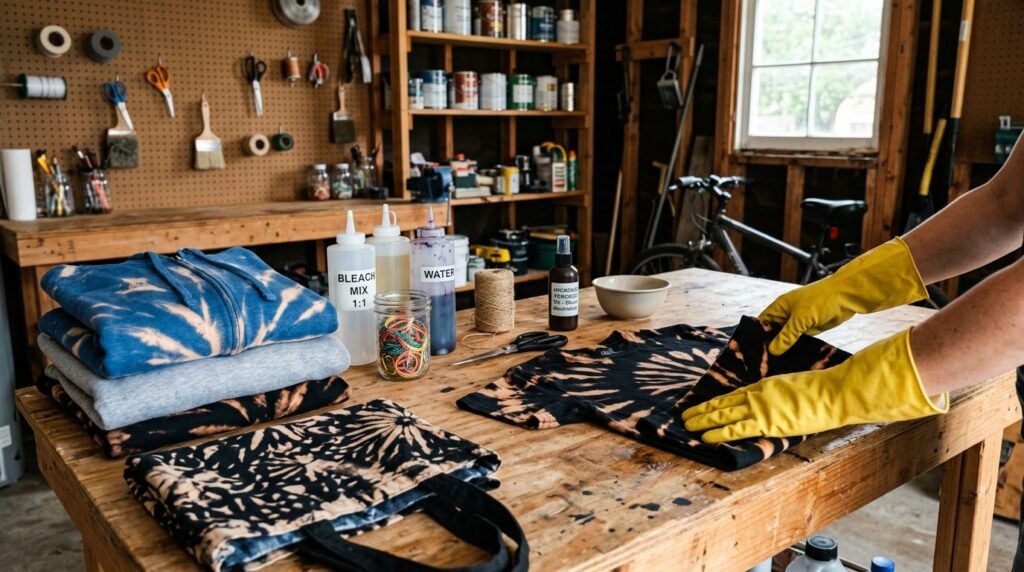
This comprehensive guide reveals exactly how to execute eight stunning transformation techniques. We cover everything from classic spiral patterns to modern geometric folds. You will learn the precise liquid ratios needed for different fabric weights. I have included my personal troubleshooting steps for common fading issues. We will also explore the exact tools required for professional looking results. Most projects take under an hour of active hands on time. The material costs rarely exceed five dollars per transformed garment. You will discover how specific fabrics react differently to chemical lightening agents. These tested methods guarantee beautiful consistent results.
Understanding the neutralizing process is crucial for long lasting custom apparel. Many beginners skip this step and watch their fabrics deteriorate over time. I will show you exactly how to stop the chemical reaction safely. We use a simple hydrogen peroxide bath to protect your clothing fibers. You will find detailed cost breakdowns for every required supply and tool. I also share my personal recommendations for the best application bottles available. These insights come from years of testing various brands and chemical concentrations. Let us dive into creating your custom wardrobe with these proven transformation strategies.
1. Reverse Tie-Dye Swirl
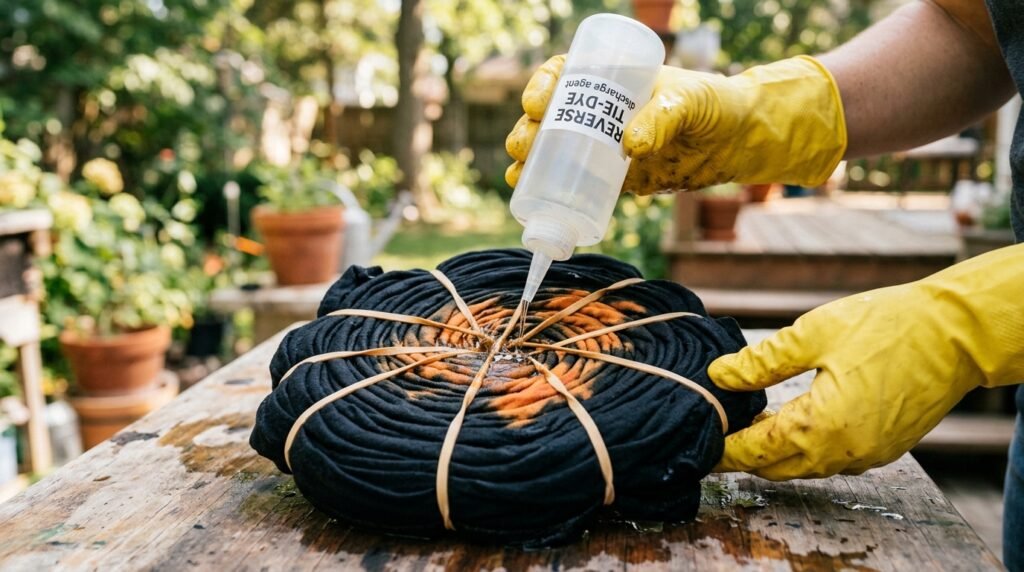
The classic spiral remains a favorite for transforming dark cotton shirts. You start by pinching the center of your shirt and twisting tightly. Rubber bands hold the fabric disc together in a compact round shape. I usually apply the lightening solution in alternating pie slice sections. This creates a striking high contrast look against the original dark fabric. In my experience applying the liquid slowly yields much sharper dividing lines. Rushing this step often results in a muddy undefined central pattern. You must let the solution soak into the folded layers completely.
Monitoring the color change requires constant attention during the first ten minutes. Different cotton blends lift color at drastically different rates. A pure black shirt might turn rust orange before shifting to pale yellow. I have noticed that adding a tiny drop of dish soap helps penetration. The soap breaks the surface tension allowing deeper color removal. You should always wear thick rubber gloves when handling saturated fabrics. Setting a timer prevents accidental over processing which weakens the cotton fibers. My first spiral attempt melted because I left it soaking for two hours.
Washing the garment correctly ensures your design stays crisp and vibrant. You must rinse the bound fabric under cold water before removing bands. Unfolding the shirt too early lets active chemicals bleed into dark areas. I always submerge the rinsed shirt in a neutralizing hydrogen peroxide bath. This crucial step immediately halts any remaining corrosive chemical reactions. After neutralizing you can wash the item normally with gentle laundry detergent. The resulting pattern features striking organic lines bursting from the center. This simple technique breathes entirely new life into faded thrift store finds.
Many creative folks sell these custom spiral shirts for excellent profits online. Creating a consistent product requires measuring your liquid ratios very carefully. I recommend mixing one part bleach with one part plain tap water. This fifty fifty blend offers the perfect balance of speed and control. Weaker solutions take too long while stronger mixes damage thin fabrics quickly. You can find quality applicator bottles at most local craft supply stores. I prefer bottles with fine metal tips for maximum placement accuracy. Proper tools make reproducing your successful designs much easier and faster.
2. Subtle Ombre Dip
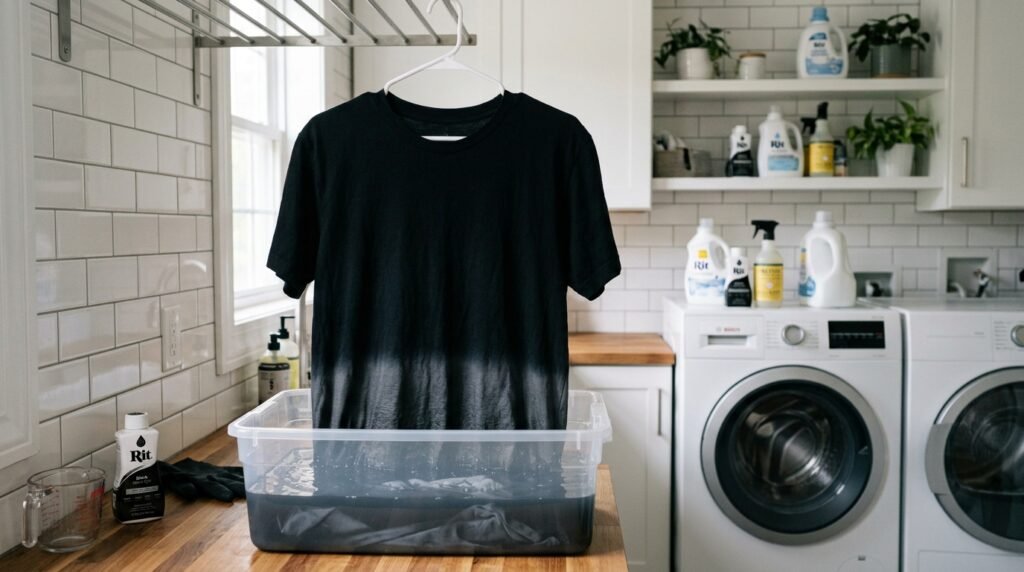
Creating a smooth gradient requires patience and a specific dipping technique. You want the bottom of the garment to be the lightest part. The color should slowly transition back to the original dark shade upward. I hang the shirt over a plastic tub using a sturdy hanger. You fill the tub with your diluted lightening mixture carefully. Lowering the fabric in stages creates the beautiful fading transition effect. In my experience wetting the shirt with plain tap water first helps immensely. Damp fabric pulls the chemical upward naturally through simple capillary action.
Beginner Ombre Technique
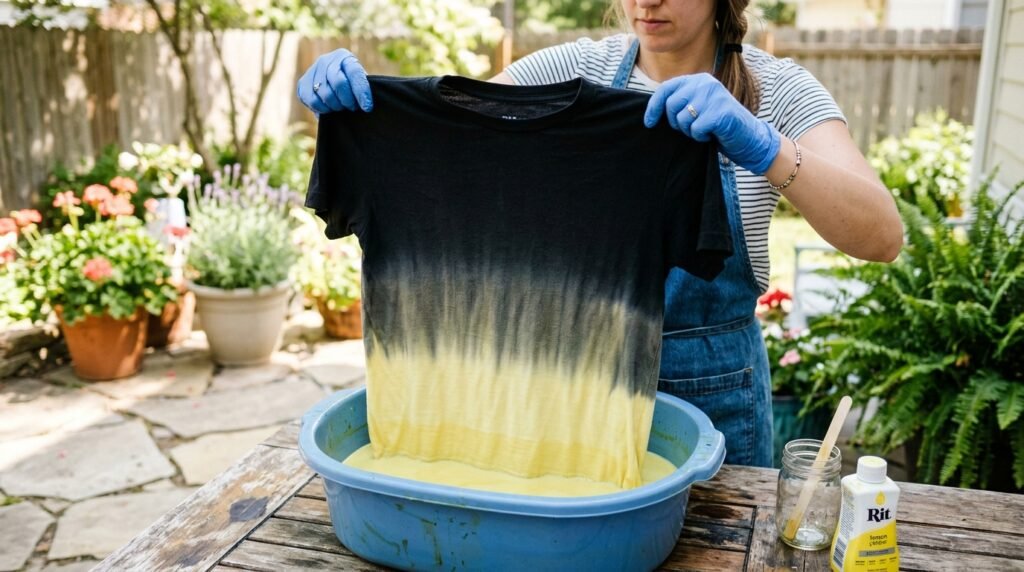
Start by dipping just the bottom three inches of your damp shirt. You should leave this bottom section submerged for about ten full minutes. Next you lower another three inches into the solution for five minutes. This creates a staggered lightening effect that looks like a painted gradient. I always agitate the liquid slightly to prevent harsh horizontal demarcation lines. You must watch the fabric closely as the chemical creeps upward naturally. Removing the shirt before the top gets too light is very important. Rinse the entire piece thoroughly with cold running water immediately.
Advanced Gradient Blending
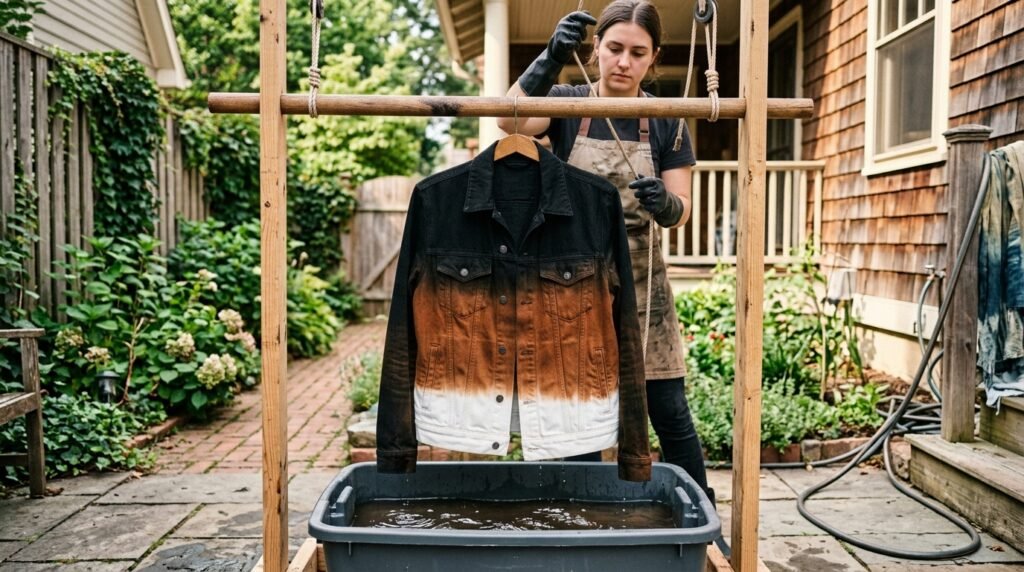
Achieving a seamless fade requires manipulating the liquid concentration during the process. I start with a very weak solution for the highest fabric section. You then add pure chemical to the tub for the middle section. The bottom gets dipped into the strongest concentration for the longest time. This creates a flawless transition without any visible banding or harsh stops. I have seen this work beautifully on heavy cotton denim jackets especially. The thick material handles multiple saturation levels without losing structural integrity. Mastering this takes practice but the professional results are absolutely stunning.
Controlling the fading process on synthetic blends often presents unique challenges. Polyester threads resist chemical lightening and maintain their original dark color entirely. This leaves a speckled look that many designers actually prefer and seek. I highly recommend checking the garment tags before attempting a gradient dip. You want at least eighty percent cotton for a smooth color transition. My favorite project involved transforming a basic black maxi dress into ombre. The sweeping visual effect made a ten dollar dress look like designer fashion. This method truly elevates simple garments into boutique quality pieces.
3. Splatter Paint Effect
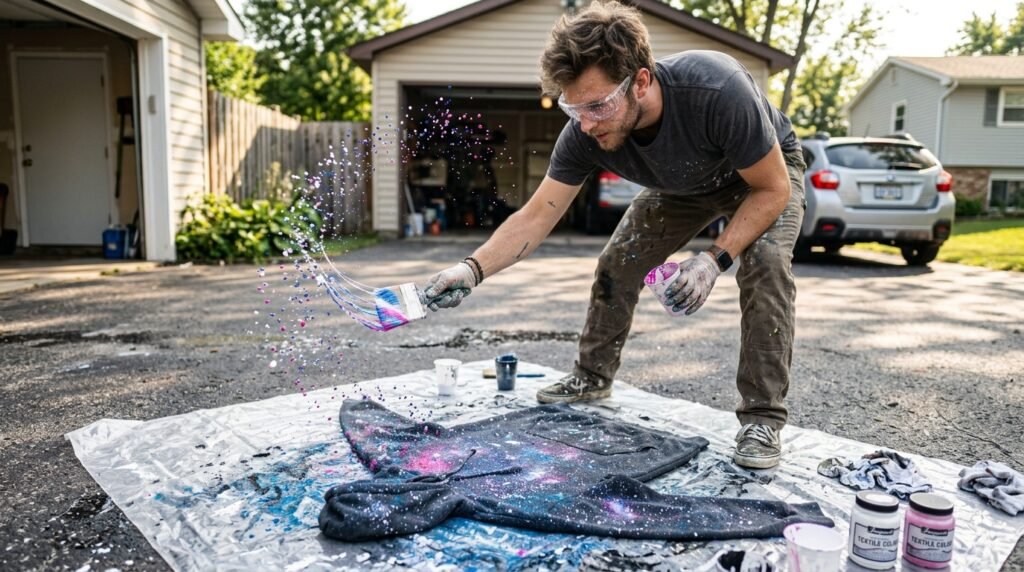
The splatter technique offers the most creative freedom of any bleaching method. You lay the dark garment completely flat on a protected outdoor surface. I use various household brushes to flick the lightening solution onto fabric. An old toothbrush creates a beautiful fine mist of tiny light speckles. A large synthetic paintbrush delivers thick dramatic drops and heavy bold lines. In my experience varying the brush sizes creates the most interesting visual depth. You can layer the splatters by letting the first round process completely. This builds a complex galaxy effect on plain dark shirts.
Protecting your surroundings is absolutely vital when flinging corrosive chemicals around blindly. I always work outside on a large heavy duty plastic drop cloth. You should wear old clothes and protective eyewear to prevent accidental splashing. The wind can easily blow fine mist back into your face unexpectedly. I learned this lesson the hard way during a breezy afternoon session. You only need a few ounces of mixture for an entire shirt. This makes splattering the most cost effective way to modify your clothing. The random nature of the drops guarantees a completely unique design.
Layering different concentrations creates incredible dimension within the final splatter pattern. I start with a strong fifty fifty mix for the largest drops. These process quickly and turn almost white against the dark background fabric. Then I use a weaker twenty eighty mix for the fine misting. These tiny specks turn a medium rust color instead of stark white. I have noticed this two toned approach mimics natural stone or starry skies. You must neutralize the entire garment carefully once you achieve desired contrast. Rinsing thoroughly prevents the tiny droplets from eating holes eventually.
Many streetwear brands charge premium prices for this exact distressed splatter look. You can recreate this aesthetic at home for literally pennies per shirt. I frequently find cheap heavy cotton hoodies at local thrift stores specifically for this. Thicker fabrics handle the concentrated chemical drops much better than thin tees. Adding a few strategic distressed holes completes the urban grunge fashion aesthetic. You simply use coarse sandpaper over the heaviest bleached spots after washing. This technique requires zero artistic skill but delivers massive visual impact immediately. Anyone can achieve professional streetwear results on their very first try.
4. Geometric Fold Patterns
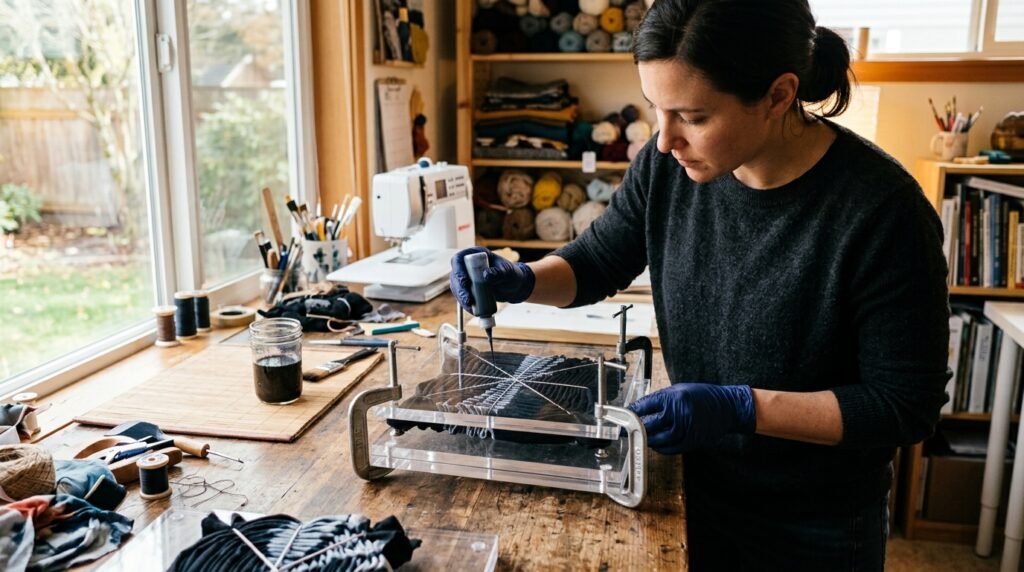
Creating sharp geometric shapes requires precise folding and clamping of the fabric. You fold the shirt like paper to control where the chemical penetrates. The most popular design involves folding the garment into a tight triangle. I use flat pieces of acrylic and heavy clamps to bind everything. The plastic resists the chemical while compressing the fabric layers very tightly. In my experience using wooden blocks often results in unwanted wood stain transfers. The exposed edges absorb the lightening agent while the clamped centers stay dark. This creates stunning repetitive patterns that look incredibly complex.
Triangle Fold Method
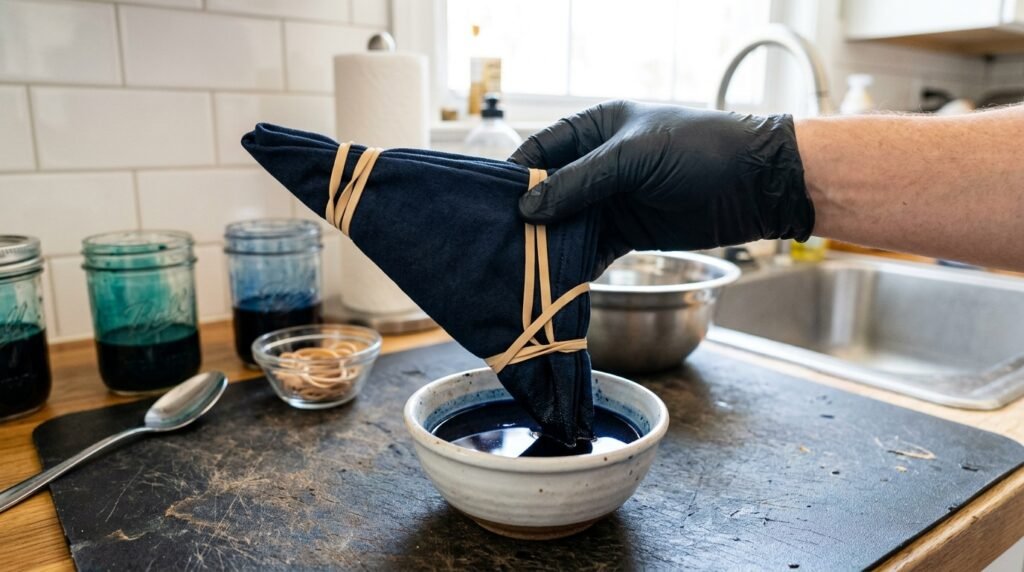
The basic triangle fold starts by pleating the shirt vertically like an accordion. You then fold the bottom corner up to create a small triangle. Continue flipping this triangle upward until the entire shirt forms one block. I bind this thick fabric wedge with tight rubber bands at every corner. You submerge only the exposed edges into your concentrated lightening solution briefly. The liquid seeps inward slightly creating sharp repeating diamond shapes upon unfolding. I once decorated an entire set of cloth napkins using this exact method. The resulting geometric precision amazed all my dinner guests.
Accordion Pleat Style
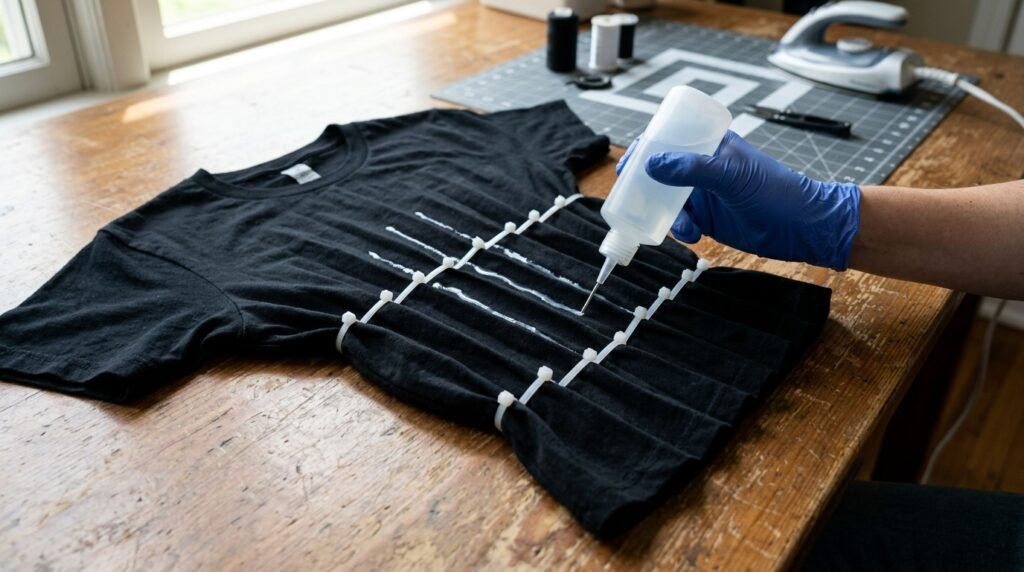
Vertical accordion pleats create stunning vertical stripes down the entire shirt body. You must ensure every single fold is perfectly straight and equal width. I iron the pleats flat before applying any liquid to guarantee sharp lines. You apply the solution using a precision tip bottle along specific fold peaks. This leaves the inner valleys dark while the outer edges turn very light. I have noticed that working on slightly damp fabric yields softer stripe edges. Dry fabric produces very harsh crisp lines that look printed by a machine. Both variations offer beautiful modern design aesthetics.
Experimenting with different clamp shapes opens up endless geometric design possibilities. You can find cheap plastic clamps at any local hardware store easily. I bought several circular plastic discs to create perfect repeating circle patterns. You sandwich the pleated fabric between two discs and tighten them down. Applying the liquid around the discs creates a striking dark circle effect. Mastering these folding techniques takes significant patience and careful manual dexterity. The dramatic reveal when unfolding the washed fabric always feels incredibly rewarding. These structured designs look much more sophisticated than traditional random dye patterns.
5. Stenciled Graphic Designs
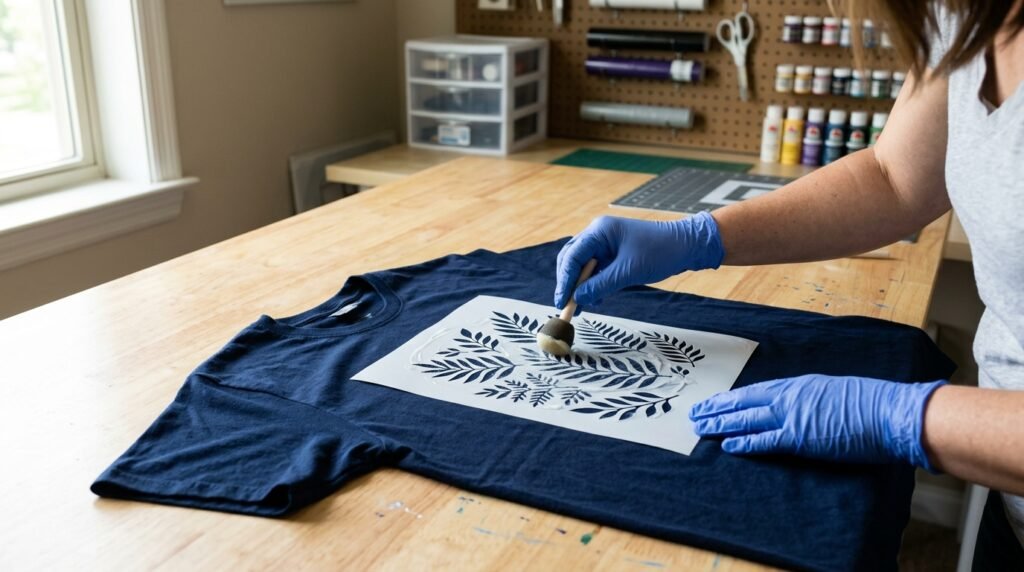
Applying exact shapes requires a specialized stencil and thickened lightening agent mixture. Liquid solutions simply bleed under stencil edges and ruin the crisp design. I mix regular liquid bleach with cornstarch to create a thick gel. You boil the water and cornstarch first before cooling and adding chemicals. This creates a stable gel that stays exactly where you paint it. In my experience using a foam dabber brush works best for stencil applications. You press the gel straight down rather than brushing side to side. This prevents the chemical from pushing under the delicate plastic edges.
Freehand Spraying
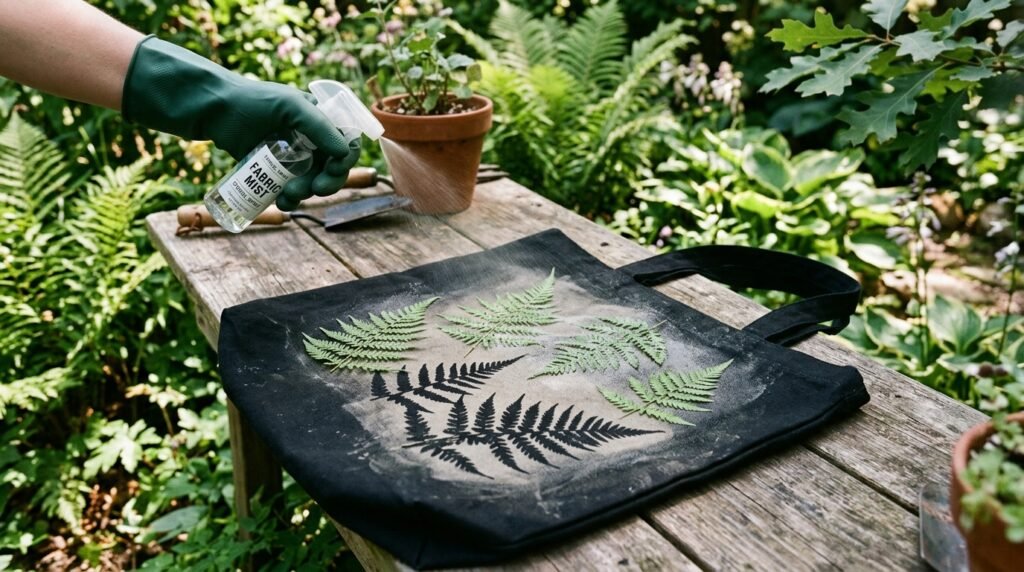
You can also use stencils with a fine mist spray bottle approach. You lay flat objects onto the shirt and spray over them lightly. Leaves and ferns create beautiful botanical silhouettes against dark cotton backgrounds. I frequently use lace doilies to create intricate vintage floral spray patterns. You must spray from directly above to maintain sharp shadow lines perfectly. The mist settles around the object leaving a dark silhouette behind easily. I have transformed plain tote bags into gorgeous botanical art pieces this way. The process takes literally five minutes but looks incredibly detailed and expensive.
Precision Cut Stencils
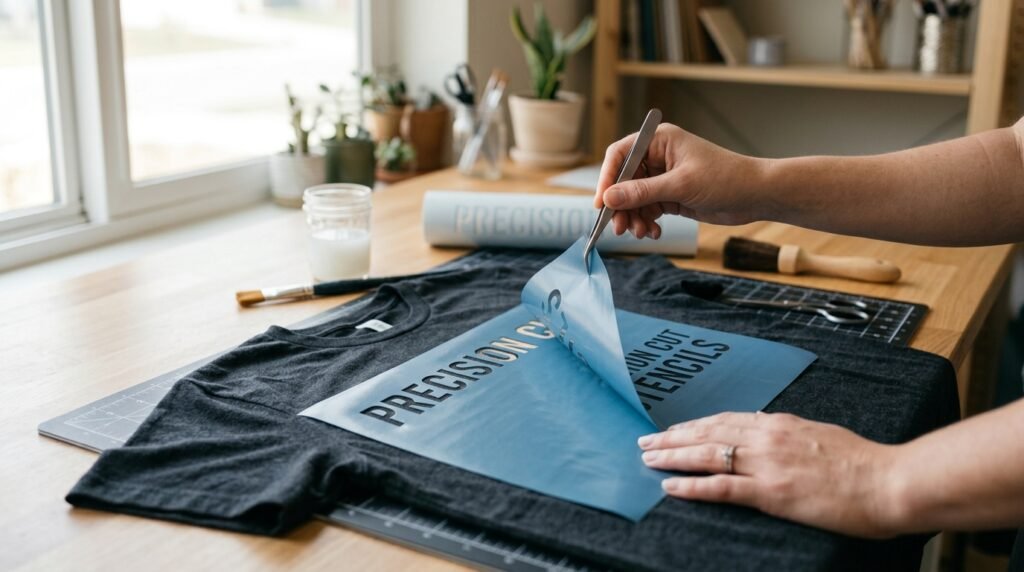
Cutting your own stencils allows for completely personalized text and custom logos. I use adhesive vinyl sheets cut with a digital craft cutting machine. The sticky backing prevents the gel from bleeding outside your design lines. You weed out the positive space and stick the remaining template down. Applying the thickened gel over the vinyl produces flawless commercial quality graphics. I created matching custom shirts for a family reunion using this exact method. Everyone assumed I paid a professional printing company to manufacture the garments. The crisp white lettering against navy blue cotton looked absolutely perfect.
Removing the stencil at the correct time is crucial for clean edges. I peel the vinyl off right before dunking the shirt into neutralizing water. Waiting too long allows the gel to dry and flake onto unwanted areas. You should wear gloves and use tweezers to lift the sticky vinyl carefully. I have noticed that intricate designs require a slightly thicker gel consistency. The thicker paste clings better to the exposed fabric without spreading outward. You can easily store leftover gel in an airtight glass jar for weeks. This makes batch processing multiple custom shirts highly efficient.
6. Scrunch And Bleach
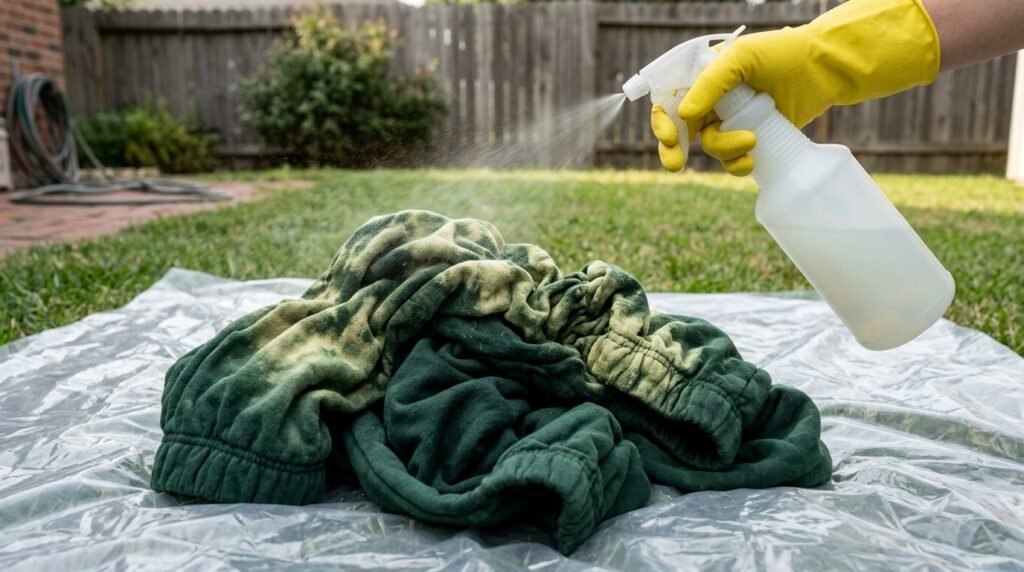
The scrunch technique creates a beautiful chaotic texture resembling crushed velvet fabric. You simply crumple the garment onto a flat surface into a tight mound. I do not use any rubber bands or string to bind the fabric. You want the wrinkles and folds to remain somewhat loose and organic. I spray the lightening solution over the top of the crumpled fabric pile. The liquid hits only the highest ridges leaving the deep valleys completely dark. In my experience this is the easiest method for absolute beginners to try. You cannot really make a mistake with this random approach.
Controlling the texture scale depends entirely on how tightly you crumple the fabric. Large loose folds create a bold marbled effect with high color contrast. Tiny tight scrunches produce a micro texture that looks like static television snow. I prefer the tighter scrunch for smaller garments like tank tops and shorts. You flip the entire crumpled mound over gently to spray the back side. This ensures an even distribution of texture across the entire wearable garment. I once used this on a pair of dark green sweatpants with amazing results. They looked like expensive custom designer streetwear instantly.
Working with a spray bottle gives you excellent control over chemical volume. I use an adjustable nozzle set to a medium wide spray pattern. You want to avoid soaking the fabric so the dark crevices survive. Waiting five minutes between light coats prevents the liquid from pooling at the bottom. Pooling causes large ugly white splotches that ruin the textured aesthetic completely. I always lay old towels under the project to absorb excess chemical runoff. This protects my work table and keeps the back of the shirt safe. Proper moisture management guarantees that perfect crushed velvet illusion.
This specific technique works wonders for covering up accidental laundry bleach stains. I regularly rescue ruined clothing by leaning into the damage with full scrunching. A shirt with one ugly spot becomes a fashionable distressed piece easily. You are basically camouflaging the accident within a deliberate chaotic design pattern. I recommend this method to anyone anxious about trying new clothing modifications. The random nature means perfection is impossible and therefore pressure is completely eliminated. You will save dozens of stained garments from ending up in local landfills. Sustainable fashion starts by reimagining what we already own.
7. Dip-Dyed Sleeves
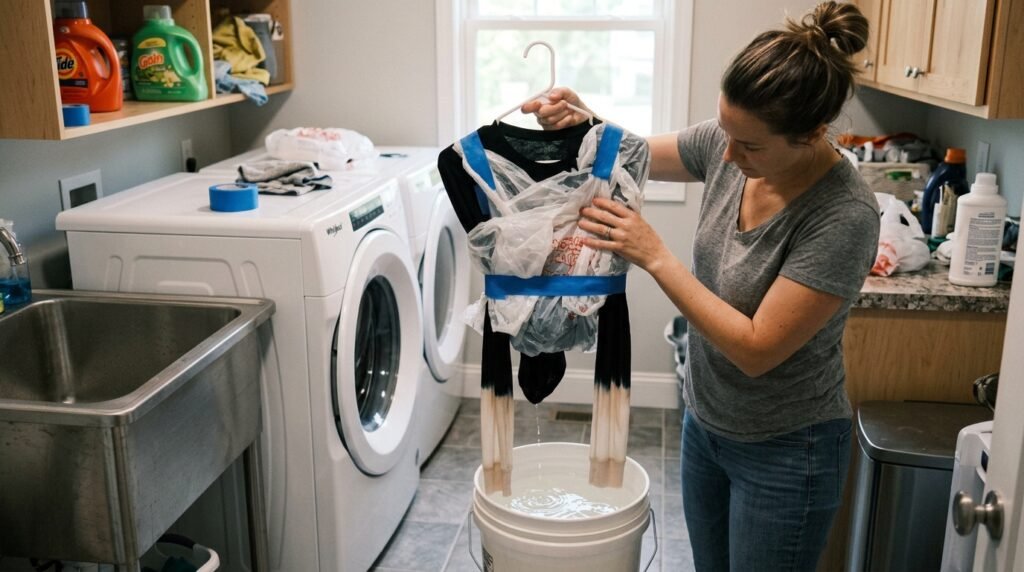
Isolating specific garment sections creates a very modern color blocked fashion statement. Dipping just the sleeves of a dark long sleeve shirt looks incredibly striking. You must protect the main body of the shirt from accidental splashing entirely. I wrap the torso tightly in plastic grocery bags sealed with painter tape. This waterproof barrier allows you to handle the garment without fear of transferring chemicals. You submerge both sleeves simultaneously into a deep bucket of diluted lightening solution. In my experience coordinating the timing for both arms guarantees perfect color symmetry. Symmetrical designs always look professionally manufactured.
The transition line between dark body and light sleeves requires careful fluid management. You want a clean horizontal line where the chemical stops climbing the fabric. I clip the shirt to a sturdy horizontal bar above the liquid bucket. The sleeves hang straight down into the bath at the exact same depth. You must factor in the capillary action pulling the liquid upward into dry fabric. I leave an inch of space between the liquid surface and my plastic wrapping. The chemical naturally climbs that inch creating a flawless gradient edge effortlessly. This setup ensures consistent repeatable results perfectly.
Experimenting with different sleeve lengths changes the entire dynamic of the garment. I love dipping just the bottom cuffs of a thick black winter hoodie. The stark white cuffs frame your hands beautifully against the dark bulky fabric. You can also reverse the process and dip the shoulders instead of cuffs. Hanging the shirt upside down submerses the neckline and shoulder seams perfectly. I have noticed this draws the eye upward toward the face very effectively. These strategic placement decisions elevate simple crafting into genuine fashion design thinking. Small localized changes often make the biggest visual impact overall.
Managing the rinsing process is critical when dealing with isolated chemical applications. You cannot simply throw the whole garment into the washing machine immediately. The active chemicals would spread onto the dark unprotected torso during the wash. I rinse the sleeves under running water while holding the dry torso safely away. You must soak the sleeves in the neutralizing peroxide bath separately as well. Once the chemical is neutralized completely you can wash the entire piece safely. Taking these careful precautionary steps preserves the stark contrast of your color blocked design. The extra effort ensures your shirt looks flawless.
8. Half And Half
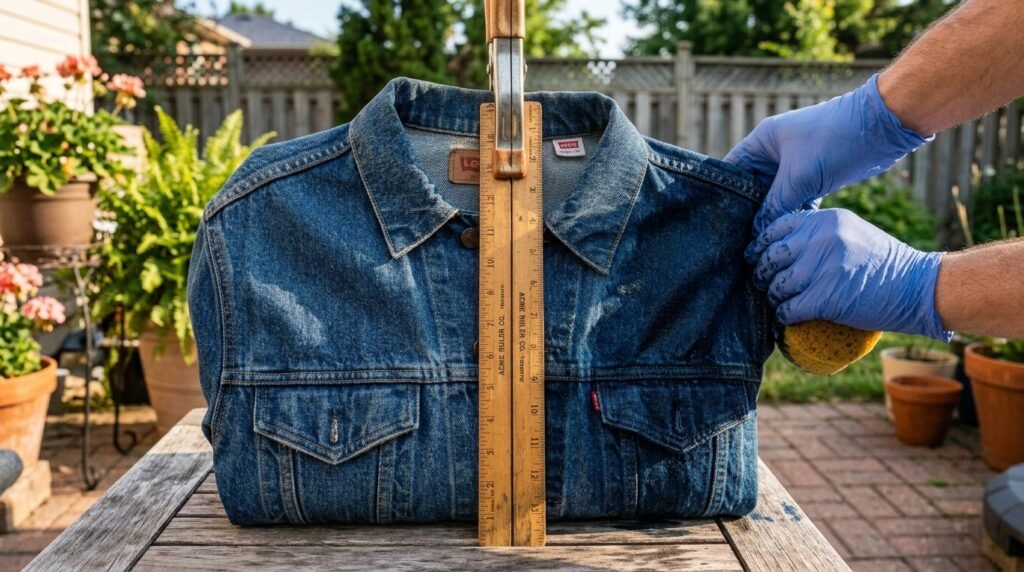
The split tone design splits a garment directly down the middle vertically. One side remains completely dark while the opposite side turns very light. You achieve this by folding the shirt exactly in half matching all seams. I place a large piece of waterproof plastic inside the folded shirt layers. This prevents the chemical from bleeding through the middle onto the protected side. You apply a strong concentrated solution heavily onto the exposed top layer only. In my experience using a large sponge works better than spraying for this technique. The sponge pushes liquid deep into the thick seams.
Securing the dividing line requires heavy clamping to prevent messy horizontal bleeding. I use two long wooden rulers clamped tightly along the center fold line. This creates an impenetrable barrier that keeps the dark side perfectly safe. You must ensure the liquid penetrates the collar and bottom hem folds completely. These thick gathered areas often resist liquid and remain stubbornly dark if ignored. I press the saturated sponge firmly into these bulky areas multiple times. Checking the underside of the top layer confirms the chemical has soaked through entirely. Complete saturation guarantees a solid uniform color block.
Creating vertical split designs on denim jackets produces absolutely stunning wearable art. The thick denim fabric handles the high chemical concentration without tearing or weakening. I transformed a vintage blue jean jacket into a two toned masterpiece recently. The right side turned pale white while the left stayed deep indigo blue. You can embellish the light side further with embroidery or colorful fabric patches. I have noticed this asymmetrical aesthetic dominates current high end streetwear fashion trends. You recreate a four hundred dollar designer look for the cost of cheap supplies. Your custom jacket will turn heads everywhere.
Properly rinsing a half and half garment takes extreme care and patience. You leave the center clamps attached while rinsing the light side under water. The water must flow away from the dark side to prevent accidental lightening. I use a handheld shower nozzle to direct the flow precisely outward always. You remove the clamps only after the water runs completely clear and clean. The final neutralizing bath stabilizes the fabric ensuring the dark side stays pristine. This dramatic split tone effect pushes the boundaries of typical diy clothes bleach ideas. It represents the pinnacle of home garment modification.
Frequently Asked Questions
Can I use this technique on any type of clothing fabric? You must check the clothing care tags before attempting any chemical lightening project. Natural fibers like cotton and linen react beautifully to these simple household chemicals. Synthetic materials like polyester and nylon resist color removal almost entirely during processing. A shirt with fifty percent polyester will only lighten to a dull gray. I highly recommend using garments containing at least eighty percent natural cotton fibers. In my experience thin delicate silks degrade and dissolve when exposed to harsh alkaline solutions. Stick to sturdy denim and thick cotton blends for the most reliable and consistent transformation results.
How long does the fabric need to sit with the solution? Timing depends heavily on the fabric thickness and the original dye concentration used. Most dark cotton shirts show significant lightening within five to ten minutes maximum. You should monitor the visual progress constantly rather than relying on a strict timer. Some stubborn black dyes turn orange first and require twenty minutes to turn pale. I have noticed that leaving the solution on past thirty minutes destroys fabric integrity. The fibers will weaken severely causing holes after just one trip through the laundry. Always rinse the garment as soon as you achieve your desired level of color contrast.
Is it safe to do these projects inside an apartment? Working indoors requires significant preparation and excellent ventilation to maintain respiratory safety standards. You must open multiple windows and utilize powerful exhaust fans during the entire process. The chemical fumes become overwhelming quickly in small enclosed spaces without proper air circulation. I always recommend working outside on a patio or balcony whenever weather permits. If you must work inside lay heavy plastic drop cloths across all floor surfaces. Accidental drips will instantly permanently ruin carpets and expensive hardwood flooring finishes. Wearing a basic respiratory mask helps filter out the harsh irritating chemical smells while you work.
How do I stop the chemical reaction from destroying the shirt? Neutralizing the active chemical is the most important step for preserving your clothes. Simply rinsing with water does not stop the corrosive alkaline reaction happening inside fibers. You must soak the rinsed garment in a hydrogen peroxide and water mixture bath. I use one cup of standard household hydrogen peroxide per gallon of cold water. Submerge the shirt completely in this neutralizing bath for at least ten full minutes. The peroxide instantly neutralizes the alkaline base stopping any further fabric deterioration completely. You can then wash the item safely in your standard washing machine with normal detergent.
Why did my black shirt turn bright orange instead of white? Commercial black dyes are actually composed of concentrated reds, blues, and yellow pigments. When you apply lightening agents the blue pigments break down and disappear first. The stubborn red and yellow pigments remain trapped in the fabric creating that orange color. I have noticed certain brands of cheap shirts always turn a bright rusty orange. You can sometimes push past the orange stage by leaving the solution on slightly longer. However some synthetic black dyes will never turn white regardless of soaking time. Embracing the unexpected rust orange color often results in beautiful warm toned clothing designs.
Can I dye over the lightened areas with new colors later? Adding fresh color over your lightened patterns creates incredibly complex multidimensional fashion pieces. The lightened sections act as a blank canvas absorbing new liquid dyes beautifully. You must ensure all lightening chemicals are completely neutralized and washed out first. Any leftover alkaline residue will immediately destroy the new dye pigments upon contact. I love lightening a black shirt then applying bright neon pink dye over it. The dark areas stay black while the lightened patterns pop with vibrant intense color. This two step process perfectly mimics expensive boutique manufacturing techniques for just a few extra dollars.
What is the best liquid ratio for a classic spiral design? Finding the perfect dilution ratio ensures your design stays crisp without destroying the fabric. I strongly recommend mixing equal parts plain tap water and standard household liquid bleach. Using pure undiluted chemical works too fast and often creates messy undefined blurred lines. A fifty fifty mixture provides excellent color removal while giving you enough working time. In my experience this exact ratio penetrates folded layers smoothly without bleeding into protected zones. You can mix the solution directly inside your plastic applicator squeeze bottle for convenience. Always use freshly mixed solutions because diluted chemicals lose their potency quickly.
How do I prevent my rubber bands from snapping during processing? Standard thin rubber bands degrade and snap when exposed to harsh alkaline liquids rapidly. Losing your binding bands prematurely ruins the geometric tension holding your design together. I always purchase thick heavy duty rubber bands from office supply stores for these projects. You can also use synthetic zip ties for ultimate security on very thick folded fabrics. Zip ties never break and provide incredible localized compression that creates beautiful crisp lines. I have noticed that wrapping bands in overlapping layers distributes the tension much more evenly. This simple upgrade guarantees your intricate folds stay perfectly intact throughout processing.
Can I use this method to fix clothes stained by accident? Transforming accidentally stained garments is actually the best use case for these techniques. A random white spot ruins a dark shirt but a deliberate pattern saves it entirely. You simply incorporate the accidental stain into a larger intentional splatter or scrunch design. The original mistake disappears completely within the new chaotic organic visual texture. I have rescued dozens of favorite garments from the trash bin using this exact strategy. People often compliment my rescued clothes without realizing they started as laundry disasters. Upcycling damaged basics represents a highly sustainable approach to maintaining your modern personal wardrobe.
Will the lightened areas fade or change color over time? Unlike traditional added dyes these lightened patterns are completely permanent structural changes. You are physically removing the pigment molecules from the cotton fibers rather than adding color. The designs will never wash out or fade into the surrounding dark fabric areas. In my experience the contrast actually becomes slightly softer and more natural after multiple washes. You must neutralize the chemicals properly initially to prevent the fabric from yellowing later. Sun exposure can slightly brighten the lightened areas naturally over several years of wear. These custom pieces age beautifully becoming softer and more visually interesting over time.
Do I need expensive tools to start creating custom clothing? You absolutely do not need expensive specialized equipment to start these fun creative projects. Most necessary supplies already exist under your kitchen sink or in your laundry room. A basic squeeze bottle, some rubber bands, and household cleaning liquids are entirely sufficient. I often use old toothbrushes and plastic forks to create unique splatter textures for free. Purchasing heavy duty rubber gloves is the only mandatory safety investment I strongly recommend making. A simple plastic drop cloth protects your work surface and costs less than two dollars. This accessibility makes these diy clothes bleach projects perfect for tight creative budgets.
How do I wash these custom shirts for the first time? The initial washing process requires careful attention to prevent unwanted chemical spreading and damage. You must rinse the garment thoroughly under cold running water before removing any bindings. Keep rinsing until the runoff water appears completely clear without any slippery chemical residue. Submerge the unbanded shirt into the neutralizing peroxide bath for ten minutes to stop reactions. After neutralizing you can confidently wash the garment alone in your washing machine on cold. I always use a gentle cycle with mild detergent for the very first machine wash. Subsequent washes can be done normally with your regular dark laundry loads.
Final Thoughts On Customizing Your Wardrobe
Transforming plain basics into stunning wearable art offers incredible creative satisfaction and financial savings. These accessible techniques prove you do not need expensive tools to build a unique wardrobe. From precise geometric folds to chaotic splatter patterns, the design possibilities remain truly endless. I have seen how small changes like these can completely transform a boring closet space. Remember to always prioritize safety by working in ventilated areas and properly neutralizing the fabric. Save this post on Pinterest to keep these creative ideas handy for your next project. Grab that forgotten dark shirt and start creating your masterpiece today

Amelia leads HavenlyStyle’s editorial vision with a passion for elegant interiors and practical home living. With years of experience in home décor and lifestyle content, she ensures every article is accurate, inspiring, and easy to follow. From timeless decorating ideas to the latest interior design trends, Amelia is committed to helping readers create beautiful, functional spaces while maintaining HavenlyStyle’s trusted and welcoming voice.