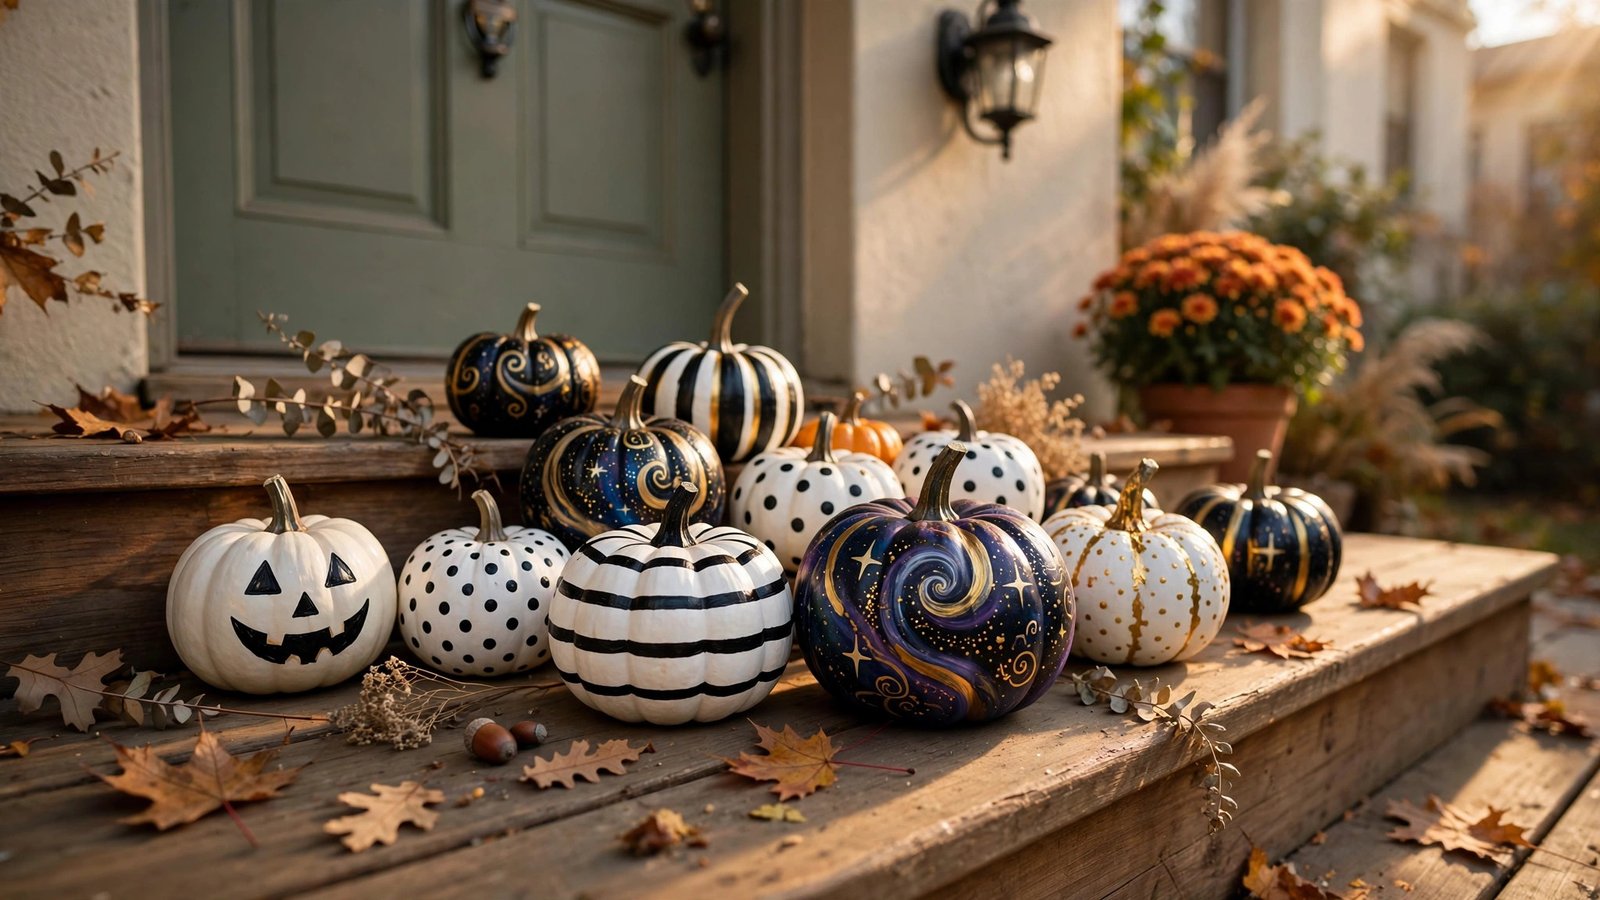
I’ve helped dozens of renters turn bare apartments and tiny rental porches into spaces that actually feel like home, and every fall I watch the same thing happen: they buy a beautiful armload of pumpkins, then stall. Because carving means a knife, a slimy interior, rotting pulp smell in a small apartment, and seeds tracked across carpet a landlord will absolutely notice. For years I told renters the same thing I tell my own clients: skip the carving entirely. Paint is your friend.
Small pumpkins — the little jack-be-littles, baby boos, and sugar-pie minis you can hold in one hand — are the perfect renter craft. They’re cheap, they sit on a windowsill, a dorm desk, or a narrow apartment stoop without blocking anything, and painted ones last weeks longer than carved ones, which matters when you want your Halloween decor to hold until November 1 without stinking up the hallway. I’ve personally seen a row of hand-painted mini pumpkins on a kitchen windowsill outlast every carved pumpkin on a whole block. And when the season ends? A painted small pumpkin goes straight into the compost or the trash with zero residue — no candle wax, no rotting mess, no landlord argument.
Below are 20 designs, grouped into 10 ideas, ordered from simplest to most involved. Every single one is carve-free, uses only craft paint and basic supplies, and is completely reversible — when you’re done, the pumpkin composts like any other gourd. Grab a cheap set of acrylics or craft paint pens, spread newspaper over your coffee table, and you’ve got a whole October’s worth of decor in one afternoon.
Executive Summary
- Paint, don’t carve. Painted small pumpkins last 2–3 weeks indoors with no mess, no knives, and no rotting smell — perfect for apartments and dorms.
- Small pumpkins are the sweet spot. Minis fit windowsills, desks, and narrow stoops; most cost under a few dollars each.
- You need very little. Acrylic craft paint, a few brushes or paint pens, and newspaper will carry you through nearly every design here.
- 20 designs, 10 ideas. The simplest need one color and ten minutes; the most involved still finish in under an hour.
- Everything is renter-safe and reversible. No tools that damage floors or walls, no permanent supplies, and the pumpkins compost when the season ends.
- Pair designs for a collected look. Most ideas pair two variations on one theme — two matching pumpkins always look more intentional than one.
1. Classic Faces: Painted Jack-O’-Lanterns and Friendly Ghosts
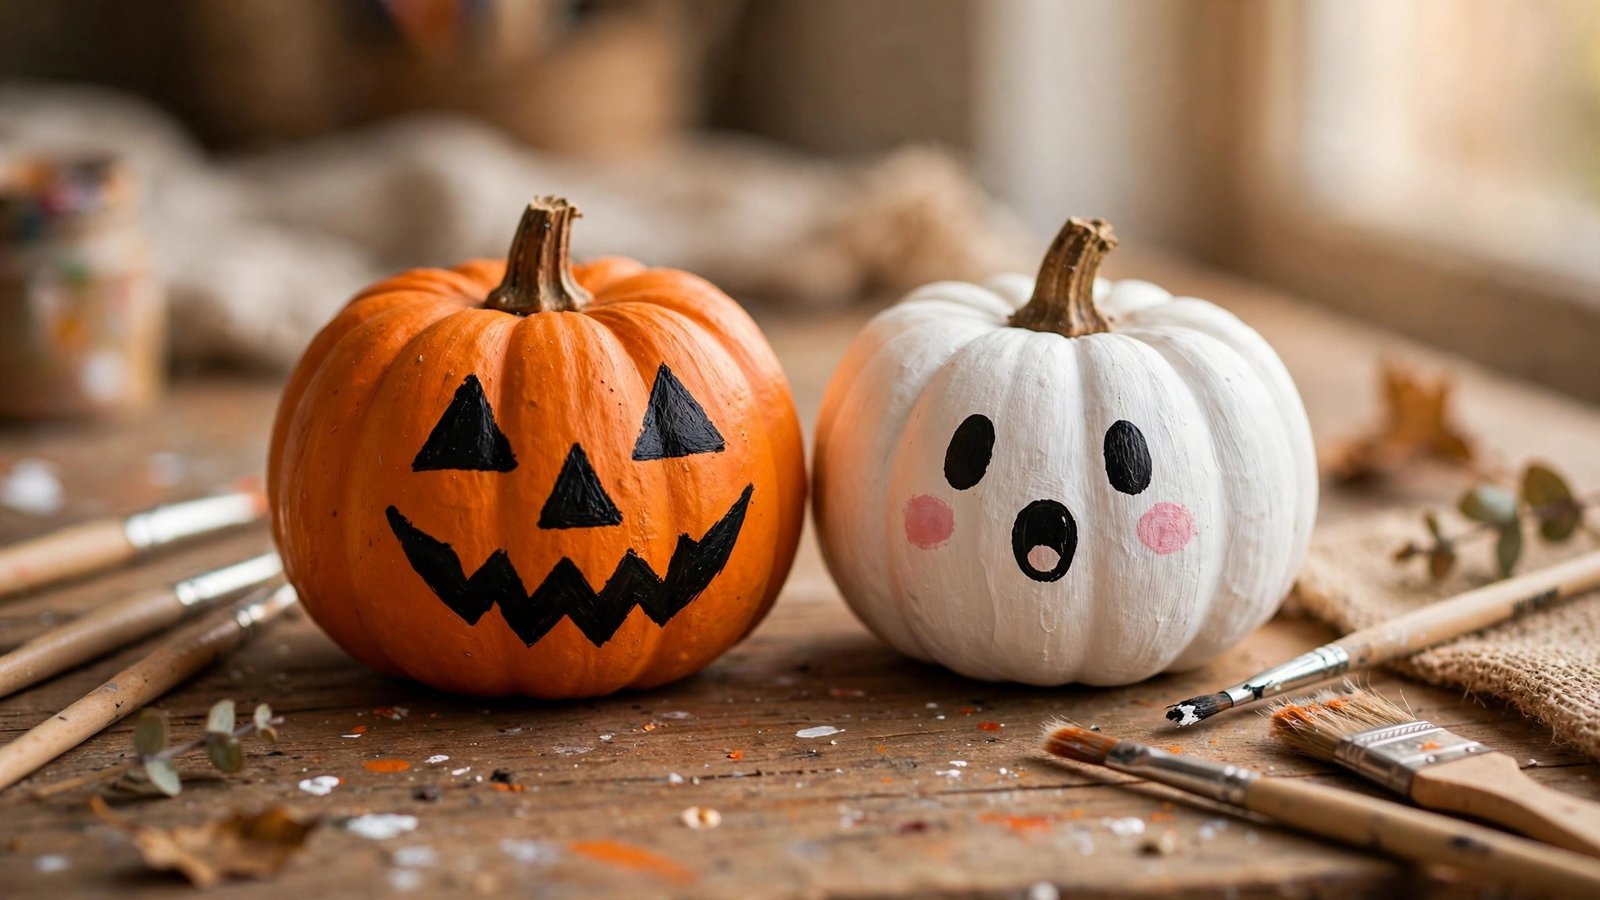
This is where almost everyone starts, and honestly it’s where I start too. A painted jack-o’-lantern face gives you the entire Halloween look with none of the carving mess. The trick is treating the face like a flat illustration rather than trying to make it look three-dimensional — bold black shapes on orange read “jack-o’-lantern” from across the room, no matter how wobbly your lines are. I always make these first in a batch because they’re fast, and once the faces are drying you can move on to a more detailed design while you wait. The ghost variation is even simpler: a white-painted mini pumpkin with two dot eyes and an open “o” mouth, which I’ve watched renters cluster on windowsills as a sweet alternative to the scary face.
For renters, faces are the lowest-risk Halloween decor there is. There’s nothing to cut, nothing to gut, and the pumpkin stays intact so it lasts far longer than a carved one — two to three weeks in a cool spot indoors, which covers the entire back half of October. Nothing touches your walls or floors beyond a sheet of newspaper on your table, and cleanup is a damp paper towel.
How to do it
Design A — Painted jack-o’-lantern face:
- Wipe the pumpkin clean and let it dry completely — paint won’t stick to damp skin.
- Sketch the face lightly in pencil: two triangle eyes, a triangle nose, and a jagged grin.
- Fill the shapes in with black craft paint using a small flat brush. Two thin coats beat one thick coat.
- Let dry for 20 minutes between coats, and you’re done — no sealing needed for indoor display.
Design B — Friendly ghost:
- Paint the whole mini pumpkin white in two coats, letting the first dry fully.
- Once dry, paint two oval eyes and an open “o” mouth in black with a small round brush.
- Add a touch of pink on the cheeks for a friendly look — I do this with a dry brush dabbed in a tiny bit of paint.
- Display the ghost next to a jack-o’-lantern for the classic pairing.
Approximate cost: $4–$8 (one black paint bottle and one white, brushes you already own or a cheap set).
2. Matte Solids: Chalky White and Sleek Black
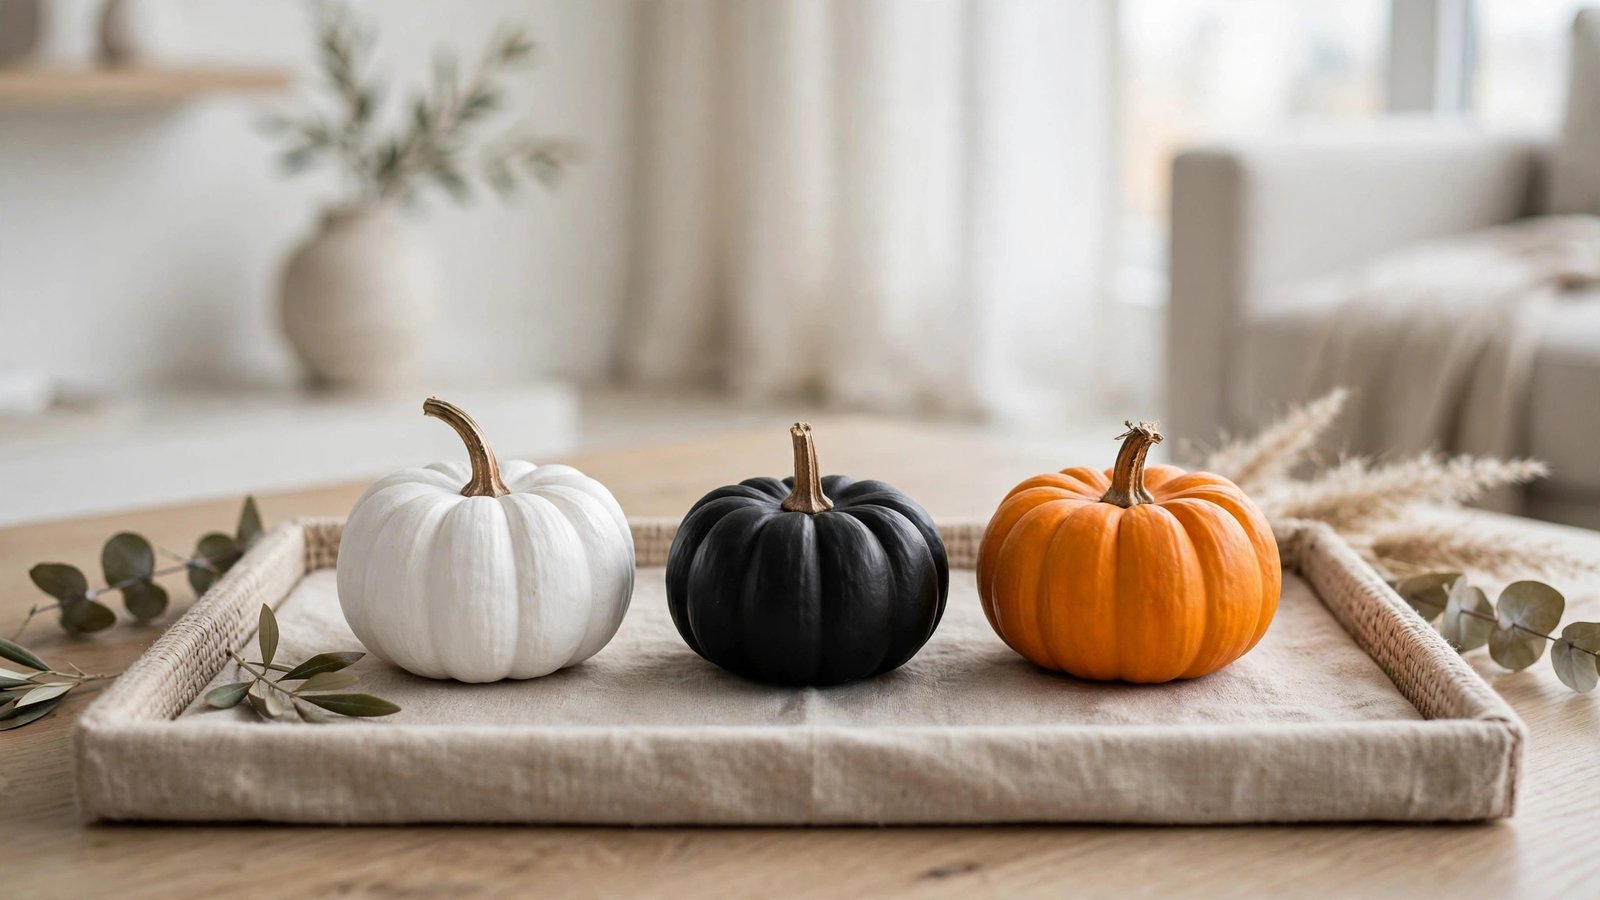
If bright orange doesn’t match your apartment’s vibe, this is the idea I recommend most. A mini pumpkin painted solid matte white looks expensive — I’m talking “styled by a magazine” expensive — and a matte black one next to it gives you that moody, modern Halloween look without a single spooky symbol. I’ve helped renters do this when their living room is all neutrals and they don’t want neon orange clashing with their carefully chosen throw pillows. The flat finish is what sells it: craft stores sell chalky-finish acrylic paint that dries to a soft, velvety surface that looks nothing like the shiny hobby paint of our childhoods.
This is the most deposit-safe craft on this entire list. The paint stays on the pumpkin, the pumpkin stays on a tray or cloth, and when October ends you toss the gourd and keep the tray. I always suggest a tray, by the way — it makes any cluster of pumpkins look deliberate and catches any stray paint chips.
How to do it
Design A — Chalky white:
- Clean the pumpkin and let it dry.
- Apply chalky-finish white acrylic in two thin coats with a wide flat brush, drying 20 minutes between coats.
- Touch up any thin spots with a third light coat — white over orange always needs one more pass than you expect.
Design B — Sleek black:
- Same prep, then paint the whole pumpkin matte black in two thin coats.
- For a softer look, leave the stem unpainted — the natural brown stem against black paint looks great.
- Cluster a white, a black, and one natural mini pumpkin together on a tray for a finished vignette.
Approximate cost: $5–$10 (two bottles of chalky-finish acrylic paint; one tray if you don’t own one).
3. Dot Play: Polka Dots and Confetti Sprinkles

Polka dots are the easiest painted pattern that exists, and they look genuinely good on pumpkins — there’s something about dots on a round gourd that just works. I’ve had renters who swore they had “no artistic ability” produce polka-dot pumpkins that looked store-bought. The confetti variation uses the same technique with smaller, multicolor dots scattered like sprinkles on a cupcake, which gives you a playful look that works for a fall party table as well as Halloween. This is my go-to suggestion for renters doing a pumpkin-painting night with friends, because nobody can mess it up and everybody’s pumpkins come out looking different.
From a renter standpoint, this one is nearly foolproof on cleanup too. Dots are made with the blunt end of a brush or a pencil eraser dipped in paint — no splatter, no drips, nothing to flick across your rental’s walls. Small pumpkins mean small surfaces, which means you finish a whole set in twenty minutes.
How to do it
Design A — Polka dots:
- Choose a base color and paint the whole pumpkin (white dots on orange, black dots on white, and metallic gold dots on black are my three favorite combos). Two coats, drying between.
- Dip the eraser end of a pencil (or the blunt end of a brush handle) in your dot color.
- Press dots in evenly spaced rows around the pumpkin, re-dipping every 3–4 dots.
- Rotate the pumpkin as you go so the pattern stays even on all sides.
Design B — Confetti sprinkles:
- Paint the pumpkin a solid base (white or cream works best).
- Using the same eraser technique, scatter tiny dots in 3–4 bright colors randomly across the surface.
- Keep the dots small and the colors varied — aim for “sprinkles,” not “polka dots.”
- A few gold or silver dots mixed in make the whole thing feel festive.
Approximate cost: $4–$9 (base color plus 2–3 accent paints; pencil eraser works as your dotting tool).
4. Stripes: Vertical Ribbons and Chevron Zigzags
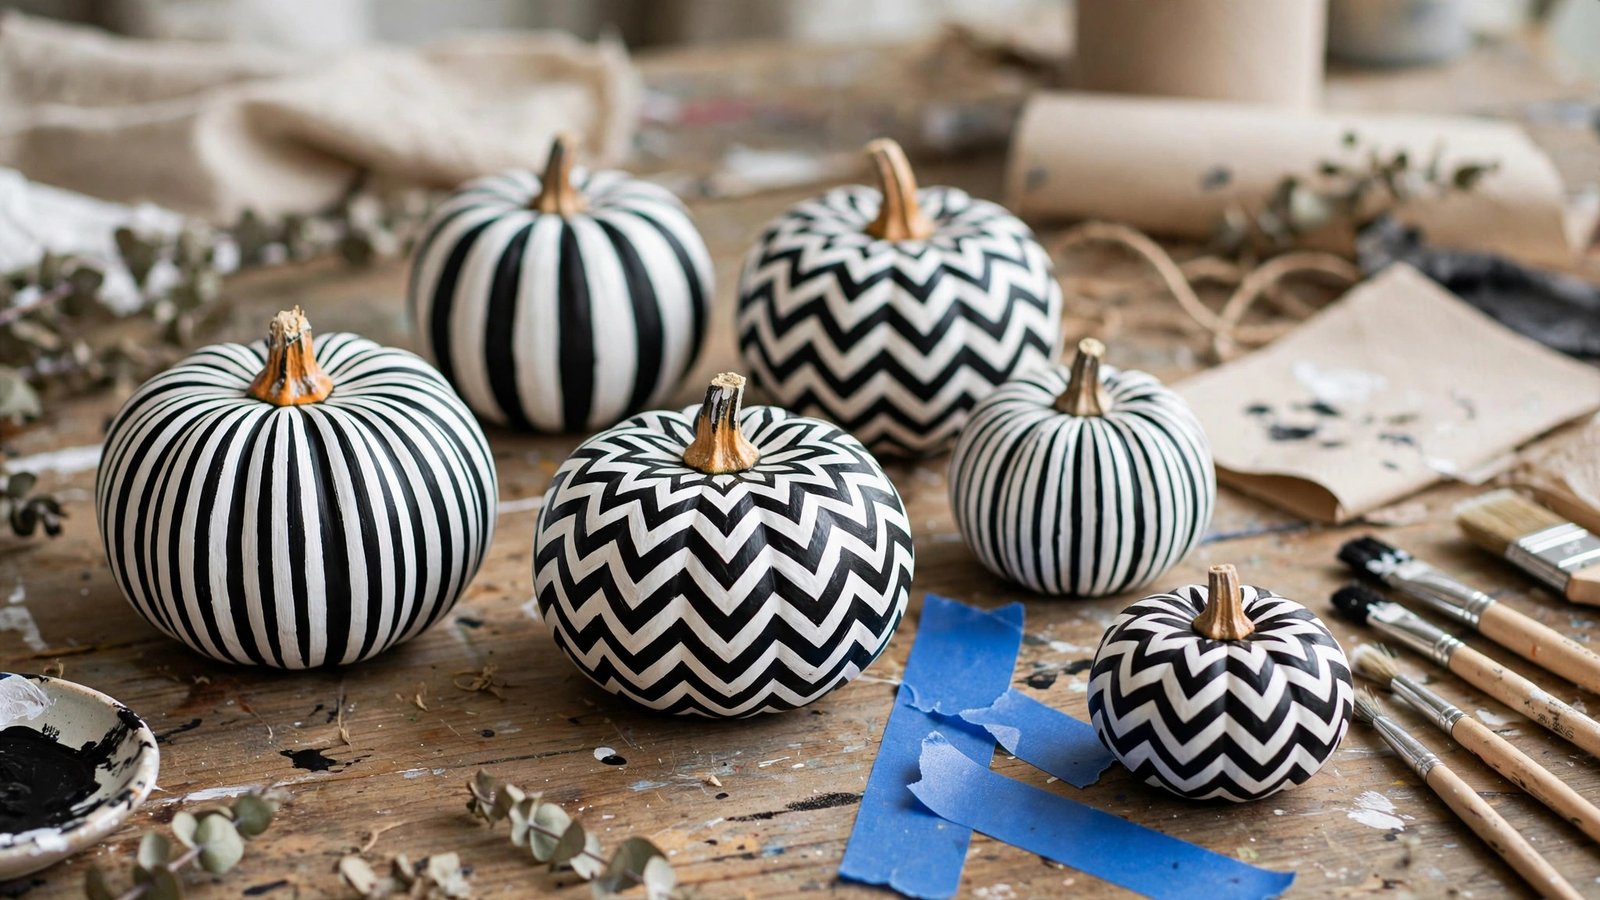
A pumpkin’s natural ridges are basically built-in guides for stripes, which is why this design photographs so well — the paint follows the gourd’s shape and looks intentional even if your lines aren’t perfect. I use painter’s tape on this one, which is a renter’s best friend anyway: it’s the same tape you’d use for touch-up paint in an apartment, and it peels off cleanly without pulling paint. Vertical stripes in two colors give you a bold, graphic look; chevrons (zigzag stripes) feel a little more playful and cover any uneven brushwork because the pattern itself is busy.
The renter angle here is really about the tape. Because you’re taping the pumpkin — not your wall — there’s zero risk to the apartment. And small pumpkins stripe up fast: one pumpkin is a ten-minute project once you get the tape rhythm down. I usually tape three or four minis at once, paint them all, and peel everything in one satisfying session.
How to do it
Design A — Vertical stripes:
- Paint the whole pumpkin your base color and let it dry fully (white base with black stripes is classic; orange with cream stripes feels warmer).
- Wrap thin strips of painter’s tape vertically around the pumpkin, following its ridges, spacing them evenly.
- Paint over everything in your stripe color — don’t worry about covering the tape, it protects the base.
- While the stripe coat is still slightly tacky, peel the tape off slowly for crisp lines.
- Touch up any bleeds with a small brush.
Design B — Chevron zigzags:
- Base-coat and dry the pumpkin as above.
- Cut short tape strips and arrange them in a zigzag (V) pattern around the middle of the pumpkin.
- Paint over with your accent color, then peel the tape while tacky.
- Fill any wobbles with a small brush — chevrons hide mistakes well.
Approximate cost: $6–$11 (two paint colors plus painter’s tape, which you’ll reuse for future apartment projects).
5. Color Blocking and Ombre: Two Modern Paint Tricks

These are the designs I pull out when a renter says “I want Halloween decor but my apartment is, like, aesthetic.” Color blocking — painting the pumpkin in two or three solid horizontal or diagonal sections — looks like modern art and takes minutes. Ombre, where one color melts into another from top to bottom, looks impressive but is honestly just a blending trick with a damp sponge. I’ve set both of these on bookshelves and bathroom vanities where a traditional jack-o’-lantern would look out of place, and they hold their own as plain old fall decor even after Halloween passes — no face to retire on November 1.
Both are completely renter-proof: the pumpkin never gets cut, the paint is on the gourd only, and the finished piece doubles as autumn decor, so you get two seasons of use out of one afternoon’s work. I especially like ombre in colors that match a renter’s existing decor — sage fading to cream, or dusty blue fading to white — so the pumpkin looks like it was always meant to be there.
How to do it
Design A — Color block:
- Paint the whole pumpkin your lightest color and let it dry.
- Tape off the section you want to keep light, dividing the pumpkin into two or three bands.
- Paint the exposed sections in your darker colors, one band at a time, peeling tape between colors.
- Let dry completely, then remove all tape for clean color breaks.
Design B — Ombre:
- Paint the whole pumpkin your lightest shade and let it dry.
- Dab your medium shade on the lower third with a damp sponge, blending the edge upward into the light shade while wet.
- Repeat with your darkest shade on the bottom quarter, blending up into the medium.
- Work quickly while the paint is wet — acrylic blends only until it starts to set.
Approximate cost: $5–$12 (two or three paint shades; a cheap sponge for the ombre).
6. Galaxy Swirl and Starry Night: Painting the Night Sky
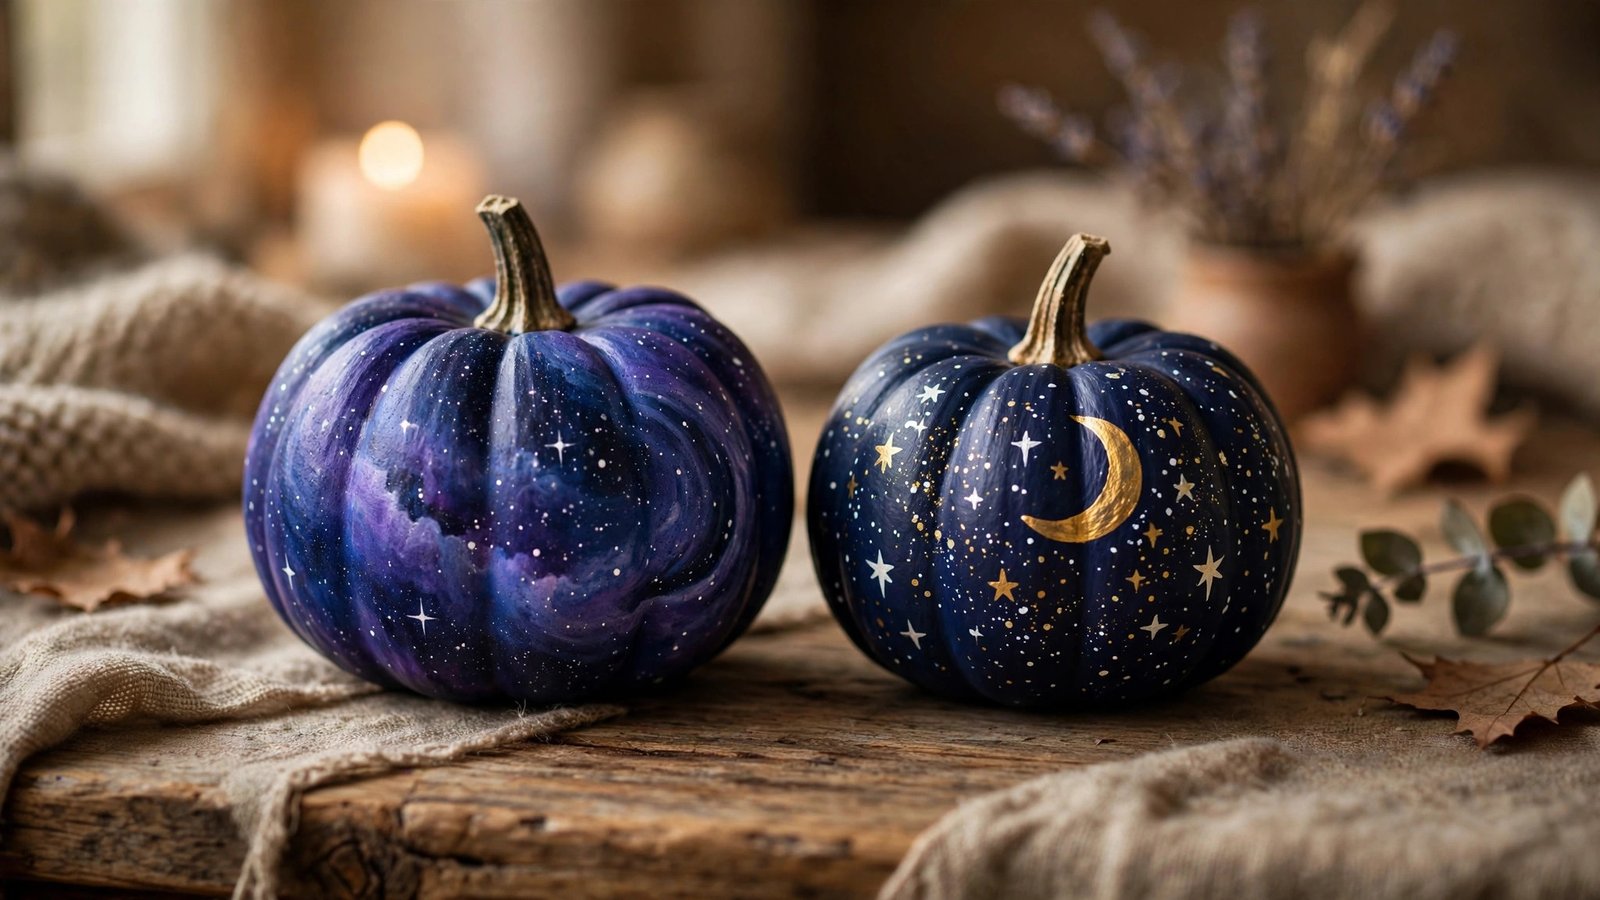
Of all the designs on this list, galaxy pumpkins get the biggest reaction — and they’re one of the easiest. The “galaxy” is just a dark base sponged with blues and purples, then dotted with white stars. There’s no way to do it wrong because space itself is messy. The starry-night variation is its calmer cousin: a deep navy or black base with clusters of white and gold dots for stars and a painted crescent moon. I keep one of these on my own shelf every October. Small pumpkins suit this perfectly because a whole galaxy fits on a surface you can hold — and clustered with the matte black pumpkins from idea 2, they make a night-sky grouping that looks genuinely artful.
For renters, this is a great small-space trick: a galaxy pumpkin gives you dramatic Halloween energy in an object the size of an apple. No candles, no carving tools, no mess beyond a sponge and three paint colors. And because the base is dark, any paint smudges or fingerprints during handling just blend into the design.
How to do it
Design A — Galaxy swirl:
- Paint the whole pumpkin black or very dark purple and let it dry.
- With a damp sponge, dab patches of deep blue and purple randomly across the surface, blending the edges.
- Add tiny dabs of pink or teal for nebula clouds — less is more here.
- Once dry, flick white paint off a toothbrush (or use a fine brush) to scatter tiny star dots.
- Add a few larger gold dots for standout stars.
Design B — Starry night:
- Paint the whole pumpkin deep navy in two coats and let dry.
- Paint a crescent moon on one side with gold or pale yellow — a simple curved shape, no detail needed.
- Scatter white and gold star dots of varying sizes around the moon with a small brush or toothbrush flick.
- Let dry, then display on a stack of books or a small tray for a vignette.
Approximate cost: $5–$11 (black/navy base plus 2–3 accent colors; sponge and old toothbrush).
7. Painted Blooms and Gold-Leaf Accents: The Pretty Pumpkins
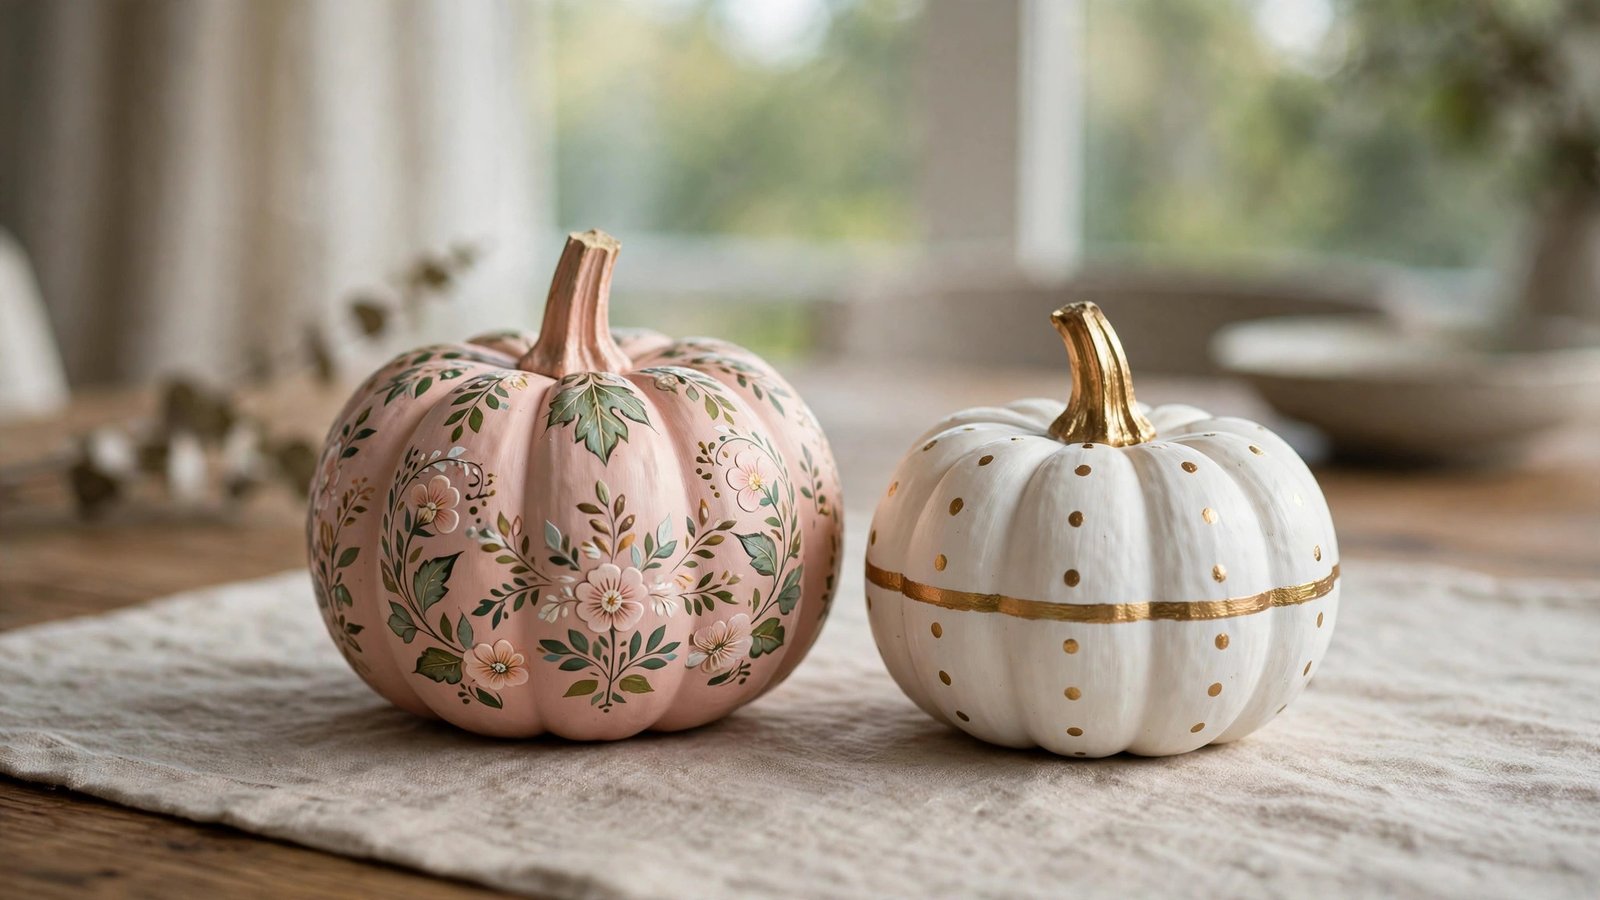
Not every pumpkin has to be spooky, and this is the idea I give renters whose fall style leans more “cozy harvest” than “haunted house.” Painted blooms — simple five-petal flowers dotted around a pumpkin — look delicate and hand-crafted, and they’re far easier than they sound because loose, folk-art flowers are supposed to look a little imperfect. The gold-leaf variation skips the flowers and adds metallic gold accents: a gold stem, gold-dipped bottom, or scattered gold dots on a white or blush base. I’ve watched a row of blush-and-gold pumpkins on a rental’s dining table carry a whole Thanksgiving table setting.
The renter case here is longevity. These aren’t Halloween-locked: a floral or gold-accent pumpkin reads as fall decor from September through November, so it’s the best cost-per-week of anything on this list. Everything is still just paint on an intact gourd — compostable when you’re done, nothing permanent in your space.
How to do it
Design A — Painted blooms:
- Paint the whole pumpkin a soft base (cream, blush, or sage) and let dry.
- With a small round brush, paint simple five-petal flowers in 2–3 colors, scattering them across the surface — five oval petals around a dot center.
- Add small green leaves or stems between flowers with quick brush strokes.
- Keep the flowers loose and varied in size; folk-art imperfection is the charm.
Design B — Gold-leaf accents:
- Paint the whole pumpkin white, blush, or sage and let dry.
- Apply gold accents: paint the stem gold, add a gold band around the middle, or scatter gold dots.
- For a luxe look, do a “gold-dipped” bottom: paint the bottom third gold with a clean horizontal line.
- Metallic craft paint works fine here — no actual gold leaf needed.
Approximate cost: $6–$12 (base color plus 2–3 floral or metallic paints).
8. Spooky Silhouettes: Black Cats and Flying Bats

Silhouettes are the secret weapon for renters who want real Halloween spook without any carving. A black cat silhouette — arched back, curled tail — painted on a white mini pumpkin is instantly recognizable and reads beautifully from across the room. Bats are even easier: three or four little bat shapes scattered across a pumpkin, which you can do freehand because bats are supposed to look scraggly. I always tell people: if you can draw a sideways “M” with scalloped edges, you can paint a bat. Cluster a cat pumpkin with two or three bat pumpkins and you’ve got a whole Halloween vignette for the cost of two paint bottles.
These are ideal for a small porch or stoop, too — and that’s the renter win. Small painted pumpkins are light, weather-resistant for a week or two in cool fall air, and they won’t roll away like a carved one with a flat face might. Bring them inside at night if your building has hallway traffic, and they’re good as new the next morning.
How to do it
Design A — Black cat silhouette:
- Paint the mini pumpkin white in two coats and let dry.
- Lightly sketch the cat in pencil: an arched back, pointed ears, curled tail — keep it simple, silhouette style.
- Fill the shape with black paint using a small brush; two thin coats for solid coverage.
- Add two small gold or yellow dot eyes once the body is dry.
Design B — Flying bats:
- Paint the pumpkin a light base (white, cream, or pale gray) and let dry.
- Paint 3–5 bat shapes in black: each is a small body with two scalloped wings — think sideways “M” shapes.
- Vary the sizes and angles so they look like they’re flying in different directions.
- Add a tiny gold crescent moon on one side to complete the scene.
Approximate cost: $4–$8 (white base plus black and one gold/yellow accent).
9. Sweet Treats: Candy-Corn Stacks and Pastel Pumpkins
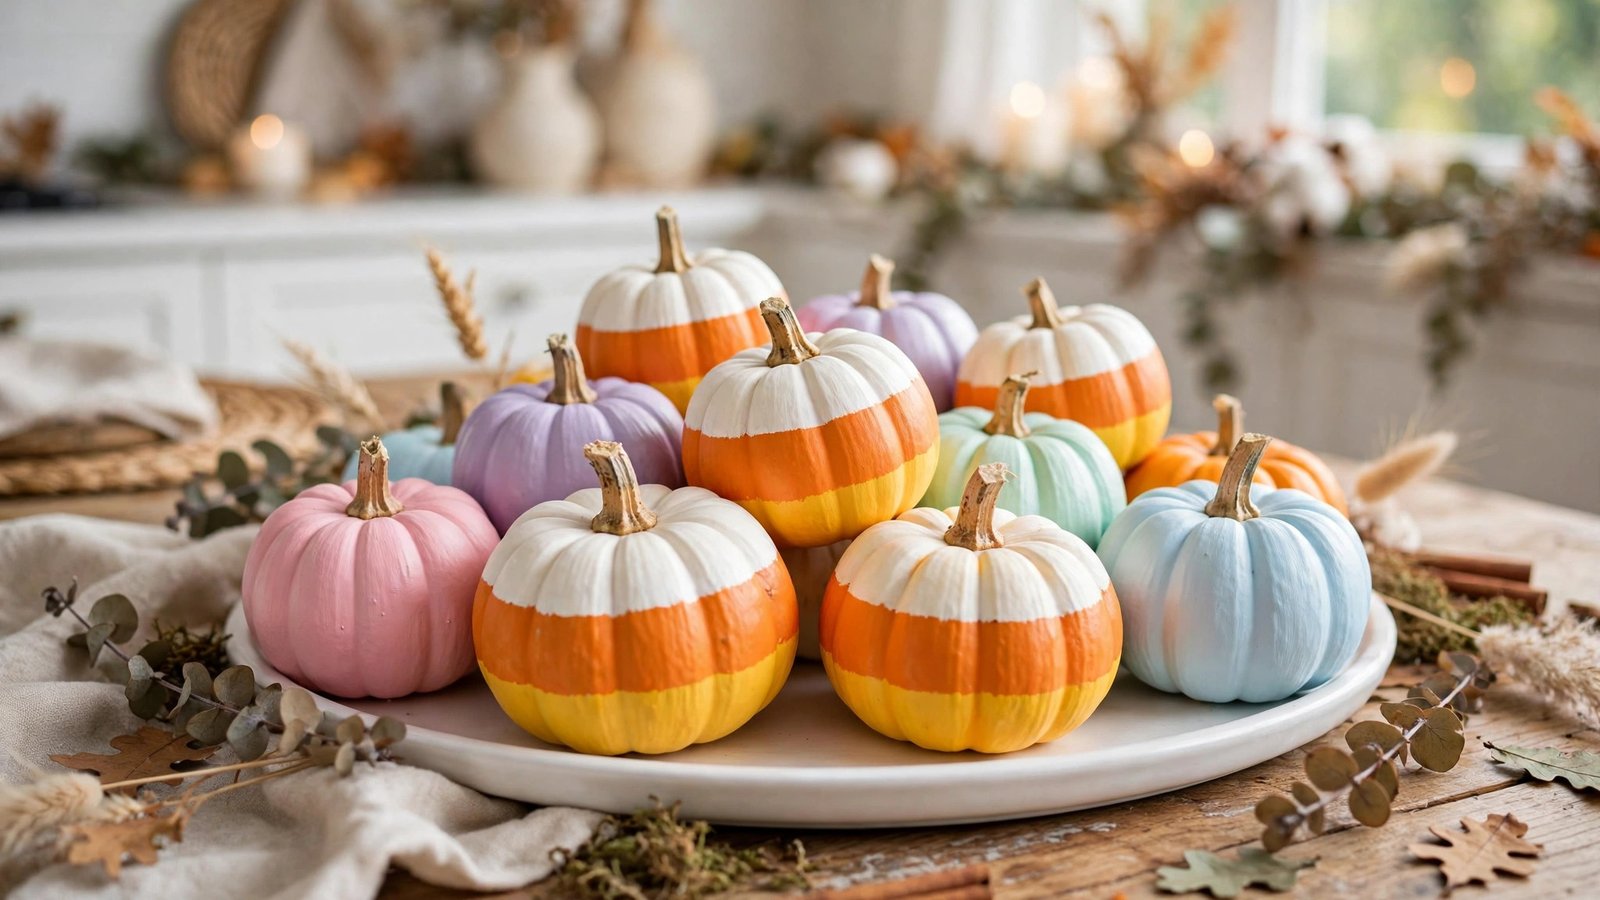
Here’s one for the renters who find traditional Halloween a little too orange-and-black. Candy-corn pumpkins — painted in the white, orange, and yellow bands of the classic candy — are cheerful, instantly readable, and take about ten minutes each. The pastel variation goes further: mini pumpkins painted soft pink, lavender, mint, or baby blue, sometimes with white polka dots, give you a “pastel Halloween” look that’s all over social media every October. I’ve helped renters in bright, airy apartments do a whole pastel pumpkin cluster because the traditional palette clashed with their space — and they got more compliments on those than any spooky design I’ve ever done.
Both designs are the gentlest possible Halloween decor for a rental: no faces, no scares, just color. They’re party-friendly (great on a dessert table), kid-friendly if you have little ones visiting, and the pastel versions transition into cute fall decor without changing a thing. Paint, dry, display — that’s the whole project.
How to do it
Design A — Candy corn:
- Paint the top third of the pumpkin white and let it dry.
- Tape a line and paint the middle third orange.
- Paint the bottom third yellow (or leave the pumpkin’s natural orange and just add white and yellow — even easier).
- Peel tape while the last coat is slightly tacky for clean bands.
Design B — Pastel pumpkins:
- Paint each mini pumpkin a different pastel shade (pink, lavender, mint, baby blue) in two coats.
- Optional: add small white polka dots with a pencil eraser for a sweet touch.
- Cluster 3–5 pastels together on a white tray or cake stand for maximum impact.
- Mix in one metallic gold pastel pumpkin for a little contrast.
Approximate cost: $5–$11 (white plus 2–3 pastel or candy colors; tape optional for crisp bands).
10. Night Details: Spiderwebs and Moons
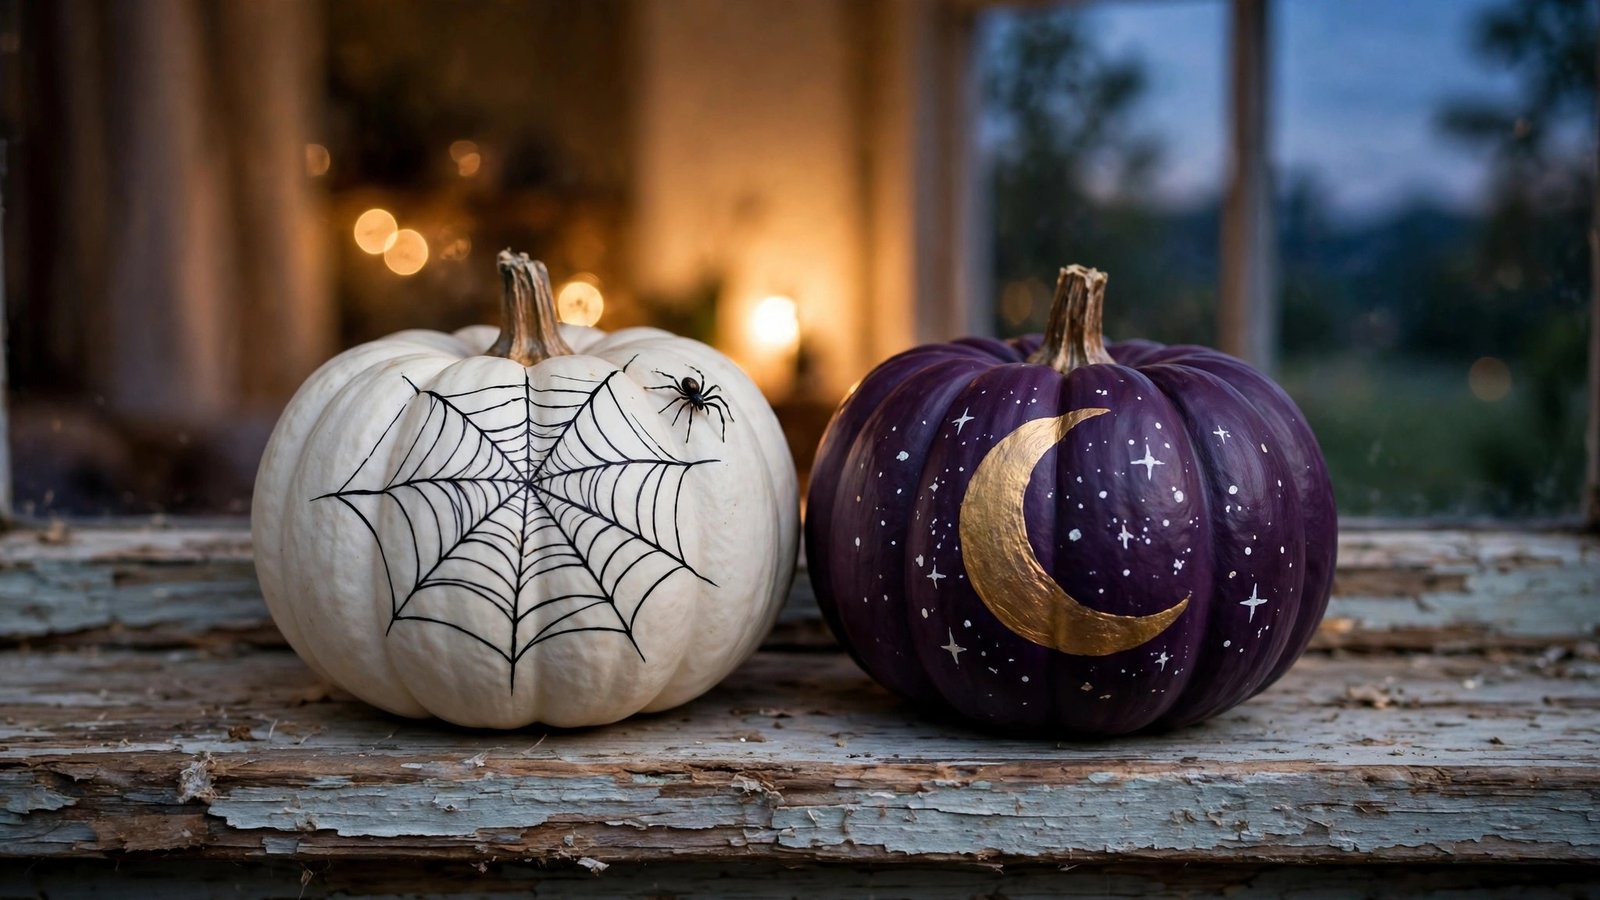
We finish with the two designs that look the hardest but are genuinely the easiest — which is why I save them for last, when your confidence is high. A spiderweb is just straight lines radiating from a center point with curved lines connecting them; on a small pumpkin you draw it on one side and it looks complete. Add a tiny painted spider (a dot body with eight line legs) and it’s perfect. The moon design is even simpler: a deep-colored pumpkin with one big painted crescent moon and a few stars. These two together make a gorgeous pair — web on one pumpkin, moon on the other — and they’re the designs that make guests ask “wait, you did that yourself?”
For renters, these are the grand finale with the smallest supply list: one dark paint, one light paint, a thin brush. They sit beautifully on a windowsill where they catch the light, and the dark bases hide every fingerprint. When November arrives, the moon pumpkin honestly works as plain fall decor — just turn the spiderweb one to face the wall.
How to do it
Design A — Spiderweb:
- Paint the pumpkin a light base (white or pale gray) and let dry.
- With a thin brush and black paint, draw straight lines radiating from a center point on one side of the pumpkin.
- Connect the radiating lines with curved arcs to form the web, working outward.
- Paint a small spider nearby: a dot for the body and eight thin line legs.
- Keep lines thin — a detail brush or even a toothpick dipped in paint works.
Design B — Crescent moon:
- Paint the pumpkin deep purple, navy, or black and let dry.
- Paint a large crescent moon in gold or pale yellow on one side — two overlapping curves.
- Scatter small white star dots around the moon.
- Optional: add tiny dots trailing from the moon like a star trail.
Approximate cost: $4–$9 (light and dark base paints plus one metallic gold or yellow).
Conclusion
Look at what one afternoon with a brush can do: twenty distinct designs, from classic jack-o’-lantern faces to pastel candy-corn stacks, all on pumpkins small enough to fit a windowsill and safe enough for the strictest lease. I’ve watched renters go from “I can’t do anything to this apartment” to a full fall vignette in a single weekend, and painted pumpkins are almost always the gateway project — because they prove the point I’ve been making for years. You don’t need to own a home to have a home that feels like yours for the season.
So pick the two or three designs that made you smile, grab a bag of mini pumpkins on your next grocery run, and give yourself an hour with some paint. Your windowsill, your desk, your little stoop — they can all have a little October. And when you’re done, take a photo of your favorite. Please save this visual guide on Pinterest and pin your painted pumpkins alongside it, so next fall you have your own inspiration board ready to go.

Amelia leads HavenlyStyle’s editorial vision with a passion for elegant interiors and practical home living. With years of experience in home décor and lifestyle content, she ensures every article is accurate, inspiring, and easy to follow. From timeless decorating ideas to the latest interior design trends, Amelia is committed to helping readers create beautiful, functional spaces while maintaining HavenlyStyle’s trusted and welcoming voice.