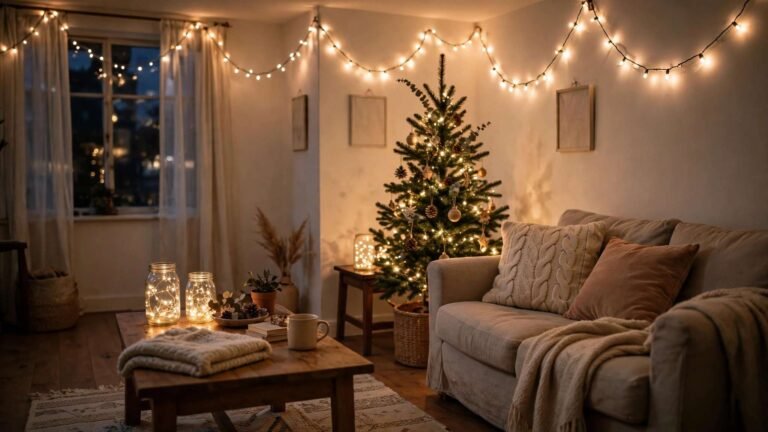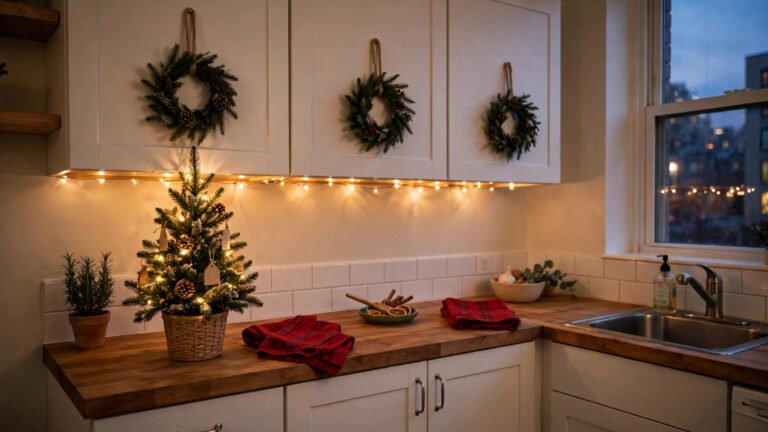
If you have ever stood in a store aisle holding a beautiful, heavy glass ornament and thought, "My little tree would tip right over," you are not alone. I have helped dozens of renters decorate small apartments, studios, and shared rentals, and the same worries come up every December: the tree is small, the walls cannot take a nail, there is nowhere to store a big box of decorations, and the budget is already stretched thin.
Here is the good news I have personally seen play out again and again: a small tree covered in handmade ornaments looks warmer and more personal than a big tree covered in store-bought filler. Handmade ornaments are almost always lighter than glass, they can be made to match your exact colors, and most of them pack flat, nest together, or squash down into a shoebox when January comes. Every idea in this guide passes the renter test — removable, reversible, and deposit-safe — and hangs from a tree, a tension rod, or a branch in a vase without a single hole in the wall.
In this guide, I am sharing twelve ornament ideas I have actually made, hung, and packed away again in rental homes. Each one is lightweight enough for a tabletop tree or a slim pencil tree, each one uses materials you can find at a dollar store, a craft store, or your own kitchen, and each one stores small. Pick three or four for this year, add a few more next year, and before long you will have a collection that means something — and that fits in one small box.
Executive Summary
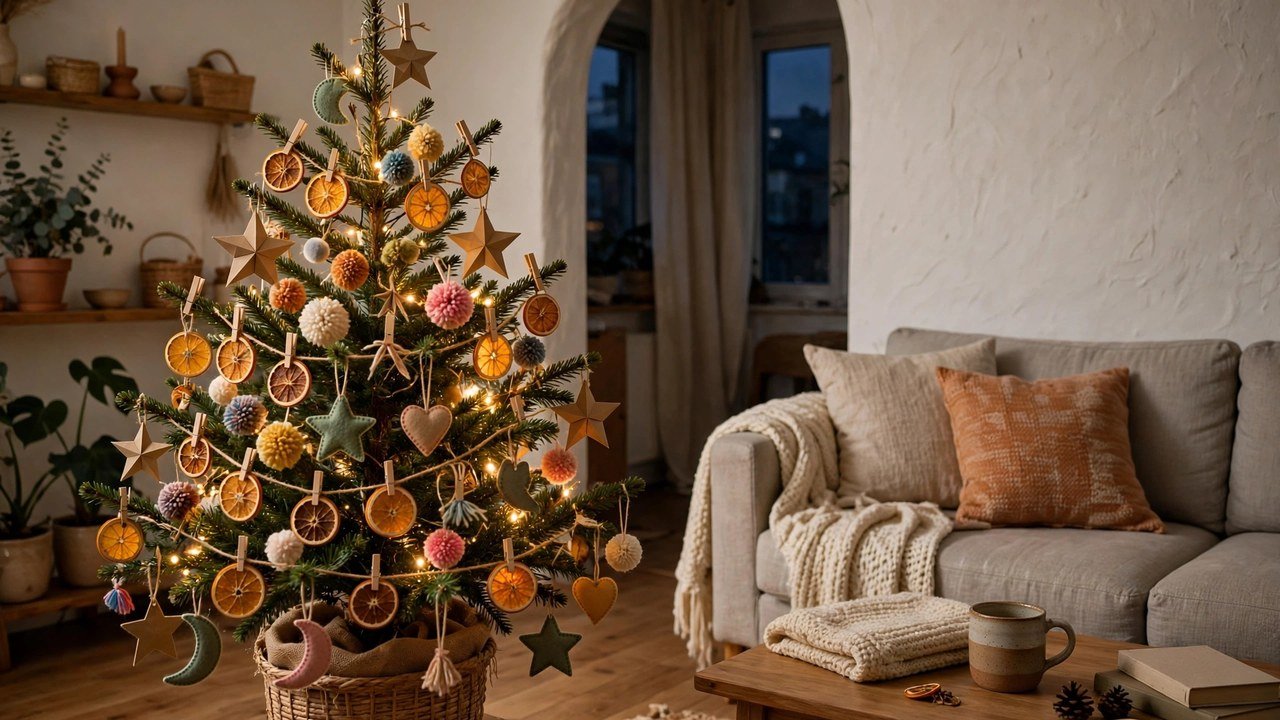
- Lightweight wins for renters: every ornament here is light enough for a small tree, a tabletop tree, or a tension rod, so nothing drags branches down or tips the tree.
- No damage, no permission needed: all twelve ideas hang without nails, screws, or wall damage, and they come down cleanly in January.
- Small storage by design: most of these ornaments pack flat, nest inside each other, or compress, so a whole tree's worth fits in a shoebox or a gallon bag.
- Budget-friendly materials: most ideas cost roughly $5–$15 in materials, often using scraps, kitchen staples, or things you already own.
- Make them in an evening: every project here takes about an hour or less of hands-on time, and several can be done while you watch a holiday movie.
- Mix, don't match perfectly: a tree full of different handmade textures — felt, paper, wood, dried fruit, yarn — looks collected and cozy, not chaotic.
1. Dried Orange Slice Ornaments

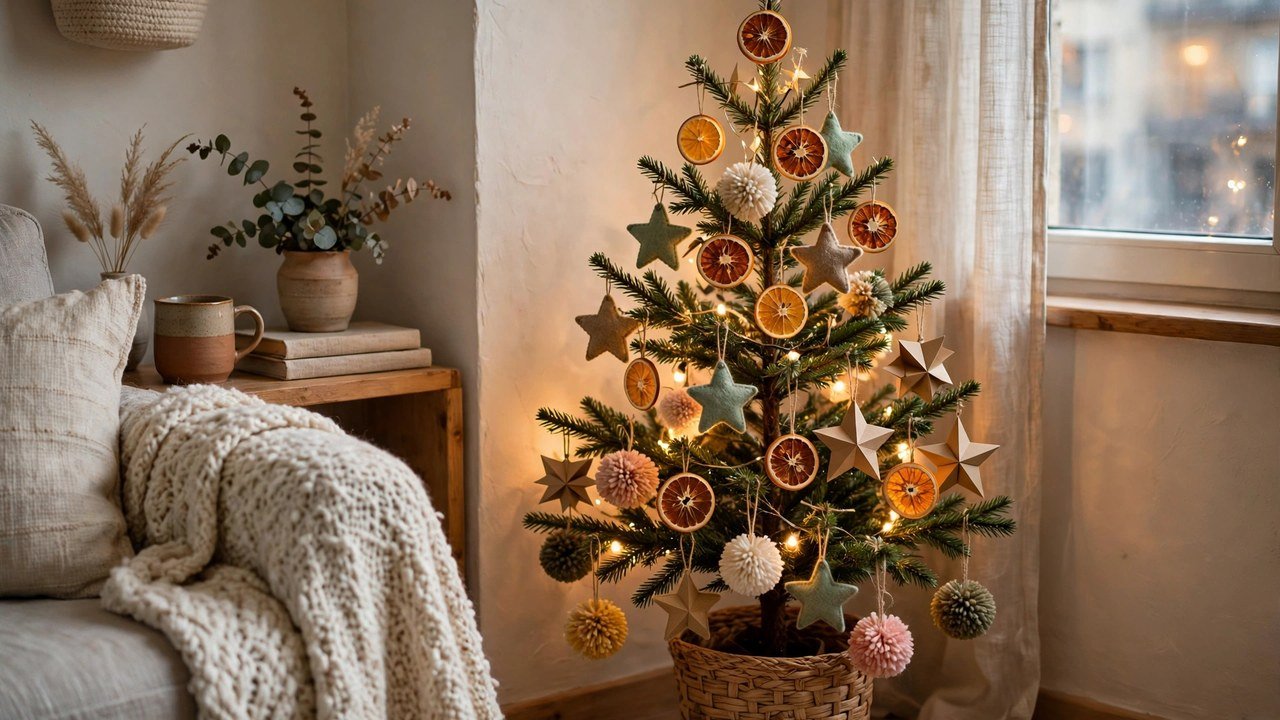
There is a reason dried orange slices show up in almost every cozy Christmas photo: they glow when the tree lights hit them, they smell faintly wonderful, and they weigh almost nothing. I have personally seen a whole set of them hang on a three-foot tabletop tree without bending a single branch.
Why this works for renters is simple. Orange slices are flat, so they store in a single layer between sheets of parchment in a zip-top bag. They cost very little, they need no special tools, and they come down without leaving a mark anywhere. If one breaks, you have lost an orange slice, not a keepsake.
Here is how to make them:
- Slice two or three navel oranges into slices about a quarter-inch thick, and blot each slice dry with a paper towel.
- Lay the slices on a parchment-lined baking sheet and bake at your oven's lowest setting, around 200 degrees, for two to three hours, flipping halfway through, until they feel dry and slightly stiff.
- Let them cool completely, then thread a loop of twine, ribbon, or thin wire through a small hole poked near the edge with a skewer.
- If you like, add a tiny sprig of rosemary or a cinnamon stick tied on with the same twine for a finished look.
Approximate cost: $3–$8 for the oranges and twine. One tip from experience: do not rush the drying. Slices that still feel soft will curl or grow sticky in a warm apartment, so bake them until they are truly dry, and store them somewhere dry.
2. Cinnamon Stick Star Ornaments

If dried oranges are the glow of a handmade tree, cinnamon sticks are the scent. A star made from five short cinnamon sticks looks like something from a craft fair, it smells like Christmas every time you walk past the tree, and it weighs less than a handful of coins.
This is a perfect renter ornament because it is sturdy without being heavy, and because it uses no paint, no glitter, and no mess that could stain a rental carpet. You can hang it from a tree branch, a tension rod across a window, or a hook that was already on the wall when you moved in.
Here is how to make it:
- Lay out five cinnamon sticks in a star shape on a flat surface, overlapping the ends so each point crosses the next stick.
- Glue each joint with a dot of hot glue or strong craft glue, holding each joint for about thirty seconds until it sets.
- Let the star dry flat for at least an hour so the joints are fully firm before you hang it.
- Tie a loop of twine or thin ribbon around one point, and tuck a tiny sprig of greenery or a small wooden bead at the center if you want a finishing touch.
Approximate cost: $5–$10 for a bag of cinnamon sticks and twine, which makes several stars. A practical note: buy sticks that are roughly the same length so your star looks balanced, and keep finished stars in a box rather than a bag so the points do not snap.
3. Felt Cut-Out Ornaments

Felt is the renter's best friend in ornament form. It is soft, so it cannot scratch a table or break a window if it falls. It is light, so even a tiny tree holds a dozen felt ornaments easily. And it comes in every color, so you can match your sofa, your bedding, or your favorite holiday palette without buying anything expensive.
I have noticed that felt ornaments are also the most forgiving project for anyone who says they are not crafty. There is no drying time, no fumes, and no precise measuring. If a cut wobbles a little, it just looks handmade, which is the whole point.
Here is how to make them:
- Choose simple shapes — stars, trees, hearts, mittens, or stockings — and cut two matching pieces of felt for each ornament.
- Stitch or glue the two pieces together around the edges, leaving a small opening, and stuff lightly with a pinch of cotton or scrap felt so the shape holds its form.
- Close the opening, then add simple details: a button, a stitched line, or a small felt circle for a tree ornament's bauble.
- Sew or glue a loop of ribbon or embroidery thread at the top for hanging.
Approximate cost: $5–$12 for a pack of felt sheets, thread, and stuffing, enough for many ornaments. Storage is the easiest part: felt ornaments stack flat in a bag or a small box, and they never shatter, chip, or tangle.
4. Folded Paper Star Ornaments

Folded paper stars look far more impressive than the effort they take, which is exactly why I recommend them to renters who want a big visual payoff on a small budget. Made from ordinary paper, they are the lightest ornaments in this whole guide — a branch barely notices them — and they fold completely flat for storage.
Why renters love them: you probably already own the materials. Scrapbook paper, old maps, brown grocery bags, or even plain white printer paper all work. You can make a whole tree's worth in one evening, change colors next year for the price of a paper pad, and recycle any star that gets crushed in a move.
Here is how to make them:
- Cut paper into strips or squares according to the folding style you choose — a simple five-point folded star or a woven paper star both work well; follow one folding tutorial the first time and the rest go quickly.
- Fold each piece crisply, creasing with a ruler edge or a spoon handle so the star holds its shape.
- Glue or tuck the final folds closed, and press the star flat under a heavy book for a few minutes.
- Thread a loop of thin string or embroidery thread through one point, and hang the star so it catches the light.
Approximate cost: $2–$8 for paper and string, often $0 if you use paper you already have. One honest caution: paper stars and steamy kitchens do not mix, so hang them on the tree rather than above a stove, and store them flat between sheets of paper.
5. Lightweight Air-Dry Clay Stamped Ornaments
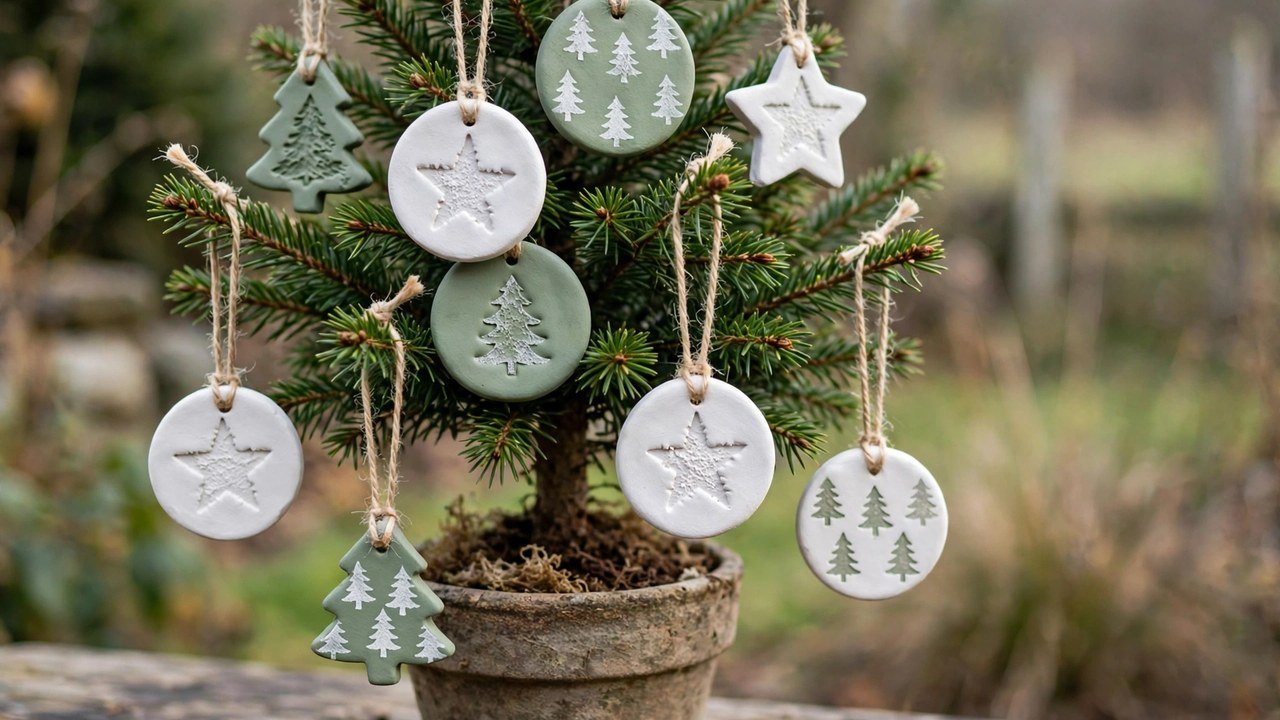
Clay ornaments sound heavy, but small, thin air-dry clay ornaments are surprisingly light — closer to a cookie than a brick — and they give you that pottery-shop look without a kiln or a craft-store splurge. I have helped renters make a set of these on a kitchen table covered with a trash bag, and the cleanup took five minutes.
The renter advantage here is durability. Unlike paper or dried fruit, clay ornaments survive a move in a padded box, and they can be painted to match any color scheme year after year. They still hang easily from small branches because each one is kept thin and small, about the size of your palm or smaller.
Here is how to make them:
- Roll air-dry clay to about a quarter-inch thick on parchment paper, and cut shapes with cookie cutters or a knife — circles, stars, and trees all work.
- Press a stamp, a leaf, a piece of lace, or a fork tine gently into the surface for texture, and poke a small hanging hole near the top with a straw.
- Let the shapes dry flat for 24 to 48 hours, flipping once, until they are completely hard and cool to the touch.
- Paint with craft paint, seal with a clear matte sealer if you like, and thread twine or ribbon through the hole.
Approximate cost: $8–$15 for a tub of air-dry clay, paint, and twine, enough for a full set. Keep each ornament small and thin — that is what keeps it light — and store them in a single layer with tissue between pieces so painted surfaces do not stick together.
6. Painted Pinecone Mini Ornaments
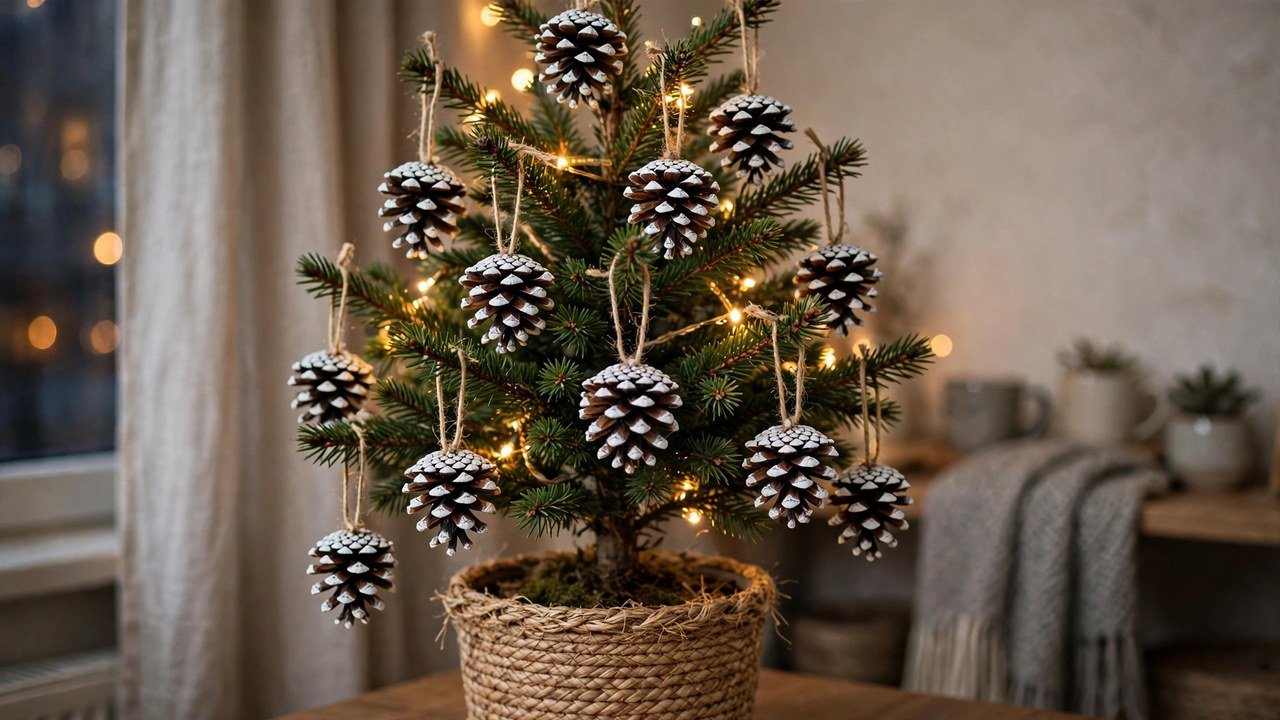
Pinecones are free if you gather them, charming if you paint just the tips, and naturally light. A pinecone hung by its top looks like a tiny rustic tree all on its own, and a cluster of them on a small tree gives you that cabin feeling without a single heavy decoration.
For renters, pinecones have one more advantage: they are practically indestructible in storage. Toss them in a bag, stack them in a box, move apartments twice — they still look the same. Just be sure to clean and fully dry any gathered pinecones before you bring them inside, and check your lease or local rules if you are gathering from a park rather than your own yard.
Here is how to make them:
- Choose small, fully opened pinecones, brush off dirt, and bake them on a foil-lined tray at around 200 degrees for 30 to 45 minutes to dry them out and open the scales, then cool completely.
- Dip just the scale tips in white, gold, or soft green craft paint, or dab paint on with a small brush, and let them dry on parchment.
- Add a tiny dusting of glitter only if you want it — and only over a tray, so it does not end up in your rental carpet.
- Wrap wire or twine around the top scales and twist it into a hanging loop.
Approximate cost: $0–$8 if you gather the cones, or roughly $5–$10 for a bag of craft pinecones plus paint. Hang pinecones near the outer tips of branches where their shape shows, and keep them away from open flames or very hot lights.
7. Cork Slice Ornaments
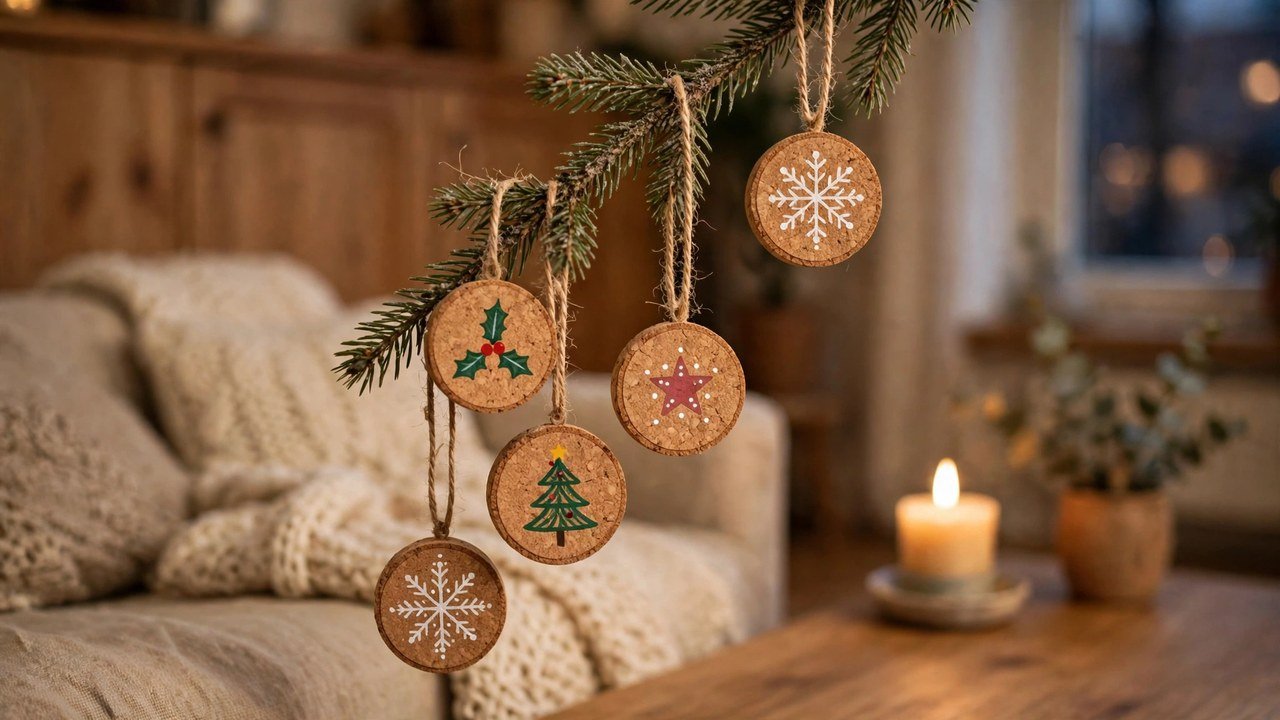
Wine corks, sliced into rounds, make some of the most charming ornaments I have seen in small apartments — and they are a wonderful use for something you were about to throw away. A cork slice painted like a tiny reindeer face, a snowman, or a simple striped bauble is light, flat, and nearly impossible to break.
This is a renter-perfect project because the materials are often free, the finished ornaments pack flat like coins in a small pouch, and nothing about the process risks your deposit. There is no paint on the walls, no mess on the floors if you work over newspaper, and no heavy weight on your tree.
Here is how to make them:
- Slice clean, dry corks crosswise into rounds about a quarter-inch thick, using a sharp knife and cutting away from yourself on a stable board.
- Paint each round with a simple design — a face, stripes, a tiny tree — and let the paint dry completely.
- Add small details with a fine brush or a marker: dot eyes, a tiny nose, or a sprig of greenery glued at the top.
- Glue a loop of twine or ribbon to the back, or poke a small hole through the top edge for a hanging loop.
Approximate cost: $0–$10, depending on whether you already have corks and paint. A safety note I always give: cork slices are small, so keep them out of reach of very young children and pets, and store them in a pouch so they do not scatter in a moving box.
8. Button Cluster Ornaments
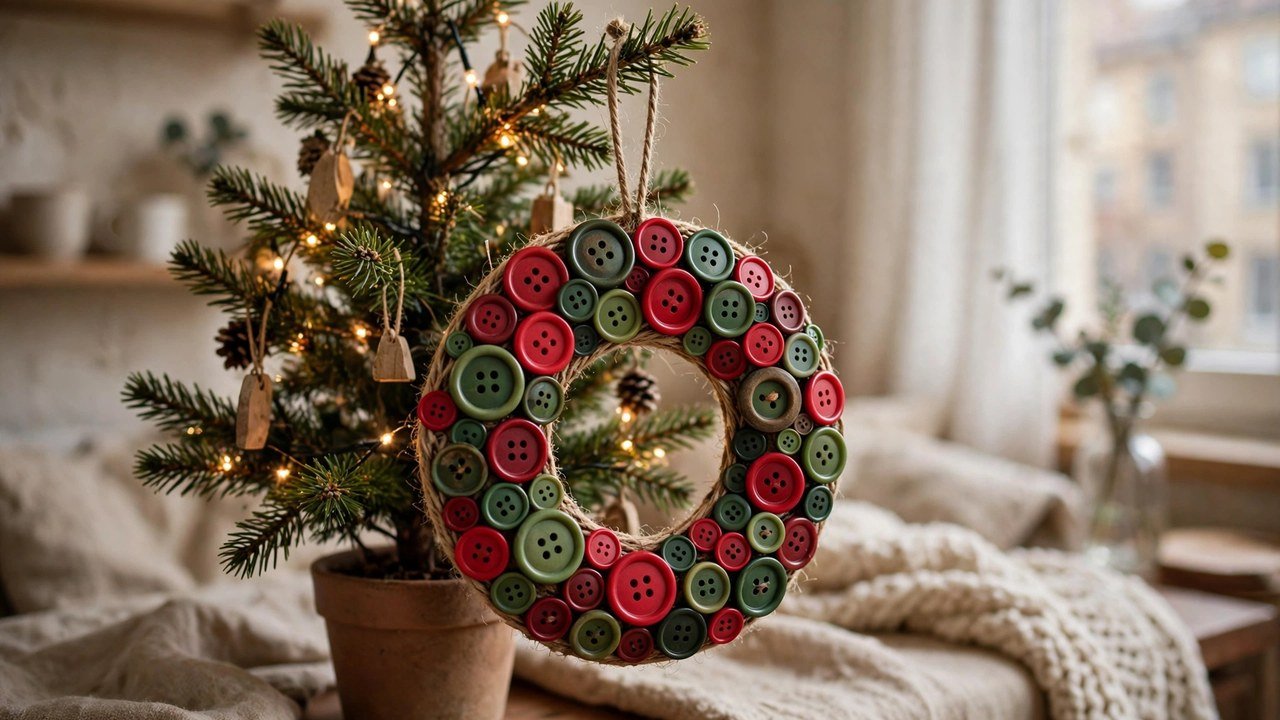
Every renter I know has a jar, tin, or baggie of spare buttons somewhere, and a button cluster ornament turns that clutter into something genuinely pretty. Buttons wired or glued into a small wreath, star, or tree shape catch the light beautifully, weigh almost nothing, and look far more intentional than a random handful of buttons ever could.
The renter test here is easy to pass: button ornaments are flat or nearly flat, they store in a small bag without tangling, and they hang from the lightest branches. They are also a lovely way to use buttons from old coats or sewing kits, which gives your tree a story no store-bought set can match.
Here is how to make them:
- Sort buttons by color family — all reds and greens, all whites and golds, or a cheerful mixed rainbow — and pick a simple base shape, like a wire circle for a wreath or a cardboard star covered in felt.
- Thread buttons onto thin wire or glue them closely together on the base, overlapping slightly so no gaps show.
- Fill any small gaps with tiny buttons or beads, and let glue dry fully if you used it.
- Attach a loop of ribbon or wire at the top, and check that the ornament hangs straight before it goes on the tree.
Approximate cost: $3–$10 for wire, a base, and any buttons you do not already own. Keep the shape small — about three to four inches across — so the ornament stays light and does not overwhelm a small tree.
9. Yarn Pom-Pom Ornaments

Yarn pom-poms are soft, squishy, colorful, and almost impossible to break, which makes them ideal for households with pets, small children, or a cat who views the Christmas tree as a personal challenge. I have personally seen a pom-pom survive being batted across a living room and go right back on the tree looking exactly the same.
For renters, pom-poms solve the storage problem in the most satisfying way: they squash flat in a bag and spring back when you unpack them. They are also one of the cheapest ornaments to make, since a single skein of yarn produces a whole handful of pom-poms in whatever colors match your apartment.
Here is how to make them:
- Wrap yarn around a pom-pom maker, a fork, or two fingers about 60 to 80 times, depending on how full you want the pom-pom.
- Tie a separate piece of yarn tightly around the middle of the bundle, then slide it off and cut through all the loops on both sides.
- Fluff the pom-pom into a ball and trim any long stragglers with scissors until it looks round.
- Leave one long tie string attached as your hanging loop, or thread a new loop through the center knot.
Approximate cost: $3–$8 for a skein or two of yarn. Mix sizes for the best look: a few large pom-poms as statement pieces, surrounded by smaller ones, reads as deliberate rather than random. Store them in a zip-top bag and they will be ready, uncrushed and cheerful, next December.
10. Scrap-Fabric Wrapped Baubles

If you have ever wished store-bought baubles came in your exact curtain fabric, your favorite old shirt, or a thrifted scarf print, this idea is for you. Wrapping a lightweight foam ball in scrap fabric gives you a custom bauble in minutes, and because the core is foam rather than glass, it weighs almost nothing and bounces instead of shattering.
This passes the renter test on every count. Foam baubles do not break, they do not scratch furniture, and they nest in a box or a bag without special padding. You can also unwrap and rewrap them next year in a new fabric if your color scheme changes, which is a kind of storage and budget win no store-bought set can offer.
Here is how to make them:
- Cut a square of scrap fabric large enough to wrap around a small foam ball with a little extra to gather at the top.
- Place the ball in the center of the fabric, gather the fabric up around it, and secure the gathered neck tightly with a rubber band, thread, or a twist of wire.
- Trim the excess fabric into a neat ruffle or fold it into a small bow shape, and cover the neck with a ribbon wrap for a finished look.
- Attach a hanging loop of ribbon through the neck wrap, making sure it is secure before the bauble goes on the tree.
Approximate cost: $5–$12 for foam balls and ribbon, often less if you use fabric scraps you already own. Keep baubles small — two to three inches across — so they suit a small tree, and group them in odd numbers for a styled look.
11. Beaded Wire Snowflake Ornaments
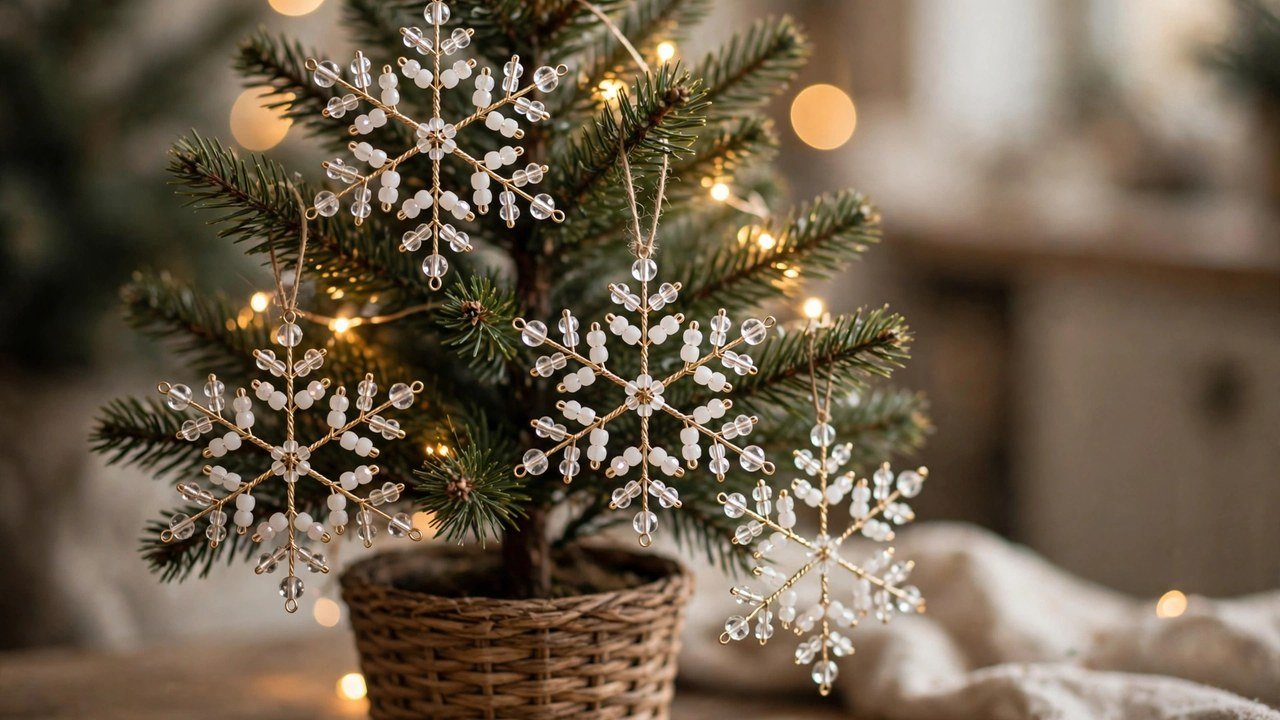
Beaded wire snowflakes look delicate and sparkling, like frost on a window, but they are tougher than they look and lighter than almost any glass ornament. I recommend them to renters who want a little sparkle without the fragility, the weight, or the price of crystal.
What makes them renter-friendly is their flat profile. A wire snowflake slides into an envelope or a book for storage, weighs less than a letter, and hangs from a branch, a window tension rod, or a garland line without pulling anything down. They also catch tree lights beautifully, so a few snowflakes go a long way on a small tree.
Here is how to make them:
- Cut three equal lengths of thin craft wire, twist them together at the center to form six spokes, and spread the spokes evenly like a star.
- Thread small beads onto each spoke — clear, white, or icy blue beads work best — leaving a little wire at the end of each spoke.
- Curl each spoke end into a tiny loop with pliers so the beads cannot slide off, and add a small bead or crystal at the center to cover the twist.
- Attach a loop of thin wire or clear thread at the top for hanging.
Approximate cost: $5–$12 for wire and a pack of beads, enough for several snowflakes. Work over a tray so dropped beads do not roll into rental carpet or floor vents, and keep finished snowflakes flat in an envelope so the spokes do not bend in storage.
12. Pressed-Flower Clear Disc Ornaments
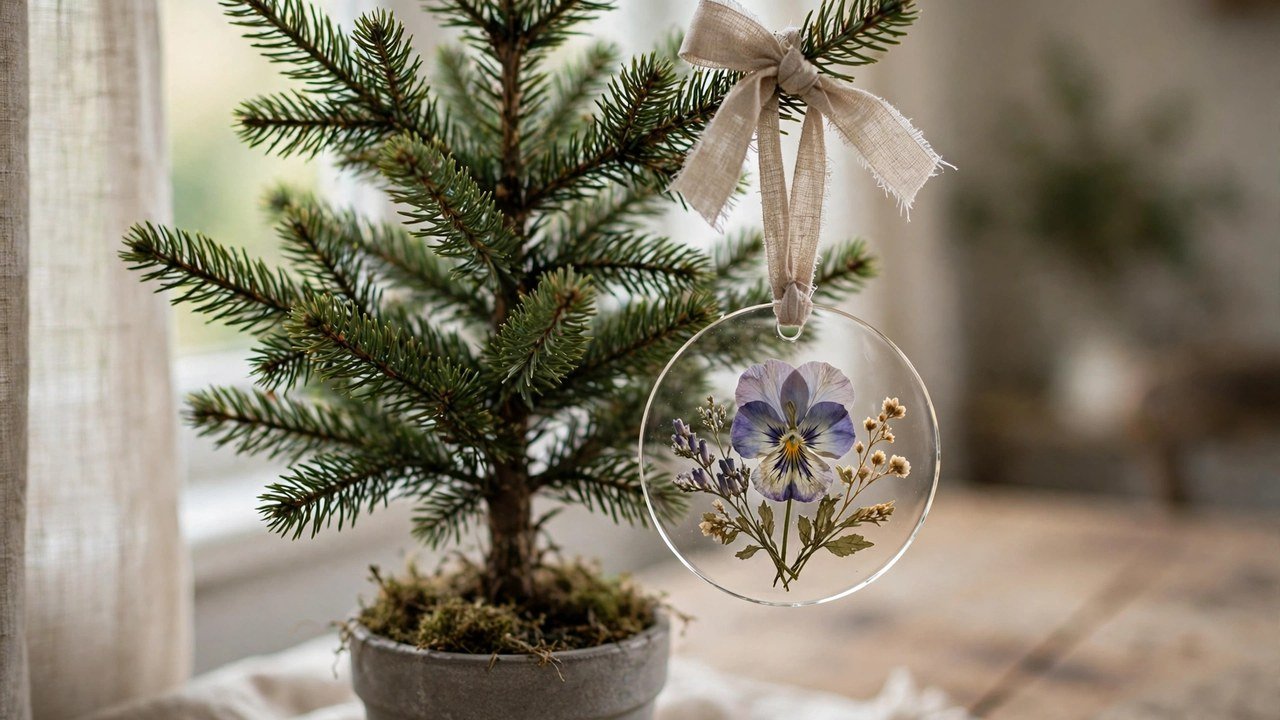
Pressed-flower ornaments are the quiet showstopper of this list. A tiny dried flower sealed inside a clear, flat disc looks like a piece of jewelry hanging on your tree, and because the disc is flat and thin, it weighs very little and stores in a stack like coasters.
For renters, this idea has a special charm: the flowers can come from your own balcony pots, a grocery-store bouquet, or a walk around the neighborhood, so the ornament carries a memory of this apartment and this year. It is also a lovely way to preserve a flower from a bouquet you were given, rather than throwing it away.
Here is how to make them:
- Press small, flat flowers and leaves between sheets of parchment inside a heavy book for one to two weeks, until they are completely dry and papery.
- Arrange a flower or a small cluster on a clear flat disc — a clear acrylic disc, a flat resin blank, or two clear flat rounds glued together — and seal it according to the product's instructions.
- Let the seal cure fully and flat, so the flower stays centered and the disc stays clear.
- Attach a loop of thin ribbon or clear thread through a small hole or a glued loop at the top.
Approximate cost: $8–$15 for clear discs or resin blanks and ribbon, often less if you press flowers you already have. A word of caution from experience: only use fully dried flowers. Any moisture trapped inside a sealed disc will cloud or spoil, so if a flower still feels soft, press it for a few more days before you seal it.
Conclusion
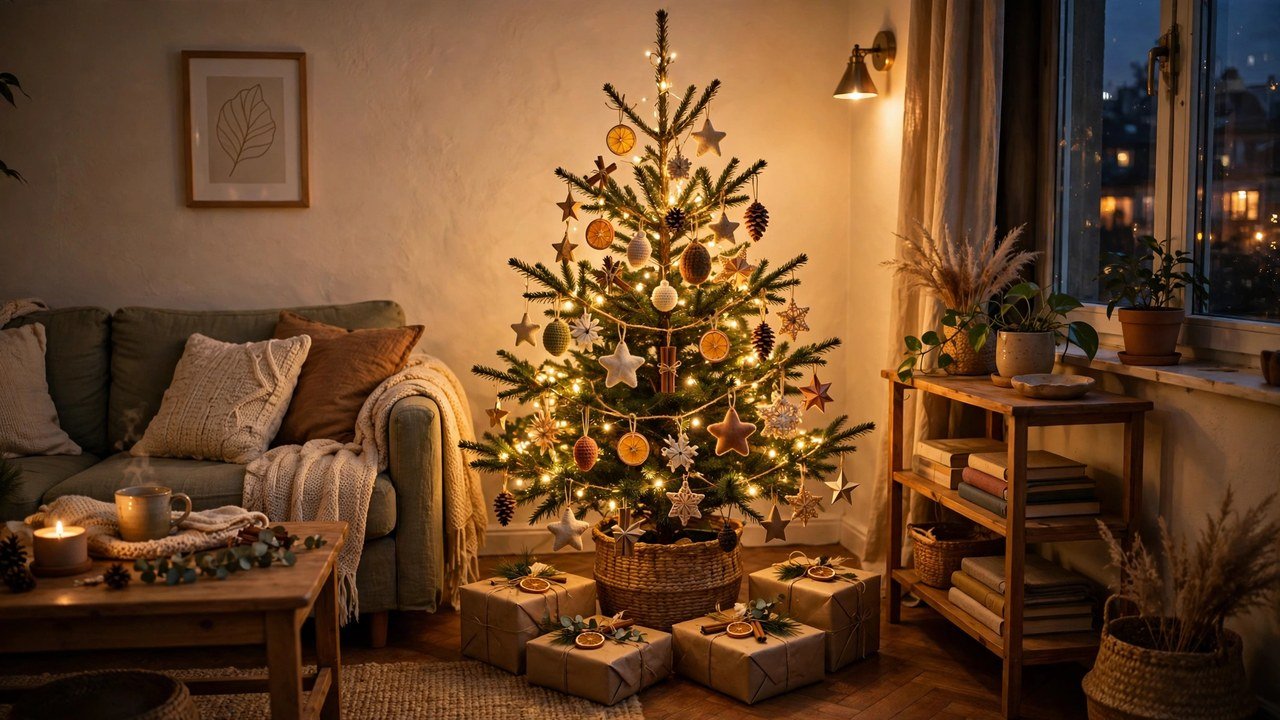
A small rental tree does not need to feel like a compromise. When every ornament on it is light, handmade, and chosen by you, the tree tells a story — the oranges you dried on a Sunday afternoon, the buttons from an old coat, the flowers from your balcony, the pom-poms you made while half-watching a holiday movie. That is a kind of warmth no big-box set can buy, and it is exactly why handmade ornaments suit renters so well: they cost less, weigh less, store smaller, and mean more.
Start with three or four ideas from this guide, not all twelve at once. Make them slowly, hang them where you can see them every day, and notice which ones make you smile when the lights come on. Next year, add a few more, swap a color, or remake a favorite in a new fabric. Before long you will have a collection that fits in one small box, survives every move, and still makes your little apartment feel like Christmas the moment you open it.
Please save this visual guide on Pinterest and share it with a renter friend who thinks a small tree cannot look magical — because a tree full of handmade ornaments absolutely can.

Amelia leads HavenlyStyle’s editorial vision with a passion for elegant interiors and practical home living. With years of experience in home décor and lifestyle content, she ensures every article is accurate, inspiring, and easy to follow. From timeless decorating ideas to the latest interior design trends, Amelia is committed to helping readers create beautiful, functional spaces while maintaining HavenlyStyle’s trusted and welcoming voice.