Creating authentic diy clothes grunge pieces entirely transforms how you express your personal style daily. You probably have boring shirts and plain jeans sitting in your closet right now. Instead of spending hundreds on expensive boutique items, you can create that perfect rebellious look yourself. I remember feeling frustrated by mall brands selling fake distressed garments for astronomical prices. That inspired me to master these simple fabric manipulation techniques at home. The right approach turns basic thrift store finds into incredible fashion statements quickly. You will save money while building a completely unique and customized alternative wardrobe.
Transforming your wardrobe does not require advanced sewing skills or expensive specialty equipment today. I started with nothing but sharp scissors and a box of cheap safety pins. You will discover exactly how to execute these beginner-friendly projects flawlessly in this guide. We will explore everything from strategic distressing to adding heavy metal hardware correctly. I have noticed beginners often overdo the destruction phase and ruin good garments permanently. We will prevent those exact mistakes by focusing on controlled, intentional design choices. Your journey into sustainable alternative fashion begins right here with these simple actionable steps.
Executive Summary
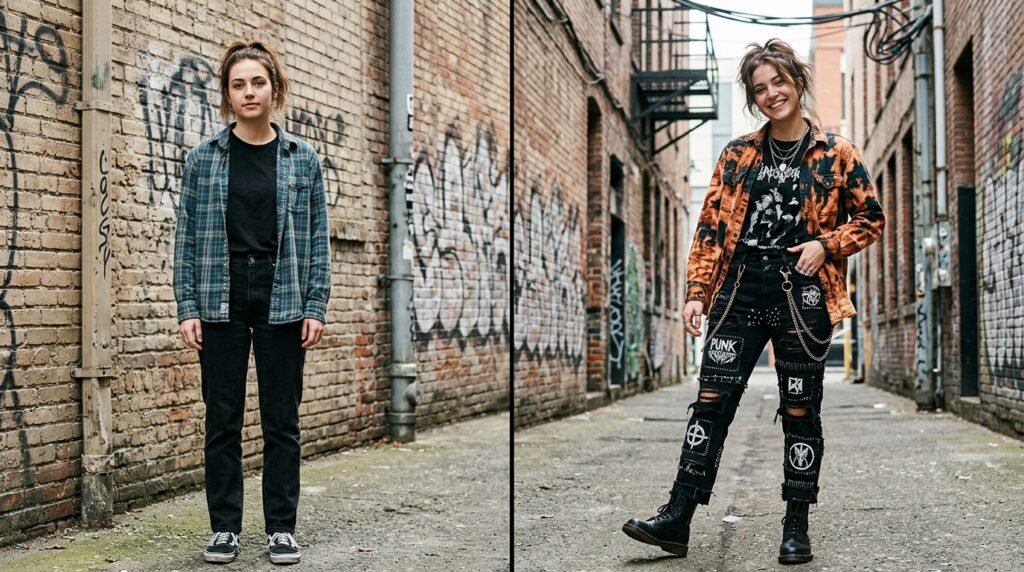
This comprehensive guide delivers exactly what you need to master alternative fashion customization safely. You will learn actionable steps for creating everything from heavily distressed tees to complex studded outerwear. I will show you exactly how to avoid the catastrophic mistakes I made early on. We cover realistic timeframes ranging from ten minute quick fixes to weekend long creative projects. You will also see precise recommendations for necessary tools like fabric shears and heavy duty metal spikes. Most projects require minimal investment while yielding results that look like expensive designer pieces. Your creative options are truly limitless.
You will discover why certain natural fabrics work much better for specific distressing projects visually. I am sharing my honest thoughts on popular crafting tools and cheap metal hardware alternatives. You will find detailed comparisons between simple hand sewing and basic machine techniques here. Every section includes practical troubleshooting advice for when things inevitably go wrong during crafting. That is why many designers recommend starting with simple bleach applications before attempting complex alterations. By the time you finish reading, you will possess expert knowledge on alternative fabric manipulation. Let us dive directly into these exciting aesthetic transformations.
1. Distressed Graphic Tees

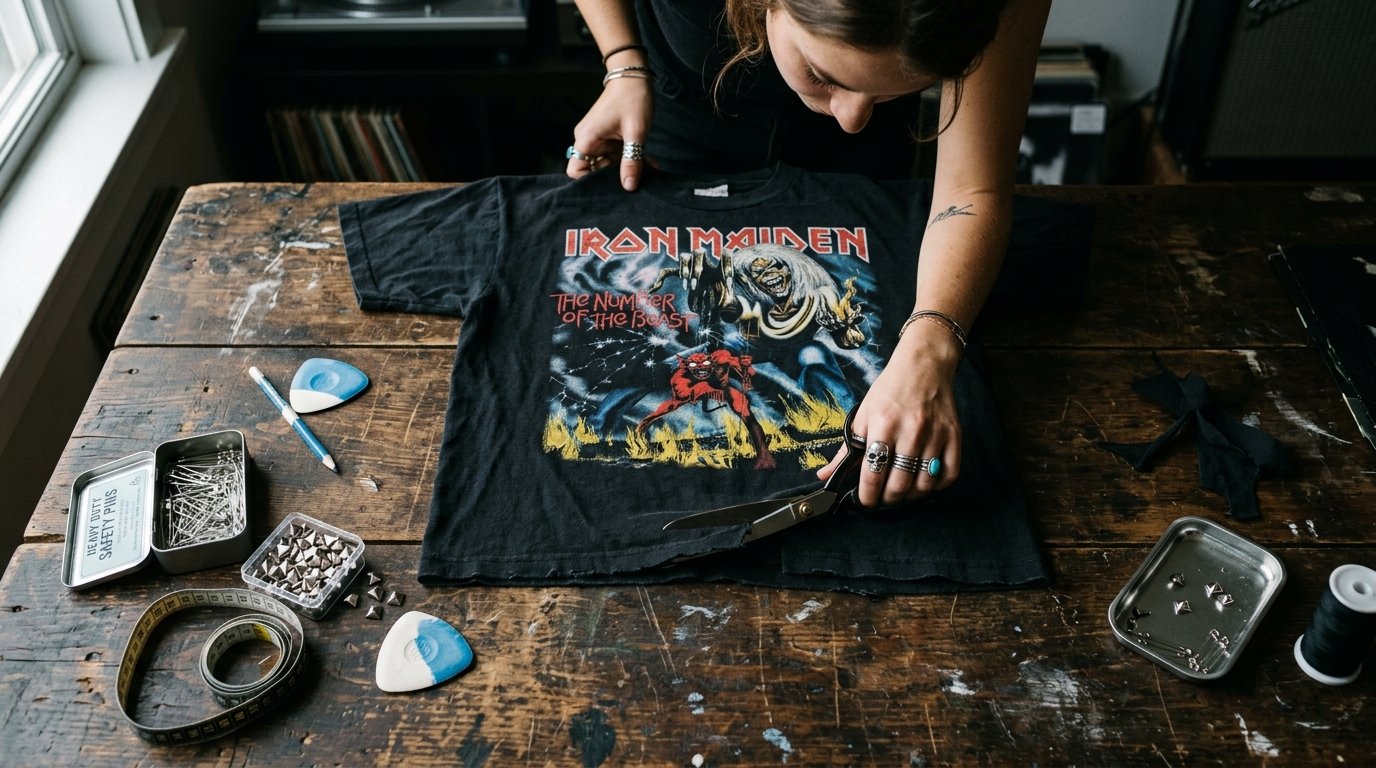
Achieving that perfectly worn vintage band shirt look requires intentional and careful fabric destruction techniques. You must use pure cotton shirts because synthetic blends do not fray naturally or attractively. I completely ruined a polyester shirt once because the edges just curled up awkwardly instead. Lay your shirt flat on a cutting mat and mark your destruction points with chalk. Use a small rotary cutter to create tiny horizontal slits around the collar and hem. I have seen this work perfectly when you keep the cuts under one inch wide. This creates authentic looking wear and tear easily.
Expanding those small slits into natural looking holes requires a heavy grade sandpaper block. You simply rub the rough sandpaper directly over your freshly cut horizontal fabric lines vigorously. This friction breaks down the vertical threads while leaving the horizontal fibers beautifully intact. I always recommend washing the shirt immediately after sanding to encourage massive natural fraying. The washing machine agitator pulls the loosened threads perfectly without tearing the entire garment apart. Your brand new band shirt now looks like it survived a massive music festival mosh pit. This remains my favorite beginner level transformation technique.
2. Safety Pin Hardware
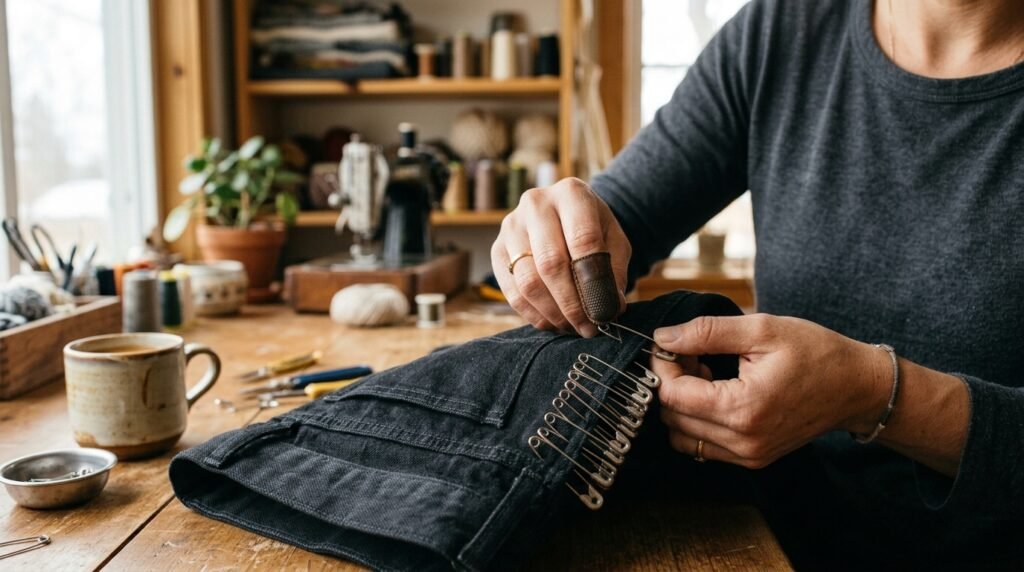
Incorporating cheap safety pins provides instant industrial edge to absolutely any boring clothing item. You should purchase bulk boxes of assorted size pins from standard craft stores very cheaply. I strictly use heavy duty steel pins because cheap aluminum ones bend during regular wear. You can weave them vertically down the side seams of old black denim pants easily. I remember poking my fingers constantly before learning to use a thimble for this process. Pushing metal through thick canvas or denim requires significant hand strength and absolute patience. The visual payoff is always completely worth the effort.
Strategic Pin Placement
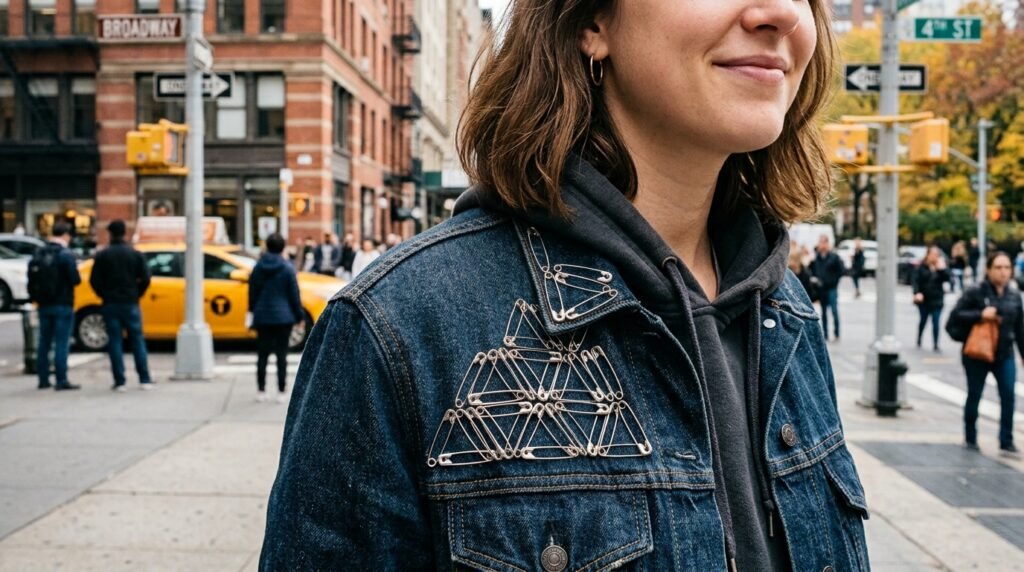
Mapping out your pin design beforehand prevents your garment from looking messy or chaotic. I strongly suggest grouping pins in tight clusters of three or five for maximum impact. You can create geometric shapes or line them up perfectly along a jacket lapel edge. I have noticed scattered placement often looks like an accident rather than an intentional design. Always push the pin through the top layer of fabric only to prevent skin irritation. This simple technique keeps the sharp metal completely away from your body while moving. Your safety and comfort remain absolutely paramount during wear.
Washing garments covered in heavy metal hardware demands extremely specific laundry care routines always. You absolutely must turn the clothing inside out before placing it in the washing machine. I highly recommend using a heavy mesh laundry bag to protect your expensive machine drum. I once skipped this step and a loose pin severely scratched my washer door glass. Use the delicate cycle with cold water to prevent the metal from rusting over time. Air drying is mandatory because high heat weakens the pin clasps rapidly. Proper care ensures your hardware stays bright and completely secure indefinitely.
3. Bleached Flannel Shirts
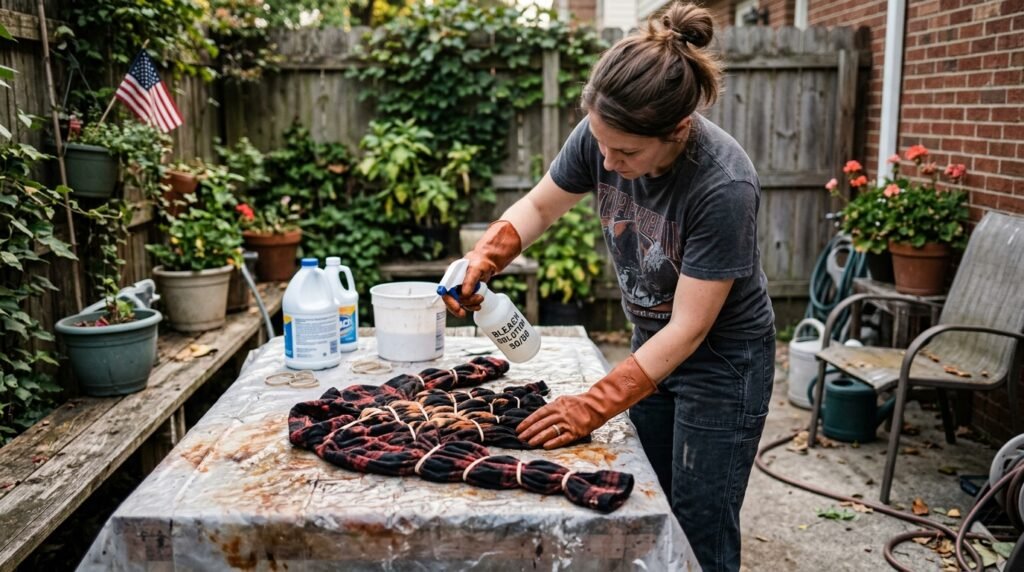
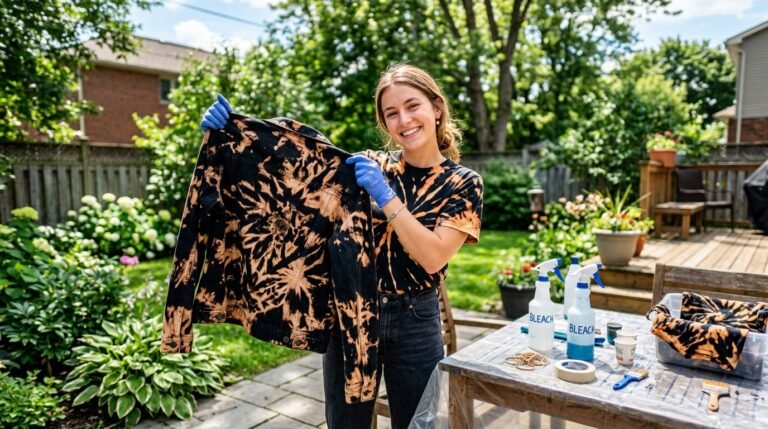
Manipulating dark plaid flannels with household bleach creates striking visual contrast and amazing texture. You must perform this messy project outdoors because concentrated chemical fumes are dangerous indoors always. I always wear thick rubber gloves and old clothes before opening the bleach bottle safely. Create a solution using equal parts water and bleach inside a standard plastic spray bottle. I once used pure bleach and it literally burned massive holes straight through my fabric. The fifty fifty dilution ratio provides perfect color lifting without destroying the underlying cotton fibers. Safety precautions make this creative process completely stress free.
Applying the chemical mixture creatively determines the final artistic direction of your custom garment. I love twisting the flannel tightly and securing it with thick rubber bands before spraying. This creates a striking reverse tie dye effect that looks incredibly authentic and highly expensive. You should start with a light layer, wait fifteen minutes, and assess the color change. The color lifts gradually, turning from deep black to rusty orange, then finally pale yellow. Once you reach your desired shade, immediately submerge the shirt in cold water mixed with peroxide. This neutralizes the bleach process permanently and safely.
4. Studded Leather Jackets
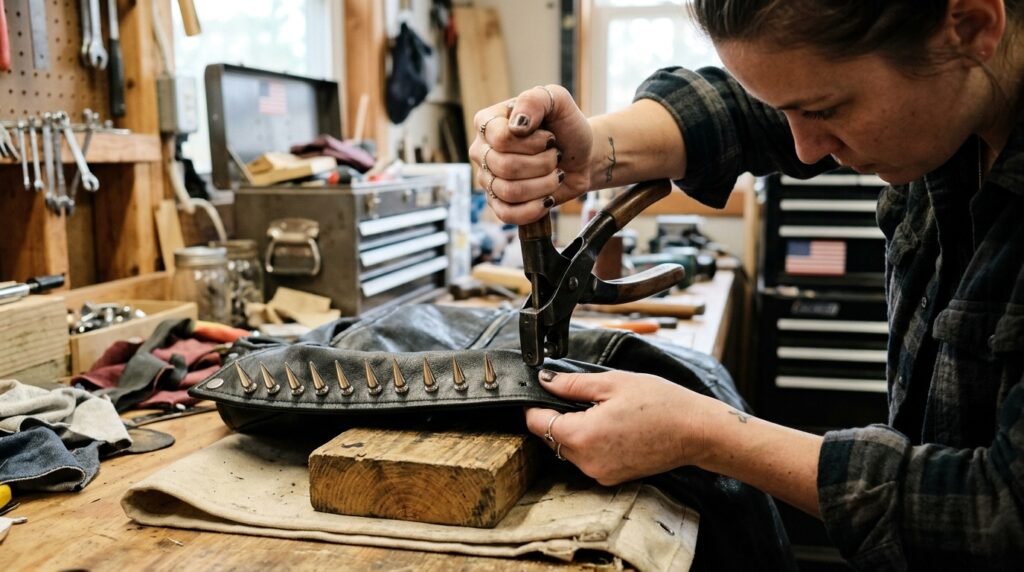
Transforming a basic thrifted jacket into a heavy metal masterpiece requires absolute precision and patience. You will need hundreds of screw back metal studs for a truly authentic aesthetic appearance. I completely ruined a thin faux leather jacket by using cheap prong studs that tore out. Always use a proper leather hole punch tool to create clean insertion points for screws. I remember trying to force a knife blade through thick cowhide and ruining the panel. Proper tools make the installation process smooth and protect the structural integrity of your garment. You must invest in proper equipment first.
Planning your stud pattern carefully ensures the final jacket looks balanced and intentionally designed. I recommend starting along the collar edges and shoulder epaulets for a classic rebel look. You must measure the distance between each hole perfectly using a flexible tailor measuring tape. I have seen many people rush this step and end up with horribly crooked metal lines. Apply a tiny drop of clear thread locker glue to each screw thread before final tightening. This prevents the heavy metal spikes from vibrating loose and falling off during wear. Your jacket will command absolute attention everywhere.
5. Patchwork Denim Jeans
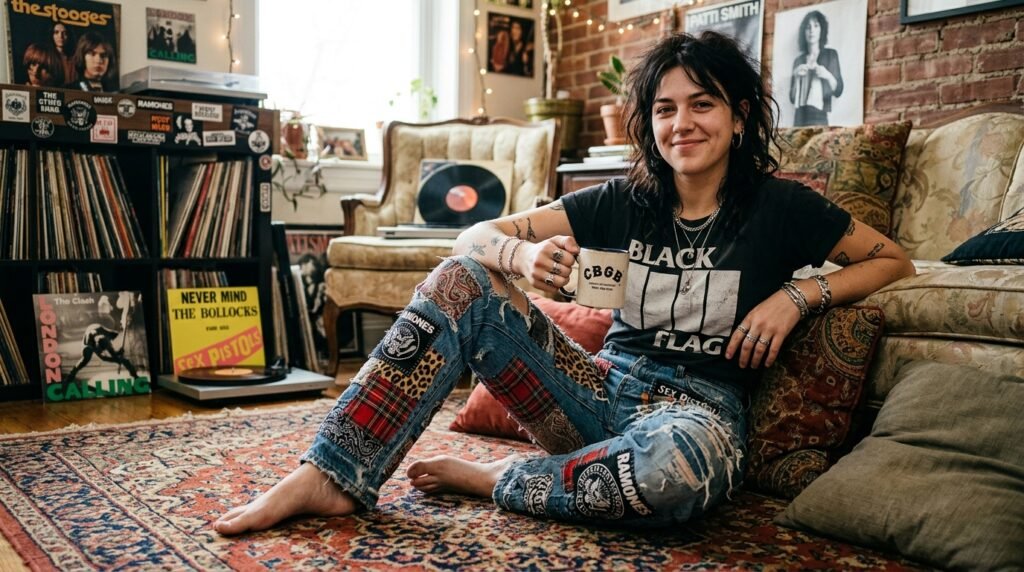
Sewing disparate fabric patches onto torn denim creates a beautiful chaotic visual texture instantly. You should collect different materials like leopard print cotton, red tartan plaid, and black canvas. I love cutting these scraps into irregular geometric shapes with completely raw unhemmed edges exposed. You must pin the patches securely over existing holes in the denim before sewing them. I once tried holding the patch manually and the fabric shifted terribly under the needle. Using glass head pins keeps everything perfectly flat and aligned while you work the machine. This technique hides stains and tears beautifully and creatively.
Sourcing Vintage Patches

Finding authentic woven band patches elevates your custom pants from basic crafts to premium fashion. You can scour local record stores and vintage clothing shops for original cloth music patches. I strongly advise against buying cheap modern reproductions because the thread colors often look terribly artificial. Real vintage patches feature a specific faded quality that blends perfectly with old washed denim. I have noticed many designers recommend checking online auction sites for bulk collections of old patches. You can often score incredible deals on rare designs from the late eighties and nineties. The authenticity dramatically improves your diy clothes punk project.
Attaching these thick woven patches requires specific techniques to ensure they survive daily heavy wear. You absolutely must use thick topstitching thread and a heavy duty denim sewing machine needle. I rely heavily on a dense zigzag stitch around the entire perimeter of the square patch. I tried using standard thin polyester thread once and the patches detached after two washes. If you lack a sewing machine, you can hand sew them using strong embroidery floss instead. The thick visible stitches actually add fantastic decorative elements to the overall chaotic punk aesthetic. Your pants become a walking canvas.
6. Frayed Sweater Hems
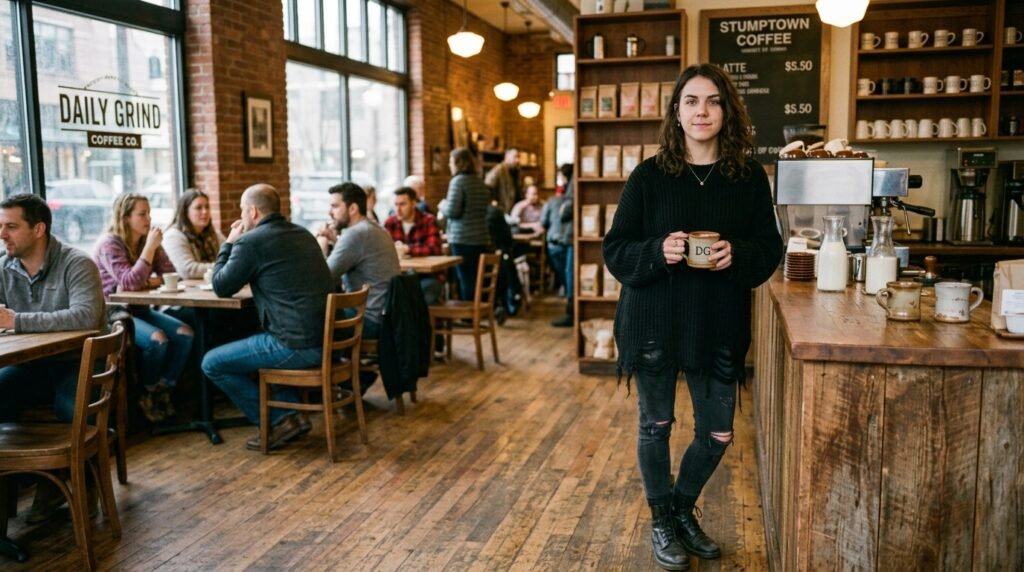
Deconstructing oversized knit sweaters provides an effortless grunge silhouette that feels incredibly cozy daily. You must hunt for loose knit cotton or wool blend sweaters at local thrift shops. I intentionally avoid tightly woven synthetic materials because they unravel far too cleanly and quickly. Lay the bulky sweater flat and decisively cut off the entire bottom ribbed hem section. I always pull gently on the freshly cut edge to encourage the yarn loops to drop. You want the bottom to look slightly ragged and perfectly uneven for that iconic nineties vibe. It is incredibly simple yet highly effective.
Managing the unraveled yarn prevents your new cropped sweater from completely disintegrating over time. You must run a straight security stitch roughly one inch above the raw cut hemline. I choose a thread color that exactly matches the yarn to keep it completely invisible. I skipped this step before, and the sweater unraveled up to my armpits during laundry. That is why many designers recommend this invisible security stitch on all raw knit edges. It locks the vertical loops in place permanently while allowing minimal intentional fraying below it. Your sweater remains perfectly distressed but structurally sound forever.
7. Chain Link Accents
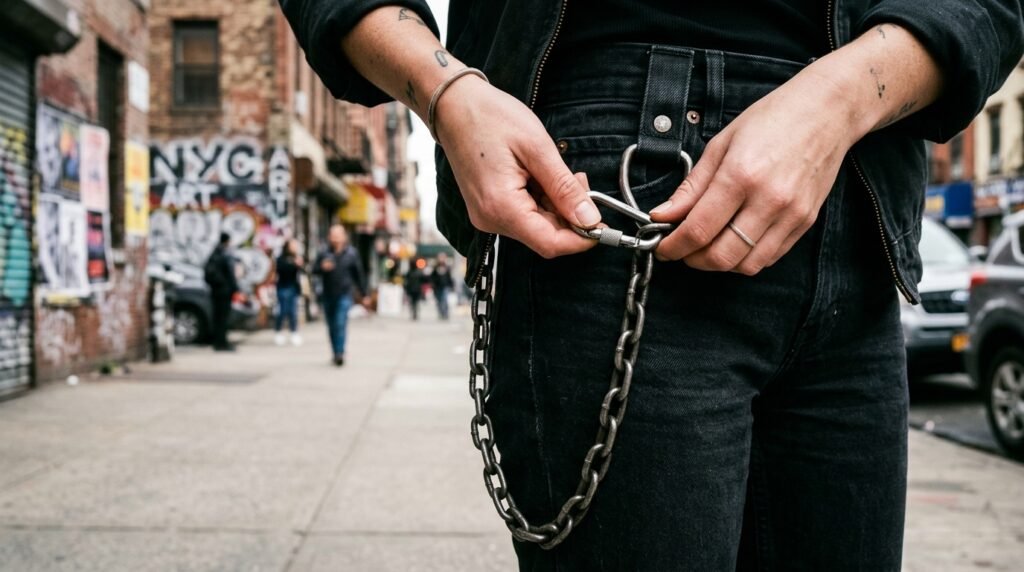
Adding industrial chain links brings massive weight and movement to standard skirts or dark pants. You can purchase standard steel utility chain by the foot at any local hardware store. I strongly recommend choosing a medium weight chain because heavy towing chains drag your clothes down. You will need a strong pair of needle nose pliers to open and close the metal links. I remember breaking two pairs of cheap craft scissors trying to cut through solid steel links. Proper hardware tools are absolutely essential for manipulating heavy metal components safely and cleanly. The results look incredibly tough.
Attaching the chains securely to your garments requires reinforced anchor points to prevent sudden tearing. I love sewing small heavy duty D-rings directly into the waistband or belt loops firmly. You simply attach the steel chain to these rings using small metal carabiners or clasps. This clever method allows you to easily remove the heavy metal chains before washing the garment. I once washed pants with permanent chains attached and completely destroyed my dryer drum instantly. Removable hardware extends the life of your diy clothes grunge style dramatically. You get maximum aesthetic impact with total practical functionality.
8. Stenciled Spray Paint
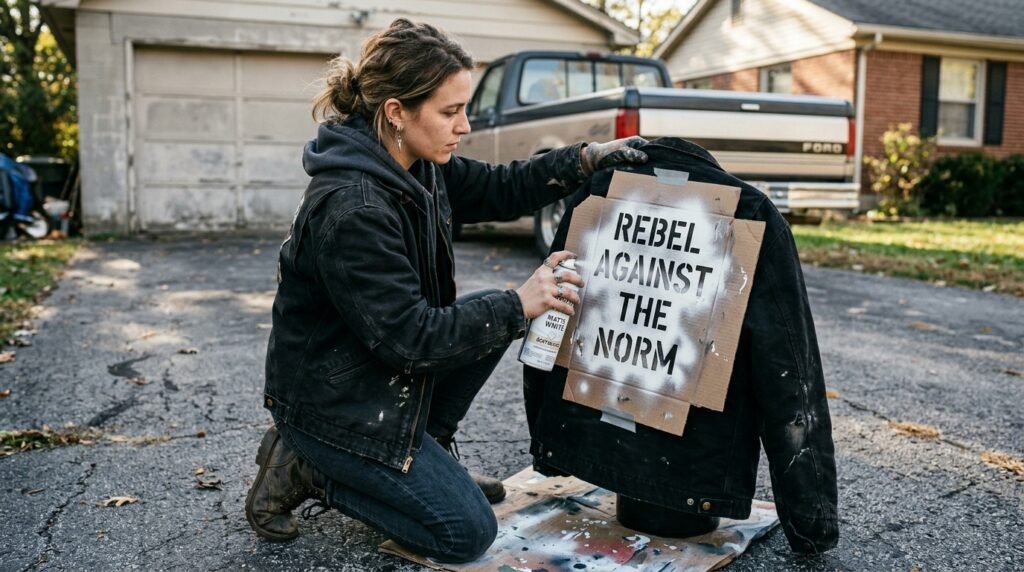
Applying rough spray paint graphics directly onto fabric screams classic anti-establishment aesthetic instantly and boldly. You need standard matte acrylic spray paint and a sharp craft knife for this project. I usually create my own custom text stencils using thick cardboard from old shipping boxes. You must place a rigid barrier inside the shirt to prevent paint bleeding through completely. I completely ruined the back of a jacket once because the black paint soaked through instantly. Spray in short controlled bursts holding the can exactly ten inches from the fabric surface. The slightly messy overspray actually enhances the look.
Setting the dried paint permanently prevents the graphic from washing away or cracking excessively. You must wait twenty four hours for the acrylic spray paint to cure completely first. I always place a clean cotton cloth over the painted graphic and apply high iron heat. The intense heat permanently binds the acrylic polymers directly into the soft cotton clothing fibers. I have noticed un-set paint flakes off terribly leaving a weird sticky residue behind everywhere. Wash the customized garment inside out in cold water only to preserve the graphic integrity. Your homemade band shirt will look incredibly authentic.
9. Fishnet Layering Basics

Integrating torn fishnet tights into your daily wardrobe creates essential texture for alternative fashion looks. You can buy cheap fishnets and intentionally destroy them with your bare hands quite easily. I love stretching the nylon grid aggressively to create massive asymmetrical holes down the legs. You can cut the crotch out of old tights and wear them as a long sleeve top. I remember seeing this genius styling hack at a concert and immediately replicating it at home. It provides that iconic dark layered aesthetic without spending premium prices on specialty tops. It is pure creative clothing manipulation.
Styling these destroyed fishnet pieces correctly requires thoughtful balancing of your solid base layers underneath. I frequently wear distressed fishnet sleeves under a vintage short sleeve graphic band tee shirt. You can also layer heavily torn fishnet stockings under heavily distressed black denim jeans beautifully. The geometric nylon grid popping through the ripped denim creates massive visual interest and depth. I have seen this work incredibly well for casual dinners or dark moody club environments alike. It perfectly demonstrates the brilliance of diy clothes grunge punk rock concepts. You just elevated basic outfits using extremely inexpensive hosiery tricks.
10. Asymmetrical Chopped Skirts

Chopping standard maxi skirts into severe asymmetrical shapes completely modernizes outdated thrift store fashion finds. You want a heavy black denim or thick red tartan fabric for this specific alteration. I always put the skirt on first and use chalk to mark my desired angle standing. I once marked a skirt while laying it flat and the angle looked terribly awkward worn. Your body geometry changes drastically between flat surfaces and actual three dimensional standing positions always. Take the skirt off and cut boldly along your chalk line with sharp fabric shears. The sharp angle looks incredibly dynamic.
Finishing the new asymmetrical hem dictates the entire vibe of your freshly cut custom skirt. You can leave it completely raw and let it fray naturally for an aggressive aesthetic. I personally prefer pulling a few horizontal threads to create an intentional but controlled fringe. You must run a straight stitch just above the fray line to prevent total garment unraveling. I have noticed people skip this crucial step and their skirts shrink inches after one wash. Proper structural care ensures your custom piece lasts for many future fashion seasons easily. Your custom skirt is fully ready today.
FAQs
How do you fade black denim naturally? Fading stiff dark denim naturally makes your customized projects look significantly more authentic and vintage. You should soak the garment in a mixture of warm water and plain white vinegar. I use two cups of standard white vinegar for every single gallon of warm water used. Let the pants sit completely submerged for at least six hours before washing them normally. I once tried using harsh chemical bleach for fading, but it turned the black fabric orange. The vinegar naturally breaks down stiff dyes without degrading the fabric integrity completely. Your dark denim becomes beautifully muted and soft.
What is the best needle for sewing denim? Choosing the absolutely correct sewing needle prevents massive frustration and potential machine damage during projects. You absolutely need a specialized heavy duty denim needle, usually sized exactly 90/14 or 100/16. I exclusively use Schmetz brand needles because they pierce thick canvas layers without snapping instantly. A standard universal needle will deflect, bend, and eventually break on thick garment crotch seams. I ruined an expensive machine timing belt by ignoring this basic hardware requirement a year ago. Proper specialized hardware ensures your stitches look professional and securely hold your upcycled creations together. Sewing precision remains totally key for longevity.
Can you distress stretch fabric easily? Working with modern stretch blends requires slightly different techniques than pure vintage rigid cotton fabrics. Stretch fabrics containing spandex do not fray beautifully like traditional rigid denim materials do ever. I strongly recommend avoiding raw hem or distressing projects on highly elastic skinny pants entirely. They tend to look rubbery and melt slightly if you use aggressive sandpaper abrasion tools. However, they work perfectly for bleach splatters or simple hardware safety pin additions instead. I have noticed people get disappointed when their stretch shorts look messy instead of chic. Match your specific project to the exact fabric composition.
How do you stop tears from growing? Securing intentionally ripped raw edges allows you to enjoy the distressed look without total destruction. You must run a straight security stitch exactly one quarter inch above your horizontal cut line. I match my thread color precisely to the fabric dye for a completely invisible finish. This locks the vertical threads firmly while allowing horizontal threads to fray naturally underneath safely. I skipped this crucial step before, and my knee slits completely dissolved in the washing machine. You can also iron lightweight fusible interfacing behind the rip for extra security. These preventative measures guarantee your handmade items survive.
How much does DIY clothing cost? Starting your upcycling journey requires minimal upfront financial investment compared to buying brand new clothes. You only need a sharp pair of fabric shears, which cost roughly twenty dollars locally. I recommend buying basic metal safety pins and heavy duty thread for under ten dollars. If you already own an iron and basic scissors, your crafting costs remain incredibly low. I have seen this work wonderfully for teenagers building a custom alternative wardrobe on a tight budget. Most projects utilize garments you already own or cheap thrift store finds. You can easily complete multiple amazing aesthetic transformations affordably.
What is the easiest beginner project? The distressed graphic band tee remains the absolute best starting point for total fashion beginners. It requires absolutely zero sewing machine skills and provides massive instant gratification within twenty minutes. You simply need a ruler, chalk, and incredibly sharp small scissors to execute this perfectly. I always recommend this to friends who feel intimidated by complex structural sewing or hardware projects. It teaches you how fabric drapes and responds to being cut without massive financial risk. If you make a mistake, the messy look actually fits the aesthetic perfectly. Confidence builds extremely quickly through these simple modifications.
How do you fix a bad cut? Making cutting mistakes happens to everyone, but creative problem solving saves the ruined garment easily. If you crop a shirt entirely too short, you can immediately pivot to making an underbust. I once ruined a hem line, so I added heavy metal chains to weigh it down. You can sew a massive vintage band patch directly over an accidental hole very easily. This accidental design choice often becomes the absolute most complimented feature of the finished clothing piece. I have noticed people panic and throw away garments that are easily salvaged. Embrace the errors and allow them space.
Can I use normal thread for patches? Using standard thin polyester thread for structural canvas patches leads to rapid garment failure unfortunately. You must purchase specialized heavy duty thick thread, often labeled specifically for denim or upholstery. I prefer Gutermann extra strong thread because it mimics industrial factory stitching perfectly and durably. I tried using regular thin thread once, and the heavy canvas pockets detached after three days. Regular thread simply lacks the high tensile strength required to hold thick fabrics together properly. You should always use a longer stitch length on your machine when using thick thread. Your projects will withstand heavy daily wear.
How do I safely bleach indoors? Bleaching requires strict adherence to safety protocols and precise chemical neutralization regardless of your location. You must never spray concentrated liquid bleach indoors without massive cross ventilation and window fans. I always perform this specific task completely outside while wearing protective rubber gloves and a mask. Once you achieve the desired color, immediately dunk the garment in a hydrogen peroxide bath. I learned the hard way that un-neutralized bleach continues eating the cotton fabric fibers permanently. Your favorite flannel will literally turn to dust if you skip the neutralizing stage. Safe chemical handling guarantees your custom projects last.
Where do you buy cheap metal studs? Finding affordable raw metal materials makes your creative projects highly sustainable and incredibly budget friendly. I frequent online leatherworking supply stores to purchase massive bulk bags of screw back studs. You can easily find bags of one hundred silver spikes for under fifteen dollars online. I also harvest heavy hardware from old broken belts or cheap ugly purses from thrift stores. I have seen this work perfectly for building a massive stash of diverse metal crafting supplies. Hardware stores offer incredible bulk deals on chains and metal O-rings daily. Building a steady supply removes the fear of experimenting.
Share Your Creative Style
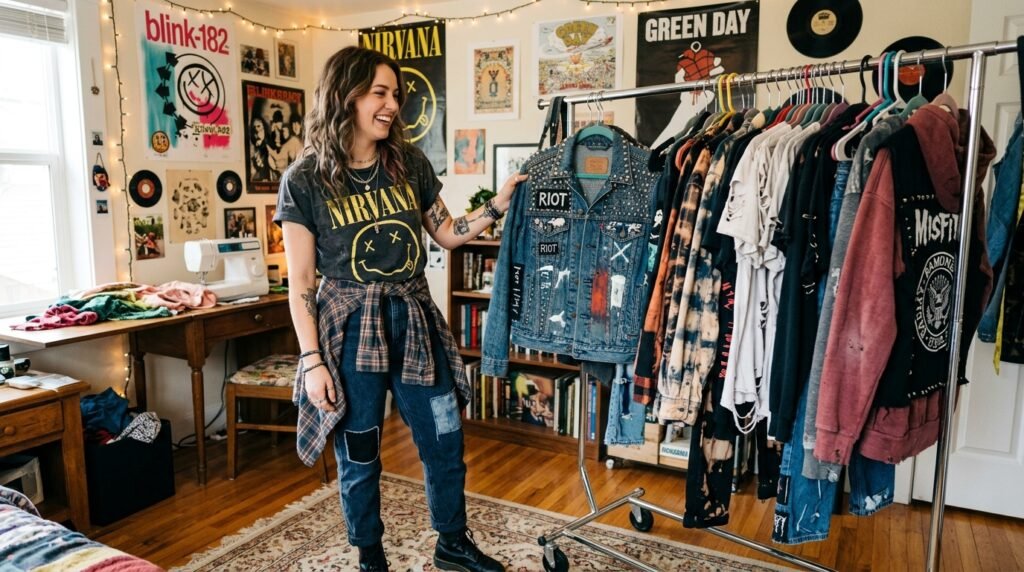
Reinventing your wardrobe through these creative rebel methods provides immense personal satisfaction and unique style. You now possess the exact foundational knowledge required to transform boring pieces into dark treasures. I strongly encourage you to grab those forgotten band shirts and start cutting them up today. Your unique diy clothes goth projects will undoubtedly turn heads and spark amazing conversations everywhere. Sustainable alternative fashion relies on creative individuals willing to experiment with existing thrifted materials bravely. Please save this post to your Pinterest boards for quick reference during weekend crafting. Share your incredible transformations online and inspire everyone completely.

Amelia leads HavenlyStyle’s editorial vision with a passion for elegant interiors and practical home living. With years of experience in home décor and lifestyle content, she ensures every article is accurate, inspiring, and easy to follow. From timeless decorating ideas to the latest interior design trends, Amelia is committed to helping readers create beautiful, functional spaces while maintaining HavenlyStyle’s trusted and welcoming voice.