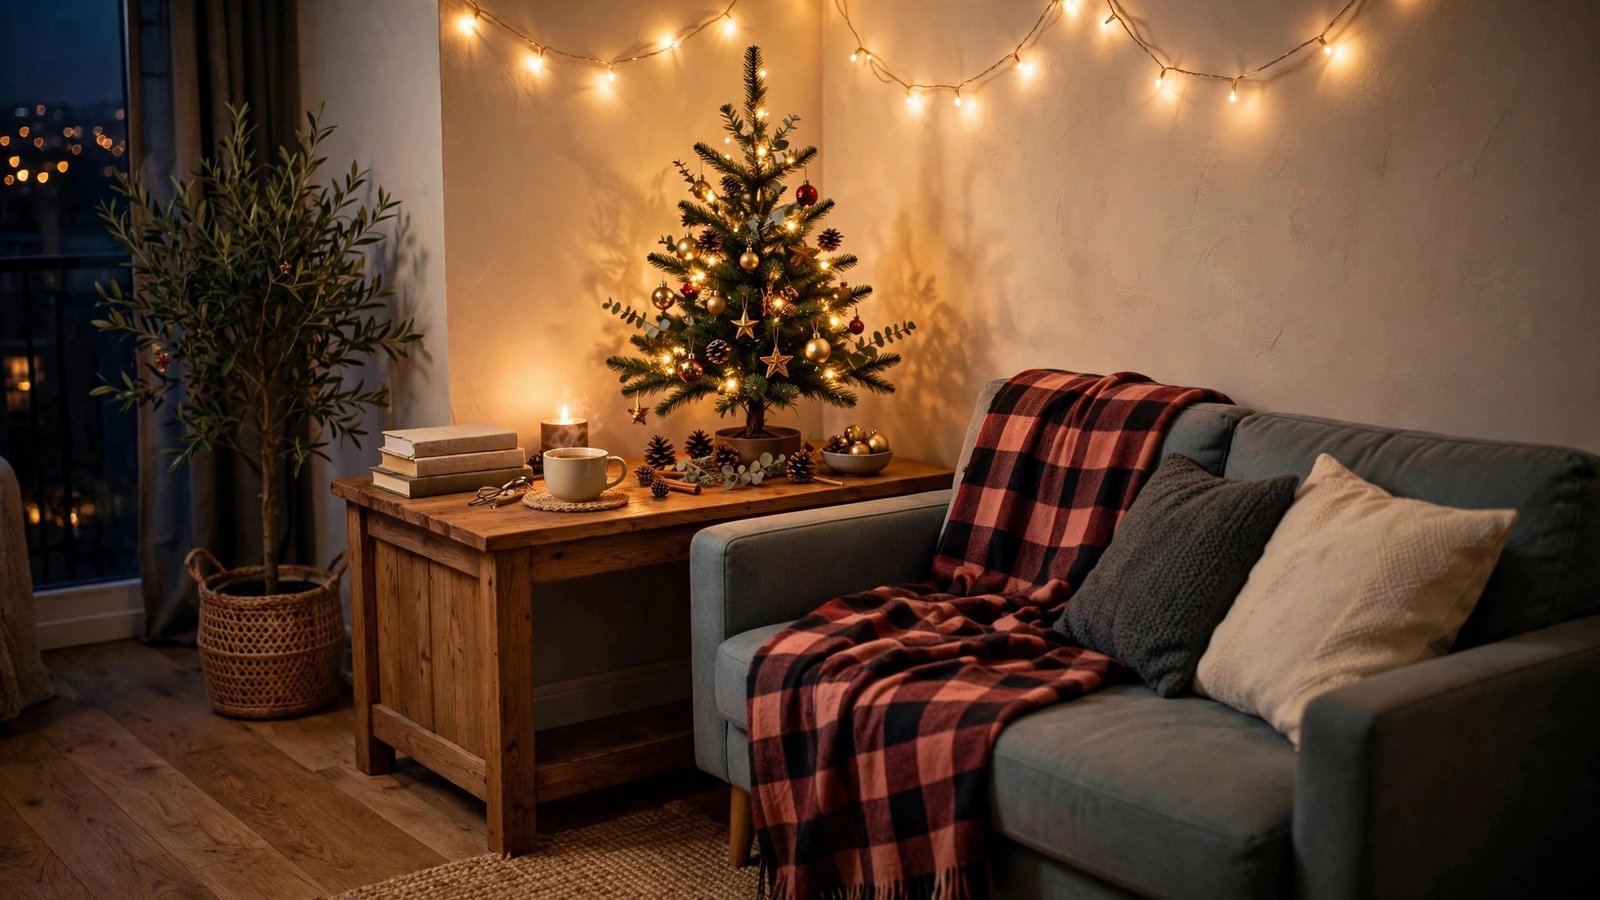
Every December I hear the same story from renters: they want the magic of a Christmas tree, but their apartment fights them at every turn. The lease says no real trees (fire hazard, needle mess, sap on the floors), the living room barely fits a sofa let alone a six-foot Fraser fir, and the deposit hanging in the balance makes drilling, nailing, or anything permanent a non-starter. I’ve helped dozens of renters in studios, one-bedrooms, and shared houses solve exactly this problem, and I’ve noticed something wonderful — the best small-apartment Christmas displays rarely look like a traditional tree at all. Some of the prettiest holiday corners I’ve ever walked into were a ladder dressed in fairy lights, a wall of felt ornaments a toddler could rearrange daily, or a few bare branches in a thrifted vase that stopped every guest at the door. You don’t need a tree farm, a storage unit, or your landlord’s written permission for any of the twelve ideas below. Every single one is deposit-safe, removable, and sized for real rental living — from a 350-square-foot studio to a one-bedroom with a strict no-real-tree clause. Pick the one that fits your space and your budget, and by this weekend your place can feel every bit as festive as the homes with the full-size fir.
Executive Summary
- Every idea below is renter-tested for two things: it takes up almost no space, and it leaves your walls, floors, and deposit completely untouched — nothing here requires drilling, nailing, or painting.
- Most ideas cost roughly $10 to $60 (all prices approximate), and half can be pulled together for under $25 with thrift-store or dollar-store finds.
- Zero floor space needed for wall trees, hanging trees, felt trees, and light outlines — the tree goes where your tree can’t.
- All twelve alternatives store flat or collapse small, so January takedown fits in a closet or under a bed — no storage-unit drama.
- If your lease bans real trees or your landlord is strict about wall damage, lean on the adhesive-hook and tension-based options — they hang everything and remove cleanly.
1. The Wall-Mounted Flat-Back Half Tree
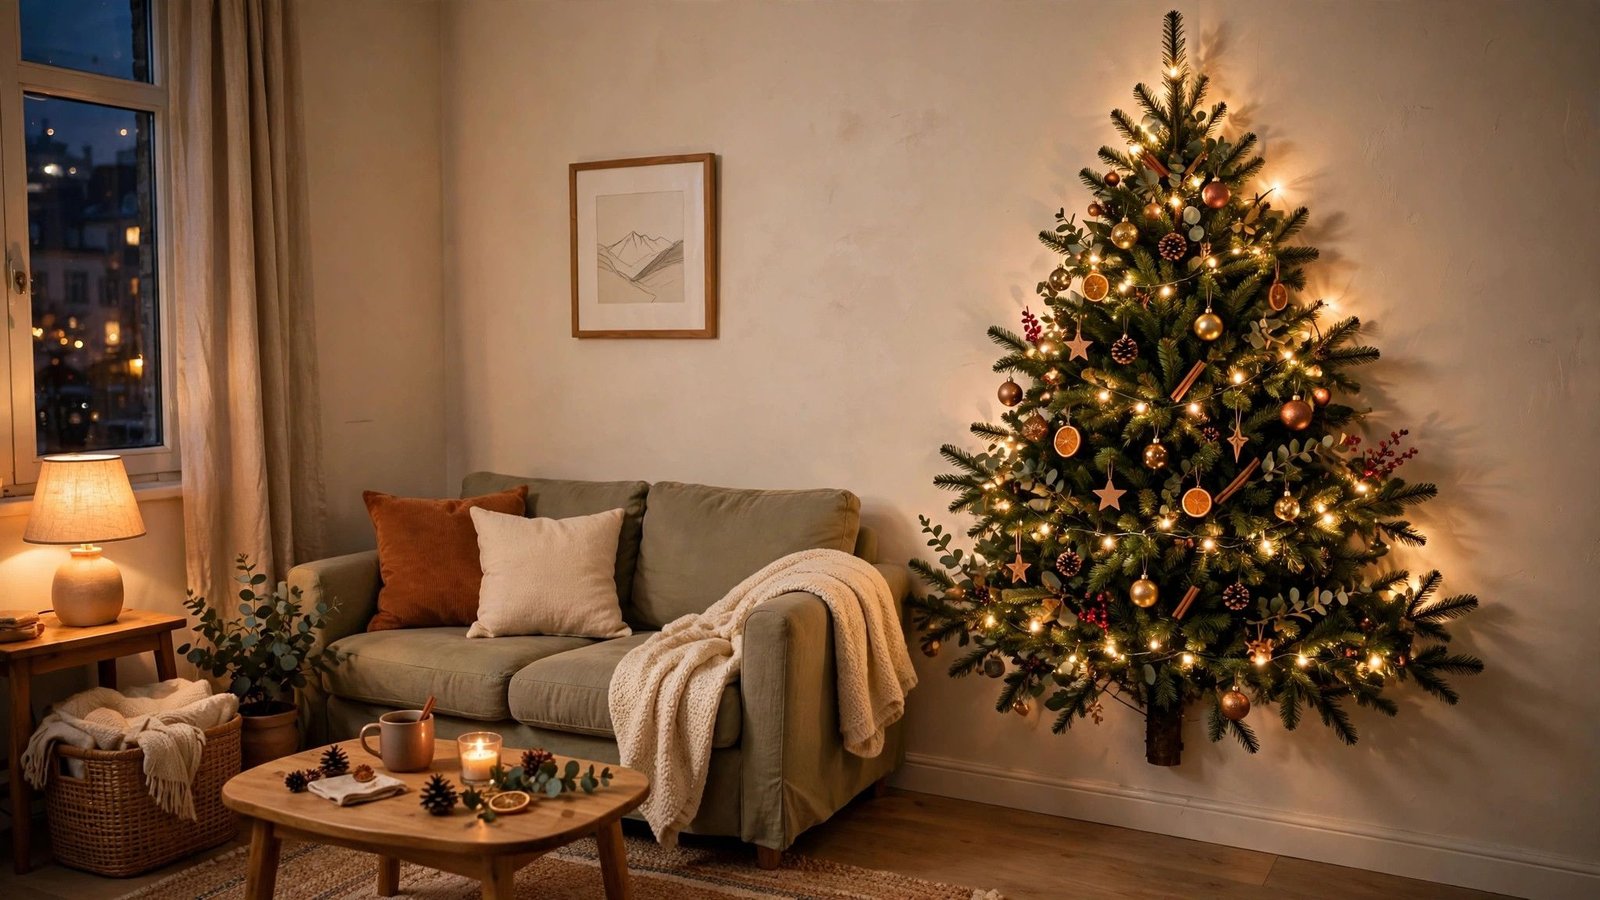
A flat-back tree is exactly what it sounds like: a half-profile artificial tree that’s full and lush from the front but flat on the back, so it hugs the wall like a piece of art. I’ve personally seen these turn a cramped studio corner into the focal point of the whole room, and the first time I recommended one to a renter friend she texted me a photo with “why didn’t anyone tell me this existed?” It’s the closest thing to a real tree experience without the footprint — you still get the branches, the ornaments, the lights — but the depth is roughly half of a standard tree, which in a small apartment is the difference between a tree and a traffic jam.
Why it works for renters: it takes up half the floor space of a full tree (often under two square feet), it leans or hangs without any wall damage, and at takedown it slides behind a dresser or under a bed. No landlord permission needed since you’re not attaching anything permanently.
How to set it up in four steps:
- Choose a wall with a nearby outlet — a 4 to 6 foot flat-back tree (approximate cost: $40–$80 for a pre-lit version) is the sweet spot for apartments.
- Lean it against the wall and stabilize it with a low-profile tree stand or a heavy planter base; no screws, no brackets.
- Wrap the base in a tree collar or a large basket to hide the mechanics — this is the detail that makes it look expensive.
- Decorate the front-facing branches only, saving ornaments and your budget.
Renter tip: if your lease is strict about wall contact of any kind, choose the freestanding lean style and skip adhesive hooks entirely — it looks just as good.
Approximate cost: $45–$90 total with a collar and ornaments from a discount store.
2. The Tabletop Mini Tree
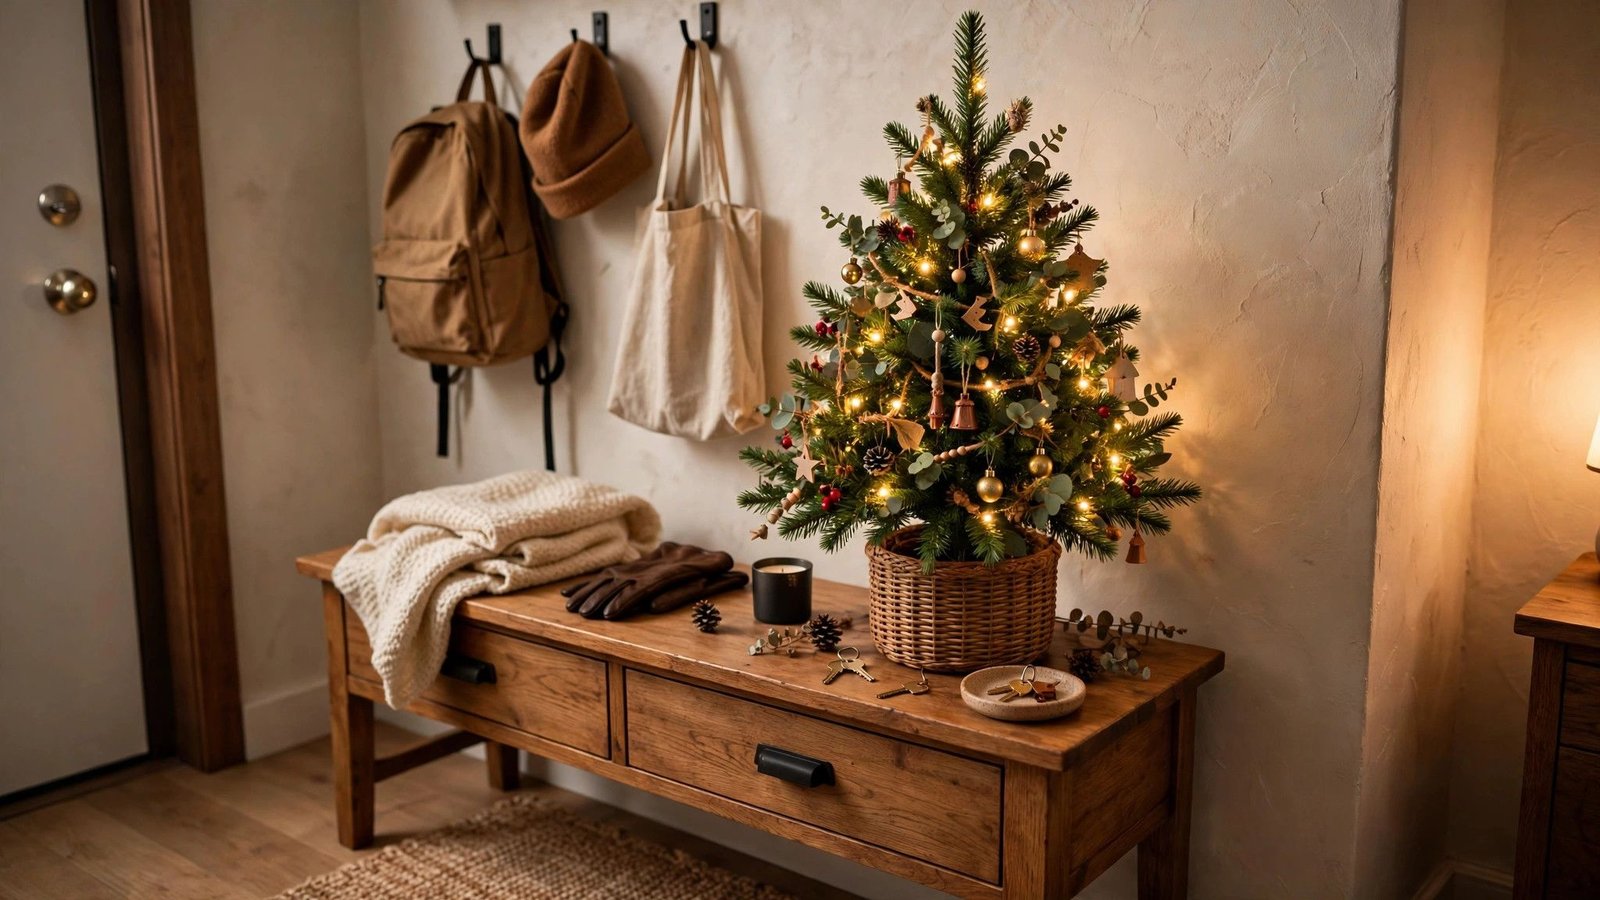
The humble tabletop tree is the workhorse of small-apartment Christmas, and in my experience it’s the option most renters already own but underuse. A 2 to 3 foot artificial or potted live tree on a console, bookshelf, bar cart, or even a stack of books gives you a genuine tree moment — real silhouette, real ornaments, real glow — at eye level where it actually gets seen. I’ve noticed renters place these almost instinctively once they stop thinking “tree” has to mean “floor tree.”
Why it works for renters: zero floor space (it lives on furniture you already own), it packs into its original box in minutes, and a live mini pine or spruce from a nursery can be replanted or gifted in January — no storage needed at all.
How to set it up in four steps:
- Pick a sturdy surface at least 12 inches deep: a side table, entry console, or the top of a bookshelf.
- Choose a 2 to 3 foot tree — artificial (approximate cost: $15–$30) or a live potted mini (approximate cost: $12–$25 at garden centers).
- Scale your decorations down: mini ornaments, a small star or bow, and a short strand of 50 fairy lights — full-size ornaments will swamp it.
- Set the base in a pretty container (a woven basket, a ceramic pot, even a gift box) instead of the plastic stand it came with.
Renter tip: a live mini tree on the balcony or fire escape (where allowed) extends the display outdoors, and in January you can plant it or gift it to a friend with a yard.
Approximate cost: $15–$40 all in, or less if you thrift the tree.
3. The Slim Pencil Tree
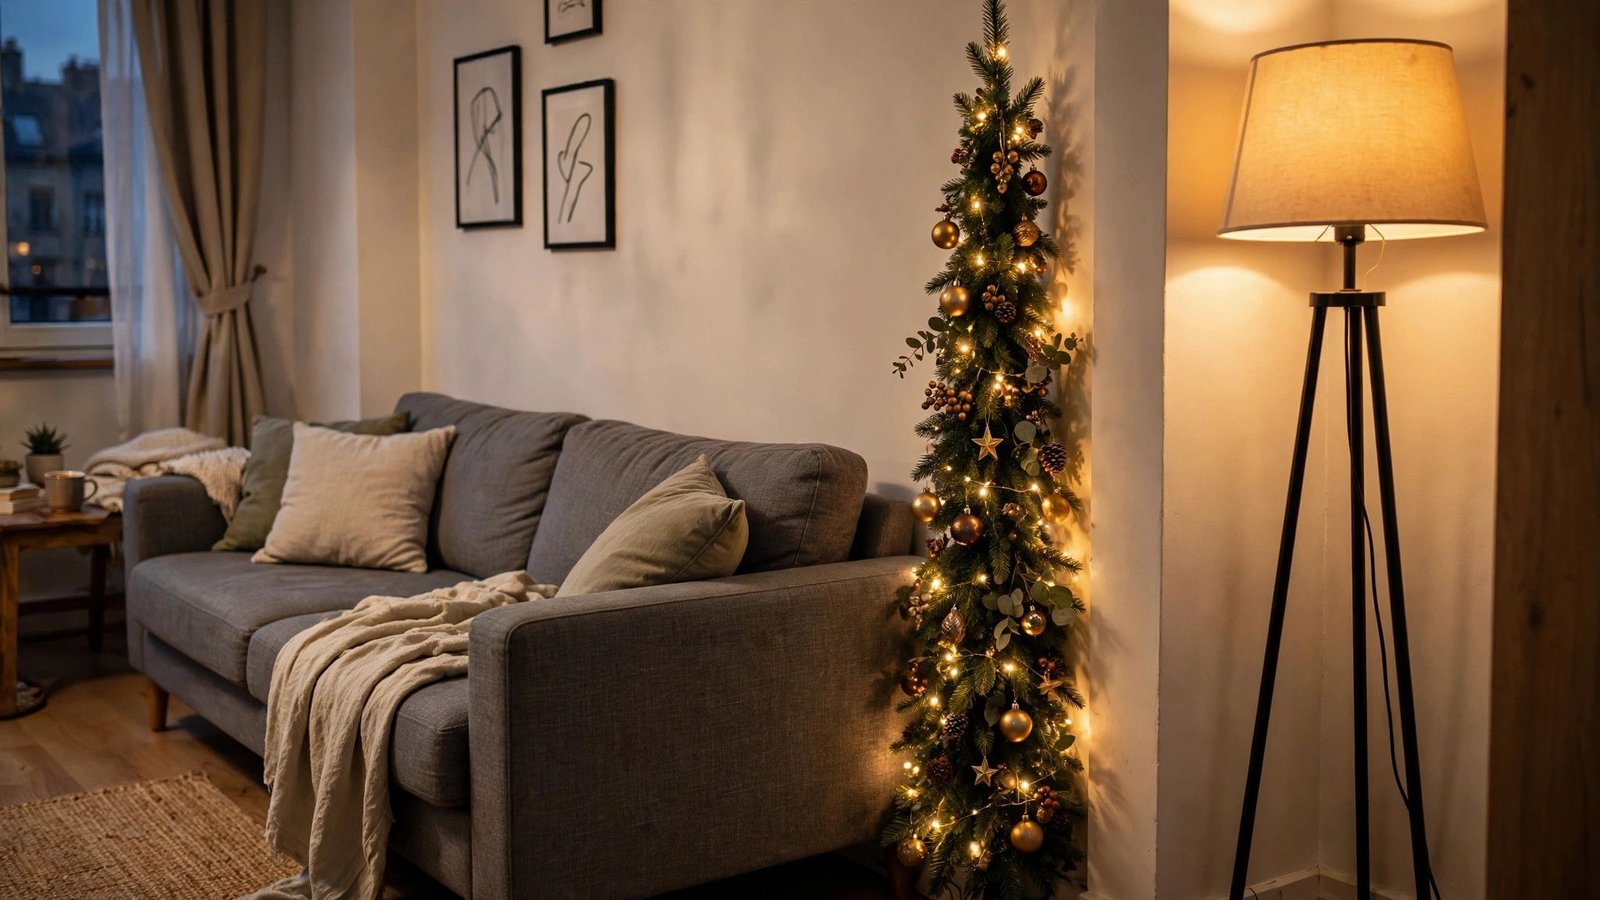
If your apartment has one skinny strip of floor — next to the TV stand, beside the entry door, in that awkward gap between the sofa and the wall — a pencil tree was made for it. Pencil trees are tall but barely two feet wide at the base, giving you six feet of holiday height in the footprint of a floor lamp. I’ve helped renters slot these into spaces where a standard tree would have blocked a walkway, and the vertical drama they add is genuinely surprising.
Why it works for renters: the footprint is roughly 2 by 2 feet, it stands on its own without touching the wall, and slim pre-lit versions are some of the cheapest full-height trees you can buy.
How to set it up in four steps:
- Measure your gap before shopping — pencil trees typically run 6 to 7.5 feet tall and 20 to 30 inches wide at the base.
- Buy pre-lit if you can (approximate cost: $30–$70); wrapping lights around a narrow tree is fiddly work.
- Anchor it with the included stand on a rug or non-slip pad so it can’t drift on hard floors — no wall attachment needed.
- Decorate lightly: a pencil tree shows its trunk, so fewer, larger ornaments look better than many small ones.
Renter tip: pencil trees show a lot of trunk, so wrap the trunk loosely with burlap ribbon — it hides the pole and gives the whole thing a designer look for about five dollars.
Approximate cost: $35–$80 with decorations.
4. The Corner-Hugger Quarter Tree
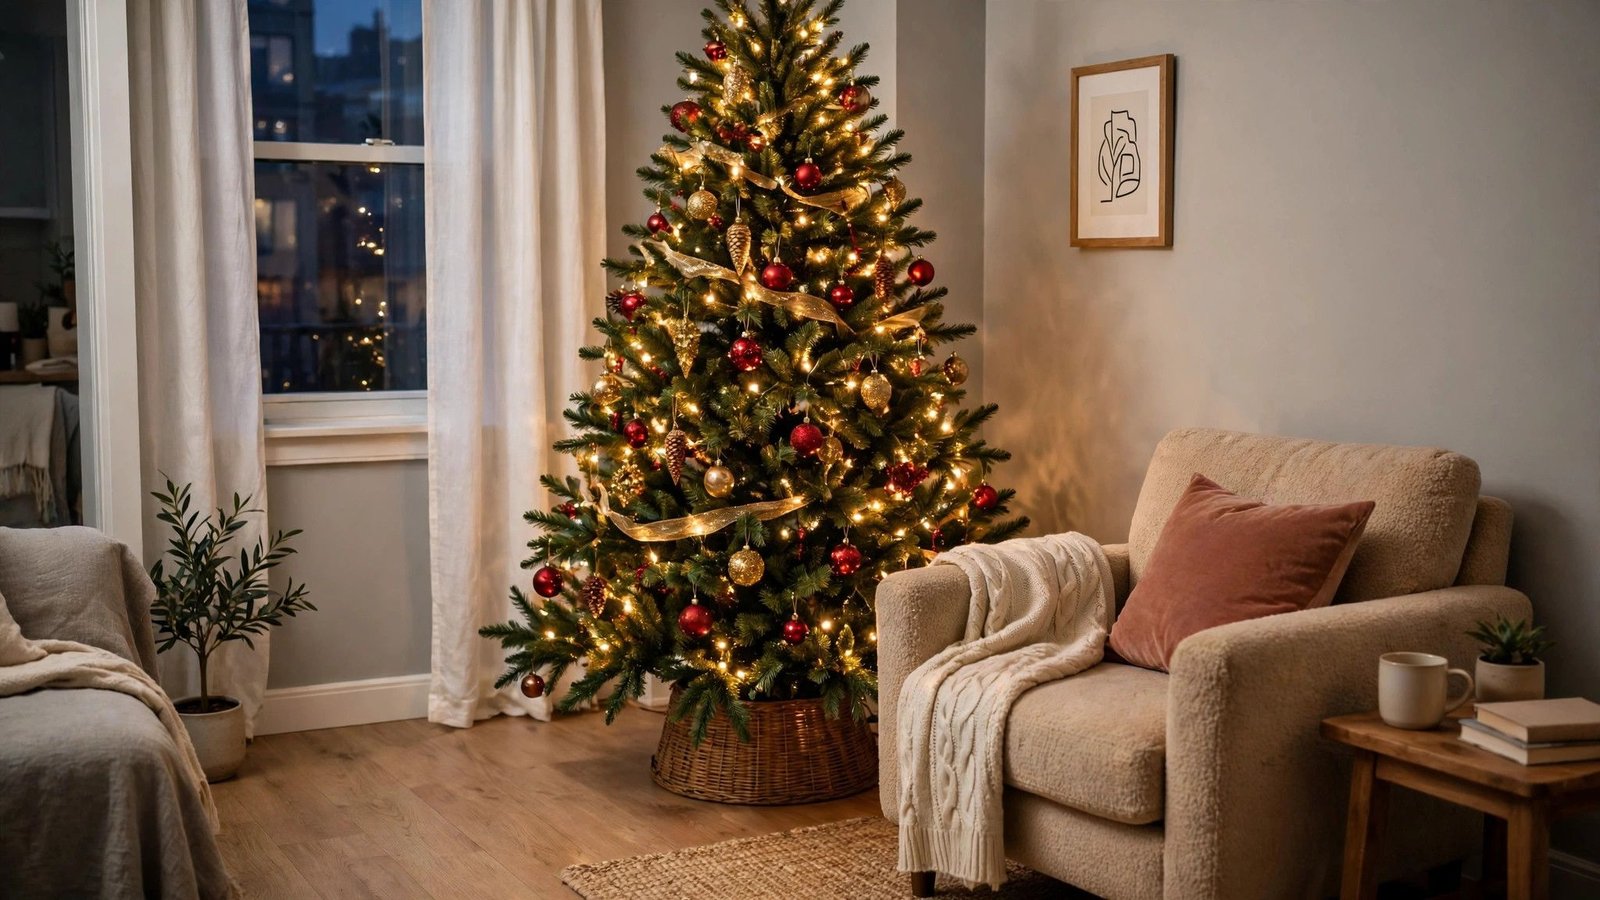
Take the half-tree concept and go one step further: a quarter tree is designed to sit in a corner, presenting a full-looking tree from the room while its back disappears into the 90-degree angle. I’ve personally seen one of these fool guests into thinking a “real tree” was behind the sofa — from every seat in the room it reads complete. Corner real estate is usually dead space in small apartments anyway, so this option reclaims the most awkward spot in the room.
Why it works for renters: it uses space you’d never use otherwise, needs zero wall contact (the corner holds it), and the profile is deep enough to feel substantial while still being far slimmer than a full tree.
How to set it up in four steps:
- Find a true empty corner with an outlet within six feet.
- Shop for a “corner tree” or “quarter tree” — 4 to 6 feet is plenty (approximate cost: $40–$75 pre-lit).
- Push it flush into the corner and let the walls do the stabilizing; add a non-slip mat under the stand for extra security on slick floors.
- Face your best ornaments outward and tuck the tree skirt or collar into the corner so the base looks finished.
Renter tip: because the back is unfinished, this is the one tree on the list you should never float in the middle of a room — keep it in its corner and nobody will ever know.
Approximate cost: $45–$85 decorated.
5. The Decorated Ladder Tree
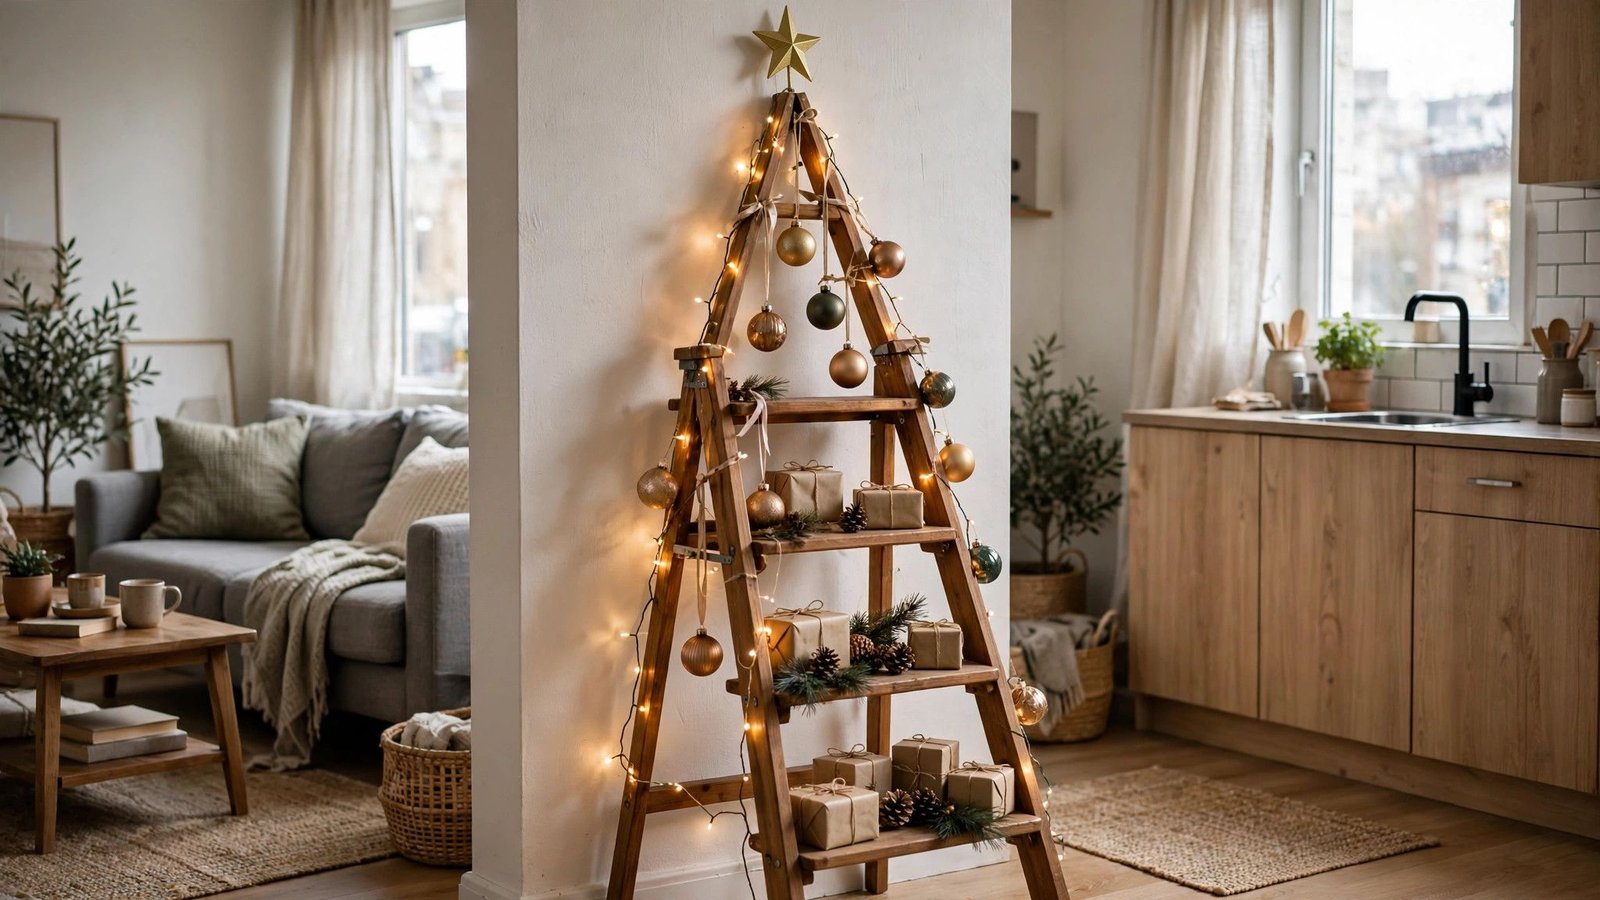
This is the idea I recommend most to renters who want something sculptural rather than tree-shaped. Take a wooden step ladder — a 4 to 5 foot decorative one — lean it against the wall, and dress each step with garland, fairy lights, ornaments, small wrapped gifts, and stockings. I’ve noticed this style photographs beautifully, which is partly why it exploded on social media, but it also works because a ladder’s open rungs read as “display” rather than clutter.
Why it works for renters: a ladder takes up about one foot of floor depth, leans against the wall with zero fasteners (rubber feet protect floors), and after the holidays it goes right back to being storage or decor.
How to set it up in five steps:
- Source a wooden step ladder 4 to 5 feet tall — thrift stores usually have them for an approximate $10–$25.
- Lean it at a safe angle against the wall, rubber feet down, and test that it doesn’t wobble before decorating.
- Drape a battery-operated fairy light strand (approximate cost: $5–$10) down the sides in a zigzag.
- Hang ornaments from the rungs with ribbon, and set small gifts, pinecones, or candles (flameless!) on the steps.
- Top it with a star, bow, or a big sprig of faux greenery.
Renter tip: check the ladder’s weight rating and lean angle before you decorate — a sturdy wooden step ladder rated for household use will hold ornaments and lights without any worry.
Approximate cost: $25–$60, less if the ladder is thrifted.
6. The Branch Vase Tree
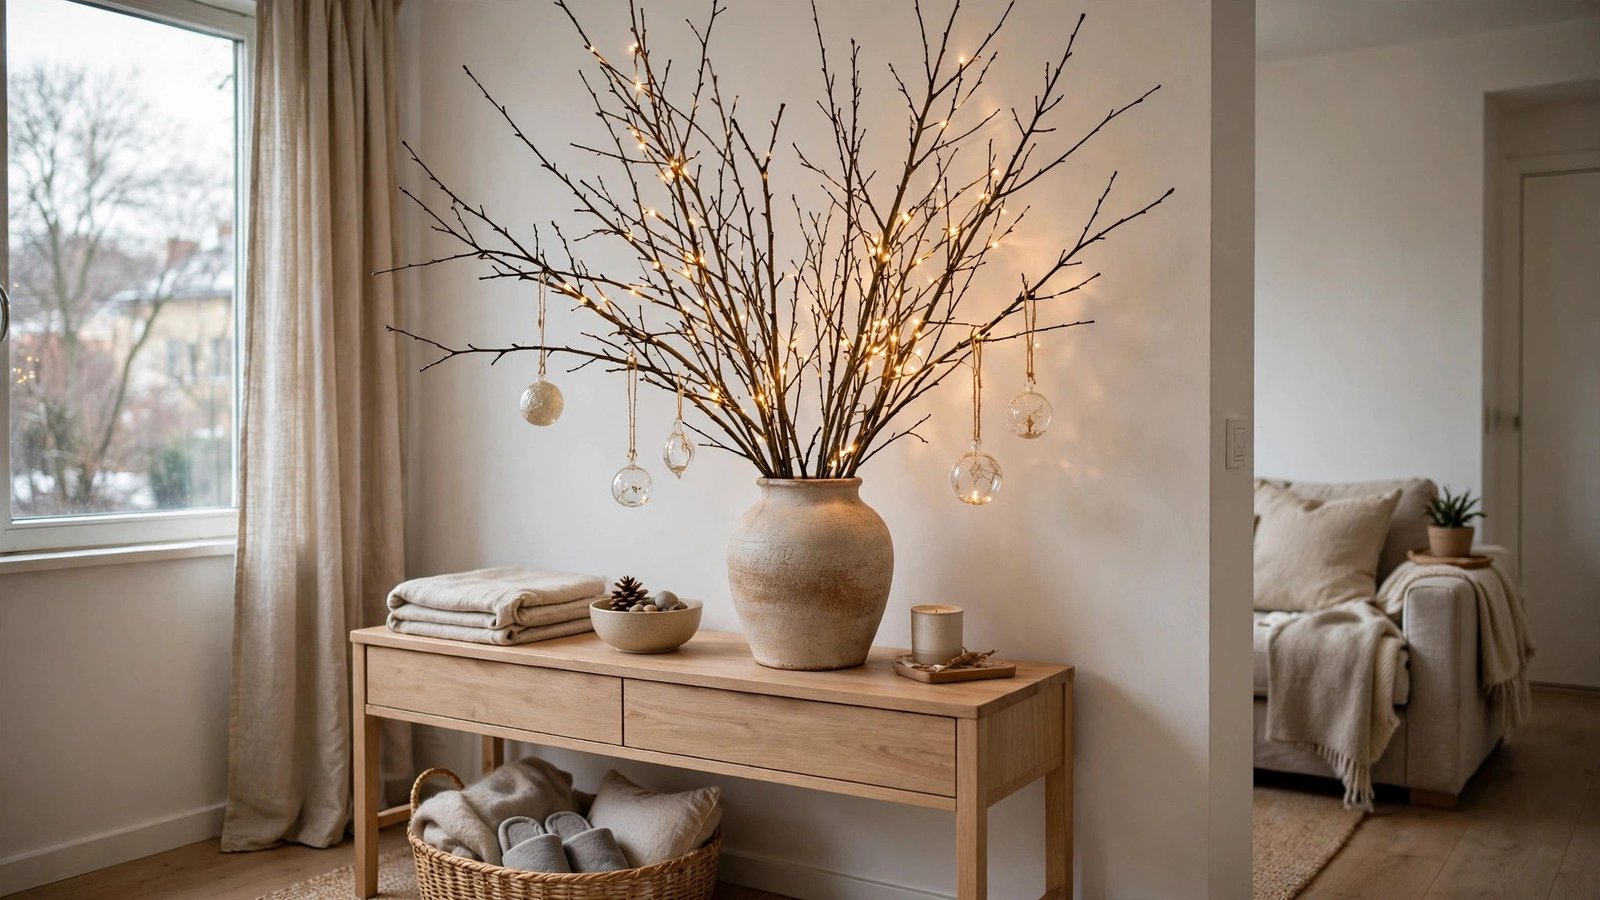
Some of the most striking holiday displays I’ve walked into were the simplest: tall bare branches — birch, curly willow, or plain foraged twigs — standing in a large vase, strung with lights and hung with a handful of beautiful ornaments. It reads modern and sculptural, it costs nearly nothing if you forage, and it takes up exactly one vase of floor space. I’ve helped renters in ultra-minimal studios use this as their entire holiday statement, and it never looks like a compromise.
Why it works for renters: one vase, zero wall contact, no storage headache (the branches go back outside or in the recycling), and it suits leases that ban anything resembling a real tree since there are no needles, no sap, and no mess.
How to set it up in five steps:
- Gather 5 to 9 tall branches, 3 to 5 feet long — foraged (free), or buy birch branches (approximate cost: $10–$20 for a bundle).
- Choose a heavy, tall vase or pitcher you already own so the arrangement can’t tip.
- Fan the branches outward for a full silhouette, trimming with pruning shears if needed.
- Wrap a battery fairy-light strand through the branches and hang 8 to 15 ornaments at varying heights.
- Set the vase on a console, mantel, or floor corner and let it be the star — it needs no other decoration.
Renter tip: spray the branches lightly with white or gold spray paint outdoors (never inside the rental) for a frosted look that makes even plain twigs look intentional and elegant.
Approximate cost: $0–$35 depending on whether you forage and what you already own.
7. The Felt Wall Christmas Tree
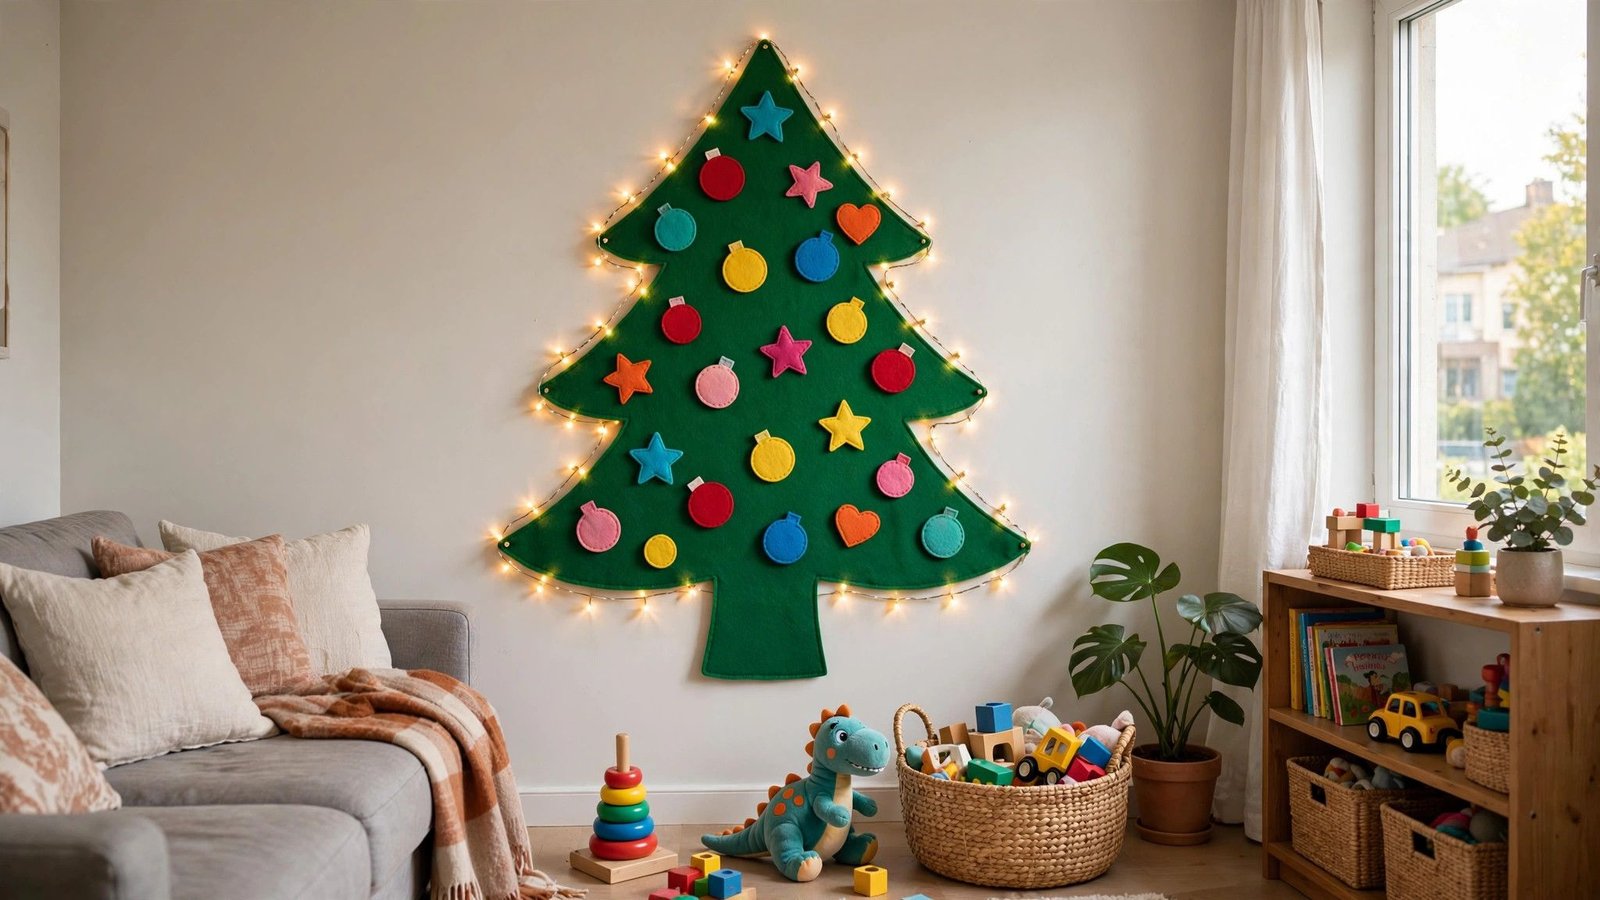
A felt Christmas tree is a large felt tree silhouette that hangs on the wall with removable adhesive strips, and the ornaments are felt too — they stick to the felt with light Velcro-style contact, so they can be moved around endlessly. I’ve personally seen this one save Christmas for renters with toddlers and cats, because there is literally nothing to break, nothing to topple, and nothing a curious pet can shatter at 3 a.m. It’s also genuinely fun: rearranging the ornaments becomes a nightly ritual.
Why it works for renters: it hangs with a few adhesive strips (removable, no holes), it’s completely flat against the wall, it folds into a drawer in January, and it’s the safest option on this list for small children and pets.
How to set it up in four steps:
- Buy a felt tree set 3 to 4 feet tall (approximate cost: $12–$25) — they come with the ornaments included.
- Hang it on a smooth wall or door with removable adhesive strips, centered at a height kids can reach if that’s your goal.
- Let the ornaments’ light-grip backing hold them on the felt — press each one firmly for a few seconds.
- Add a string of battery fairy lights around the edge for evening glow (keep the battery pack tucked behind the felt).
Renter tip: if adhesive strips worry you, hang the felt tree over a door with an over-the-door hook — zero wall contact and it still sits perfectly flat.
Approximate cost: $15–$35 with lights.
8. The Floating Ornament Tree
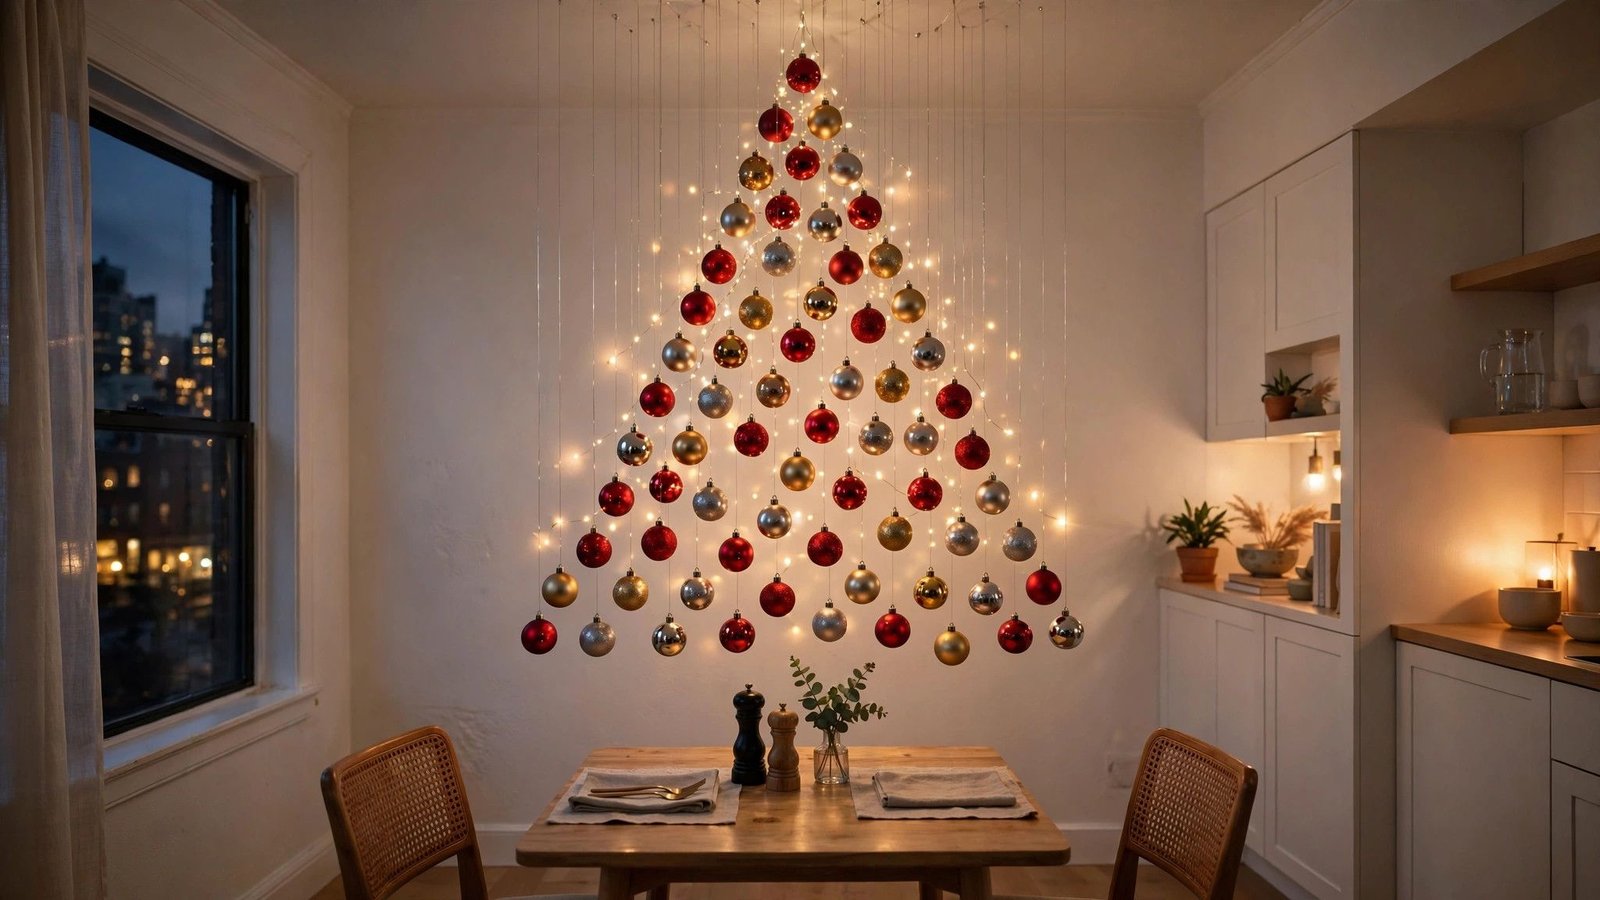
This one is pure magic for the price: ornaments suspended from the ceiling at descending heights so they form the silhouette of a tree in midair — wide at the bottom, narrow at the top. I’ve helped renters build this over a dining table or in an entryway, and the first time the evening lights hit it, every single one of them gasped. It uses no floor space at all, which makes it the ultimate small-apartment solution.
Why it works for renters: zero footprint — the “tree” hangs in air you weren’t using — and it installs with a single removable adhesive ceiling hook or a tension-mounted curtain wire, so there’s no drilling and no holes. Takedown is five minutes of unhooking.
How to set it up in five steps:
- Install one removable adhesive ceiling hook rated for a few pounds (approximate cost: $5–$10), or string a tension wire between two walls.
- Cut clear fishing line or thin ribbon into lengths from 6 inches (top) to 24 inches (bottom).
- Tie an ornament to each line, graduating the lengths so the widest spread sits lowest — sketch the triangle on paper first.
- Hang the lines from the hook or wire in concentric rings, widest at the bottom.
- Tuck a battery fairy-light strand through the middle for sparkle (or use light-up ornaments and skip the strand).
Renter tip: build this over a dining or coffee table rather than a walkway — you’ll never bump it, and the table anchors the display visually from below.
Approximate cost: $15–$40, mostly ornaments.
9. The Fairy-Light Wall Outline Tree
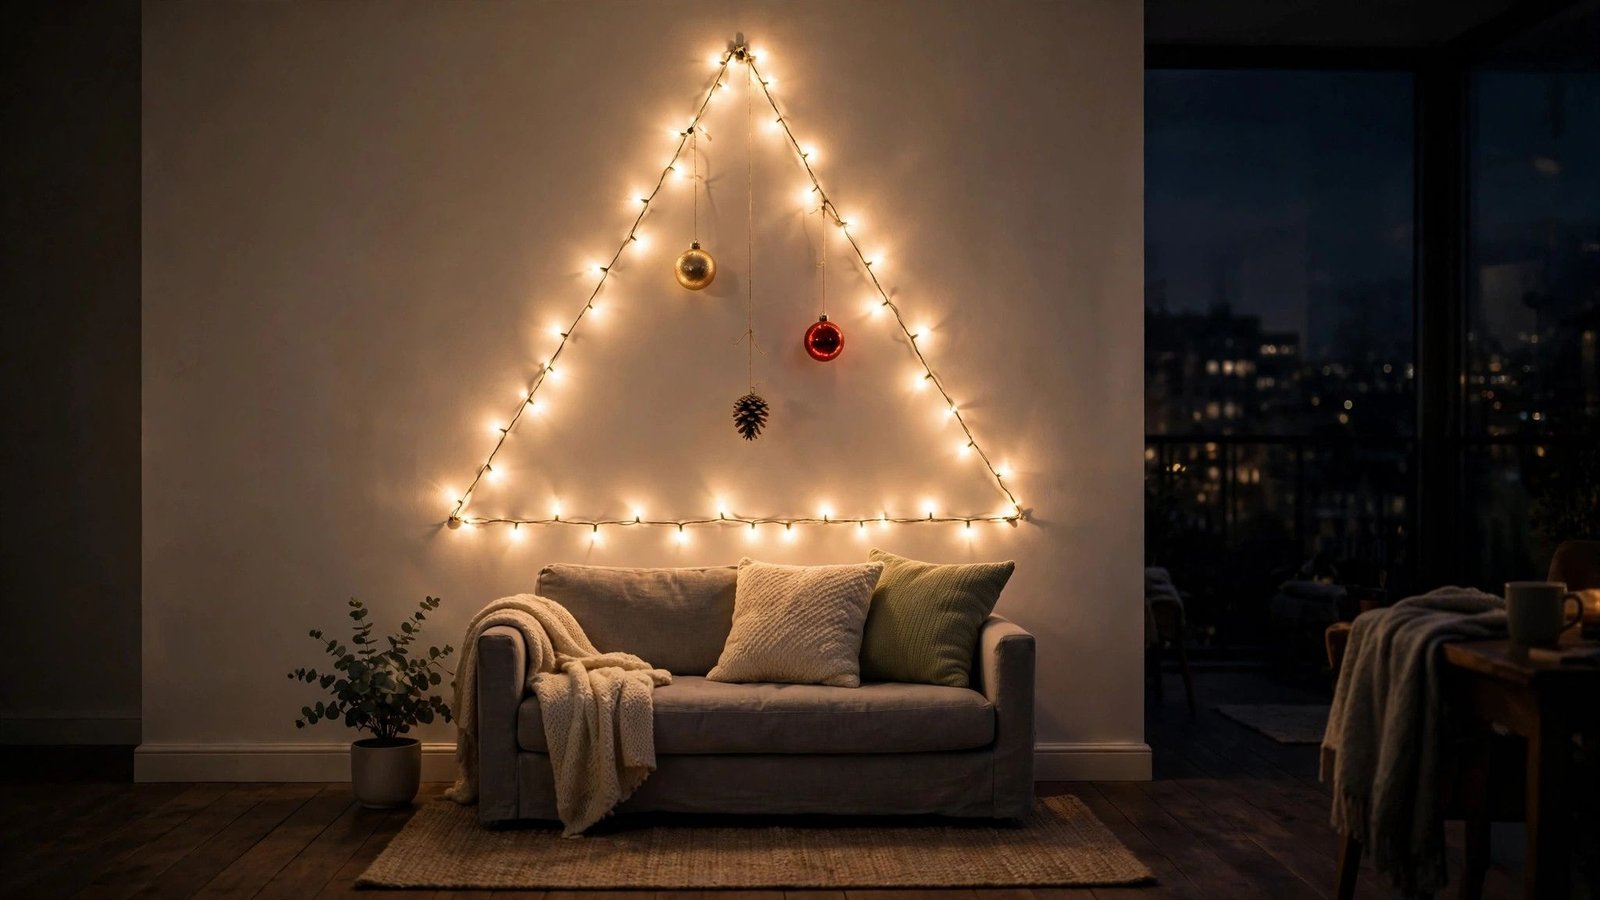
If your walls are your only free real estate, draw the tree with light: a simple triangle outline of warm fairy lights on the wall, hung from removable adhesive clips, filled in with a few hanging ornaments or photos. I’ve noticed this style is especially loved by renters in studios where every square foot is spoken for — it gives you a glowing, unmistakable Christmas tree that occupies exactly zero inches of your room.
Why it works for renters: nothing touches the floor, the lights hang on small removable adhesive clips that peel off cleanly, and the whole display packs into a sandwich bag in January.
How to set it up in four steps:
- Plan a triangle about 4 to 5 feet tall on a blank wall, marking the three points lightly with painter’s tape.
- Stick removable adhesive light clips (approximate cost: $5–$8 for a pack) along the triangle lines, spacing them 8 to 12 inches apart.
- Zigzag two strands of warm-white fairy lights (approximate cost: $8–$15) through the clips to form the outline, plugging into the nearest outlet or using battery strands.
- Hang a few lightweight ornaments or clipped holiday photos inside the triangle with mini adhesive hooks, and top it with a star.
Renter tip: warm-white lights photograph far better than cool-white for this style, and a simple plug-in timer means you never have to remember to turn it off at night.
Approximate cost: $15–$30.
10. The Tiered-Tray Mini Forest
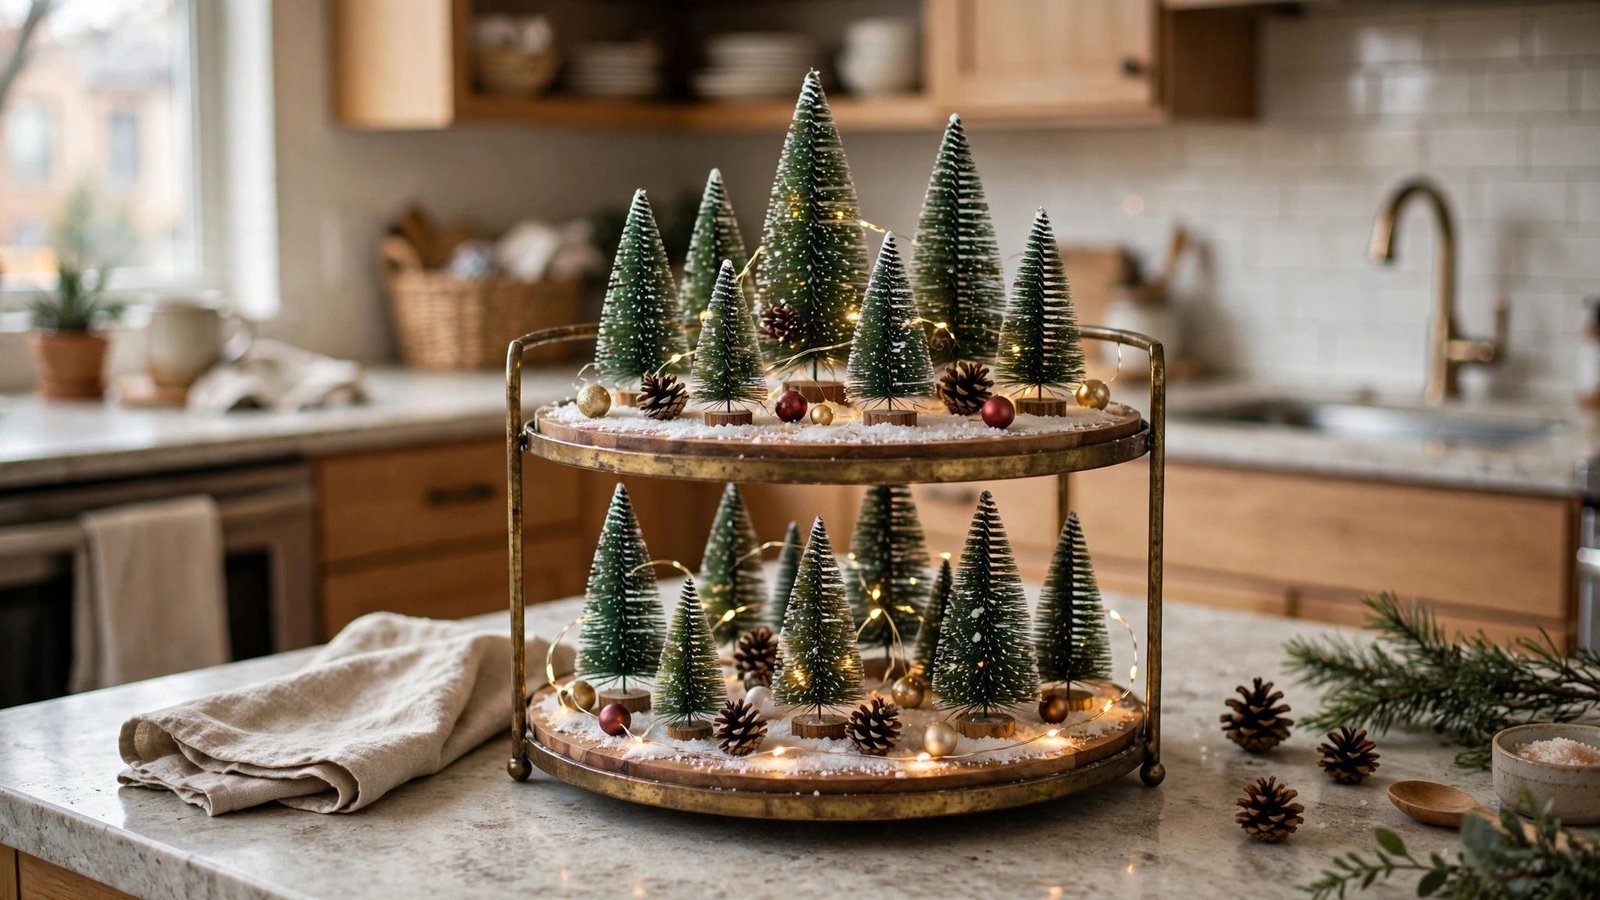
Tiered trays — those two- or three-level serving stands — make the sweetest tiny Christmas forest on a kitchen counter, coffee table, or entry console. You fill each level with bottle-brush trees, mini ornaments, fairy lights, and little winter scenes, and the whole thing reads as one composed holiday display. I’ve personally seen renters who “don’t decorate” fall for this one because it feels more like styling a shelf than committing to Christmas.
Why it works for renters: it sits on a counter or table you already use, assembles and disassembles in minutes, and everything stores in a single shoebox. No wall contact, no floor space, no permission needed.
How to set it up in five steps:
- Grab a 2- or 3-tier tray (approximate cost: $15–$30; thrift stores often have them cheaper).
- Place 3 to 6 bottle-brush trees of varying heights on the tiers (approximate cost: $1–$3 each at discount stores).
- Weave a short battery fairy-light strand through the levels.
- Tuck in mini ornaments, pinecones, faux snow, or tiny wrapped gifts to fill the gaps.
- Top the highest tier with a star or a tiny tree topper.
Renter tip: keep one tier of the tray functional — a little dish of candy canes or holiday tea bags makes the display feel lived-in rather than just looked-at.
Approximate cost: $20–$45, less with thrifted trays.
11. The Window Tension-Rod Tree

Your window is wasted holiday real estate in most rentals — so hang the tree there. A tension rod wedged inside the window frame holds a cascade of hanging ornaments, greenery, and fairy lights at graduated lengths, forming a tree silhouette against the glass. From the street it looks like a glowing storefront display; from inside it’s a backlit holiday scene. I’ve helped renters in ground-floor apartments do this specifically because it gives them a tree their neighbors can enjoy too.
Why it works for renters: a tension rod needs zero screws and leaves zero marks — it wedges in by pressure alone — and the window frame is space that was never usable for anything else.
How to set it up in five steps:
- Buy a tension rod that fits your window frame width (approximate cost: $8–$15).
- Wedge it firmly across the top of the frame, about 2 inches below the top.
- Cut ribbons or fishing line in graduated lengths — longest at the edges, shortest in the center — to form the triangle.
- Tie ornaments, small greenery sprigs, and pinecones to the lines and hang them from the rod.
- Drape a fairy-light strand along the rod so the whole display glows after dark.
Renter tip: test the tension rod’s grip before hanging anything fragile — twist it until it’s snug, give it a firm tug, and only then add your ornaments.
Approximate cost: $15–$35.
12. The Bookshelf Tree Silhouette

This is my favorite zero-cost option: rearrange the books and objects on one section of your existing bookshelf into a tree silhouette — stacks of books forming widening tiers, garland woven through, a string of fairy lights, and a star or bow at the top. I’ve personally seen a renter do this in twenty minutes with things she already owned, and her holiday party guests spent the whole evening taking photos of it. It turns furniture you already have into the tree.
Why it works for renters: it costs nothing, uses furniture that’s already there, and “undecorating” just means putting your books back. There is no more deposit-safe option on this list.
How to set it up in five steps:
- Clear one 2- to 3-foot-wide section of a bookshelf or cube unit.
- Stack books horizontally in widening rows — short stacks at top, wider at the bottom — to form the triangle.
- Weave a battery fairy-light strand through the stacks so the light glows between the books.
- Tuck small ornaments, pinecones, or greenery sprigs into the gaps between stacks.
- Crown it with a star, bow, or a small framed holiday print.
Renter tip: photograph your shelf before you start so January reset takes five minutes — and take a photo of the tree version too, because you’ll want to recreate it next year.
Approximate cost: $0–$10 (just the lights, if you don’t own a strand).
A Tree That Fits Your Lease — and Your Life
Here’s what I’ve learned after years of helping renters decorate for the holidays: the tree was never really about the tree. It’s about coming home in December to something that glows, something that says this season is special even in a 400-square-foot studio with a strict lease and a landlord who notices everything. Every idea on this list gives you that feeling without asking you to risk your deposit, drill a single hole, or rearrange your furniture around a six-foot fir. Whether you lean a ladder against the wall, outline a triangle in fairy lights, or let a vase of branches do all the talking, you’re not settling for less Christmas — you’re choosing the version that actually fits your life right now. Start with the one that made you smile as you read, give yourself an afternoon, and enjoy the particular satisfaction of a holiday display that comes down in January without a trace. Please save this visual guide on Pinterest and follow along for more renter-friendly holiday ideas — your future self, mid-December and admiring that glow, will thank you.

Amelia leads HavenlyStyle’s editorial vision with a passion for elegant interiors and practical home living. With years of experience in home décor and lifestyle content, she ensures every article is accurate, inspiring, and easy to follow. From timeless decorating ideas to the latest interior design trends, Amelia is committed to helping readers create beautiful, functional spaces while maintaining HavenlyStyle’s trusted and welcoming voice.