Every December, my phone fills with the same panicked text from renter friends: “People are coming over and my entryway is a disaster.” I get it. A rental entryway is usually a narrow strip of floor between the front door and the living room — no mudroom, no coat closet to spare, and a strict landlord who notices every nail hole. Then the holidays hit, and suddenly six guests arrive at once with puffy coats, wet boots, gift bags, and a casserole dish, and your 40-square-foot foyer has to absorb all of it.
I’ve helped dozens of renters rethink their entryways ahead of holiday hosting, and here’s what I’ve learned: guests don’t need square footage. They need a clear, obvious system — a place for the coat, a spot for the shoes, somewhere to set the bag down — all of it reversible, all of it landlord-approved. When the entryway works, the whole party feels calmer, because nobody is standing in a pile of jackets wondering where things go.
Below are my 12 favorite renter-safe ways to organize a small entryway for the holiday guest surge. Every single idea is removable, no-drill (or explicitly flagged), and built for a space that might be nothing more than a hallway corner.
Executive Summary
- Give every guest an obvious landing spot for coats, shoes, and bags — clear zones beat square footage.
- Removable adhesive hooks and over-the-door rows hold a surprising number of coats with zero wall damage.
- A freestanding coat rack or hall tree is the nuclear option for renters who can’t touch the walls at all.
- Shoe trays, washable runners, and boot mats contain wet-weather chaos and protect the floors (and the deposit).
- Baskets, a slim bench, and a rolling guest cart turn a hallway corner into a real welcome station — all of it moves with you on move-out day.
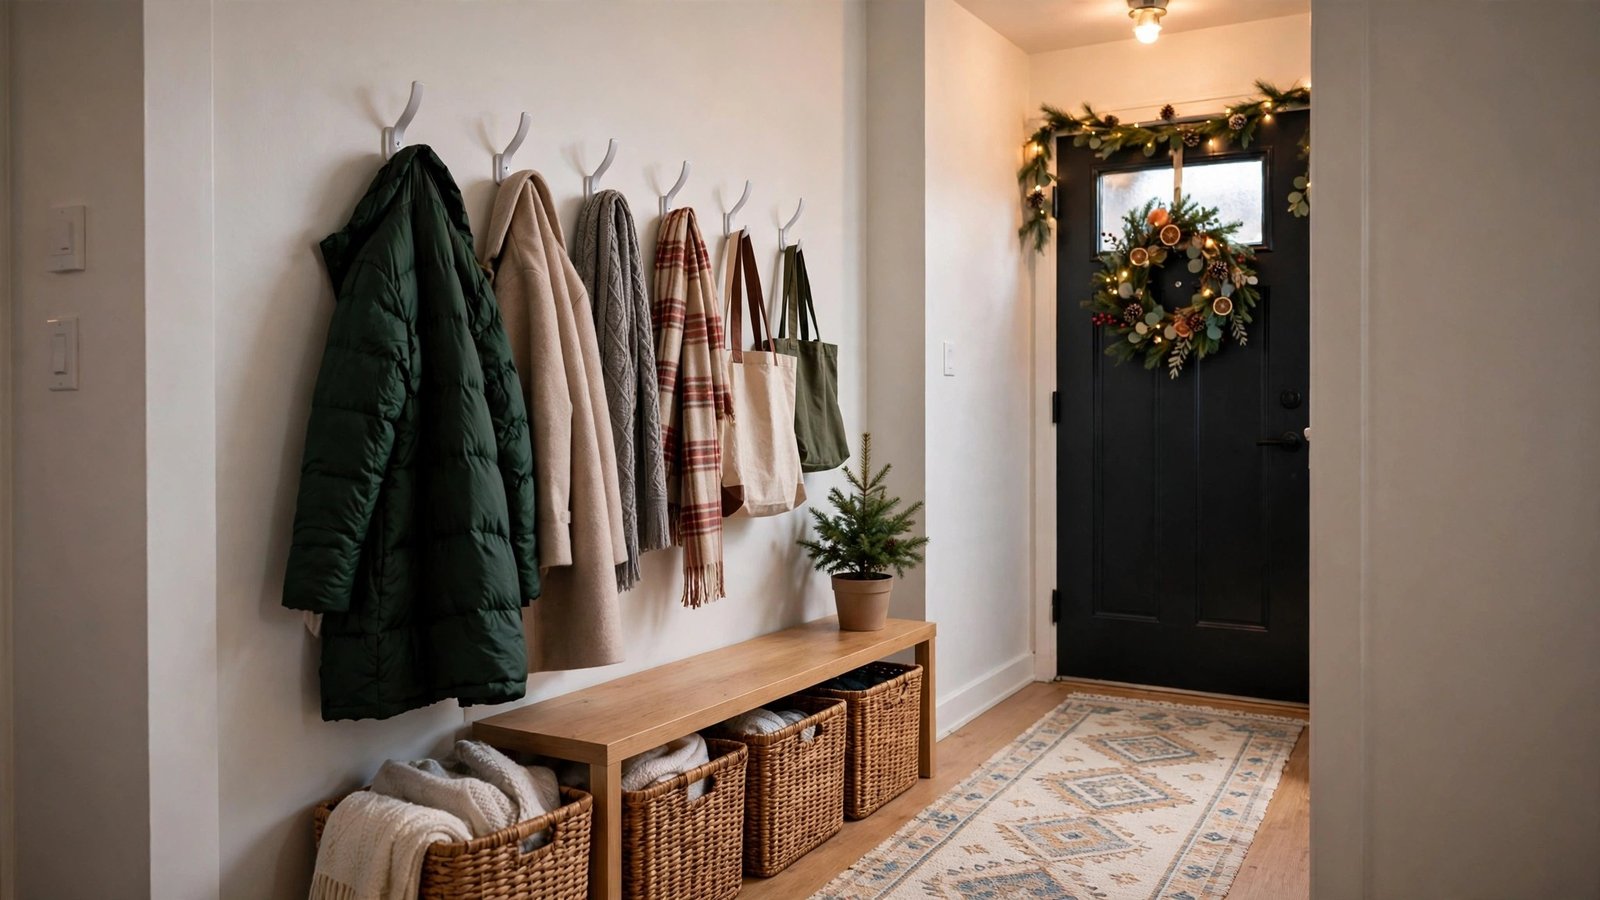
1. Build a Removable Hook Wall for Guest Coats

The single highest-impact move I’ve seen renters make before holiday hosting is turning one entryway wall into a dedicated coat-hook grid using removable adhesive hooks. Six to ten large-capacity adhesive hooks, arranged in two neat rows, can absorb an entire party’s worth of coats, scarves, and tote bags — and every hook peels off cleanly when your lease ends.
Why it works for renters: quality adhesive hooks are rated for 5–8 pounds each and remove without paint damage when you pull the tab correctly. No drilling, no anchors, no landlord conversation needed. If a hook ever does take paint with it (rare on flat latex paint, more common on cheap builder-grade finishes), a dab of spackle fixes it — but in my experience, the removal tabs do their job.
How to do it:
- Choose large removable adhesive hooks rated for at least 5 pounds each — plan one hook per expected guest plus two extra.
- Wipe the wall section with rubbing alcohol and let it dry fully; adhesion fails most often on dusty or greasy paint.
- Space hooks 10–12 inches apart in two staggered rows (high row for coats, low row for kids’ jackets and bags).
- Press each hook’s base firmly for 30 seconds, then wait a full hour before hanging anything — the adhesive needs that curing time.
- Add small removable label dots above each hook with guest names for a thoughtful, party-ready touch.
Hook style options
Clear mini hooks disappear against the wall for a minimalist look; brushed-metal-look hooks read more styled and intentional. For kids’ coats, drop one row to 36 inches high so little guests can hang their own jackets — independence keeps the entryway flowing.
Approximate cost: $12–$25 for a pack of large adhesive hooks. Renter tip: photograph the wall before you stick anything on it — a dated phone photo is your best move-out proof if a landlord ever questions the paint.
2. Bring In a Freestanding Coat Rack (Zero Wall Contact)
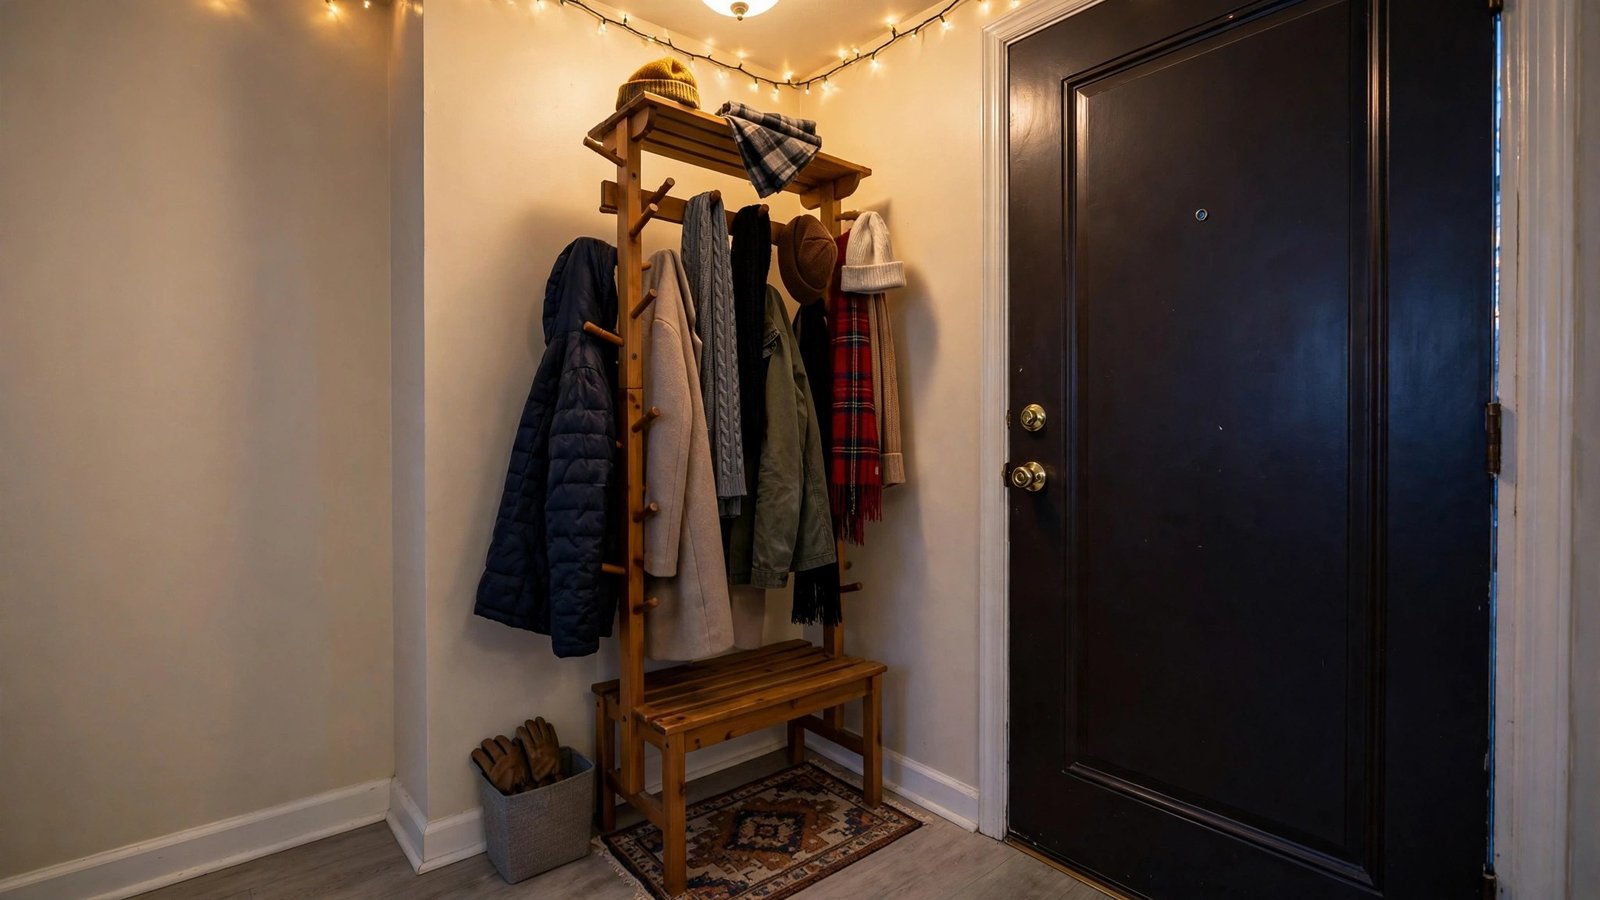
If your lease is strict or your entryway walls are plaster, textured, or freshly painted — the surfaces adhesive hooks hate — a freestanding coat rack is your answer. I’ve watched a single sturdy hall tree rescue a studio apartment’s holiday party: coats, hats, and bags all went vertical, and the floor stayed clear.
Why it works for renters: nothing touches the walls, so there’s literally nothing to explain at move-out. A weighted or tripod base stands on its own, and when the party’s over you can fold it or move it to a bedroom. It’s the most landlord-proof option on this list.
How to do it:
- Measure your entryway’s open floor footprint — you need roughly a 2-by-2-foot corner to keep the door swing clear.
- Pick a rack with at least 8–12 hooks or pegs and a stable weighted or tripod base (avoid top-heavy single-pole styles if kids are coming).
- Place it just inside the door but out of the swing path, so guests meet it the moment they step in.
- Pre-hang two or three empty hangers so early arrivals don’t have to ask where coats go.
- After the holidays, relocate it to a bedroom or closet so it doesn’t eat entryway space year-round.
Approximate cost: $30–$80 for a sturdy freestanding rack. Renter tip: choose a rack with rubber or felt feet so the base never scratches hardwood or leaves marks on vinyl plank.
3. Set a Shoe Tray and Washable Runner Drop Zone

Wet boots are the fastest way to lose a deposit in December. The fix I’ve recommended more than any other is stupidly simple: a low-lipped tray or boot mat right inside the door, with a washable runner leading guests to it. Shoes come off, water stays in the tray, and your floors — and your security deposit — survive the season.
Why it works for renters: this is 100% freestanding. The tray catches slush and salt that would otherwise stain carpet or warp laminate, and a machine-washable runner means muddy footprints wash out instead of becoming a move-out cleaning fee.
How to do it:
- Place a boot tray with a raised lip directly inside the door, sized for 4–6 pairs (roughly 30 by 15 inches).
- Lay a washable low-pile runner from the door to the tray so guests have a dry path and a visual cue.
- Tuck a small stack of spare socks or disposable shoe covers beside the tray for guests who arrive in wet boots.
- Add a folded towel on the tray’s edge for wiping down truly soaked footwear.
- Empty and rinse the tray after each gathering — standing salt water is what damages floors.
Tray material options
Rubber trays with deep grooves hold the most slush; metal-look trays with a plastic liner photograph better for a styled entry. If your rental has carpet right inside the door, add a waterproof mat under the tray as a second line of defense.
Approximate cost: $15–$40 for a boot tray plus a washable runner. Renter tip: pick a tray with a lip at least an inch and a half high — shallow decorative trays let slush escape onto the floor, which defeats the whole point.
4. Assign One Basket Per Guest (or Couple)

My favorite trick for the “where do I put my stuff” shuffle is the one-basket-per-guest system: a row of identical open baskets on an entryway bench, shelf, or even the floor against the wall. Each guest gets a basket for their bag, gloves, hat, and phone. It looks intentional and styled, and it ends the pile-on-the-chair problem completely.
Why it works for renters: baskets are furniture, not fixtures. They stack, they move, they work in a hallway with zero wall space. At the end of the night, each guest grabs their basket’s contents and leaves — no lost gloves, no digging through a communal heap.
How to do it:
- Buy or gather 4–6 matching open-top baskets (woven, felt, or fabric bins — whatever fits your style).
- Line them up on a bench, low shelf, or directly on the floor along the entryway wall.
- Slip a removable gift tag or sticky label with each guest’s name on the basket rim.
- Toss a spare pair of cozy socks or a wrapped candy into each basket as a welcome touch.
- After guests leave, stack the baskets and store them — they collapse into almost no space.
Basket size guide
Small (10-inch) baskets suit gloves, hats, and phones; medium (14-inch) baskets swallow purses and tote bags. Mixing one size keeps the row looking tidy — two sizes max, or the system starts looking like clutter again.
Approximate cost: $20–$45 for a set of matching baskets. Renter tip: felt or fabric baskets are the safest pick for rental floors — woven seagrass looks great but can leave fine scratches on soft wood.
5. Add Over-the-Door Hook Rows for Bags and Scarves

The back of the front door — or better, the back of an entry-closet door — is prime real estate most renters ignore. An over-the-door hook rack with 5–7 hooks instantly creates hanging space for purses, scarves, umbrellas, and kids’ backpacks, using a surface that was doing nothing.
Why it works for renters: over-the-door racks hang on the door itself with padded brackets — no screws, no adhesive, no wall contact at all. Lift it off when you move. Just check the bracket clearance so the door still closes fully, and skip this one on doors with tight frames.
How to do it:
- Measure the top of your door for bracket fit — most racks fit standard 1⅜ to 1¾-inch doors.
- Choose a rack with padded, non-slip brackets to protect the door’s finish.
- Hang it on the inside of the front door or the entry closet door, whichever guests reach first.
- Reserve the end hooks for umbrellas and long scarves so they don’t tangle with bags.
- Remove it between gatherings if the door is in a tight hallway — it takes ten seconds.
Approximate cost: $10–$25 for an over-the-door hook rack. Renter tip: test that the door closes and latches fully the day you hang it — discovering a clearance problem mid-party is no fun.
6. Use a Slim Storage Bench as the Entryway Workhorse

If your entryway can fit exactly one piece of furniture, make it a slim storage bench. I’ve seen 30-inch benches transform rental foyers: guests sit to pull off boots, lift the lid or open the cubbies for shoes and bags, and the whole thing doubles as a styled surface for a holiday garland on top.
Why it works for renters: it’s freestanding furniture with triple duty — seating, hidden storage, and a display surface. Nothing mounts to the wall. And unlike a bulky hall tree, a slim bench (12–15 inches deep) fits the narrow hallways most rentals have.
How to do it:
- Measure your wall run and leave at least 36 inches of clear walkway in front of the bench.
- Choose a bench 30–40 inches wide with a flip-top, cubbies, or drawers — cubbies are fastest for guests.
- Style the top simply: a folded throw, a small tray for keys, and one holiday accent.
- Pre-load cubbies with guest slippers in a few sizes so visitors aren’t padding around in socks.
- Keep the bench’s footprint clear on both sides so it never becomes a hallway bottleneck.
Bench style options
Flip-top benches hide clutter completely and give guests a seat; open-cubby benches make shoes grab-and-go fast. In very narrow halls, a backless bench tucks tighter to the wall than one with a backrest.
Approximate cost: $50–$120 for a slim entryway storage bench. Renter tip: measure your door swing before you buy — a bench placed in the swing path is the number one entryway mistake I see renters make.
7. Create a Wet-Weather Corner With an Umbrella Stand
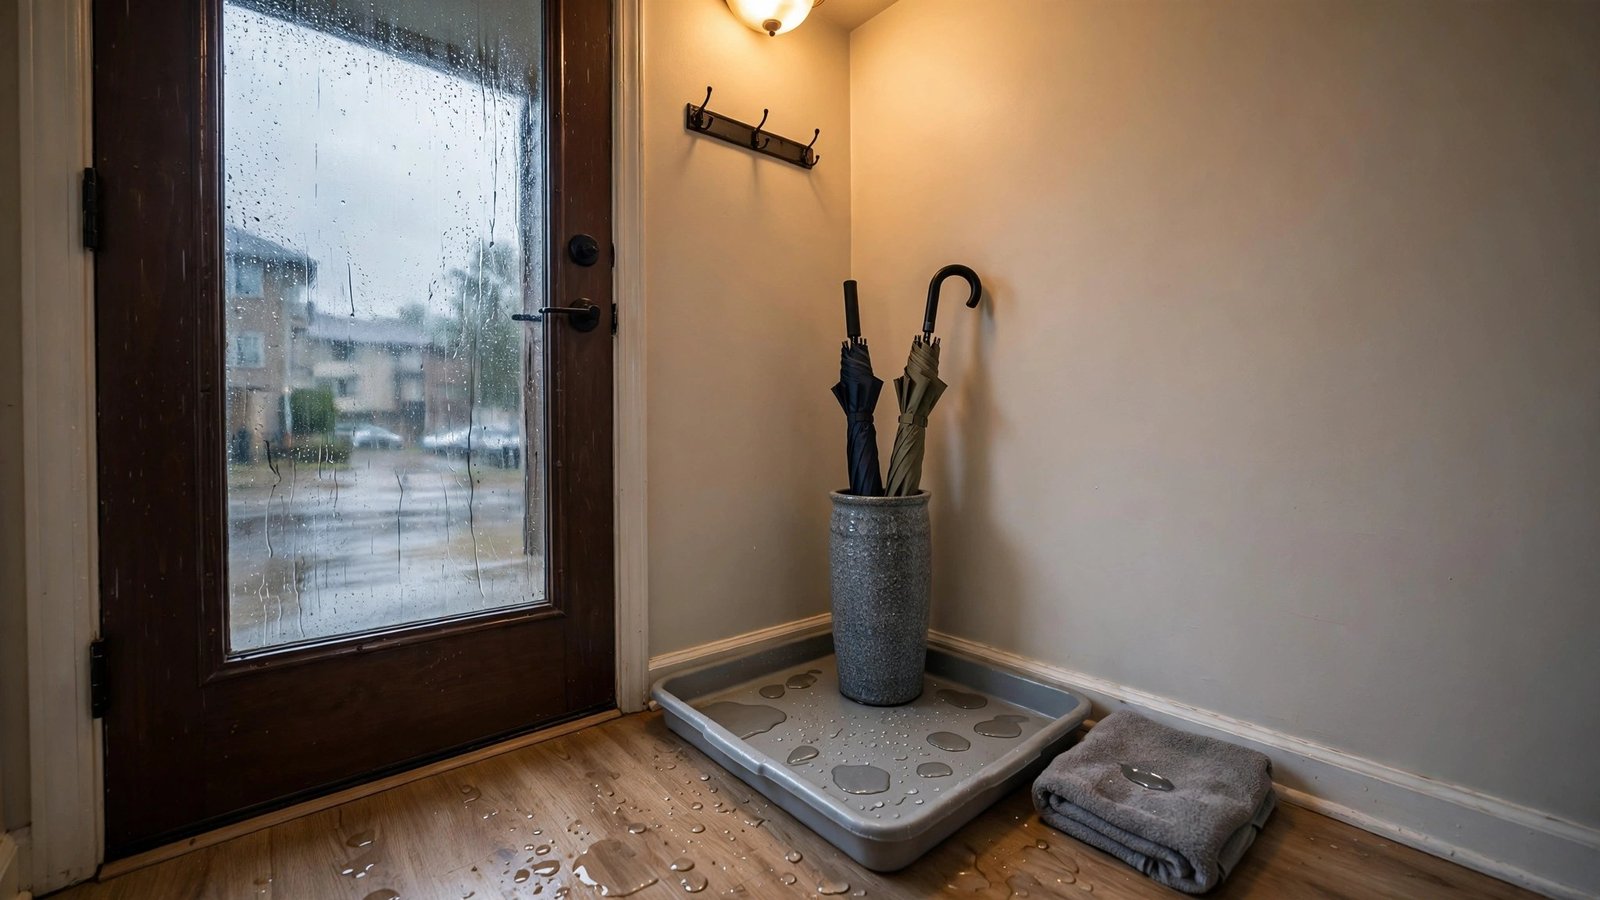
Holiday hosting in rainy or snowy climates means dripping umbrellas and soaked rain boots with nowhere to go. A dedicated wet-weather corner — an umbrella stand set inside a washable tray, beside the boot mat — keeps the drip contained to one small, easy-to-clean footprint instead of the whole entryway.
Why it works for renters: everything sits on the floor inside washable containment. No wall mounting, no plumbing, no fuss — and it protects the exact floors your landlord will inspect. In my experience, landlords notice water damage faster than almost anything else.
How to do it:
- Pick a tall, stable umbrella stand with a drip tray or waterproof liner.
- Set the stand inside a larger washable tray or boot mat to catch splashes.
- Position it in the entryway corner nearest the door, out of the main walking path.
- Add a folded microfiber towel beside it for guests to wipe down wet umbrellas.
- Dump collected water after each rainy-day gathering so nothing sits and mildews.
Approximate cost: $20–$50 for a stand plus tray. Renter tip: slide a five-dollar washable boot mat under the stand to double the contained drip area for truly stormy arrivals.
8. Stage a Folding Luggage Rack for Overnight Guests

Holiday guests who stay the night arrive with suitcases, and nothing wrecks an entryway faster than luggage sprawled across the floor. A folding luggage rack — the kind hotels use — parked just inside the entry or in the hallway gives every overnight bag an instant, elevated home.
Why it works for renters: it folds flat to about 3 inches thick and slides behind a door or under a bed when not in use. Zero installation, zero footprint most of the year, and guests immediately understand what it’s for — no instructions needed.
How to do it:
- Buy a folding luggage rack rated for at least 100 pounds (most standard ones are).
- Open it in the hallway or entry corner before overnight guests arrive.
- Drape a small folded blanket over the straps for a styled, welcoming look.
- Point arriving guests to it with a quick “bags go here” as they walk in.
- Fold it flat and stash it behind a door once the visit ends.
Approximate cost: $25–$55 for a folding luggage rack. Renter tip: folded flat, most racks are about three inches thick — they slide behind any bedroom door, so there’s no excuse not to own one.
9. Build a “Welcome Station” on a Rolling Cart
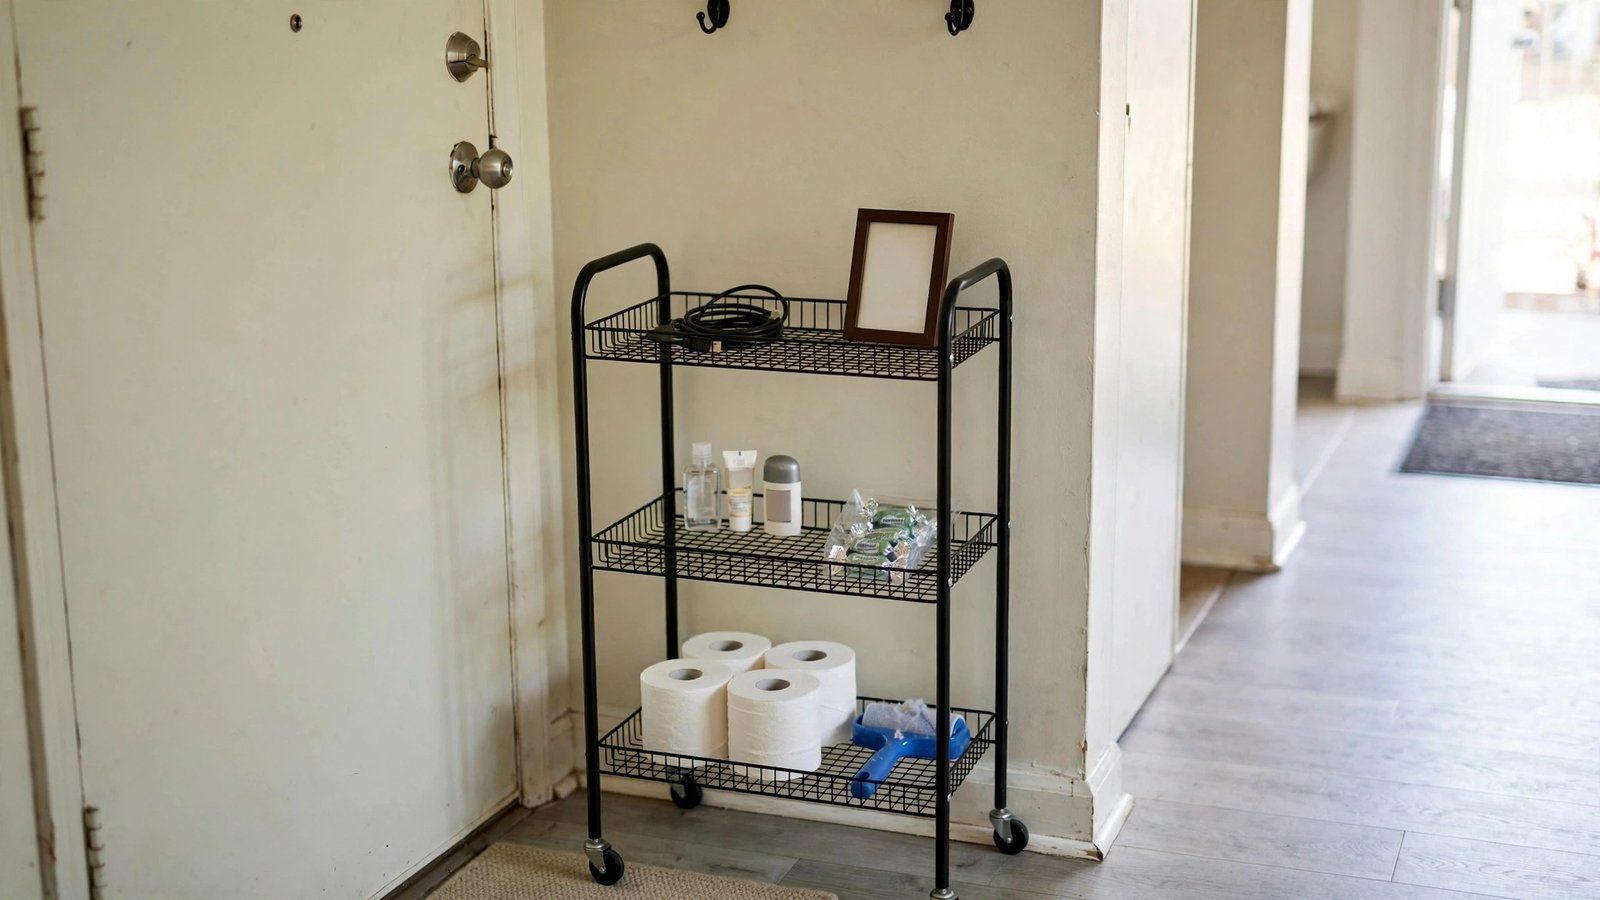
This is the idea my renter clients rave about most: a slim rolling cart — the three-tier kind — stocked as a guest welcome station and parked in or beside the entryway. Top tier: phone chargers and the Wi-Fi password in a little frame. Middle: spare toiletries, pain reliever, and tissues. Bottom: extra toilet paper rolls and a lint roller. Guests help themselves without having to ask you for anything.
Why it works for renters: a rolling cart is furniture on wheels — no installation, endlessly repositionable, and it rolls into a closet when the party’s over. It solves the awkward “where’s your bathroom / do you have a charger” dance that eats the first hour of every holiday visit.
How to do it:
- Get a three-tier rolling cart roughly 15 by 18 inches — slim enough for a hallway.
- Stock the top tier with a multi-device charger and a small card with your Wi-Fi network and password.
- Fill the middle tier with travel-size toiletries, tissues, and a few wrapped mints or candies.
- Load the bottom tier with practical extras: toilet paper, a lint roller, stain-remover wipes.
- Park the cart near the entryway but out of the door swing; roll it away after hosting season.
Approximate cost: $30–$60 for the cart, plus $10–$20 to stock it. Renter tip: print the Wi-Fi card on cardstock at home or a library — a framed little sign looks intentional and guests actually photograph it.
10. Sort Shoes in a Stackable Cubby Tower
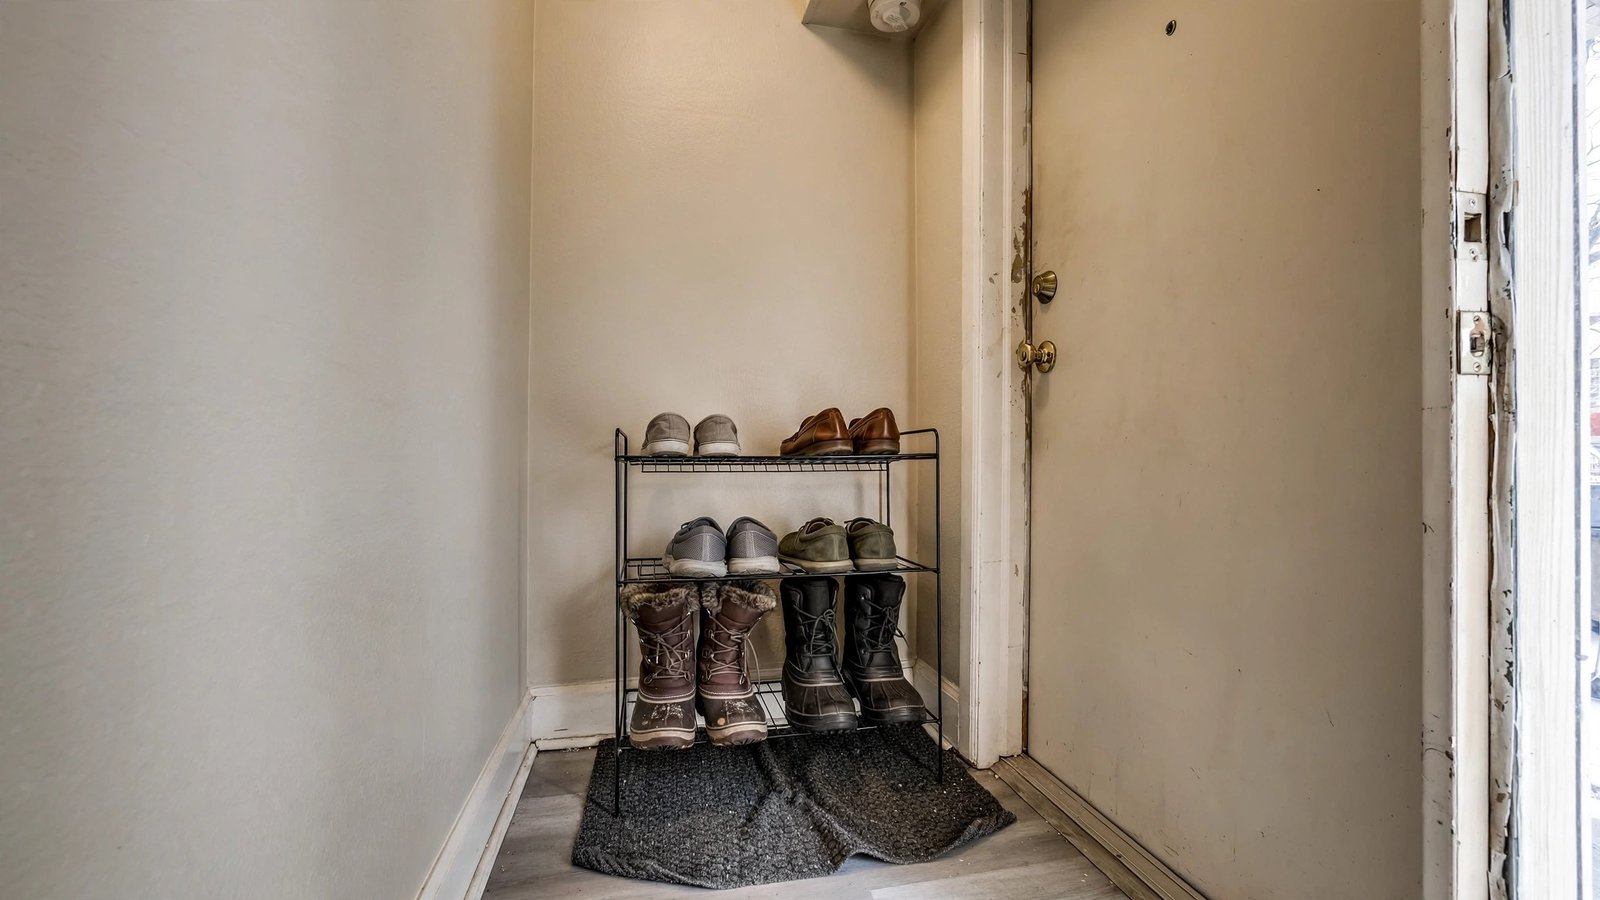
When six guests each bring a pair of boots, a single shoe tray overflows. A narrow stackable shoe cubby tower — 2 or 3 tiers, about 12 inches deep — multiplies your shoe capacity vertically against one wall, and every pair stays visible and paired instead of becoming a jumbled pile.
Why it works for renters: these towers assemble without tools and disassemble flat for moving day. They lean against the wall but don’t mount to it, so the deposit stays safe. Place the heaviest shoes on the bottom tier for stability.
How to do it:
- Choose a 2–4 tier stackable shoe rack no deeper than 12–14 inches for narrow hallways.
- Assemble it tool-free and position it against the entryway wall beside the door.
- Put a washable mat underneath to catch drips from wet soles.
- Assign the bottom tier to boots (heaviest, most stable) and upper tiers to smaller shoes.
- Break it down flat and store it when hosting season ends if space is tight.
Approximate cost: $20–$45 for a stackable shoe tower. Renter tip: heaviest boots always go on the bottom tier — these towers get top-heavy and tippy if you load big boots up high.
11. Hide the Overflow With a Tension-Rod Curtain Corner
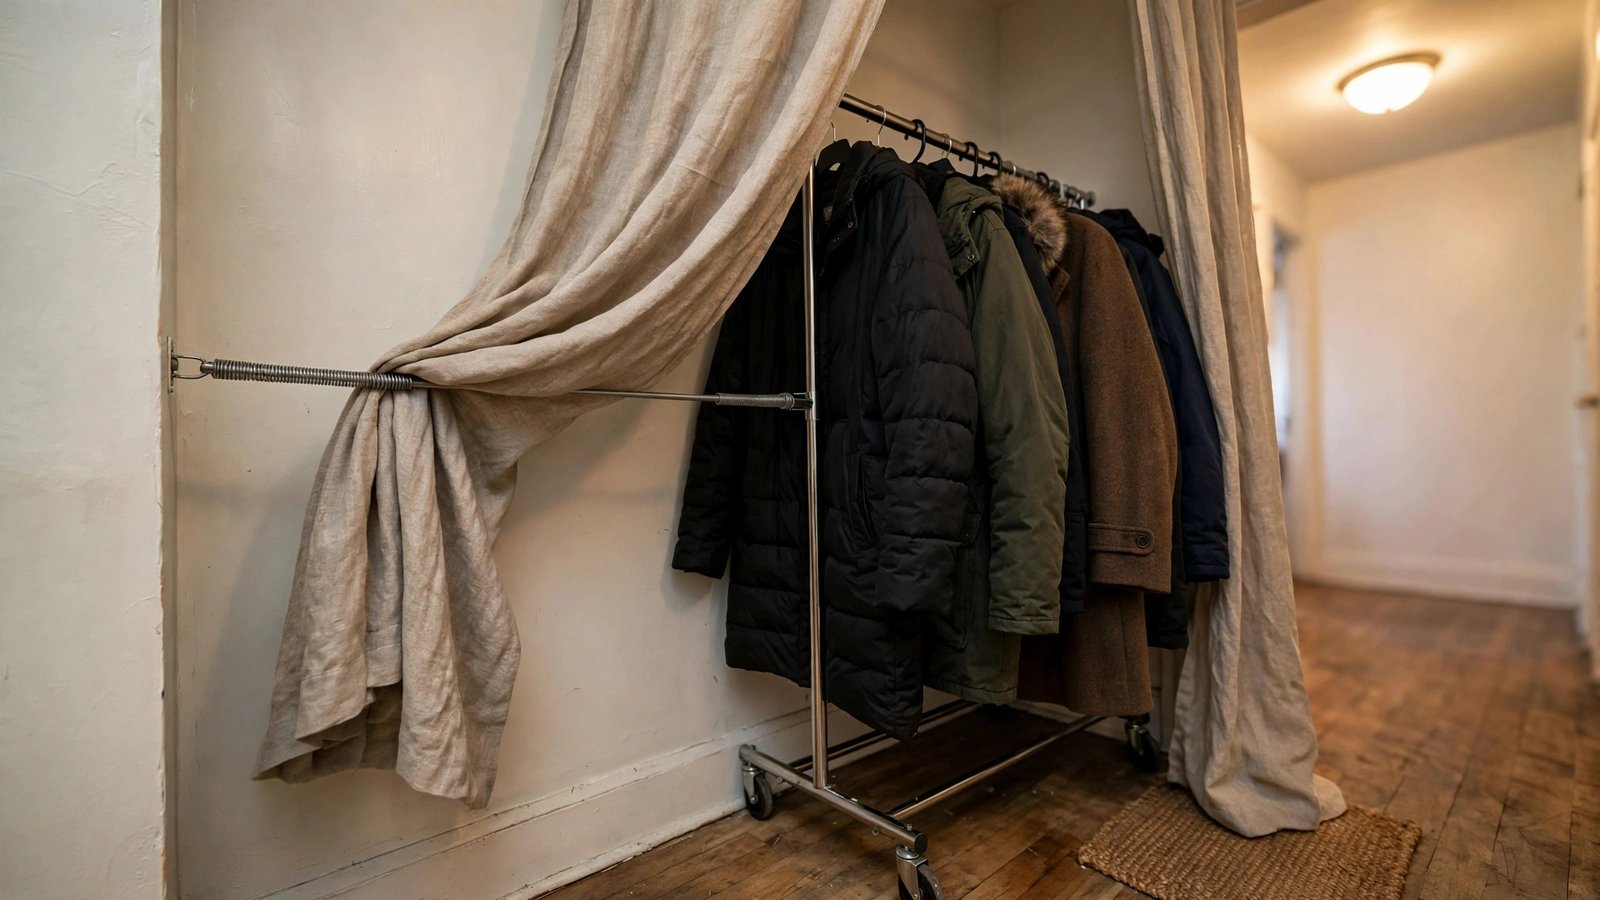
Renters without an entry closet face the same holiday problem: where do the extra coats go when the hooks are full? My go-to is the tension-rod curtain corner — a spring-tension rod wedged between two walls (or wall and doorframe) with a curtain panel, hiding a rolling rack or a stack of bins holding the overflow. Guests see a styled curtain; you see organized chaos, contained.
Why it works for renters: tension rods grip with spring pressure — no drilling, no holes, and they come down in seconds. This is the classic renter workaround for creating a “closet” where the builder forgot one, and landlords universally accept them.
How to do it:
- Find a corner or short hallway section where a rod can span wall to wall (most rods cover 24–48 inches).
- Install the tension rod at about 72 inches high, tightening until it’s snug — test with a firm tug.
- Hang a curtain panel or two that reaches the floor for a finished look.
- Behind the curtain, place a rolling garment rack or stacked bins for overflow coats and bags.
- Pull the curtain closed before guests arrive; open it when you need access.
Curtain fabric options
A heavy linen-look panel hides lumpy shapes best; a sheer panel keeps the corner feeling light but still softens the visual clutter. Match the curtain to your wall color and the whole thing nearly disappears.
Approximate cost: $15–$35 for a tension rod plus curtain panel. Renter tip: stick small felt pads where the rod ends press against the wall — it prevents the faint circular scuffs tension rods can leave on matte paint.
12. Zone a “No-Closet” Entry With a Rug-and-Runner Layout
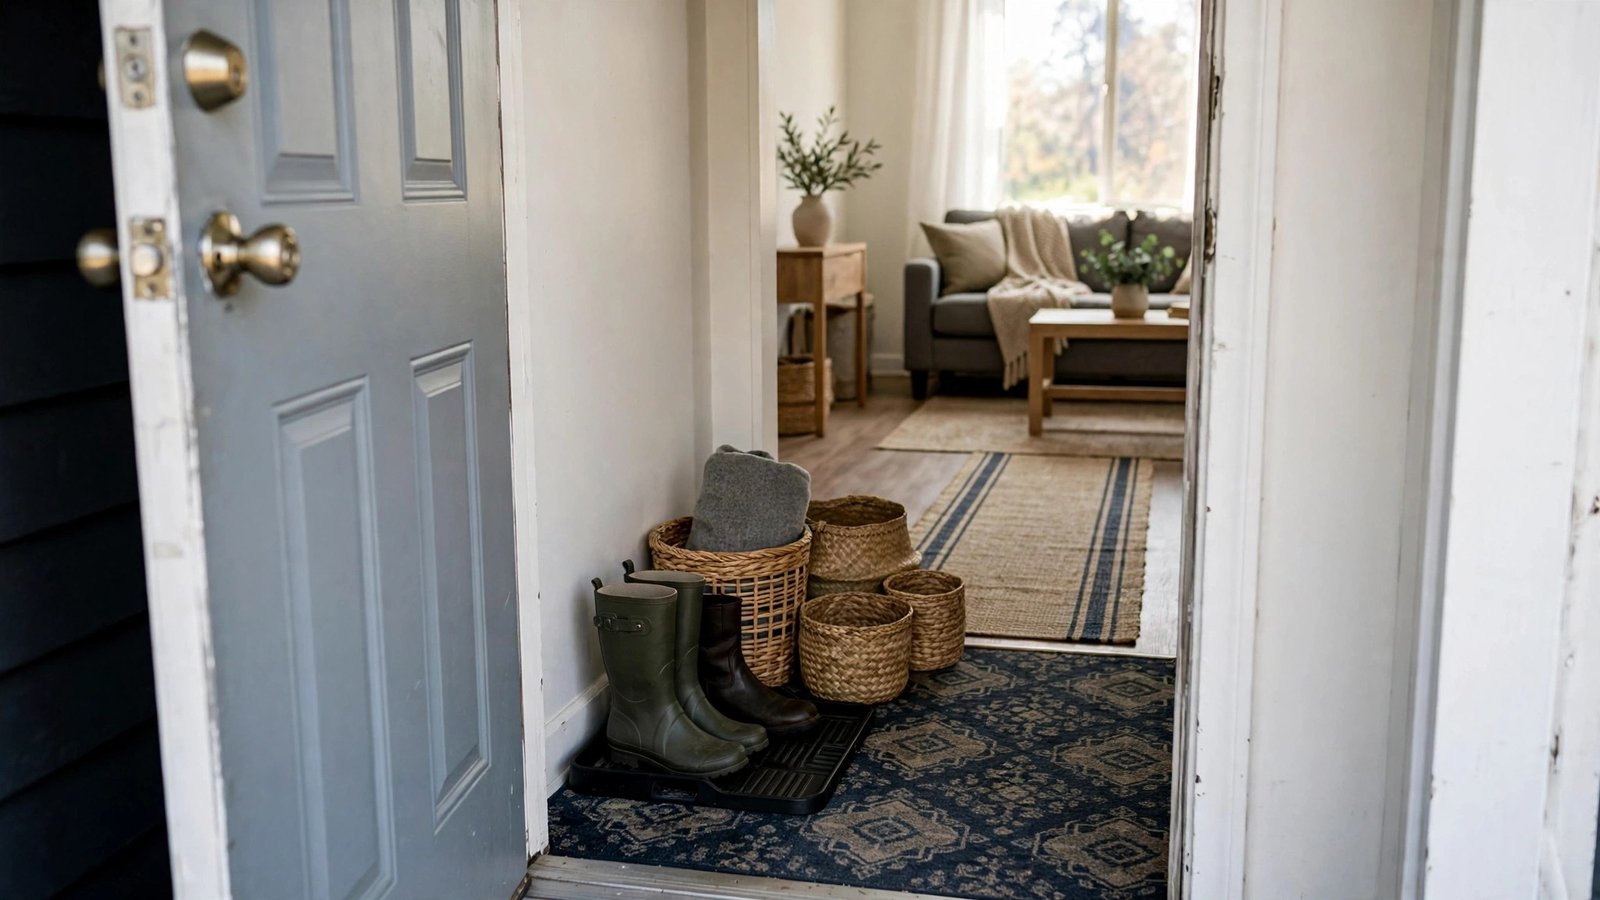
Some rental entryways are just… a door that opens into the living room. No foyer, no wall, no zone at all. For these spaces, I’ve had the best luck defining the entryway purely with textiles: a washable area rug under a small bench or basket cluster, plus a runner marking the “shoes-off here” path. The rugs create a visual room-within-a-room that tells guests exactly where the entryway begins and ends.
Why it works for renters: rugs are the ultimate no-commitment zone-makers. Nothing attaches to anything, they roll up on moving day, and washable flat-weave styles survive the salt, slush, and red-wine spills of holiday season.
How to do it:
- Choose a washable, low-pile rug (3-by-5 feet is the sweet spot for most rental entries).
- Layer a narrow runner from the door to the rug to mark the arrival path.
- Anchor the rug’s edges with washable rug tape so it never slides or bunches.
- Place your basket cluster, bench, or shoe tray on the rug so everything reads as one zone.
- Toss both textiles in the wash after the holidays — they come out looking new.
Rug pattern options
A busy, dark pattern hides salt stains and footprints between gatherings; a light solid rug shows everything but photographs beautifully. For holiday season specifically, I’d go dark and patterned — practicality wins in December.
Approximate cost: $25–$60 for a washable rug and runner set. Renter tip: washable rug tape is the unsung hero here — regular double-sided rug tape can pull up floor finishes, so read the label before you stick anything down.
Conclusion
A rental entryway doesn’t need to be big to handle the holidays — it needs to be deliberate. When every coat has a hook, every pair of boots has a tray, and every guest has a basket with their name on it, a 40-square-foot foyer can absorb a full house of visitors without breaking a sweat. And because every idea here is removable, freestanding, or tension-held, your landlord never has to know how hard that little space worked.
Start with the two or three ideas that match your biggest pain point — the coat pile, the shoe sprawl, the wet-weather mess — and build from there. Your guests will feel the difference the moment they walk in: no awkward hovering, no “where should I put this,” just a warm, organized welcome that sets the tone for the whole visit.
You’ve got this, and your deposit is safe. Please save this visual guide on Pinterest and share it with a fellow renter who’s hosting this holiday season — organized entryways make for happy guests, and happy guests make for happy holidays.

Amelia leads HavenlyStyle’s editorial vision with a passion for elegant interiors and practical home living. With years of experience in home décor and lifestyle content, she ensures every article is accurate, inspiring, and easy to follow. From timeless decorating ideas to the latest interior design trends, Amelia is committed to helping readers create beautiful, functional spaces while maintaining HavenlyStyle’s trusted and welcoming voice.