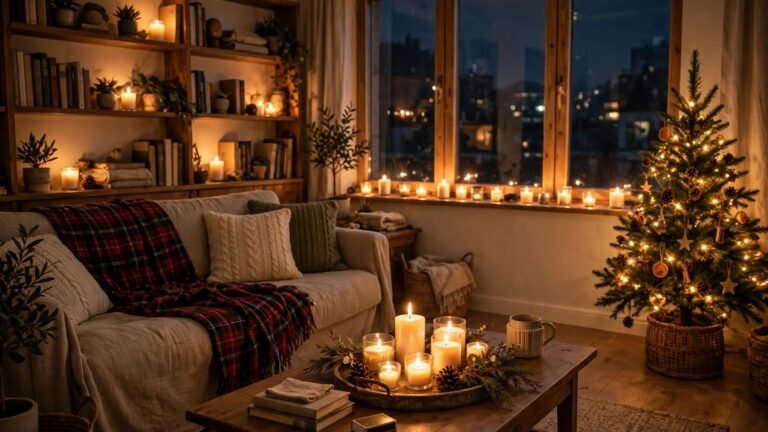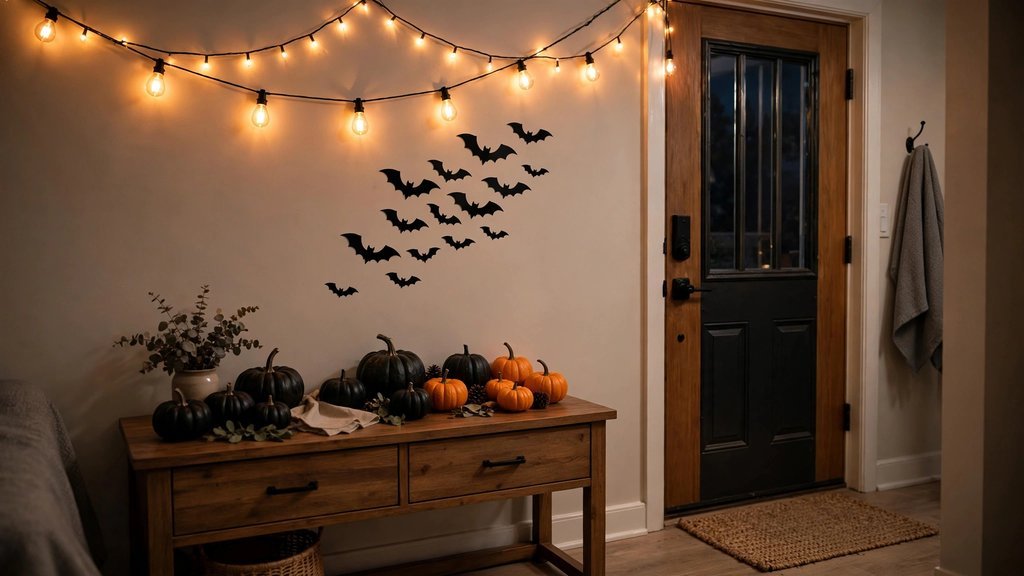
There’s a special kind of frustration that hits every October if you rent a small apartment. You scroll past gorgeous Halloween houses with full porches and carved porch displays, and then you look around your 500-square-foot space with its white walls, strict lease, and zero mantel — and you wonder if decorating is even worth it. I hear this from renters every single fall, and my answer is always the same: small apartments are actually easier to decorate for Halloween, not harder. You need fewer pieces, less money, and one good surface can change the whole room.
I’ve helped dozens of renters dress their apartments for the season without a single nail hole, paint swatch, or landlord complaint. The trick isn’t more stuff — it’s strategic, deposit-safe styling in the spots your eye naturally lands: the entryway, the walls you see from the couch, the windows the neighbors see from outside. Every idea below passes what I call the renter test: it’s removable, reversible, and leaves zero trace come November. A few even pack flat for next year, which is the real small-space win.
Here are the 12 indoor Halloween decor ideas I recommend to renters in small apartments, ordered from the highest-impact move you can make down to the finishing touches.
Executive Summary
- Start with one contained surface (a tray, a tiered stand, a console top) — one styled surface reads as “decorated apartment,” while scattered pieces read as clutter.
- Walls without damage are the renter’s superpower: peel-and-stick decals, window clings, and adhesive strips give you big Halloween presence with zero holes to patch.
- Swap, don’t store: pillow covers, throws, and shower curtains give you a full seasonal transformation and just go back in the closet November 1st.
- Light is the cheapest Halloween decorator: warm string lights and flameless candles make everything look intentional and cozy after dark.
- Nothing here requires landlord permission — every idea is removable and reversible by design, and costs roughly $8–$30 per idea.
1. The One-Tray Entryway Vignette
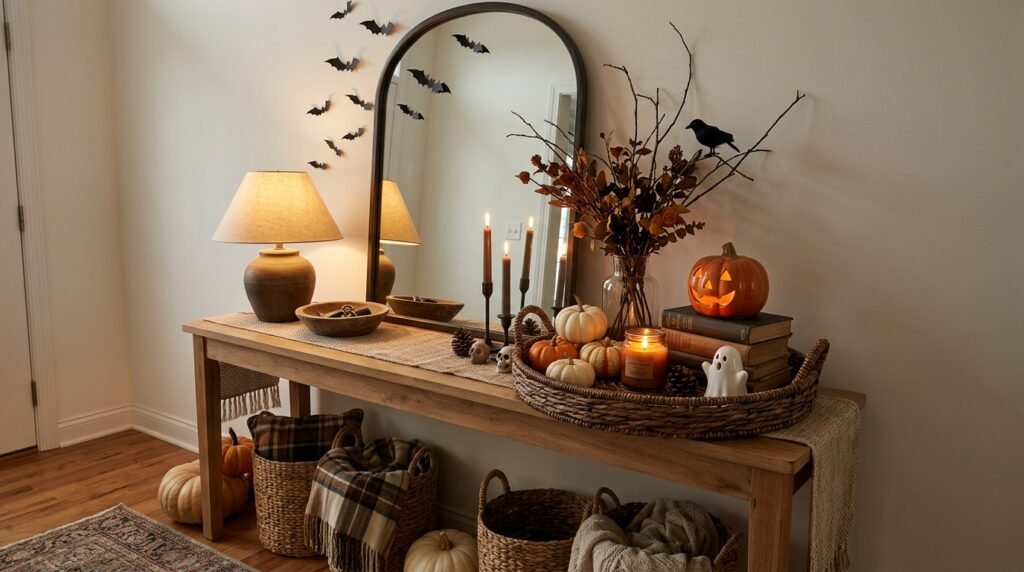
This is the single highest-impact move you can make, and it’s the first thing I tell every small-apartment renter: corral all your Halloween decor onto one tray, board, or shallow basket right where you walk in. In a small space, a tray reads as styled and intentional; the same five objects scattered on three surfaces read as clutter. A tray also protects your furniture — candle wax, pumpkin moisture, and cinnamon-scented whatever stay on the tray, never on your landlord’s countertop.
Why it works for renters: zero wall contact, zero surface damage, and the whole thing lifts away in one move on November 1st. It also solves the “no entryway” problem most small apartments have — a tray on any small table, stool, or the top of a shoe rack instantly creates an entry moment.
Here’s how to build it in about ten minutes:
- Grab any wooden tray, cutting board, or low basket you already own — roughly 12 to 18 inches wide is perfect.
- Anchor it with height: add one small black lantern or a tall flameless candle toward the back of the tray.
- Cluster three mini pumpkins (real or faux) in front at staggered heights — odd numbers photograph better and look more natural.
- Fill the gaps with dried autumn leaves, pinecones, or eucalyptus sprigs from the yard or the craft store.
- Lay the tray wherever you enter — console table, the top of your shoe bench, even a sturdy radiator cover.
My favorite bonus: the tray doubles as your everyday landing zone — drop your keys and mail on it and the whole arrangement still looks styled. Line the tray with a scrap of kraft paper or a cloth napkin first so nothing sits directly on the wood.
Approximate cost: $12–$25 if you need to buy mini pumpkins and a tray; under $10 if you’re shopping your own shelves.
2. Peel-and-Stick Bat and Moon Wall Decals
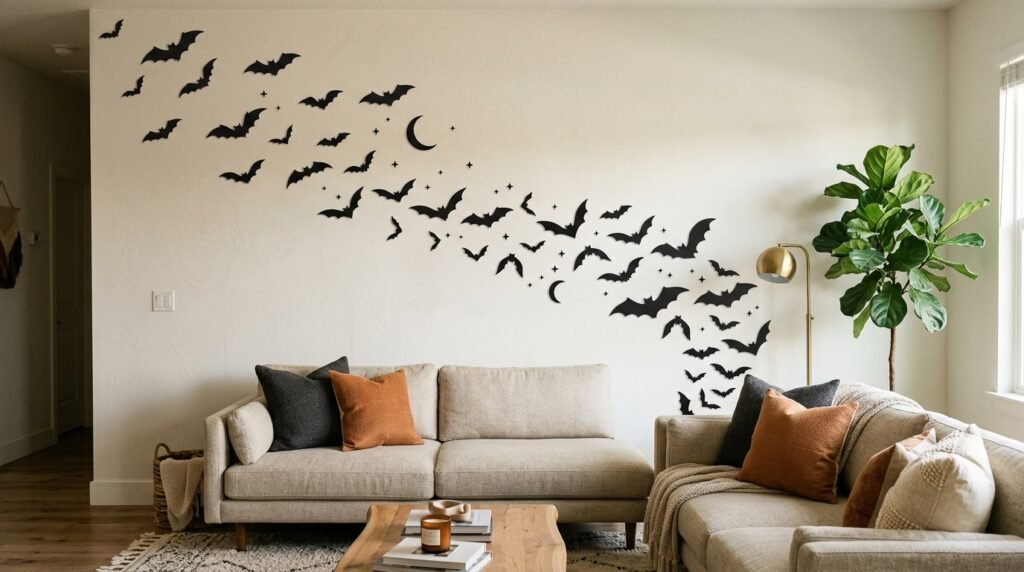
If I could only recommend one wall treatment for Halloween in a rental, it would be this. A sheet of peel-and-stick bats arranged in a swooping flight path up a living room wall looks like you hired a stylist, and it takes fifteen minutes. I’ve personally seen this one idea make guests gasp — it has the drama of a mural with absolutely no commitment.
Why it works for renters: these decals are made to peel off cleanly with no residue, so your deposit stays safe. They also exploit the one thing small apartments have in abundance — blank white wall. The high contrast of black bats on a white wall is what makes it so striking.
Four steps to the swooping-bat wall:
- Choose the biggest blank wall in your living room — the one you face from the couch is ideal.
- Lay the bats on the floor first and arrange them in a rising, curved flight path, mixing three or four sizes.
- Peel and stick them starting from the lowest, largest bat and working upward — step back twice to check the curve.
- Add one crescent moon decal at the top of the flight for a focal point, then photograph it (this is the Pinterest shot).
To remove them in November, peel slowly from one corner — if a decal resists, warm it for ten seconds with a hairdryer and it lifts right off. Test one in a hidden spot behind a door first if your paint is very fresh; older matte paint handles these best.
Approximate cost: $8–$15 per sheet; one sheet of 60–80 decals covers most apartment walls.
3. Double-Sided Halloween Window Clings
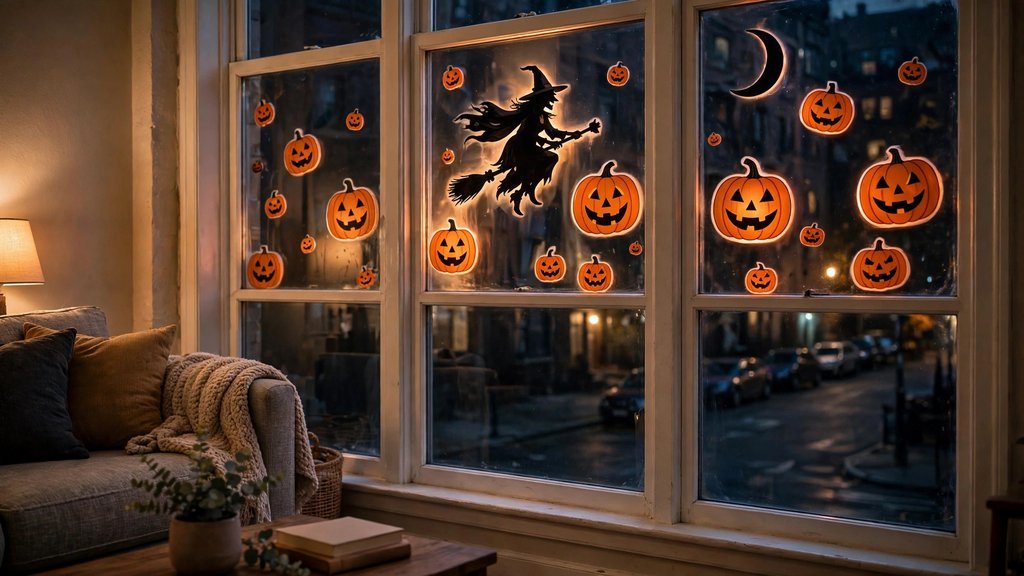
Here’s the idea renters overlook: your windows are decoration for two audiences — you from the inside, and the street from the outside. Double-sided static-cling decals (the kind that stick with water, no adhesive) turn an ordinary apartment window into a glowing Halloween display at night, and everyone walking past your building gets the show. I’ve noticed renters in upper-floor apartments love this one because it’s the only Halloween decor visible from the ground.
Why it works for renters: static clings leave zero residue and remove with a damp cloth. And unlike outdoor decorations, which your landlord or building might restrict, what’s on the inside of your window is your business.
- Clean the glass first — clings stick far better to a dust-free window (use glass cleaner and let it dry).
- Mist the window lightly with water in a spray bottle; that’s the entire “adhesive.”
- Press on pumpkin, witch, and moon clings in a loose scene, smoothing bubbles from center to edge.
- At night, leave one lamp on near the window so the clings glow like a lantern for the street below.
During the day they look like cheerful cartoon cutouts from your couch; at night, backlit by your lamp, they turn into glowing silhouettes for the sidewalk. Peel them off, lay them flat between sheets of wax paper, and they stick again next year.
Approximate cost: $8–$12 for a multi-pack of clings.
4. The Pillow-and-Throw Swap
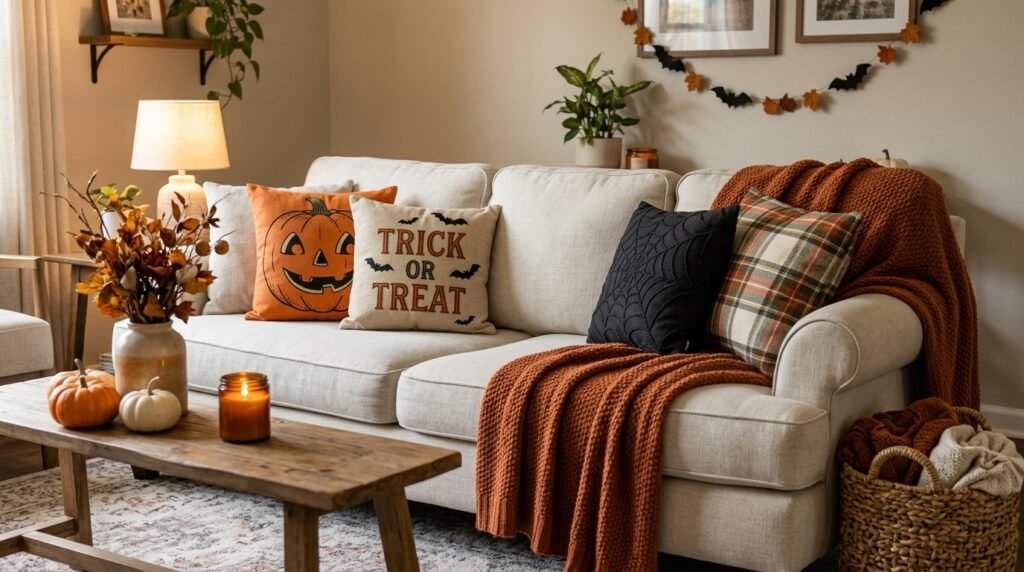
This is the fastest seasonal transformation in decorating, and it’s tailor-made for small apartments. You don’t need new pillows — just slip seasonal covers over the pillow inserts you already own, fold your everyday throw into the closet, and drape a chunkier, warmer throw for October. The sofa is the biggest surface in a small living room, so changing its textiles changes the entire room’s story in about three minutes.
Why it works for renters: it’s 100% reversible by definition. Your neutral sofa underneath stays exactly as your landlord left it, and the seasonal covers fold flat into a drawer when the holiday ends.
- Buy two or three pillow covers in Halloween-adjacent tones — burnt orange, black, or deep plum in velvet or linen.
- Swap the covers onto your existing pillow inserts (no need to buy new pillows).
- Replace your light throw with a heavier knit or plaid in a warm neutral to balance the bold pillows.
- Tuck one small velvet or fabric pumpkin into a sofa corner — it’s the one object that says “Halloween” while the textiles say “autumn.”
Pro tip I give every renter: keep one pillow in a solid neutral and make the other two the bold seasonal ones — two bold pillows read as “styled,” while three or four start to read as “costume.” When the holiday ends, the covers fold into a dresser drawer with zero storage guilt.
Approximate cost: $15–$30 for a set of covers and one throw, depending on fabric.
5. String Lights Draped Over the Bookshelf

Real talk: Halloween lighting does more for a small apartment than almost any object you can buy. Warm string lights draped over the top of a bookshelf create that amber, golden-hour glow that makes every pumpkin and pillow around them look twice as good. I’ve helped dozens of renters with this exact move, and it’s the one people photograph and send back to me saying “why does my apartment suddenly look like a movie set?”
Why it works for renters: the lights drape over furniture you already own — no nails, no hooks on the wall, no holes to patch. Battery-operated sets mean no cord routing across the room, and LED strings stay cool enough to weave among books and decor safely.
- Choose a warm-white or amber LED string (about 20–30 feet for a standard bookshelf); skip multicolor if you want the cozy look.
- Drape it over the top of the bookshelf so it hangs slightly down both sides — gravity does the work, no fasteners needed.
- Weave one or two strands behind the books on a middle shelf for depth (LEDs stay cool, but keep bulbs off paper pages).
- Tuck a few mini pumpkins or pinecones among the books so the lights catch their shapes.
- Turn off your overhead light and let the shelf be the room’s glow after 7 p.m.
Choose a set with a built-in timer so the shelf lights itself at dusk — one less thing to remember. If you want to go a touch more Halloween, swap one strand for purple or orange lights, but keep the others warm white so the room still feels like a home and not a haunted house attraction.
Approximate cost: $10–$20 for battery-operated LED strings; under $15 at most big-box and craft stores.
6. The Tiered Pumpkin Display
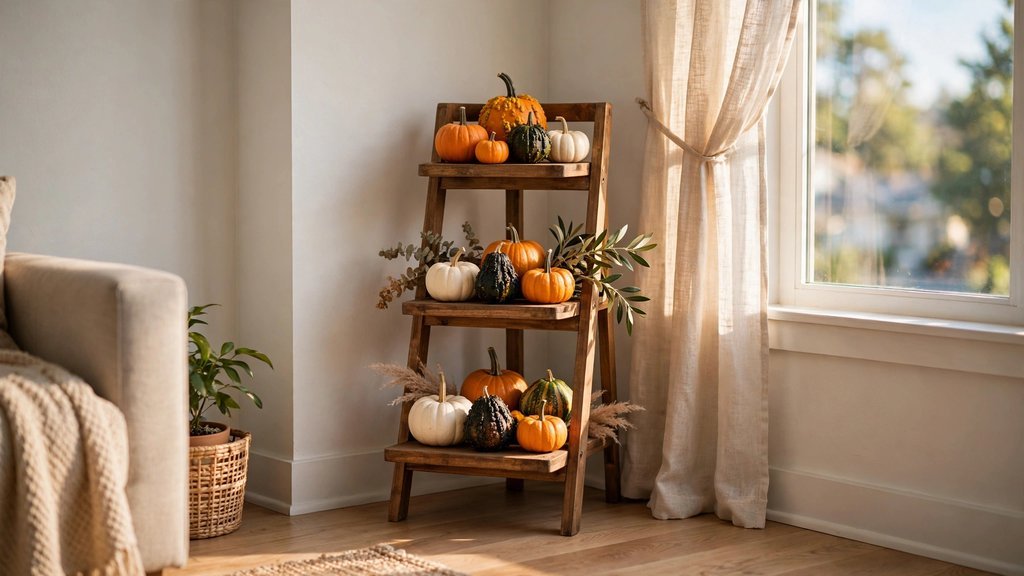
When floor space is scarce, you decorate vertically. A tiered stand — the kind made for plants, a small ladder shelf, even a sturdy step stool you dress up — holds a dozen pumpkins in about one square foot of floor. I’ve personally seen this trick turn a dead corner of a studio into the most-photographed spot in the apartment. It’s also the idea that scales best: add one pumpkin per tier per week in October and watch it grow.
Why it works for renters: it needs one square foot of floor and nothing touches the walls. When the season ends, the stand goes right back to being a plant stand.
- Set up a tiered stand in the apartment’s most visible dead corner — next to a window is perfect for natural light.
- Start with your largest pumpkins on the bottom tier and work up to the smallest on top (stability and visual logic).
- Mix colors for a stylist look: classic orange, white, and one or two dark green or black pumpkins.
- Tuck dried greenery, eucalyptus sprigs, or pampas stems between the pumpkins to fill gaps.
- If you use real pumpkins, set a paper towel under each one — it wicks away any moisture and protects the shelf.
A mix of real and faux pumpkins is the smart play: real ones for the top tier where they’ll be seen up close and touched, faux ones on the bottom where the dog, cat, or toddler traffic lives. Come December, swap the pumpkins for ornaments and the same stand becomes your Christmas display.
Approximate cost: $15–$30 for a dozen mixed mini pumpkins and gourds; the stand is something most renters already own.
7. A Mantel Where There Is None
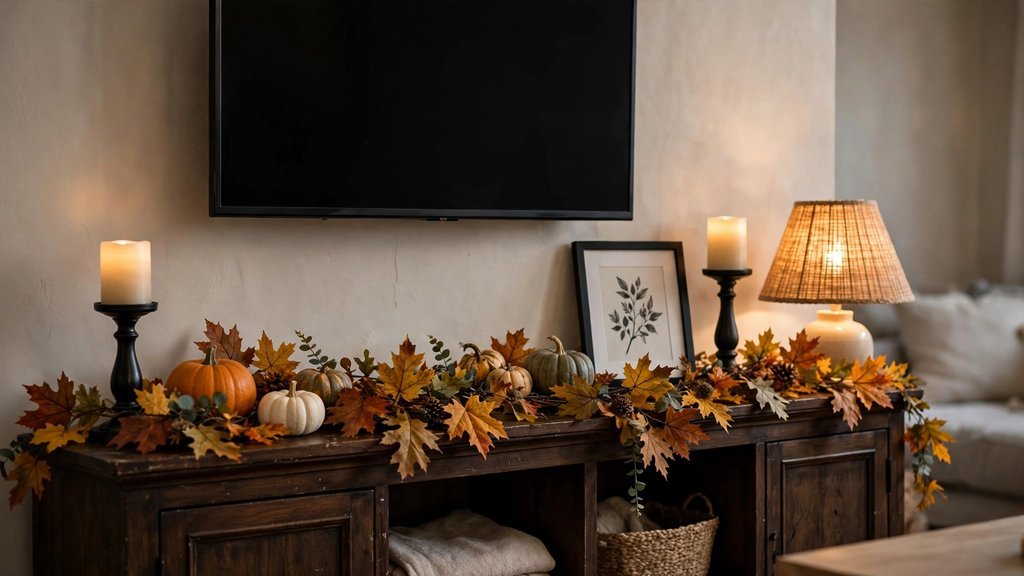
Most rentals don’t have fireplaces, which means most renters give up on the classic Halloween mantel display. Don’t. The top of any low console, TV stand, or credenza can be styled exactly like a mantel — garland draped along the front edge, pumpkins and candlesticks arranged behind it, something framed leaning against the wall in the middle. I’ve styled this in more rental living rooms than I can count, and guests always ask about “the mantel.”
Why it works for renters: everything sits on furniture you already own. The garland drapes — nothing is taped, nailed, or stuck to anything. Lift it all off on November 1st and your console looks exactly as before.
- Choose a low, wide surface — a TV console or credenza is ideal; clear it completely first.
- Drape an autumn leaf garland along the front edge so the leaves hang over the front slightly.
- Arrange three to five pumpkins of mixed sizes behind the garland, tallest in the middle.
- Add two black candlesticks with flameless candles at the ends for height and symmetry.
- Lean one framed print or a small round mirror against the wall in the center as the “mantel mirror.”
Keep the arrangement slightly asymmetrical — group the pumpkins a touch left of center and let one end of the garland trail longer. Perfect symmetry reads formal; a little looseness reads like a home. And if the console holds your router or game box, leave a small clear zone in the middle so the “mantel” never fights your electronics.
Approximate cost: $20–$30 for a garland and a few candlesticks; free if you’re borrowing from your existing decor.
8. The Five-Minute Bathroom Swap
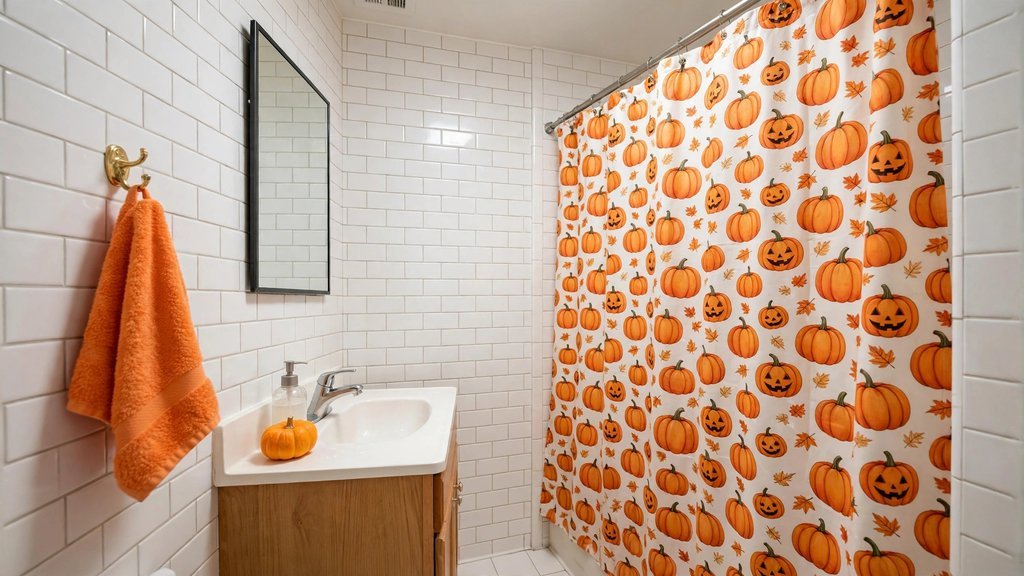
Nobody decorates the rental bathroom for Halloween, which is exactly why you should. Guests always end up in the bathroom at a Halloween get-together, and the seasonal surprise of a pumpkin-print shower curtain in an otherwise plain white bathroom gets the biggest laugh of the night. Because bathrooms are small, just two or three swapped items completely transform the room — this is the cheapest whole-room transformation on the list.
Why it works for renters: a shower curtain hangs on your existing rod, a towel hangs on your existing hook, and a mini pumpkin sits on the vanity. Nothing touches a wall, nothing is installed, and your originals go back up in five minutes.
- Swap your everyday shower curtain for a Halloween-print one (pumpkin pattern, black cats, or a subtle spiderweb).
- Hang one orange or black hand towel on the existing hook or towel bar.
- Set a mini pumpkin and a small plain soap dispenser on the vanity or the back of the toilet tank.
- If you have a shelf, add one flameless tea light in an amber glass holder for evening glow.
Keep your regular shower curtain folded in the linen closet so the swap-back is effortless, and toss the Halloween towel in with your normal laundry — no special care needed. If you’re hosting a Halloween gathering, this swap alone buys you five minutes of “wait, come look at the bathroom” conversation.
Approximate cost: $12–$20 for a shower curtain and a towel; most renters already own the pumpkin.
9. The Halloween Coffee-Bar Tray
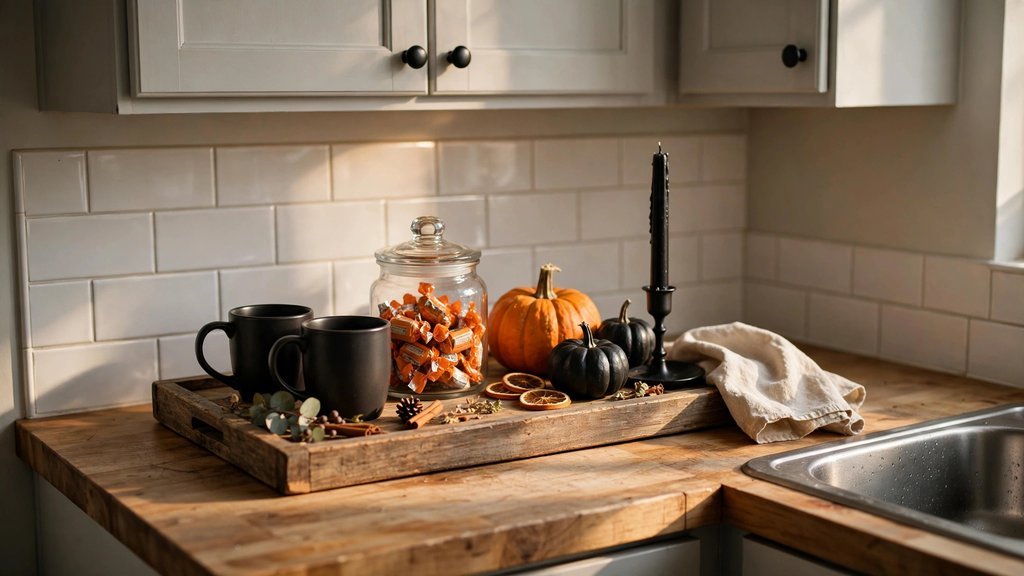
Your kitchen counter is prime Halloween real estate, and the coffee-bar tray is the reason. A single wooden tray holding two dark mugs, a candy jar, mini pumpkins, and one black candle turns your morning coffee routine into a little seasonal ritual — and because it’s a tray, it lifts off the counter when you need the space to cook. I’ve noticed this is the idea renters say they enjoy most, because they see it and use it every single day of October.
Why it works for renters: it protects the counter from rings, crumbs, and candle wax, it needs zero installation, and the whole vignette is portable. It also doubles as the treat station if you host — the candy jar does the entertaining for you.
- Choose a tray that fits your counter — 16 to 20 inches long is plenty.
- Set two dark or black mugs on it as your everyday October cups.
- Add a lidded glass jar filled with individually wrapped orange candies (the lid keeps them fresh and the jar looks great).
- Nestle two or three mini pumpkins and a small black candle around the jar.
- Slide the whole tray against the backsplash so it reads as a permanent little station.
Keep the tray at least a foot from the stove and sink splash zone — it’s decor, not prep space — and refill the candy jar once so it never sits empty and sad. When October ends, swap the pumpkins for pinecones and you’ve got a winter coffee station without buying a thing.
Approximate cost: $15–$25 for a candy jar and tray; mugs and pumpkins are usually already on hand.
10. Shadow Silhouettes With a Lantern
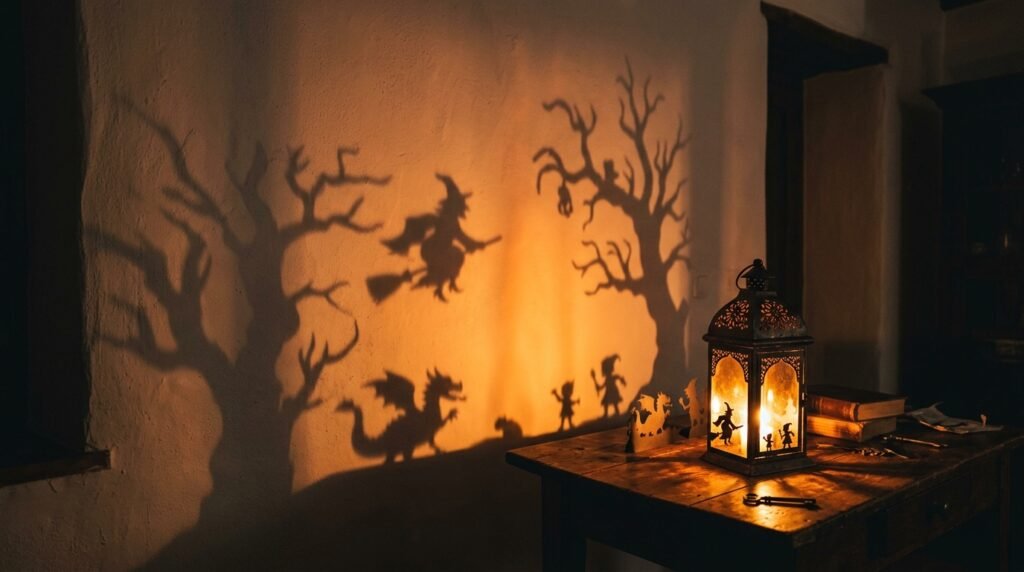
This is the most dramatic idea on the list for the least money, and it’s pure renter genius: you don’t decorate the wall, you decorate the light. Cut simple witch, cat, or bat silhouettes from black cardstock, tape them to the inside of a lantern or a bare table lamp shade, and their giant shadows project across your living room wall at night. I’ve helped renters do this for Halloween parties and watched a plain white rental wall turn into a haunted house scene with about three dollars of cardstock.
Why it works for renters: the cardstock goes on the light fixture, never the wall. When you take it down, the wall was never involved at all. And it’s the only idea here that’s genuinely theatrical — perfect for one Halloween night.
- Cut witch, cat, and bat silhouettes from black cardstock (free templates are everywhere online; simple shapes work best).
- Tape them around the inside of a lantern or onto a clear table-lamp shade with painter’s tape — outside the bulb’s direct heat.
- Place the lamp or lantern two to three feet from a blank wall, turned off at first.
- At dusk, light it up (flameless LED light sources only — real flames and paper don’t mix) and watch the shadows stretch.
- For a party, add two or three small bat cutouts on the wall corners with painter’s tape as a finishing frame.
Don’t limit yourself to one wall — a lantern on the floor near a hallway throws long shadows down the corridor, which is gloriously spooky for the cost of moving a lamp. This is also the best idea here for a last-minute Halloween night: the whole setup takes about twenty minutes, and the reveal happens the moment the sun goes down.
Approximate cost: $5–$12 for cardstock and painter’s tape; the lantern or lamp is already yours.
11. The Command-Strip Gallery Wall
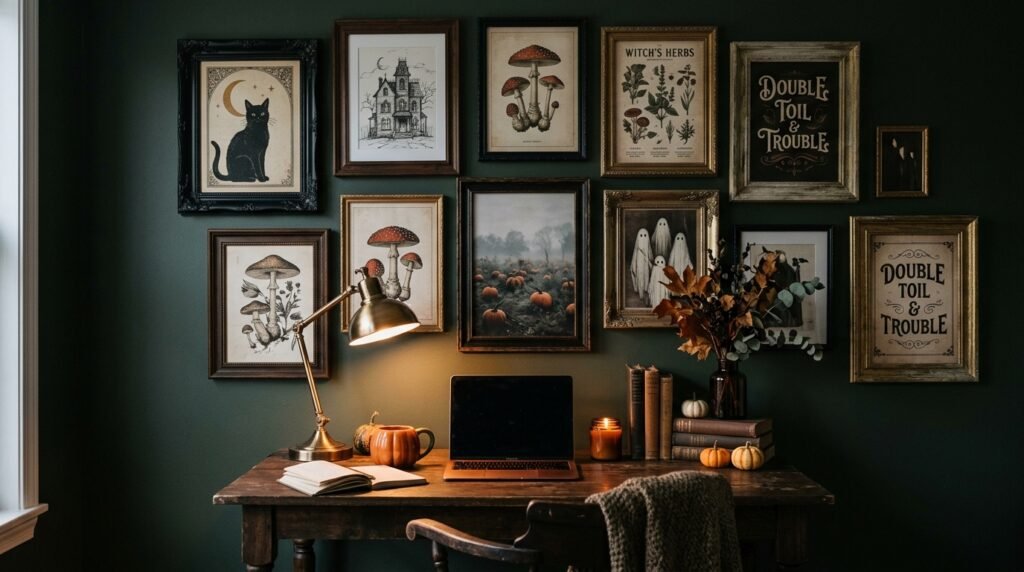
A gallery wall of Halloween art prints is the fastest way to make a small apartment feel curated and seasonal, and adhesive hanging strips make it completely renter-safe. Six matching black frames with Halloween-themed prints — pumpkins, black cats, moons — hung in a tight grid above a desk or sofa look like something from a design magazine. I’ve personally seen this wall become the backdrop for every Halloween photo a renter takes that October.
Why it works for renters: adhesive hanging strips are the classic renter hanging solution — they hold real frames and remove cleanly per the package directions when you’re done. Keep the frames and swap the prints seasonally, and the same wall carries you through fall, winter, and beyond.
- Print six Halloween art prints at home or at a print shop in matching sizes (5×7 or 8×10 inches).
- Put them in matching black frames — identical frames are what make a grid look expensive.
- Plan the layout on the floor first: two rows of three, spaced two inches apart.
- Hang with adhesive strips rated for the frame weight, following the package’s cure-time instructions (usually one hour before hanging).
- Add one small seasonal object below — a basket of mini pumpkins or a candle — to ground the wall.
The frames are the real investment here — buy them once and they serve you for years. Print Halloween art in October, winter scenes in December, and the same grid above your desk becomes a permanent rotating gallery, and each season’s prints cost almost nothing to reprint.
Approximate cost: $20–$30 for prints, frames, and a pack of adhesive strips.
12. Flameless Candles and Autumn Scent

The final layer is atmosphere, and in a small apartment it’s the most powerful one — because scent fills a small space fast. A tray of flameless pillar candles in amber tones plus a reed diffuser in a warm spice scent makes the apartment feel like Halloween the moment someone walks in, without a single visible decoration doing the work. This is the idea I add when a renter says “I don’t want my apartment to look like a Halloween store threw up in it.” It whispers instead of shouting.
Why it works for renters: flameless candles mean no flame risk on a small coffee table near a sofa, and most leases actually prefer them. A reed diffuser needs no outlet, no heat, and no installation — and scent is the one decoration that leaves no physical trace at all.
- Gather three flameless pillar candles in staggered heights — amber or ivory reads warmest.
- Arrange them on a small dark tray with mini pumpkins and dried leaves around the base.
- Place a reed diffuser in a warm spice or pumpkin-apple scent beside the tray (not on it — spills stay off the tray).
- Set the candles on their built-in timer (most have a 6-hour timer) so they glow every evening automatically.
- Keep everything at least six inches from sofa edges and curtains — flameless or not, keep the layout breathable.
One note from experience: if you have a cat that climbs, skip the reed diffuser on an open table and choose a plug-in or countertop diffuser with a heavier base instead. The candles are fair game either way — flameless means zero fire risk, zero soot on your rental’s white ceiling, and batteries you change once a season.
Approximate cost: $18–$28 for a set of flameless candles and a reed diffuser.
Conclusion: Your Small Apartment Is a Halloween Advantage
Here’s what I want you to take away from all of this: your small apartment isn’t a limitation on Halloween decorating — it’s the cheat code. One styled tray, one swooping wall of bats, one window glowing for the street, and your whole space feels like the holiday. You don’t need a porch, a mantel, or a single nail. Every idea in this guide comes off clean in November, your deposit stays intact, and most of it packs flat for next year.
Start with the tray or the pillow swap this weekend — the one move that takes ten minutes and changes how your apartment feels the moment you walk in the door. Then layer in light and scent as October deepens, and let the smallness of your space do what it does best: make every little touch count double.
Please save this visual guide on Pinterest and share it with a renter friend who’s convinced their apartment is “too small for Halloween” — they’ll thank you when their place looks like a fall magazine by the weekend.

Amelia leads HavenlyStyle’s editorial vision with a passion for elegant interiors and practical home living. With years of experience in home décor and lifestyle content, she ensures every article is accurate, inspiring, and easy to follow. From timeless decorating ideas to the latest interior design trends, Amelia is committed to helping readers create beautiful, functional spaces while maintaining HavenlyStyle’s trusted and welcoming voice.