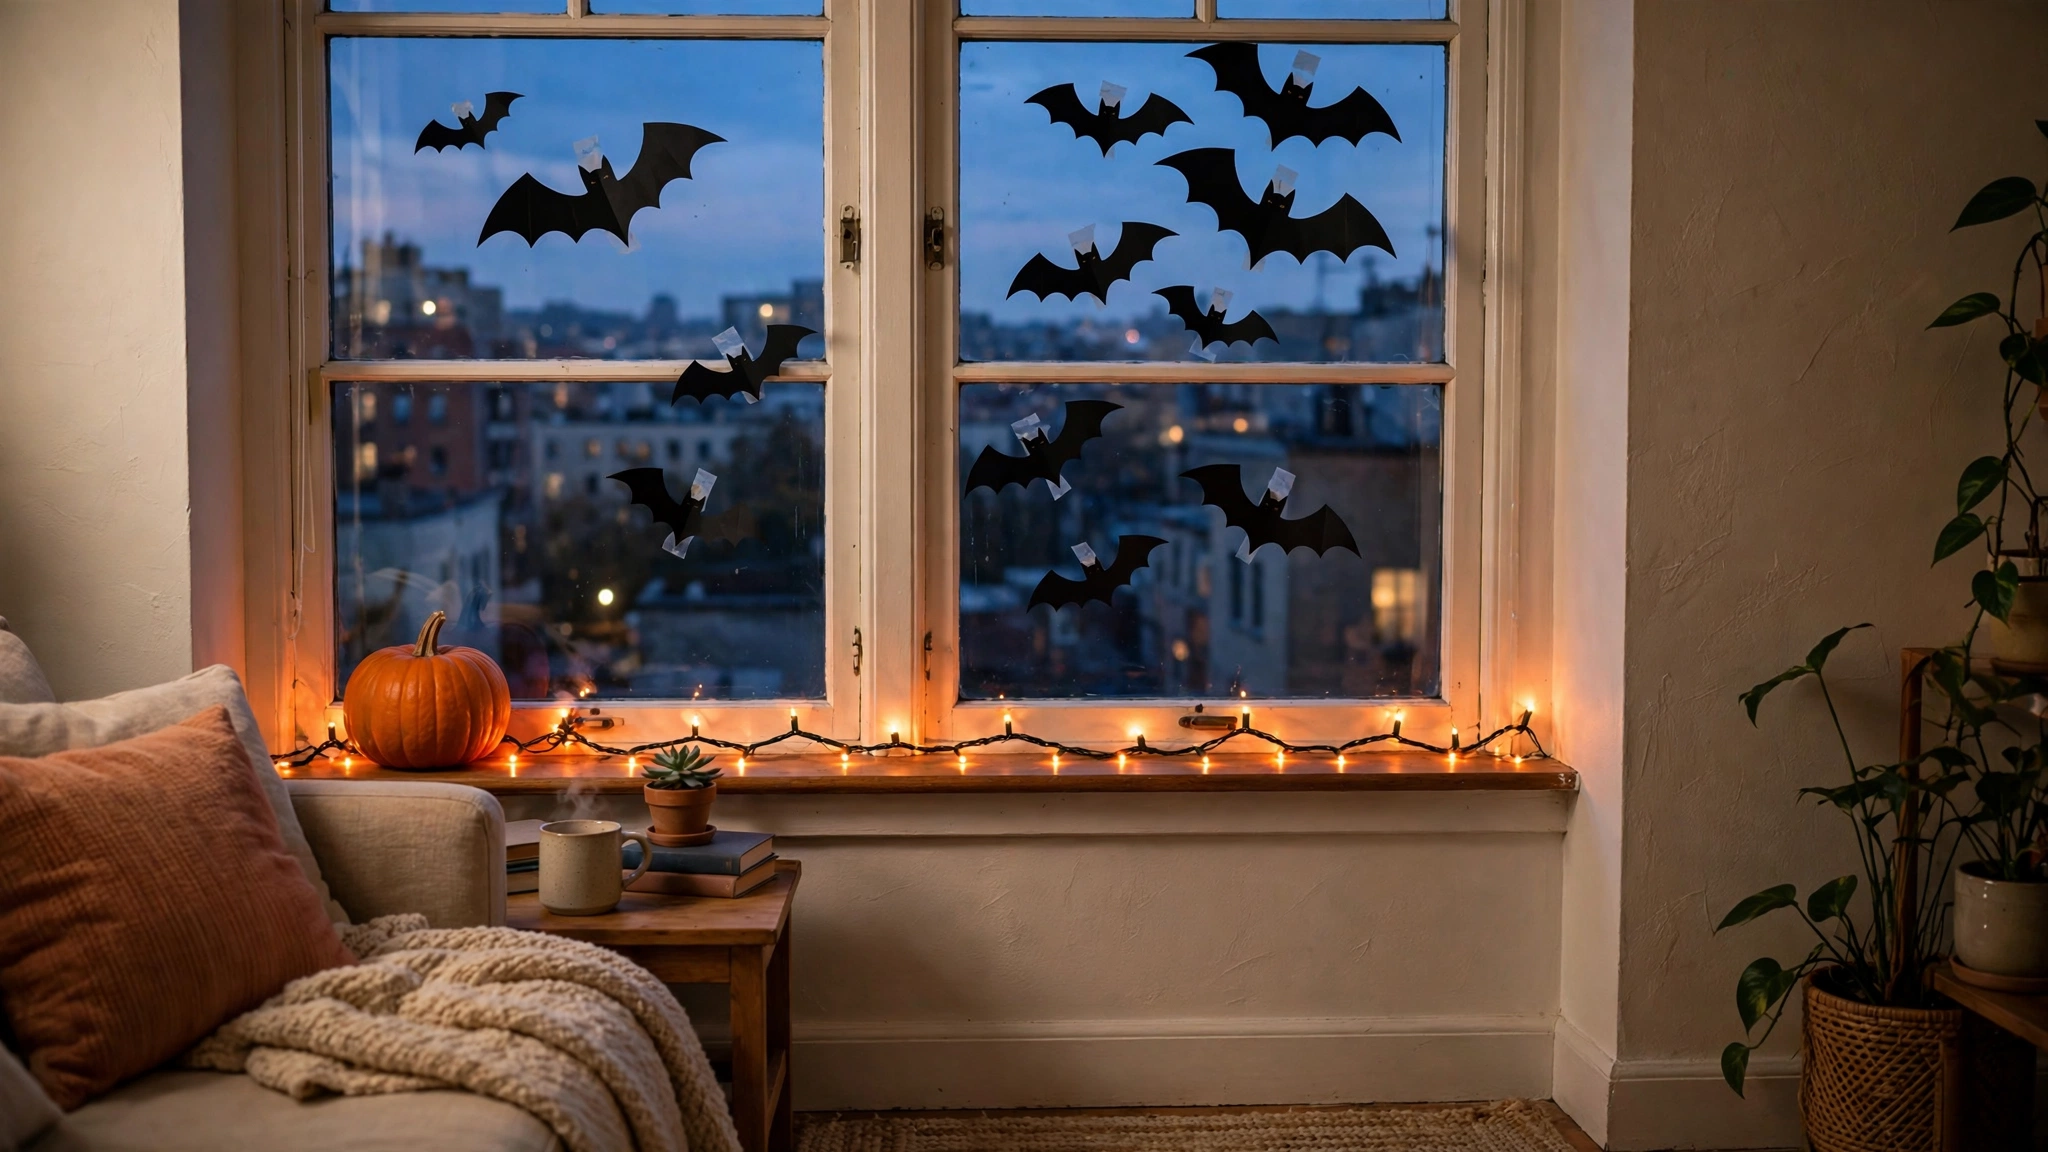
If you’ve ever walked past an apartment building in October and thought, “how is everyone else pulling off gorgeous Halloween windows while mine just look… plain?” — I’ve been there with dozens of renters I’ve helped over the years. Here’s the thing most people get wrong: they assume decorating windows for Halloween requires painting trim, drilling curtain rods, or hanging heavy wreaths on nails. It doesn’t. In fact, your windows are the single easiest part of a rental to dress up for the season, because glass is naturally reversible — everything you stick on it can come right back off.
I’ve personally seen renters transform a single living-room window into the kind of display that stops people on the sidewalk, all for less than twenty dollars and zero deposit risk. The trick is working with rental constraints instead of fighting them: no-drill hardware, removable adhesives, static clings, and tension rods. Landlords don’t care about your windows as long as you hand them back exactly as they were — and every idea below does exactly that.
The other reason I love window decor is the double payoff. Unlike a console-table display that only you see, a decorated window works from both sides: it looks festive from inside your apartment and glows for the whole street after dark. For renters in apartment complexes especially, your window is your storefront. These 12 ideas are ordered by visual impact, each one genuinely different from the next, and every single one leaves your security deposit untouched.
Executive Summary
- Your rental windows are the highest-impact Halloween canvas you own: visible from inside and outside, and everything on glass is fully reversible.
- The best renter-friendly methods are static-cling decals, removable adhesive dots, tension rods, and suction cups — no drilling, no painting, no nail holes.
- The biggest street-side impact comes from backlit silhouettes (bats, haunted villages, glowing pumpkin faces), which turn a plain window into a glowing Halloween scene after dark.
- A tension rod hung inside the window frame can hold cheesecloth ghost curtains, fairy lights, or a garland — all without touching a single screw.
- Washable window paint markers exist specifically for glass and wipe off with glass cleaner, giving you a “painted” look with zero permanence.
- Keep every decoration removable before your lease ends, and never apply adhesive directly to painted trim — glass only.
1. The Bat Swarm Silhouette
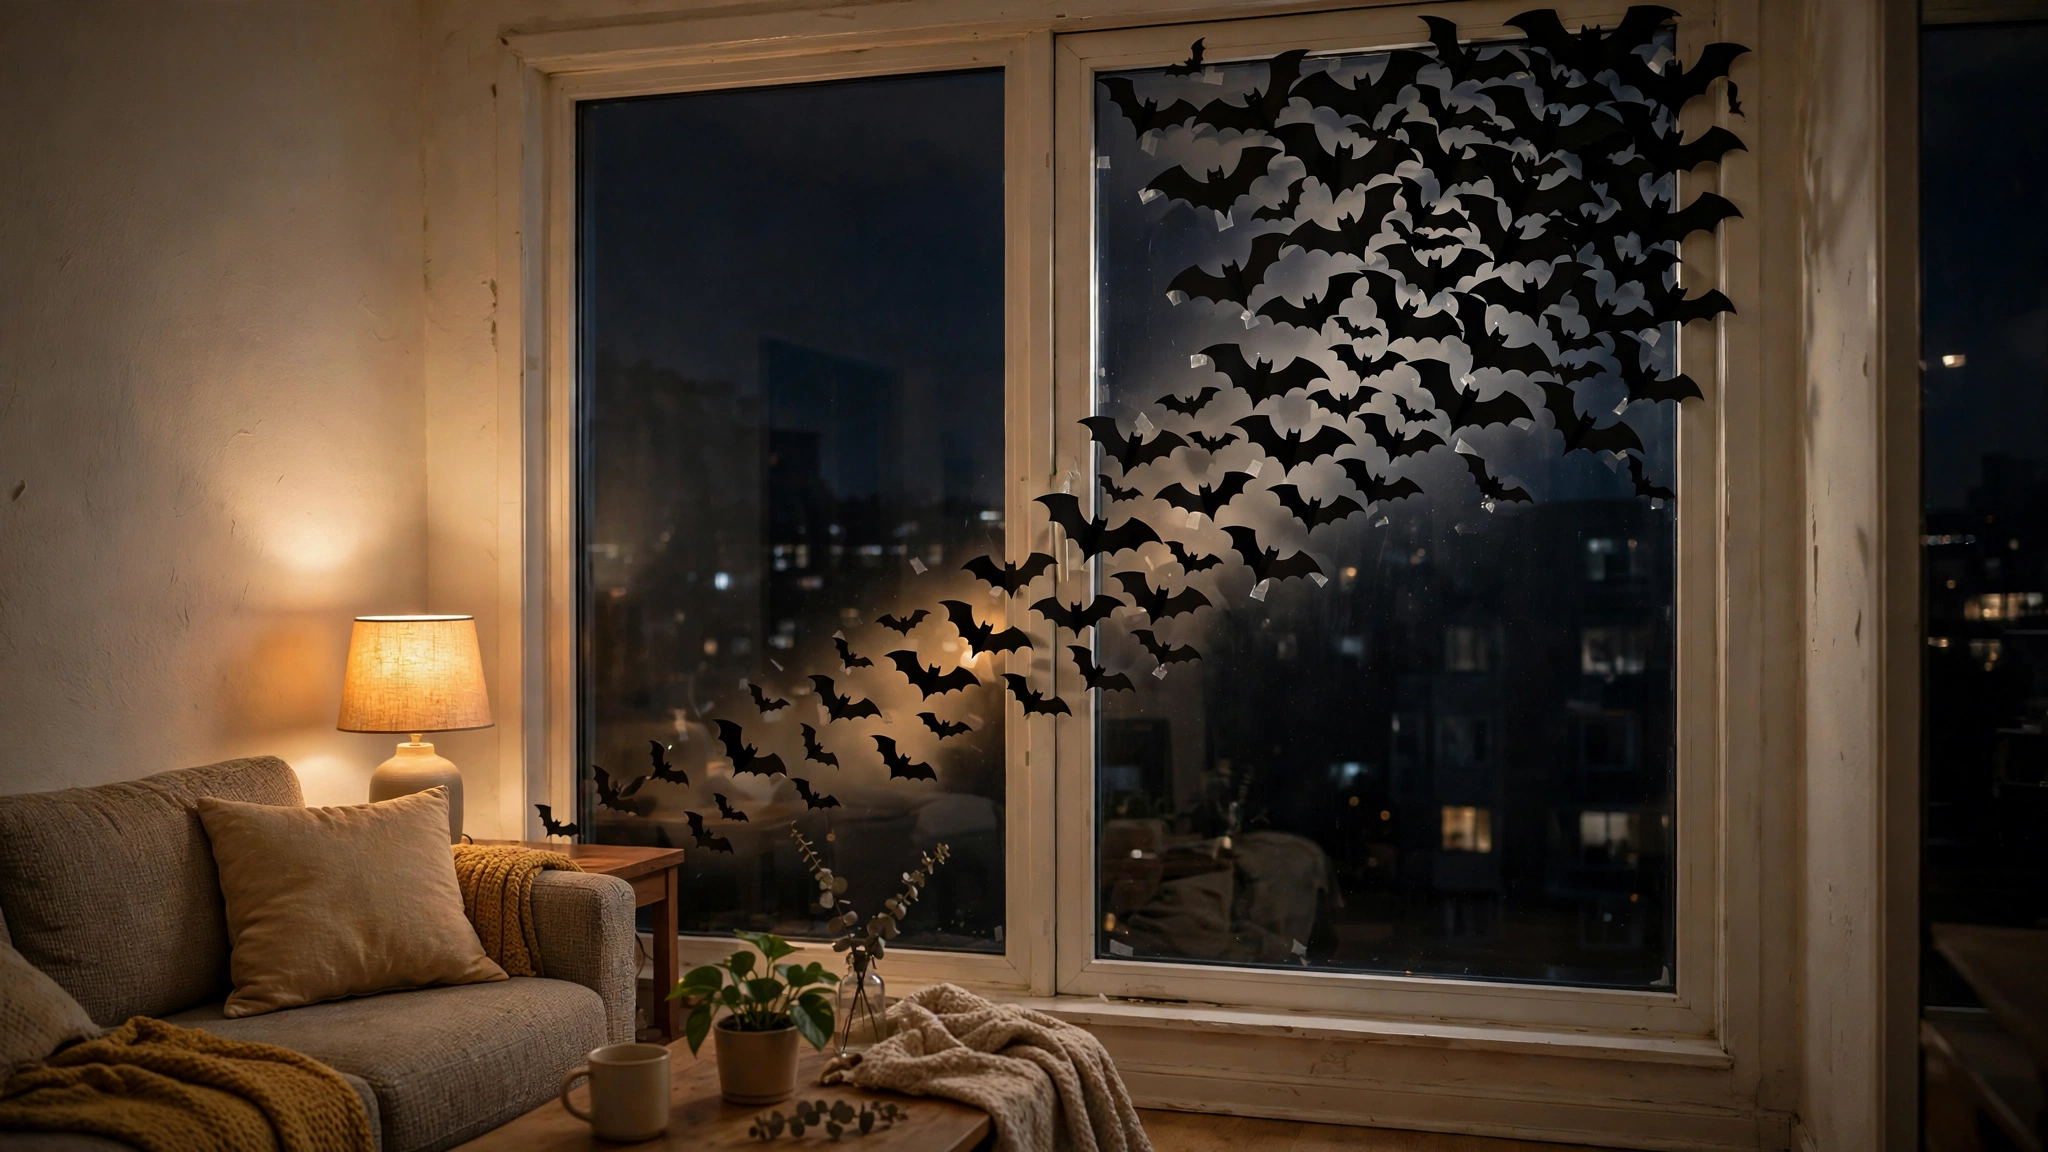
This is the idea I recommend first to every renter, because nothing reads “Halloween” from the street like a swarm of black bats against glowing glass. Cut from plain black construction paper or cardstock, these bats look expensive and intentional, and they cost almost nothing.
Why it works for renters: the bats attach to the glass with removable adhesive dots or even water-activated static film — never to the frame or trim, so there’s nothing for a landlord to object to. They peel off cleanly in November, and you can reuse them next year.
How to do it:
- Cut 15-25 bat shapes from black construction paper or black cardstock — vary the sizes from about 4 to 10 inches wide so the swarm looks natural. Free templates are easy to find and print at a library if you don’t own a printer.
- Plan the arrangement on the floor first: bats cluster tightly near one upper corner and scatter outward, like they’re bursting from a corner of the window. Photograph your layout so you can recreate it.
- Clean the window glass with glass cleaner and let it dry completely — adhesive sticks far better to clean glass.
- Press each bat onto the inside of the glass with a removable adhesive dot (these are rated for temporary mounting and won’t damage glass). Start with the largest bats in the dense cluster, then add smaller ones trailing outward.
- For extra drama after dark, leave a warm lamp on inside the room — the backlit glass turns your bat swarm into a glowing silhouette display the whole block can see.
Approximate cost: $3–$8 (paper, scissors, removable adhesive dots).
2. The Backlit Haunted Village Scene
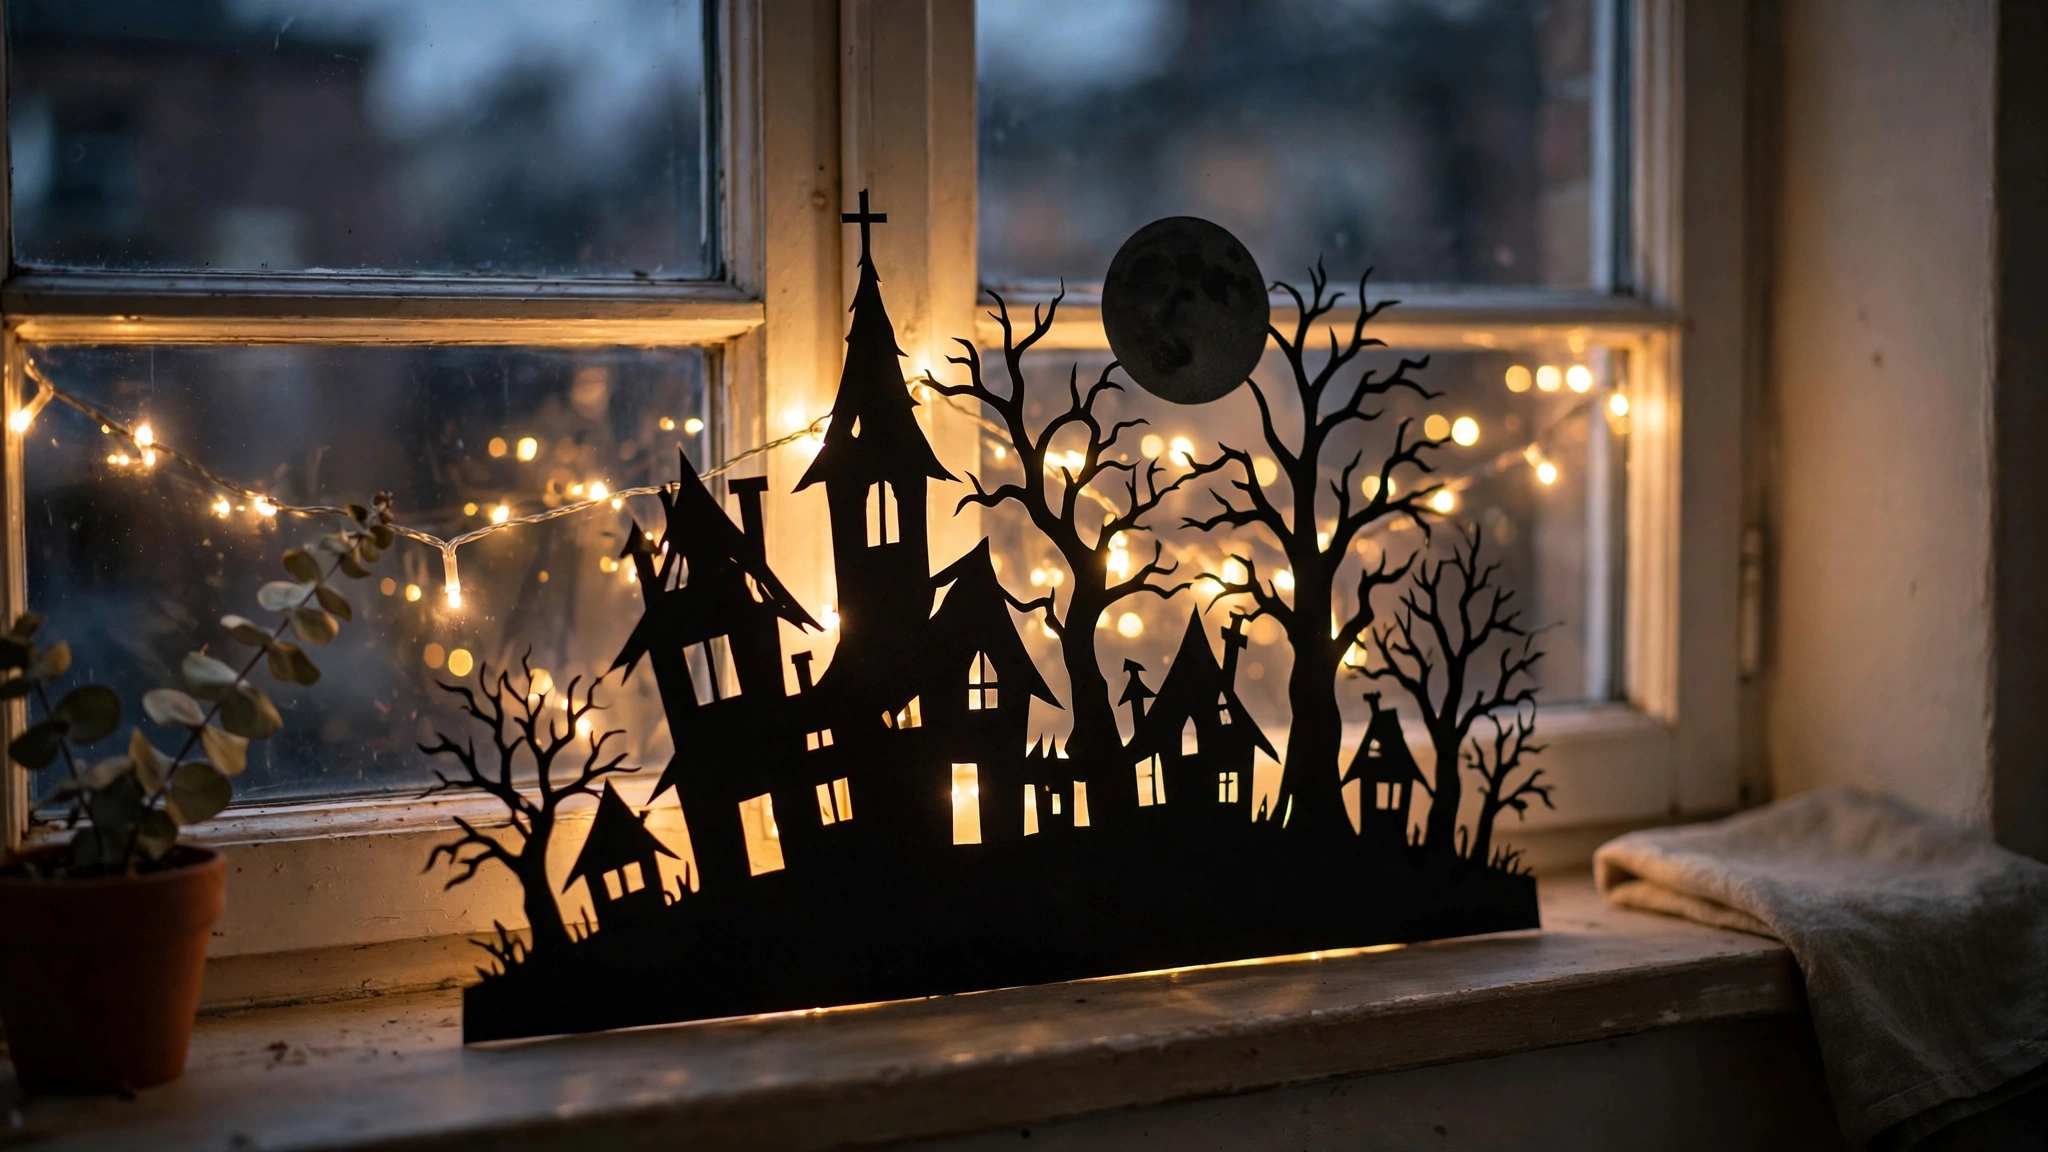
If the bat swarm is the quick win, this is the showstopper. A haunted village silhouette — crooked houses, a church steeple, a bare tree, a full moon — stretches across your windowsill, and a string of lights behind it turns the whole window into a glowing storybook scene.
Why it works for renters: the entire scene sits on the windowsill (no attachment at all) or leans against the glass. Nothing touches the walls, nothing hangs from the ceiling. When the season ends, the whole village folds flat and slides under a bed.
How to do it:
- Buy a roll of black craft paper (or a few sheets of black poster board) and sketch or trace a village skyline: a few crooked houses, a pointed church steeple, leafless trees, and a big circle for the moon. Keep the bottom edge straight — that’s the sill line.
- Cut out the scene in one continuous strip, roughly 6-10 inches tall and as long as your window is wide. Make two overlapping strips for wider windows.
- Place the cutout on the windowsill, standing upright, leaning slightly against the glass. A few removable adhesive dots on the back of the base will keep it from sliding.
- Drape a warm-white LED fairy light string behind the cutout (between the paper and the room), letting the wire coil loosely along the sill so no single bulb shows through as a hot spot.
- From outside at dusk, adjust spacing until the village reads as one continuous glowing silhouette. The moon cutout can get its own small battery puck light for extra punch.
Approximate cost: $10–$20 (black paper, LED fairy lights, battery puck light).
3. Cheesecloth Ghost Curtains
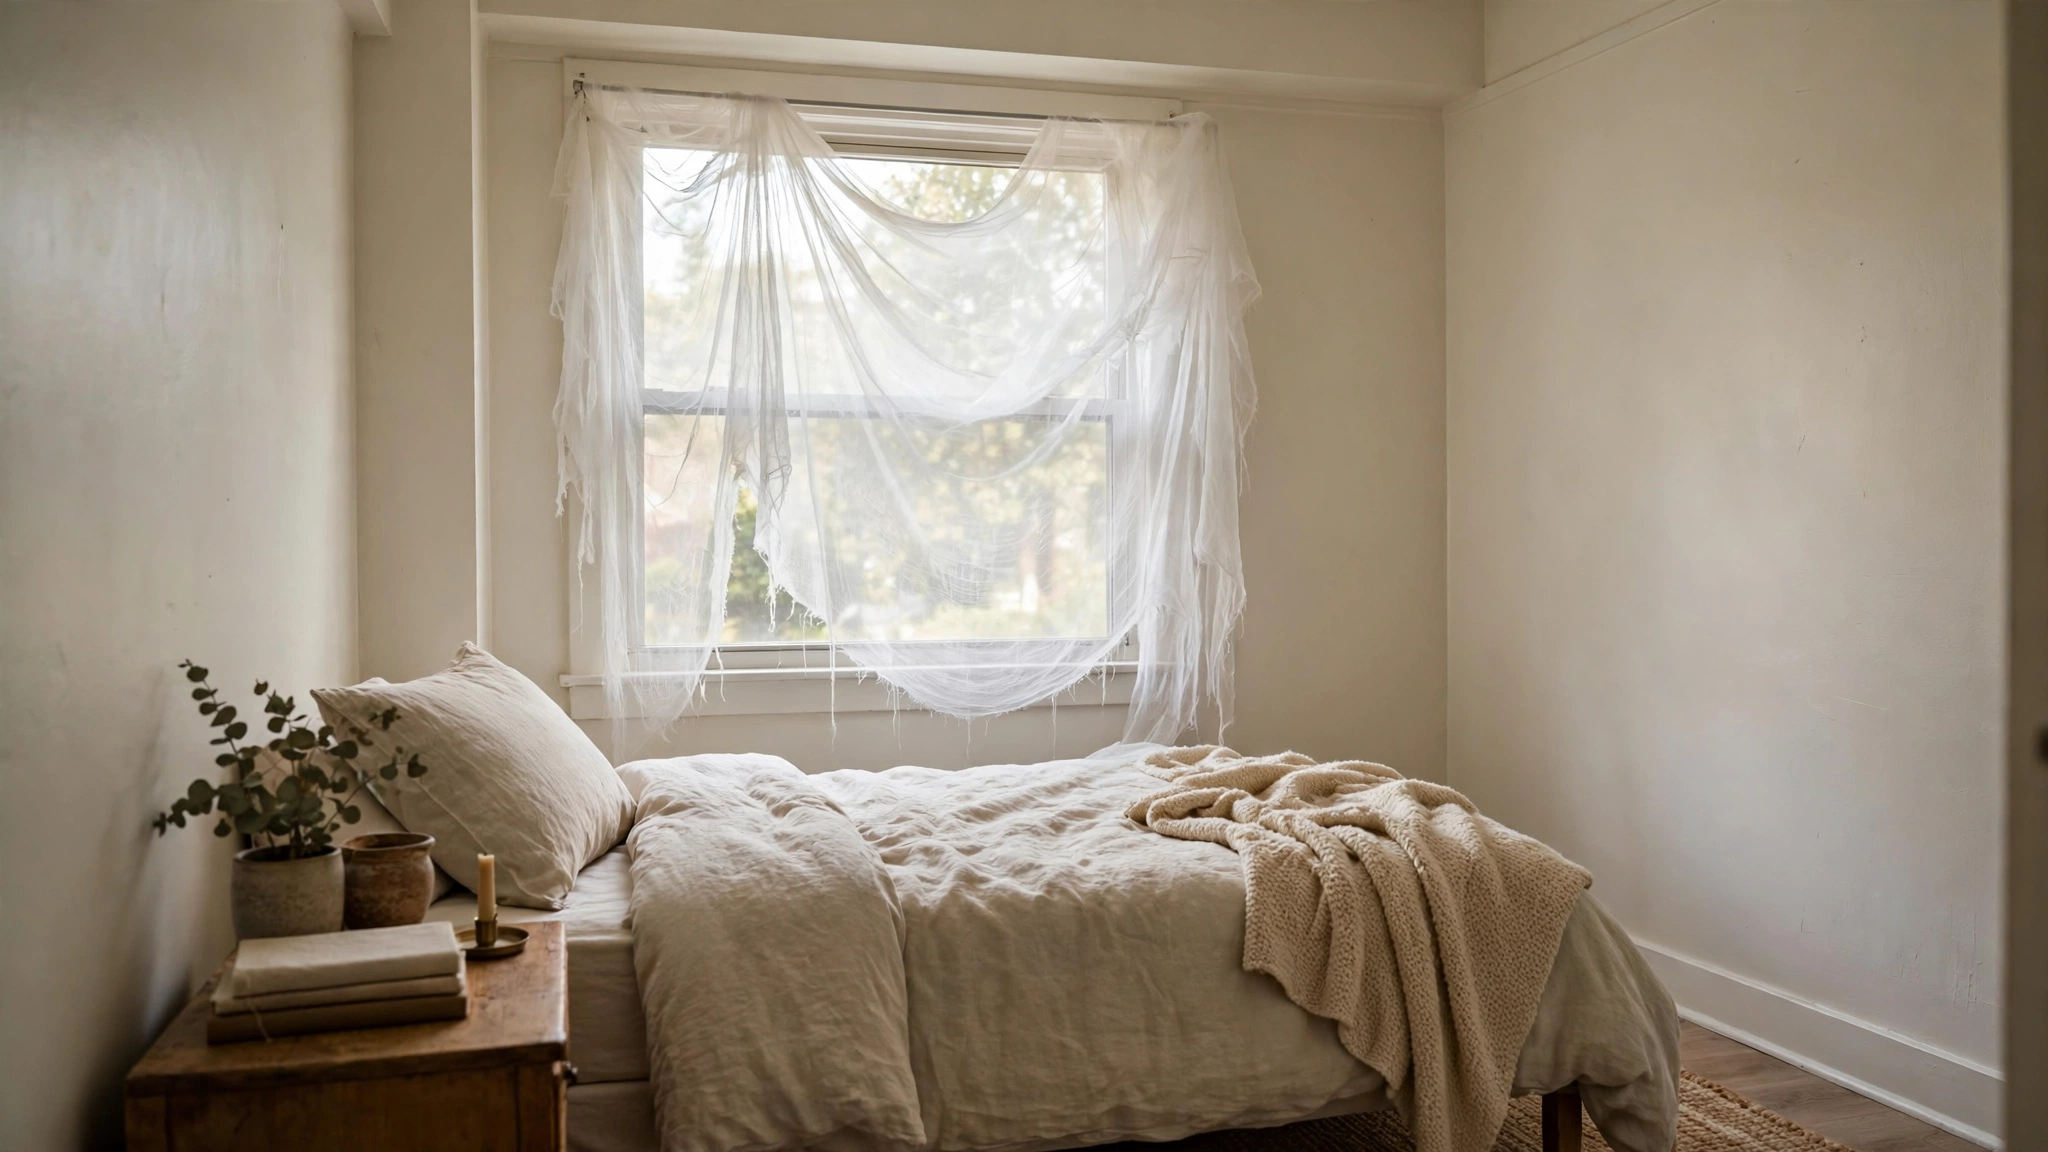
Cheesecloth is a Halloween decorator’s secret weapon, and it was made for renter windows. Hung inside the frame on a tension rod, layers of white cheesecloth look like drifting mist — and they filter daylight in a way that makes the whole room feel haunted.
Why it works for renters: a tension rod fits inside the window frame with zero drilling and zero hardware. The cheesecloth just drapes over it. When you take the rod down, there is literally no trace it was ever there.
How to do it:
- Measure the inside width of your window frame and buy an adjustable tension rod that fits snugly (twist-and-hold style — no tools needed).
- Buy 2-4 yards of white cheesecloth from a craft store or the Halloween aisle; one wide panel per window is usually enough.
- Drape the cheesecloth over the rod so it hangs in loose folds, letting the bottom pool slightly on the sill or hang uneven. Pull a few threads and let edges fray for that weathered, ghostly texture.
- Twist the rod into the window frame at the top of the glass, about an inch inside the frame so it grips solidly. Hang the draped cheesecloth from it like curtains.
- Optional: tuck a few tiny black plastic spiders or a string of orange fairy lights into the folds of the cloth for detail that rewards a closer look.
Approximate cost: $8–$15 (tension rod, cheesecloth; spiders optional).
4. Orange Fairy Light Curtain
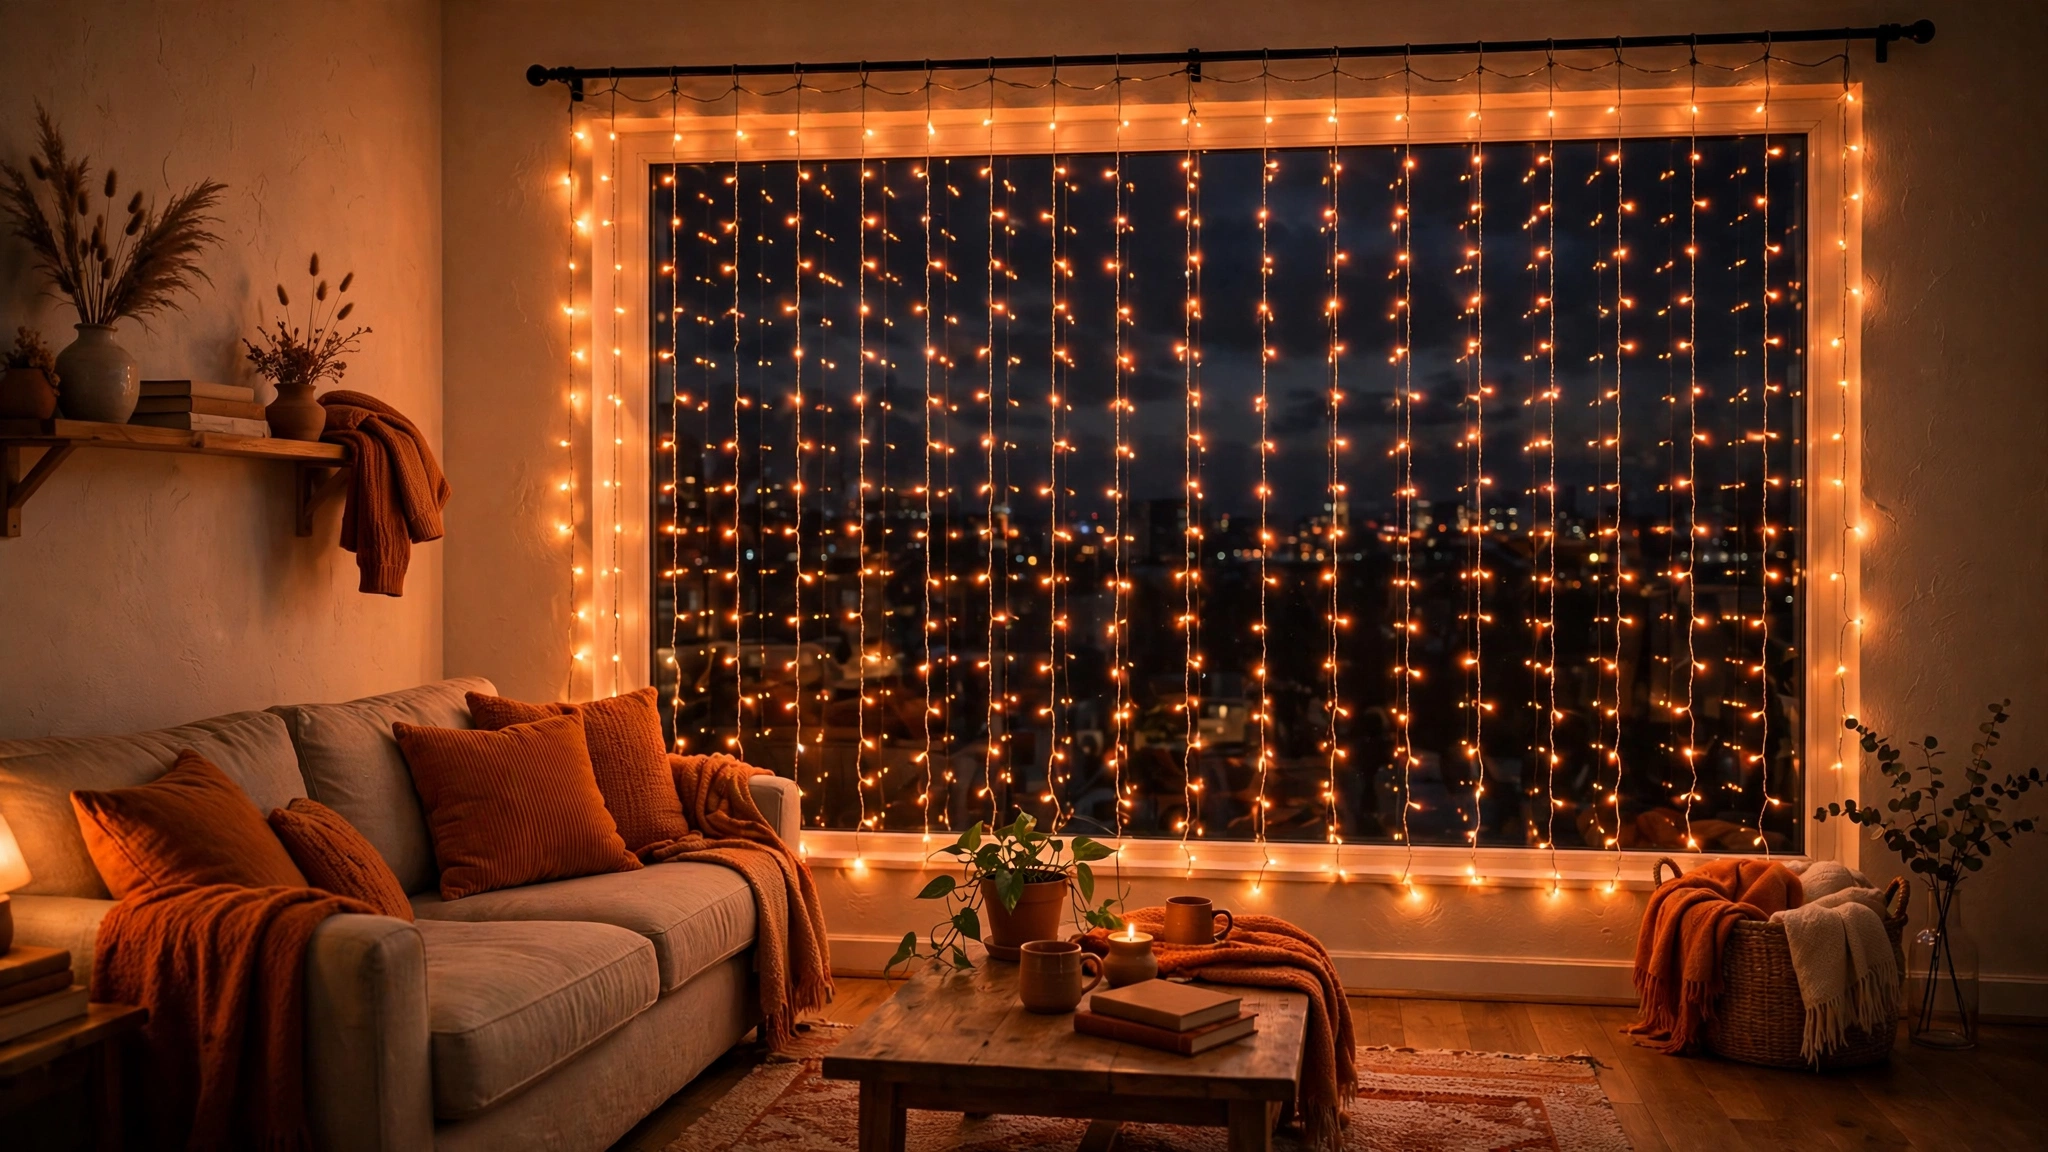
Sometimes the simplest idea is the strongest: a curtain of warm orange fairy lights across the whole window turns your apartment into a glowing pumpkin from the street. I’ve watched renters do this in under fifteen minutes and get compliments all October.
Why it works for renters: the lights hang from a tension rod (see idea #3) or from removable adhesive light clips stuck to the glass. Both come off without a trace, and LED fairy lights run cool and use almost no electricity, so a landlord or building manager has no reason to object.
How to do it:
- Mount a tension rod inside the top of the window frame, or stick a row of small removable adhesive clips along the top edge of the glass.
- Drape 2-3 strands of orange LED fairy lights (the copper-wire kind look best) over the rod so they hang in vertical curtains, varying the drop lengths for texture.
- Tuck the battery pack or plug end behind the sill where it’s hidden — battery-operated strands are easiest for rentals since most windows don’t have nearby outlets.
- If you have two strands, layer one of warm-white lights behind the orange for depth — it reads as firelight through the window.
- Set a simple timer plug or use strands with a built-in timer (6 hours on / 18 off) so they glow every evening automatically without you remembering.
Approximate cost: $10–$18 (2-3 LED fairy light strands, tension rod or clips).
5. Static-Cling Halloween Decals
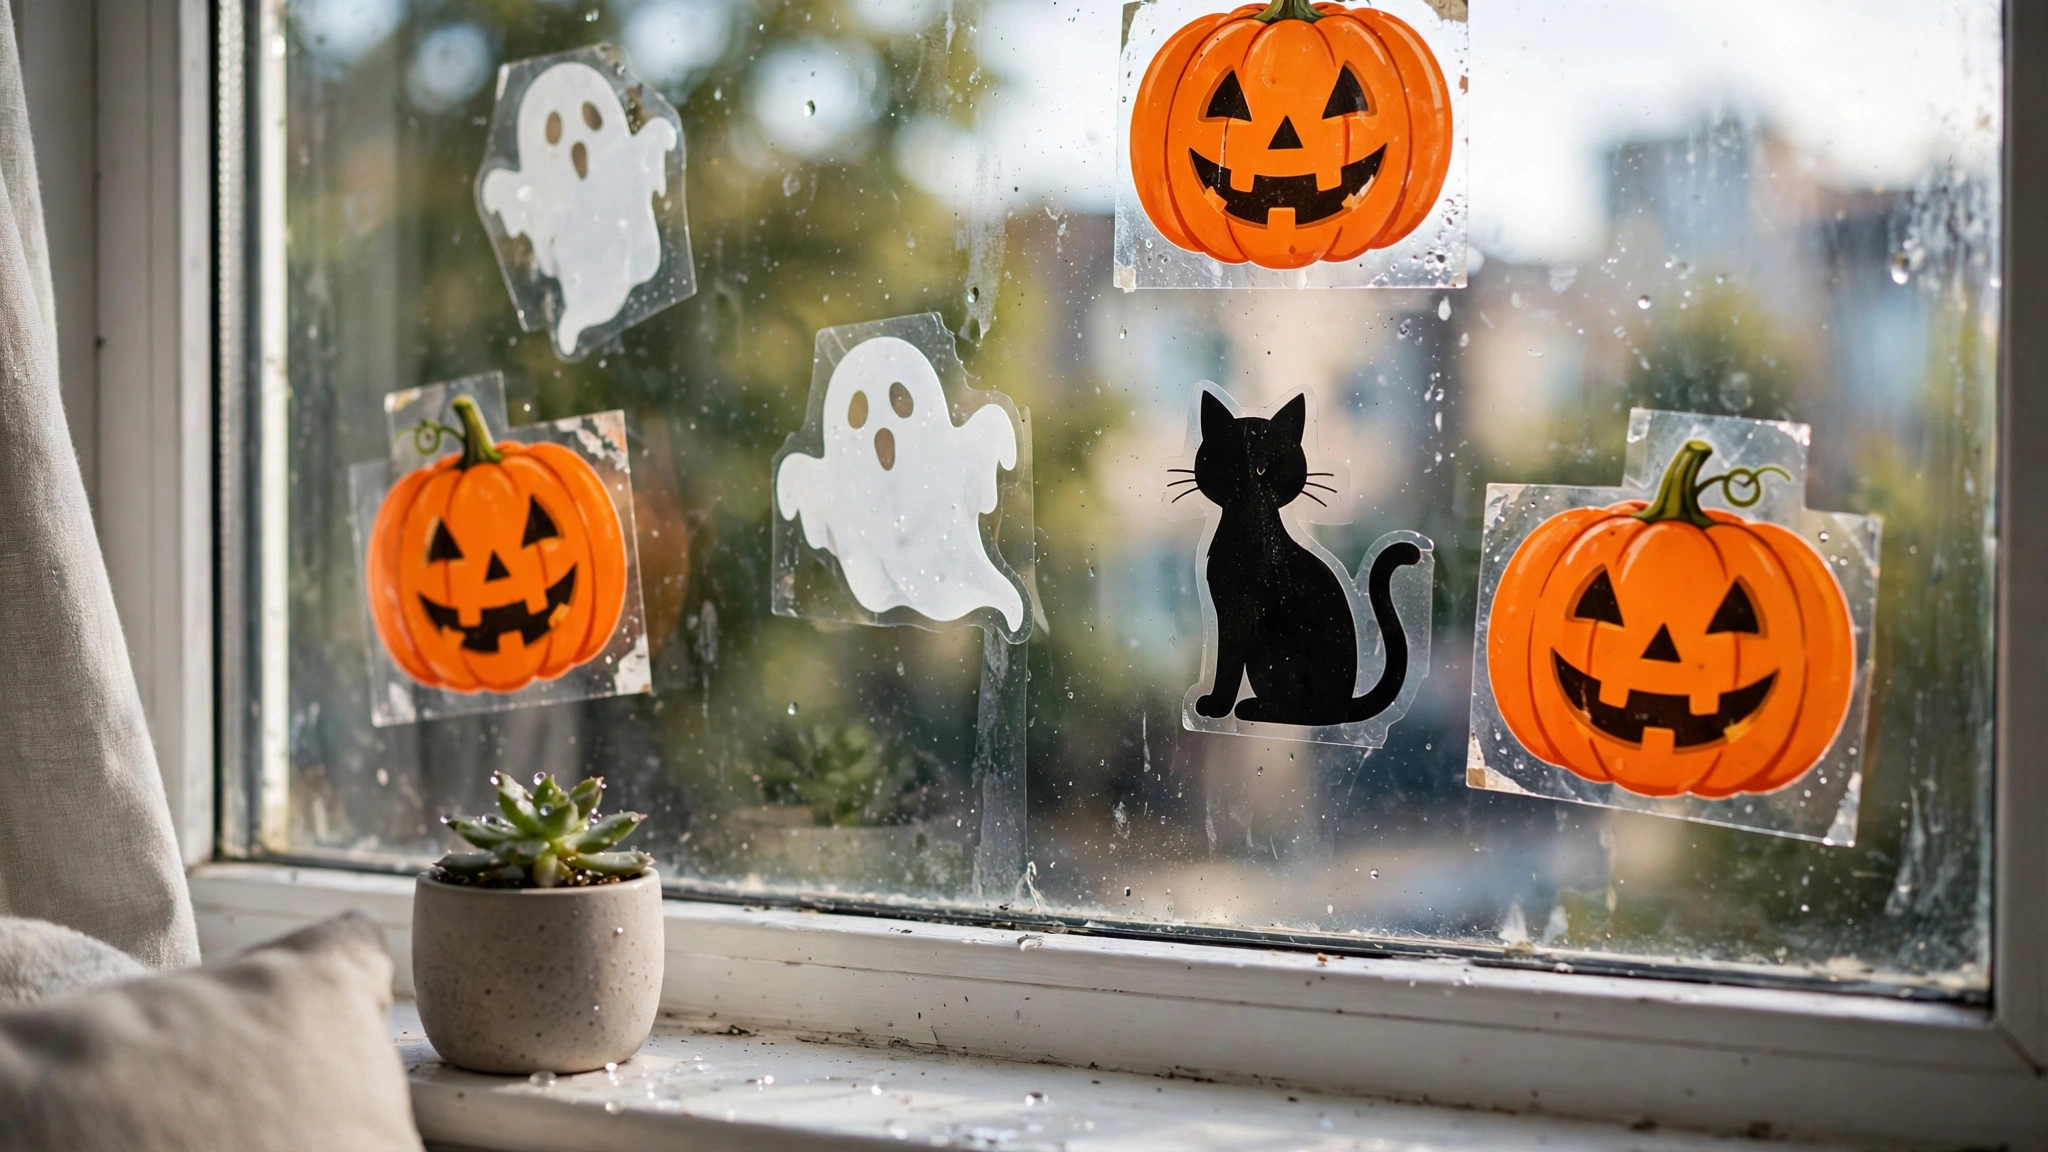
This is the zero-commitment option I give to renters in strict buildings — the kind where the lease bans “decorations on windows” but management means adhesive decorations. Static clings use no adhesive at all; they grip by static electricity and reposition endlessly.
Why it works for renters: nothing in a lease can reasonably object to these. They apply with water, peel off in seconds, leave zero residue, and can be reused for years. They’re also the best option if you have textured or double-pane glass where adhesives don’t stick well.
How to do it:
- Buy sheets of Halloween static-cling decals (pumpkins, ghosts, cats, spiders, “trick or treat” lettering) — they’re sold in variety packs each fall.
- Clean the glass with glass cleaner and a microfiber cloth. Any dust or film will weaken the static hold.
- Lightly mist the glass with water from a spray bottle — damp glass is what activates the cling.
- Smooth each decal onto the inside of the glass, pressing out air bubbles from the center outward with a soft cloth. Build a loose scene: pumpkins low, ghosts floating high, a cat silhouette on the sill line.
- To reposition or remove, just peel a corner and lift — no residue, no scraping. Store them on their original backing sheets between seasons.
Approximate cost: $5–$12 (variety pack of static-cling decals).
6. The Jack-o’-Lantern Window Glow
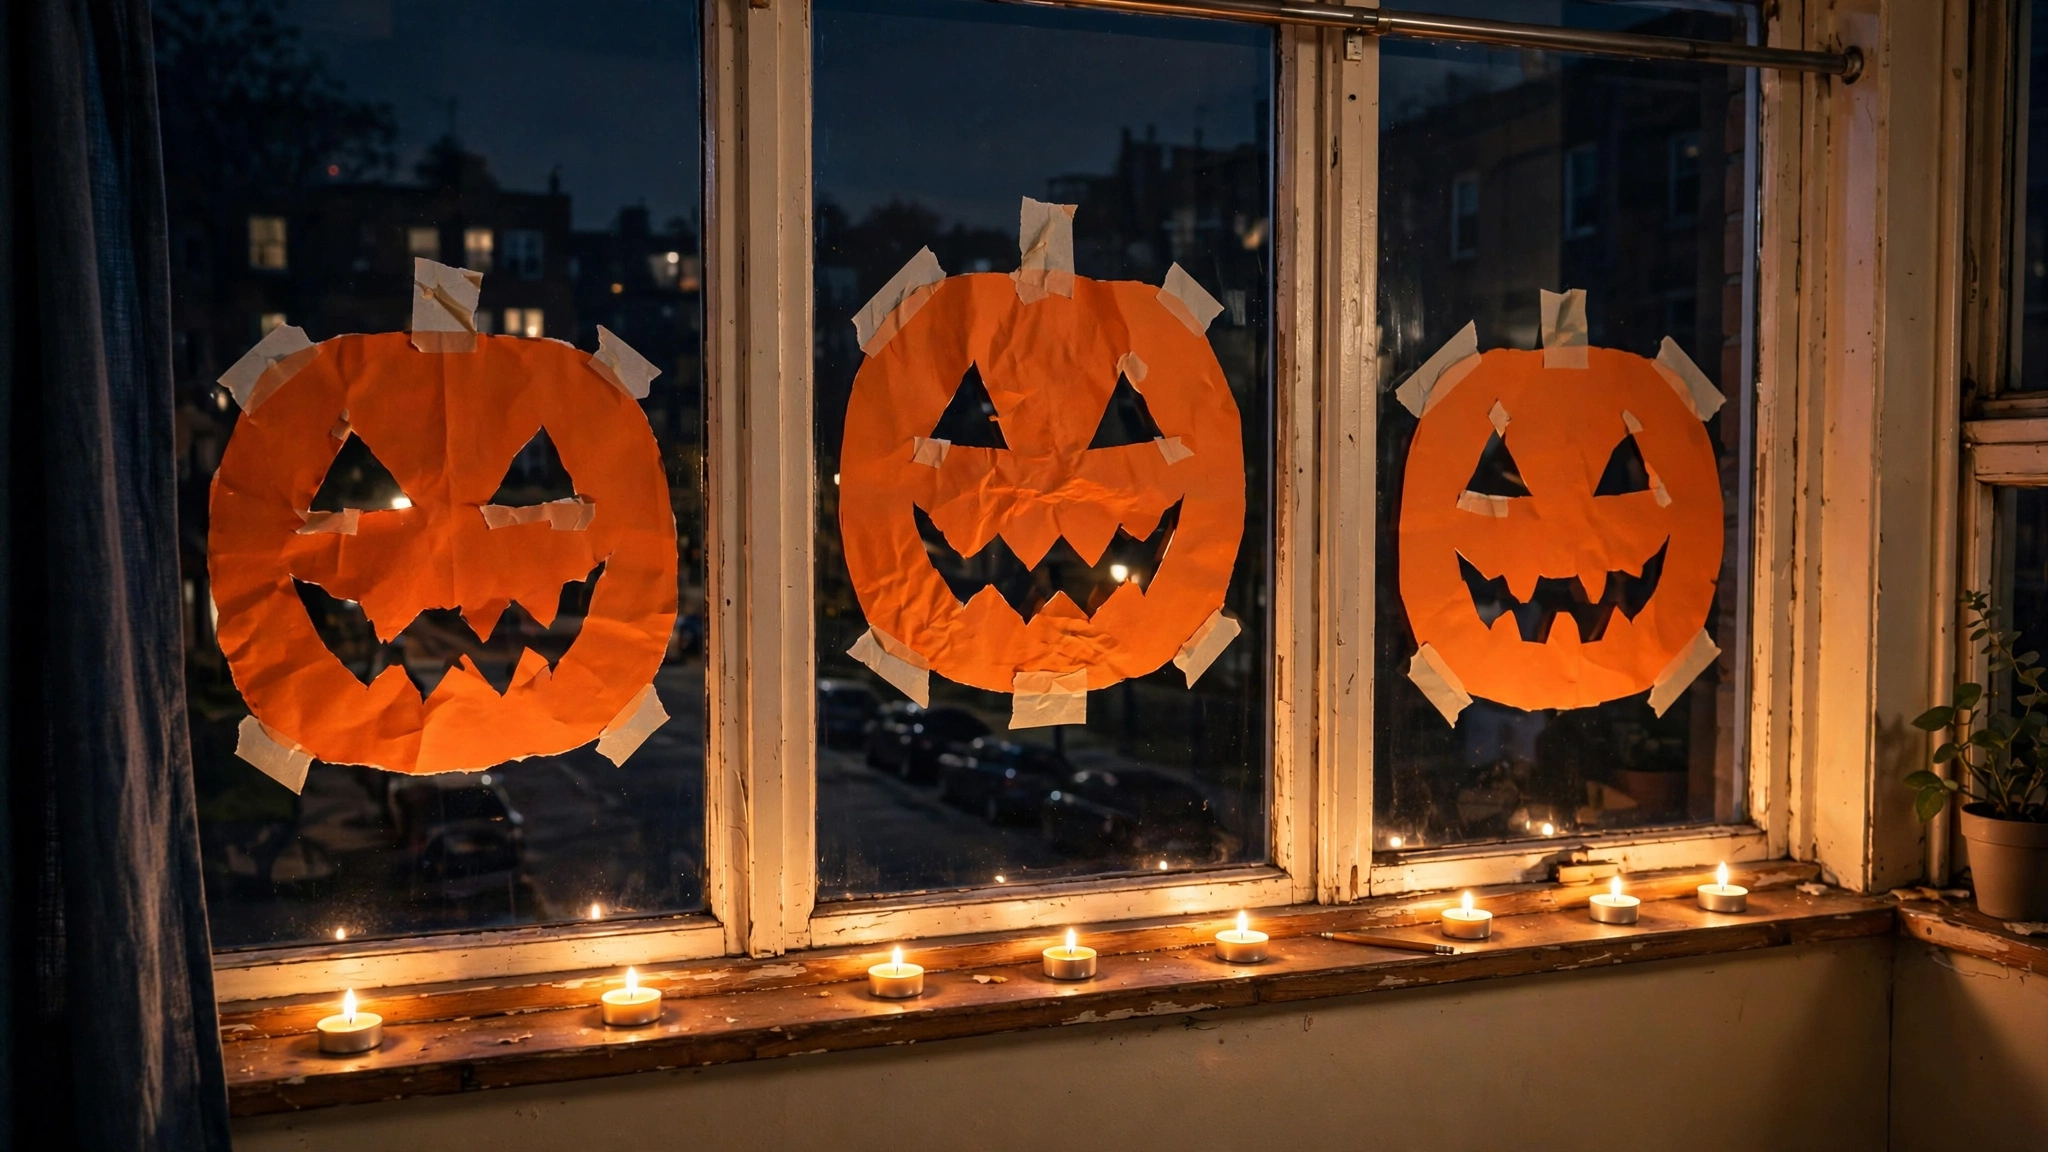
Carving real pumpkins is messy, they rot in a week, and many apartment buildings discourage them in hallways. This idea gives you the glowing jack-o’-lantern look with zero rot and zero knives: glowing pumpkin faces right on your window glass.
Why it works for renters: you’re decorating the glass, not carving produce. The “pumpkins” are orange paper or static-cling circles with cut-out faces, backlit by battery tealights on the sill. Everything is temporary and damage-free.
How to do it:
- Cut large circles (8-14 inches) from orange construction paper or orange cardstock — three to five pumpkins across one window reads best.
- Cut classic jack-o’-lantern faces (triangle eyes, jagged mouth) out of each circle. Tape the faces to the inside of the glass with small loops of painter’s tape or removable adhesive dots.
- Line the windowsill behind each pumpkin face with a battery-operated LED tealight, set far enough back that the glow spreads evenly rather than showing a hot spot.
- From outside at night, adjust the tealight positions until each face glows like a lit pumpkin. Add a black-paper stem on top of each circle for the finishing touch.
- For apartments with deep sills, you can instead stack the faces on orange paper bags weighted with a little rice — they stand on their own and glow from a tealight tucked inside.
Approximate cost: $8–$15 (orange paper, battery tealights).
7. Floating Witch Hats
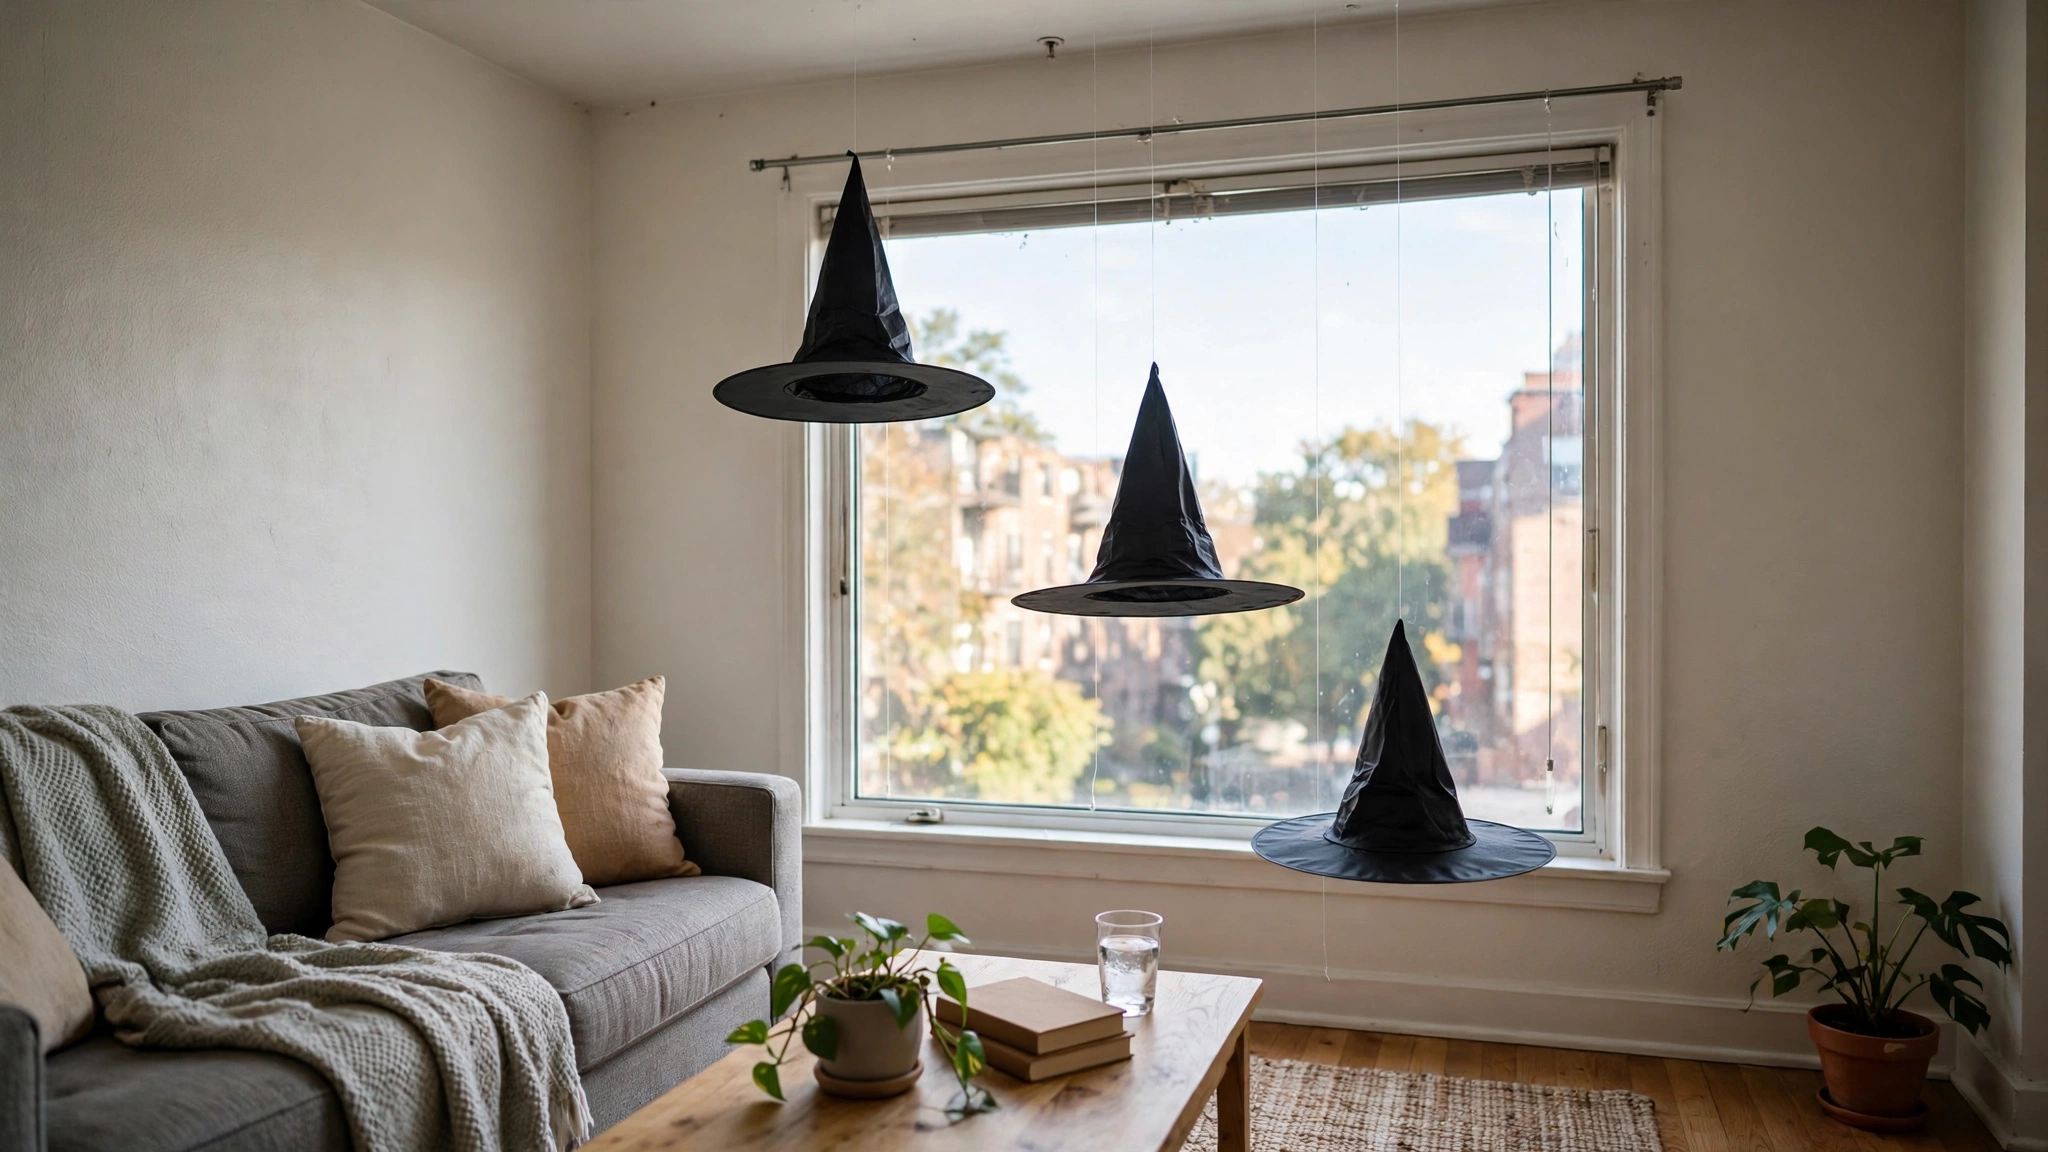
This one gets the most double-takes from visitors I’ve helped. A few witch hats suspended at different heights inside the window frame look like they’re hovering in midair — playful, three-dimensional, and visible from both sides.
Why it works for renters: the hats hang from a tension rod on clear fishing line. No hooks, no nails, no ceiling damage. The whole display comes down in two minutes.
How to do it:
- Mount a tension rod inside the top of the window frame (twist-and-hold, no tools).
- Buy 3-5 inexpensive black witch hats — the kind sold in costume aisles. Stiffer hats hold their shape better for this.
- Tie a loop of clear monofilament fishing line through the top of each hat’s cone, varying the lengths (12, 18, and 24 inches) so the hats hover at different heights.
- Tie each line to the tension rod, spacing the hats across the window width. From a distance, the clear line disappears and the hats genuinely look like they’re floating.
- Optional: place a small orange fairy light strand along the sill beneath them so the hats are softly lit from below at night.
Approximate cost: $10–$18 (witch hats, fishing line, tension rod if you don’t already have one).
8. Suction-Cup Halloween Wreath
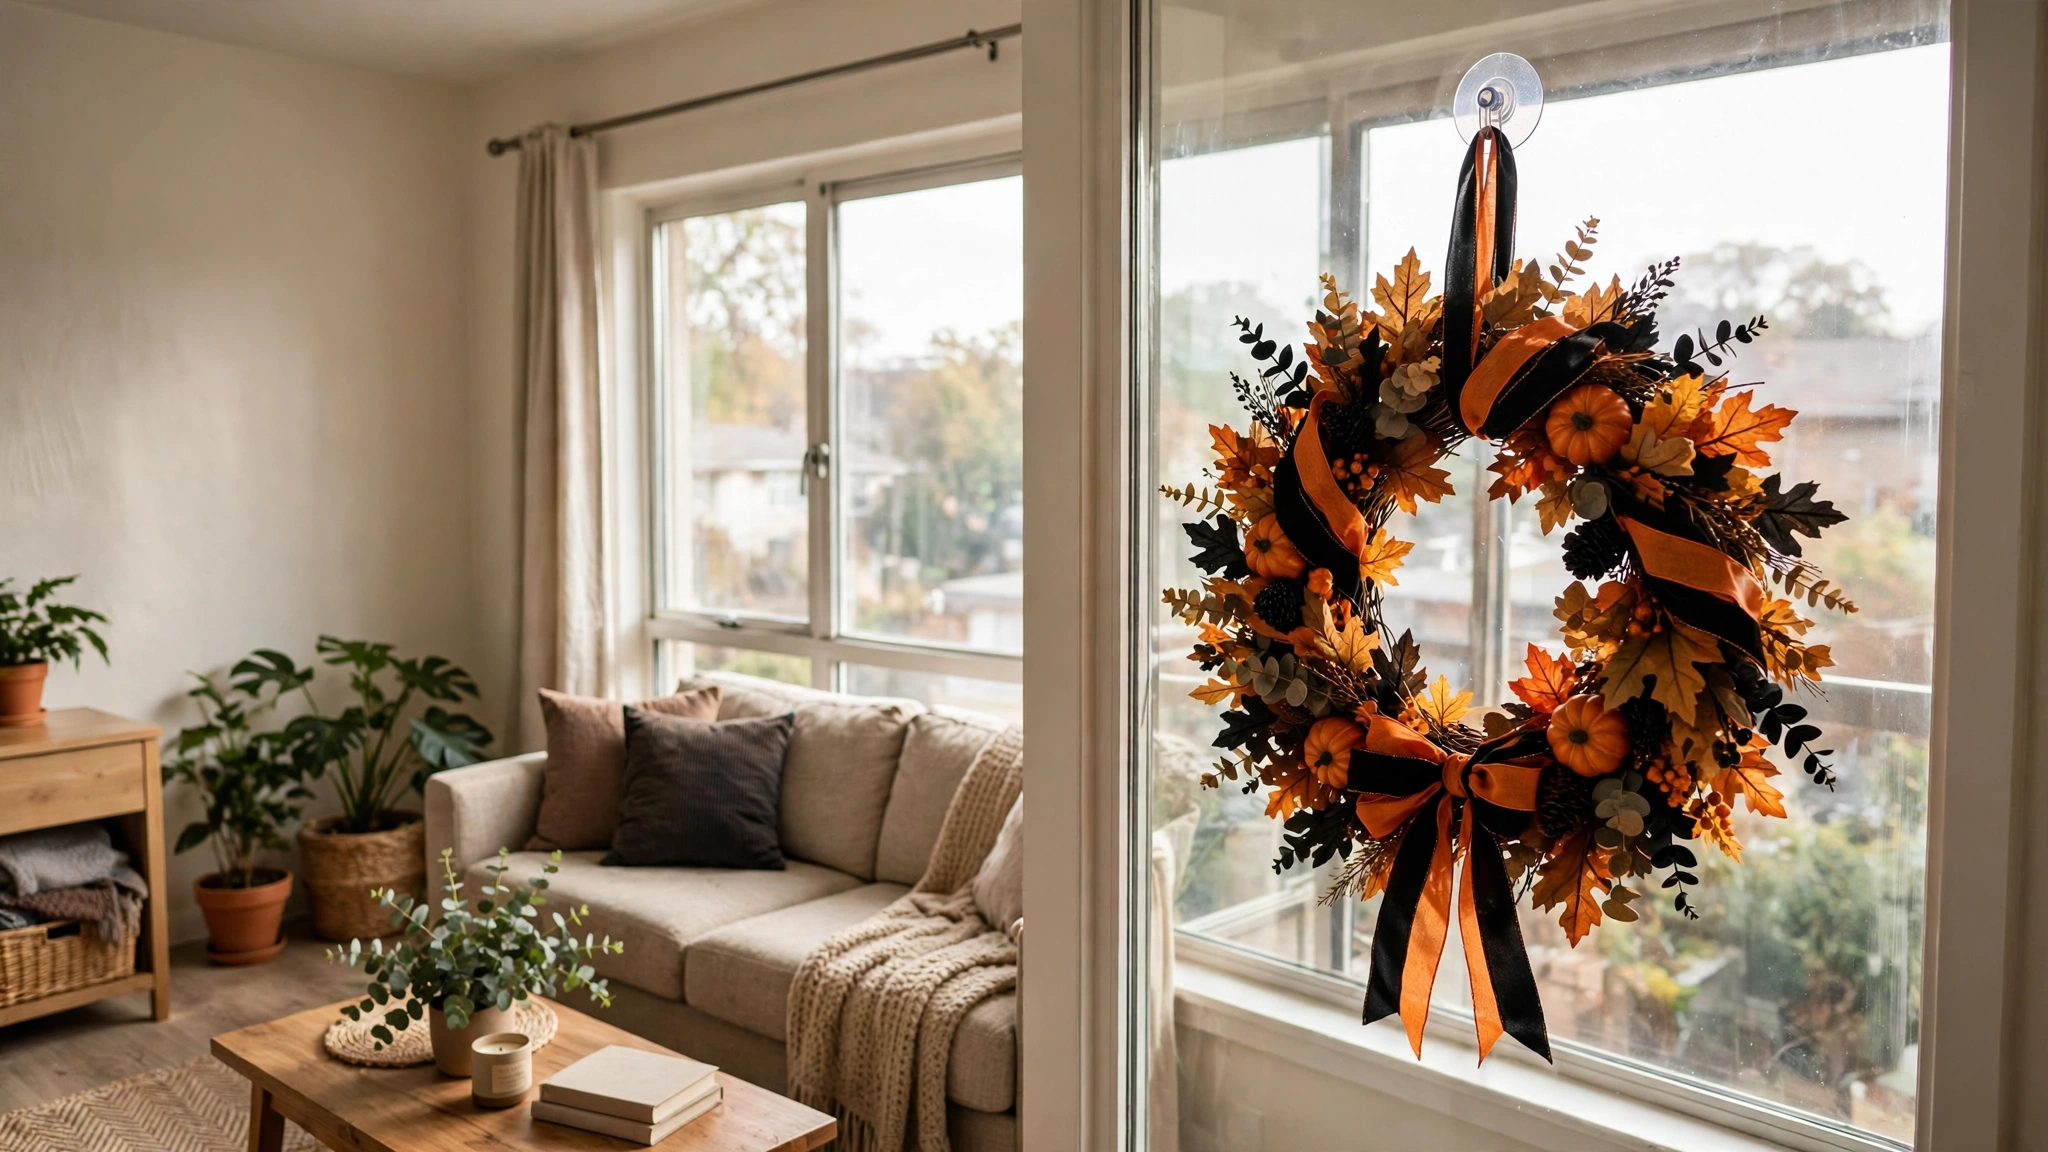
Wreaths aren’t just for front doors — a Halloween wreath hung on the inside of a big window reads beautifully from the street and keeps your door (and your landlord’s common-area rules) completely out of the equation.
Why it works for renters: a heavy-duty suction cup hook holds the wreath on the glass. Suction cups on smooth glass can support several pounds, and they release with a pull-tab, leaving no mark. This is also the best option for renters whose leases forbid door decorations.
How to do it:
- Choose or make a Halloween wreath — grapevine or foam base dressed with black and orange ribbon, faux fall leaves, mini pumpkins, or a few plastic spiders.
- Buy a heavy-duty suction cup hook rated for at least 5 pounds (sold in the bathroom/kitchen aisle — they’re made for tile and glass).
- Clean the inside of the window glass where the hook will go, then press the suction cup firmly and engage the locking lever. Give it a firm tug to confirm the hold.
- Hang the wreath from the hook, centered on the glass. Because it’s inside, weather can’t damage it — a real advantage over outdoor wreaths.
- Check the suction cup once a week; if your glass gets condensation, press it back down. In November, pull the release tab and the hook pops off cleanly.
Approximate cost: $15–$30 (wreath + suction cup hook; less if you DIY the wreath).
9. The Spider Web Corner
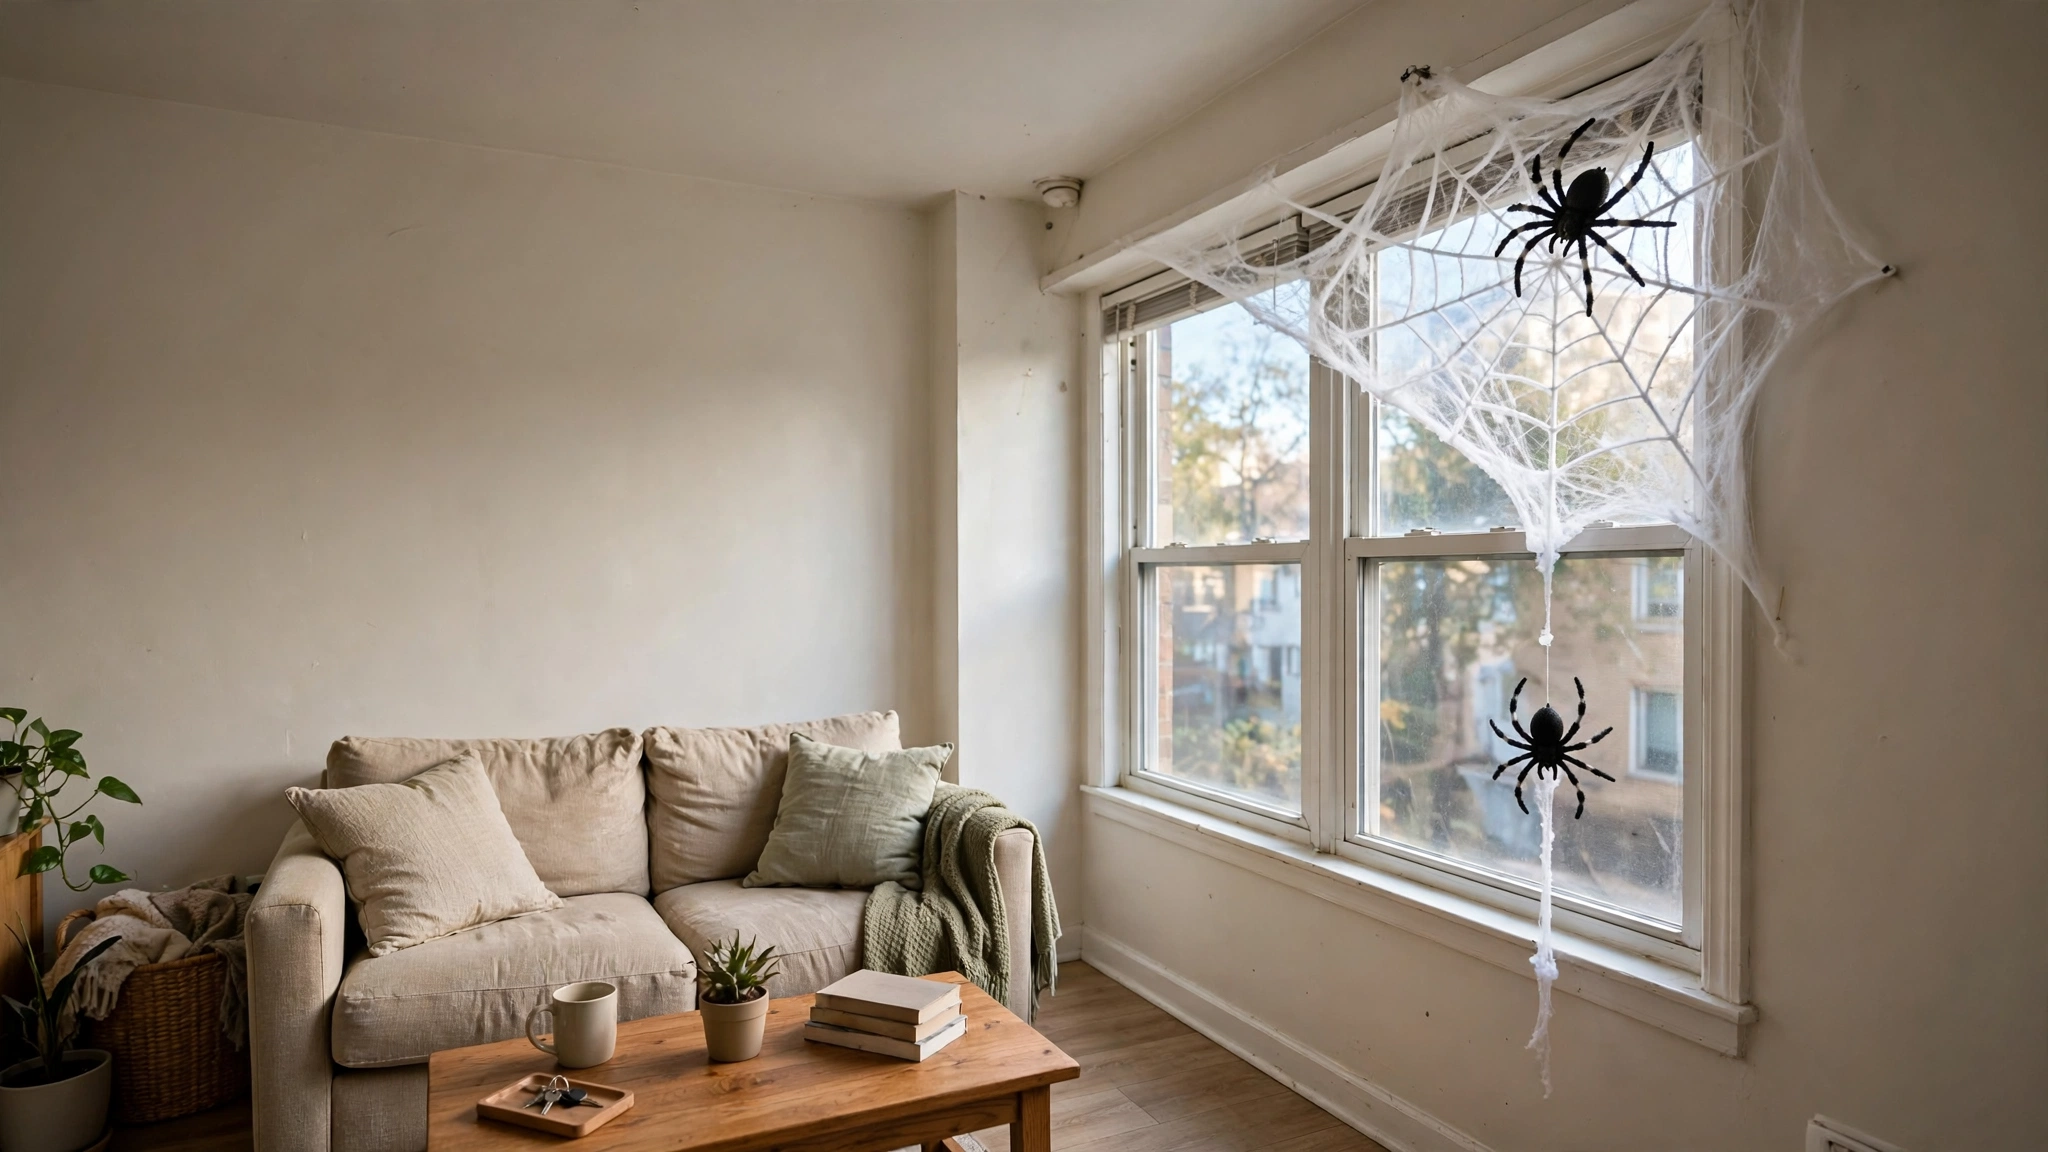
A stretchy spider web in one corner of the window, with a few oversized spiders, is the classic haunted-house shorthand — and it’s one of the easiest displays to make look genuinely good. The secret is placement: webs look best tucked into a corner, not stretched across the whole window.
Why it works for renters: the web anchors with tiny removable adhesive hooks or dots on the glass, or simply drapes over a tension rod. It weighs almost nothing, and removal is a single pull.
How to do it:
- Buy one bag of stretchy white webbing (the kind sold in Halloween aisles) — one bag easily covers a window corner.
- Anchor the web’s outer corners first: press small removable adhesive dots onto the glass at the window’s top corner and sill, then stretch thin strands of webbing between them, fanning outward.
- Fill in the middle by pulling and draping the webbing loosely — the messier and more irregular, the more realistic it looks. Avoid one flat sheet; real webs have depth.
- Add 2-3 large plastic spiders to the web (they have tiny clips or just nestle into the fibers), plus one hanging from a thread in front of the glass.
- Optional: mist the web very lightly with water from a spray bottle — it makes the fibers cling to the glass better and catches the light at night.
Approximate cost: $5–$10 (webbing bag, plastic spiders, adhesive dots).
10. Spooky Word Lettering
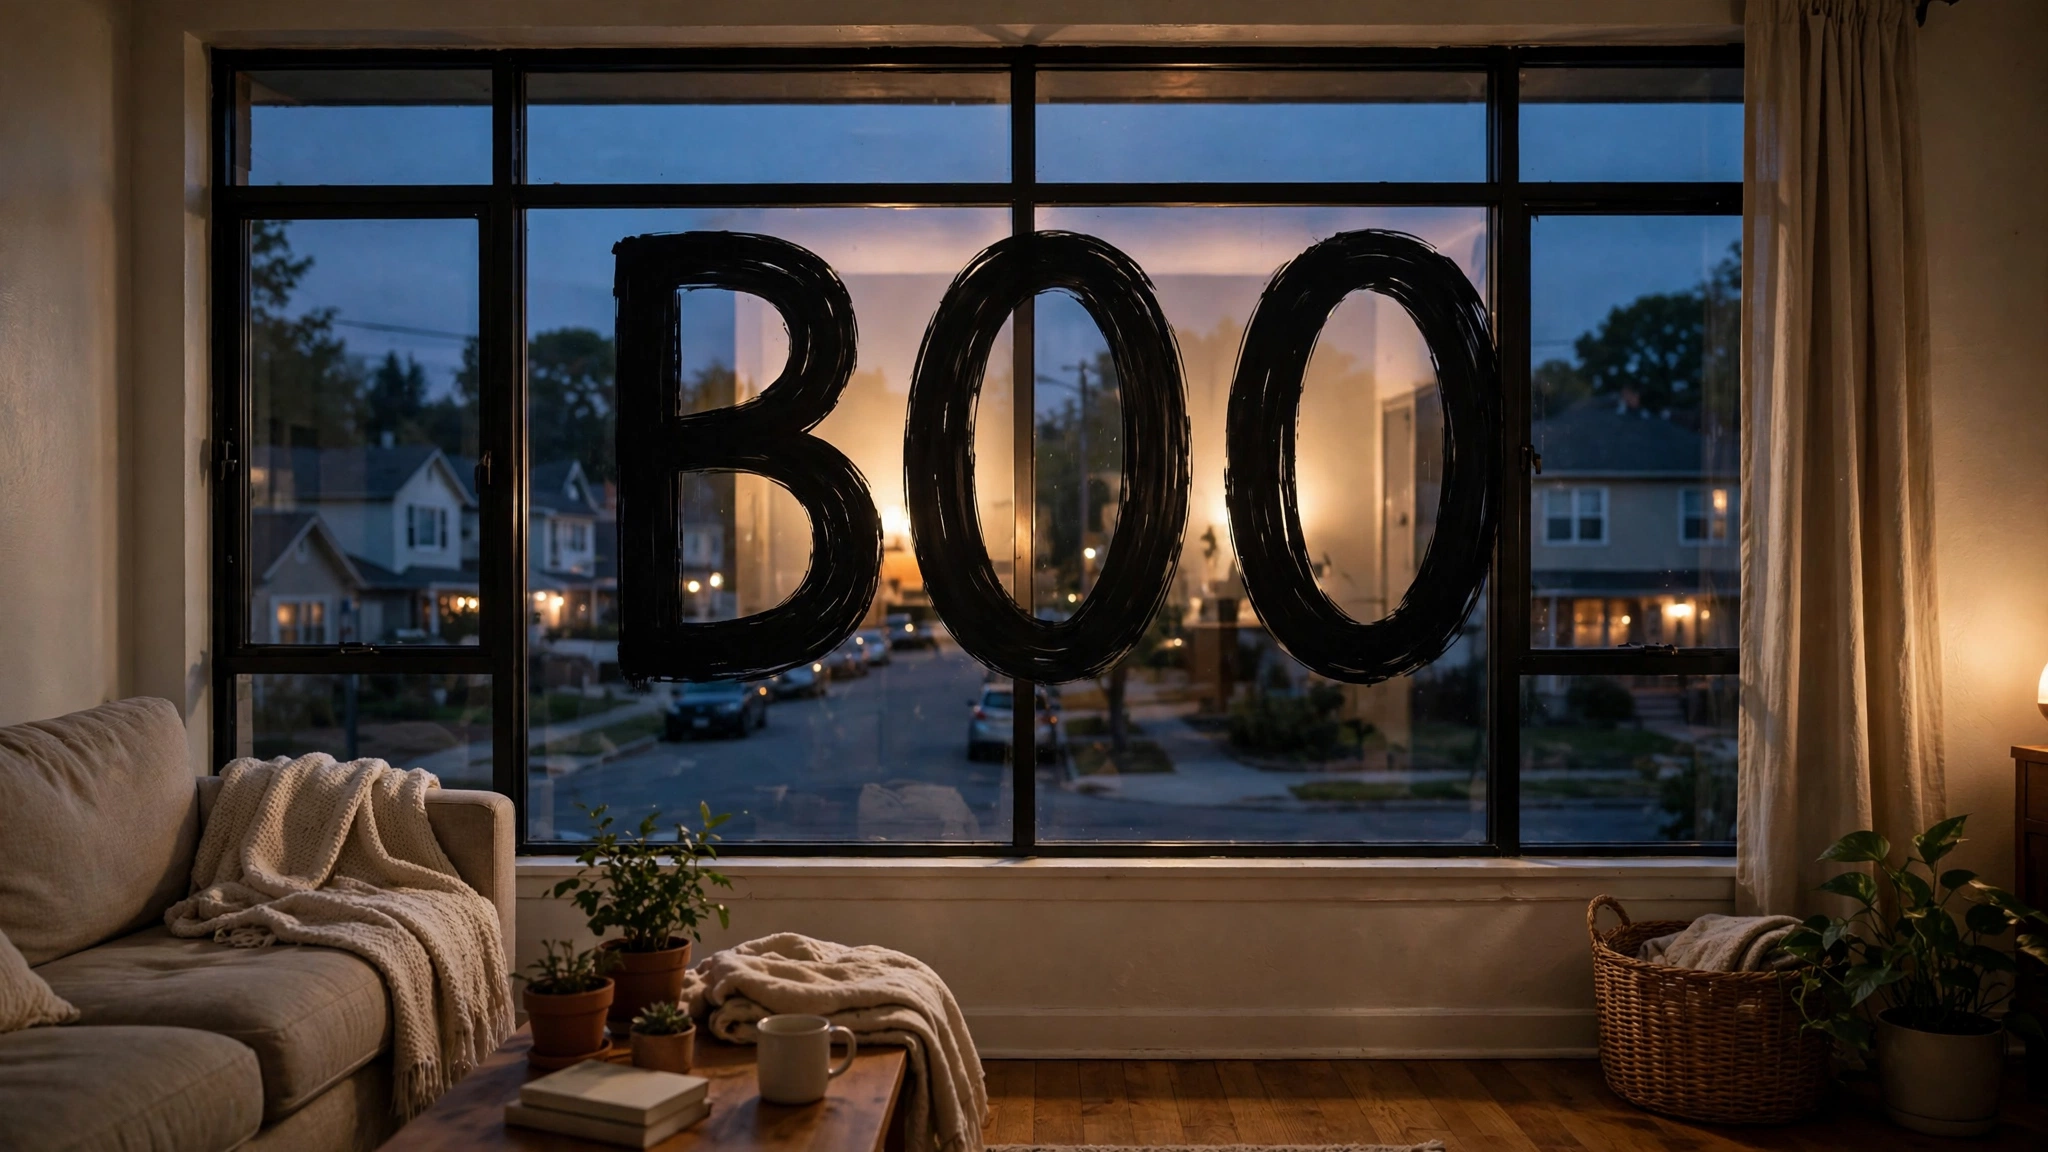
Sometimes one word does all the work. Big letters spelling BOO, EEK, SPOOKY, or HAPPY HALLOWEEN across the glass is bold, readable from down the street, and incredibly easy — it’s the window equivalent of a marquee sign.
Why it works for renters: use repositionable vinyl letter clings or cut letters from black cardstock with removable adhesive dots. Either way, it’s glass-only, residue-free, and comes down in minutes.
How to do it:
- Choose your word: BOO fits narrow windows, HAPPY HALLOWEEN needs a wide picture window. Short words read best from a distance.
- Buy repositionable vinyl letter clings, or cut 6-10 inch letters from black cardstock using a printed template.
- Clean the glass thoroughly — large letters show every speck of dust underneath.
- Apply the letters to the inside of the glass, centered vertically, spacing them evenly. Step outside (or have someone check from the sidewalk) to confirm readability and alignment.
- Backlight them at night: leave a room light on behind the window so the letters read as dark silhouettes against glowing glass, or frame them with a strand of orange fairy lights.
Approximate cost: $6–$14 (vinyl letter clings or cardstock + adhesive dots).
11. Paper Lantern Garland Across the Frame
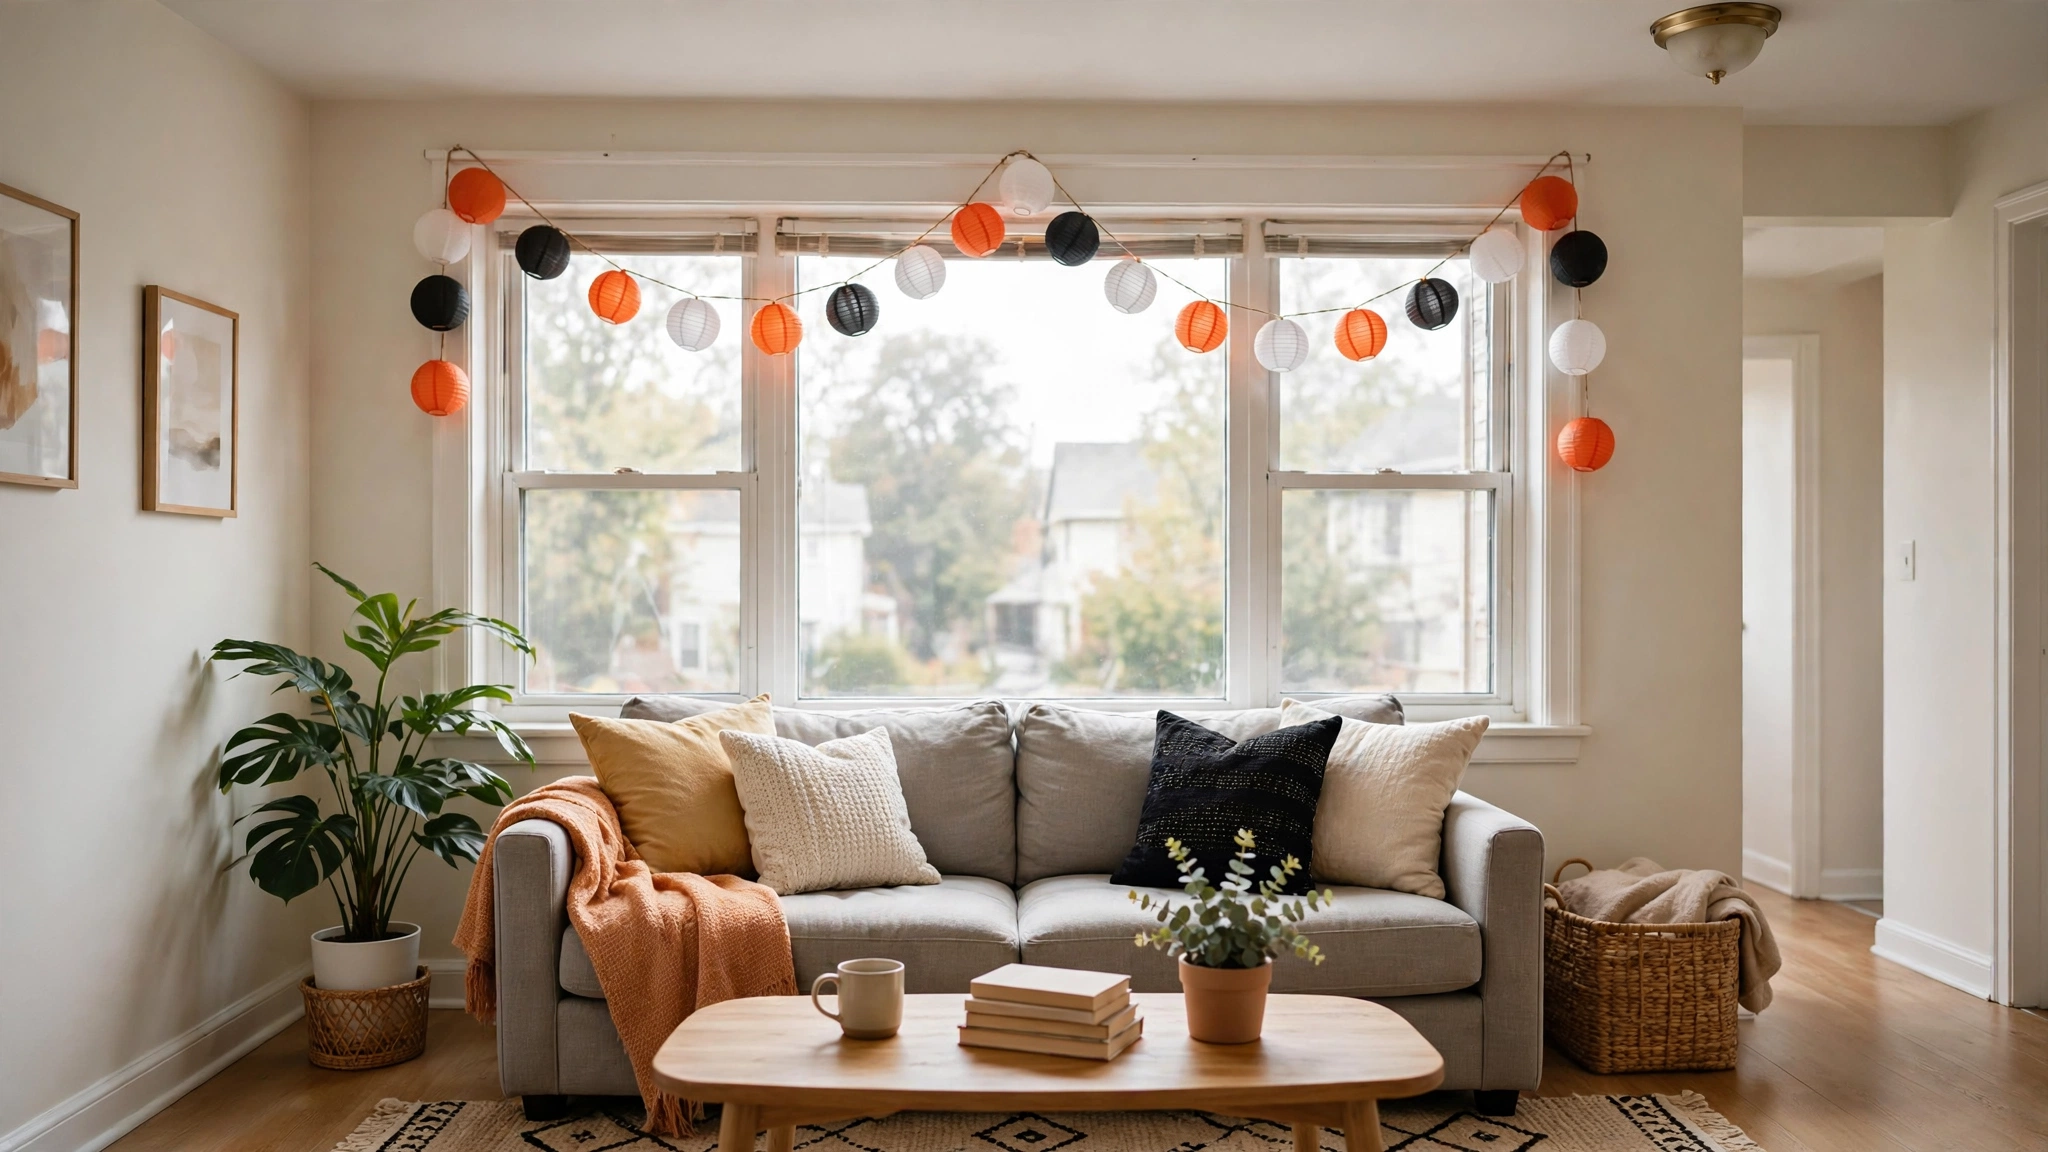
A garland of small orange, black, and white paper lanterns strung across the top of the window frame brings color and shape to windows that don’t get much direct light — perfect for north-facing apartments or basement units where silhouette ideas fall flat.
Why it works for renters: the garland hangs from a tension rod or from removable adhesive hooks on the frame’s inside edge — never from the wall or ceiling. It’s lightweight, cheerful rather than spooky, and easy to store flat.
How to do it:
- Buy a string of small paper lanterns (orange, black, and white mix) — the kind that expand from flat discs. Halloween variety packs appear in craft stores every September.
- Expand the lanterns and thread them onto a length of string or the included cord, alternating colors. Add a few inches of spacing between each for a fuller look.
- Hang the garland from a tension rod inside the window frame, or from 2-3 small removable adhesive hooks pressed onto the inside frame edge.
- Let the garland swag gently in the middle rather than pulling it taut — a soft drape looks more festive than a straight line.
- For evening glow, weave a battery-operated fairy light strand through the lanterns. The paper diffuses the light and each lantern glows like a tiny moon.
Approximate cost: $12–$20 (paper lantern string, fairy lights, tension rod or hooks).
12. Washable Window Paint Markers
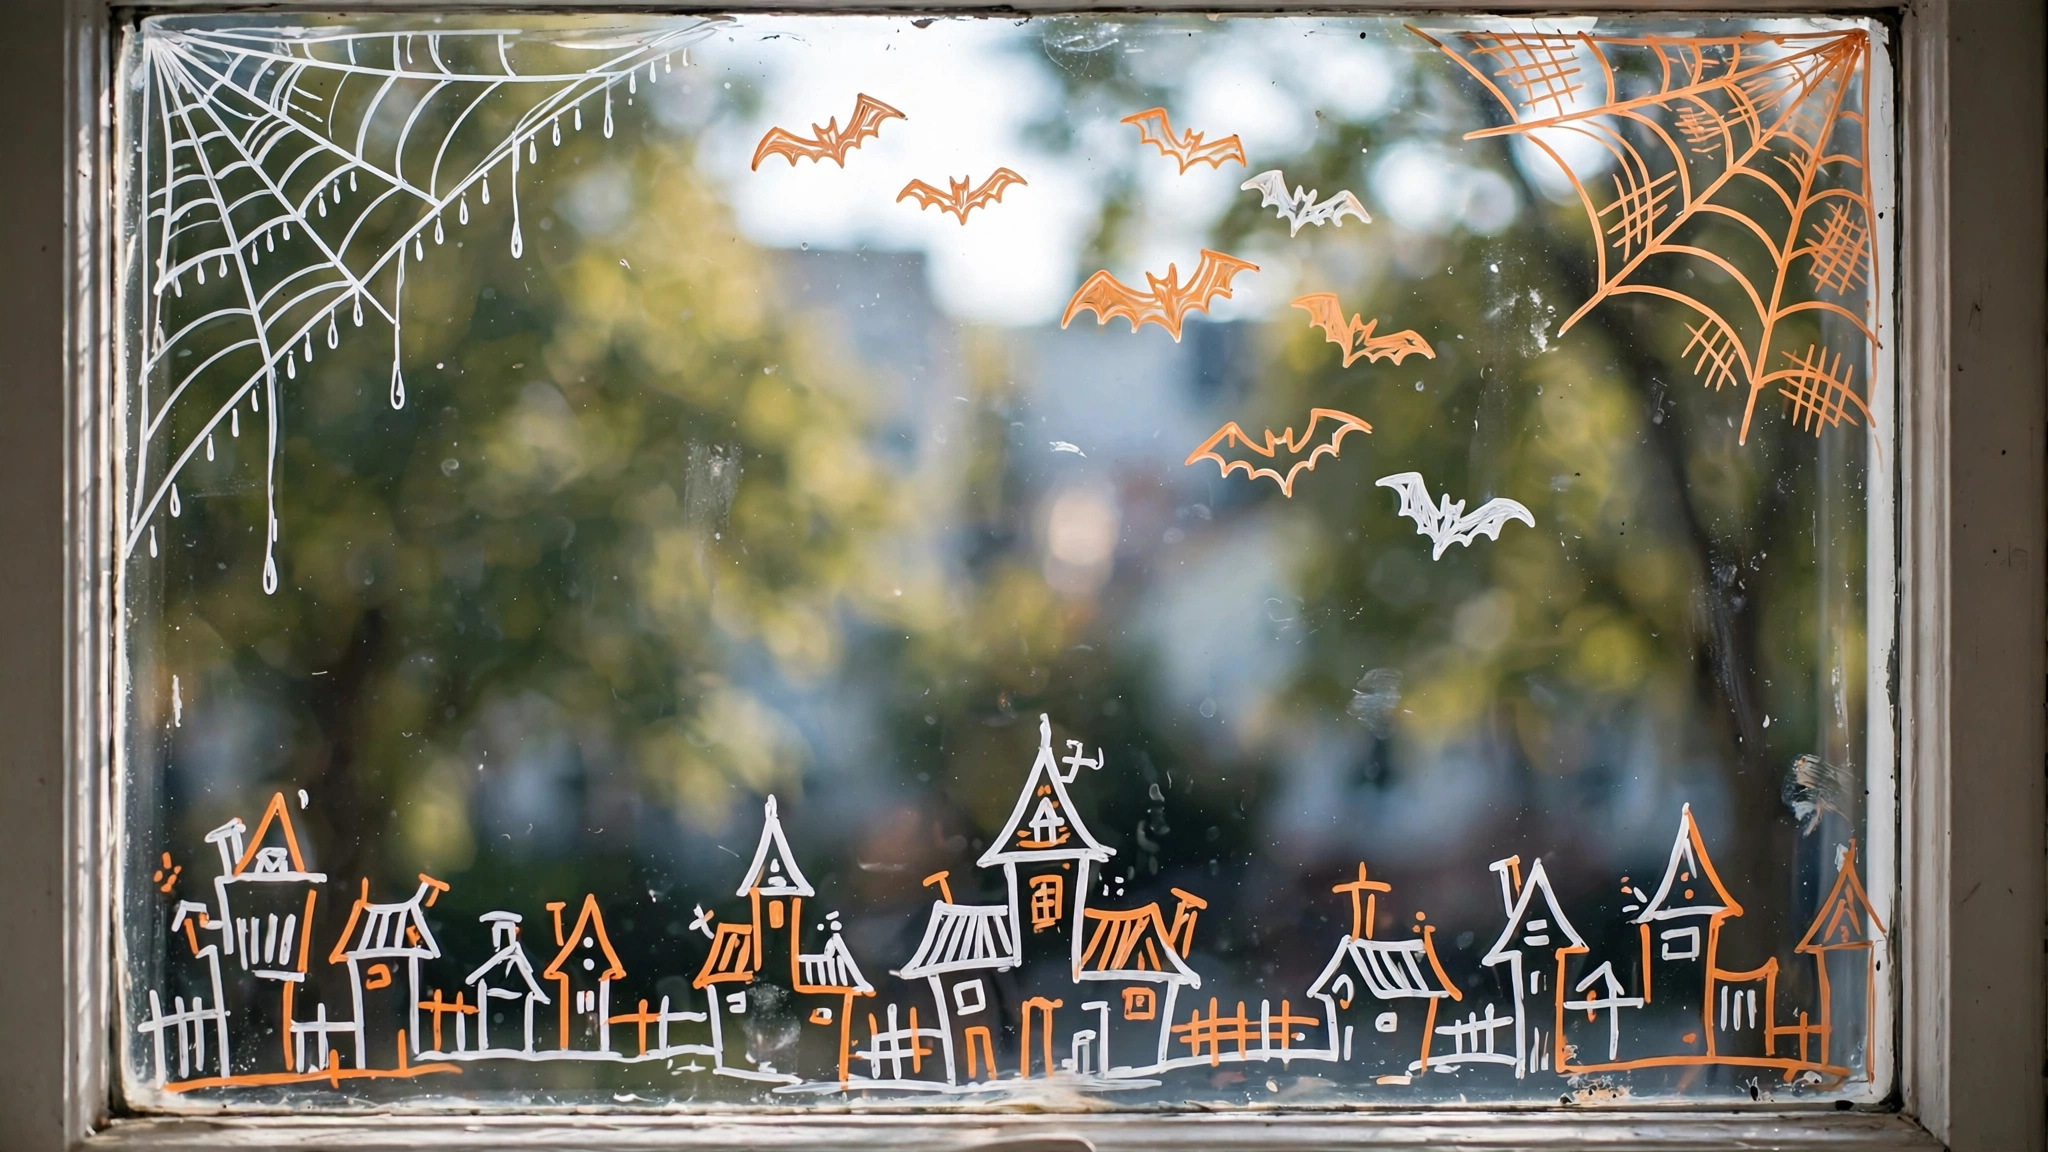
This is the idea renters are most skeptical about until they try it — and then it’s the one they rave about. Window paint markers are made specifically for glass: the paint goes on opaque and bold like real paint, and wipes off completely with glass cleaner. Spider webs, haunted houses, “trick or treat” lettering in your own handwriting — it’s the most personal option on this list.
Why it works for renters: these markers are formulated for temporary glass art (stores use them for sale signs). They are NOT permanent paint, NOT Sharpies, NOT acrylic — buy the ones labeled “window markers” or “washable glass markers.” On glass only, they remove fully. Never use them on painted frames, wood trim, or walls.
How to do it:
- Buy window paint markers (white, orange, and black are the Halloween essentials) — confirm the package says washable/removable and safe for glass.
- Clean the glass with glass cleaner and let it dry. Test one small mark in a corner, wait an hour, and wipe it off to confirm clean removal on your particular glass.
- Sketch your design lightly first or print a template to tape on the outside of the glass as a tracing guide — spider webs in the corners, a haunted house skyline along the bottom, bats flying across the top.
- Draw on the inside of the glass, working from the top down so you don’t smudge wet paint with your sleeve. Let each color dry a few minutes before layering.
- In November, spray with glass cleaner, let it sit for a minute, and wipe — the paint comes off in seconds. Follow with a final clean pass so the glass is spotless.
Approximate cost: $8–$14 (set of window paint markers). Note: glass only — keep markers off painted trim and frames, or this idea loses its renter-safe status.
Your Windows Are Ready for Their Close-Up
Here’s what I love most about Halloween window decor for renters: it’s the one decorating project where the rental itself is an advantage. Glass is the perfect temporary canvas. Tension rods grip where nails can’t go. And when the season’s over, every single one of these twelve ideas reverses in minutes — no spackle, no touch-up paint, no awkward conversations with your landlord.
Start with the idea that fits your window and your courage level. If you’re nervous, begin with the static-cling decals — they literally cannot go wrong. If you want the street to stop and stare, go straight for the backlit haunted village or the bat swarm. And if you have a tension rod from a previous apartment (most long-term renters do), the ghost curtains and floating witch hats are practically free.
You’ve put in the work to make a rental feel like home; Halloween is your chance to show it off to the whole neighborhood. Pick one window, pick one idea, and give it an evening — I promise the glow from the sidewalk is worth it.
Please save this visual guide on Pinterest and share it with a fellow renter who’s staring at a blank window right now — they’ll thank you when their place is the one everyone slows down to look at.

Amelia leads HavenlyStyle’s editorial vision with a passion for elegant interiors and practical home living. With years of experience in home décor and lifestyle content, she ensures every article is accurate, inspiring, and easy to follow. From timeless decorating ideas to the latest interior design trends, Amelia is committed to helping readers create beautiful, functional spaces while maintaining HavenlyStyle’s trusted and welcoming voice.