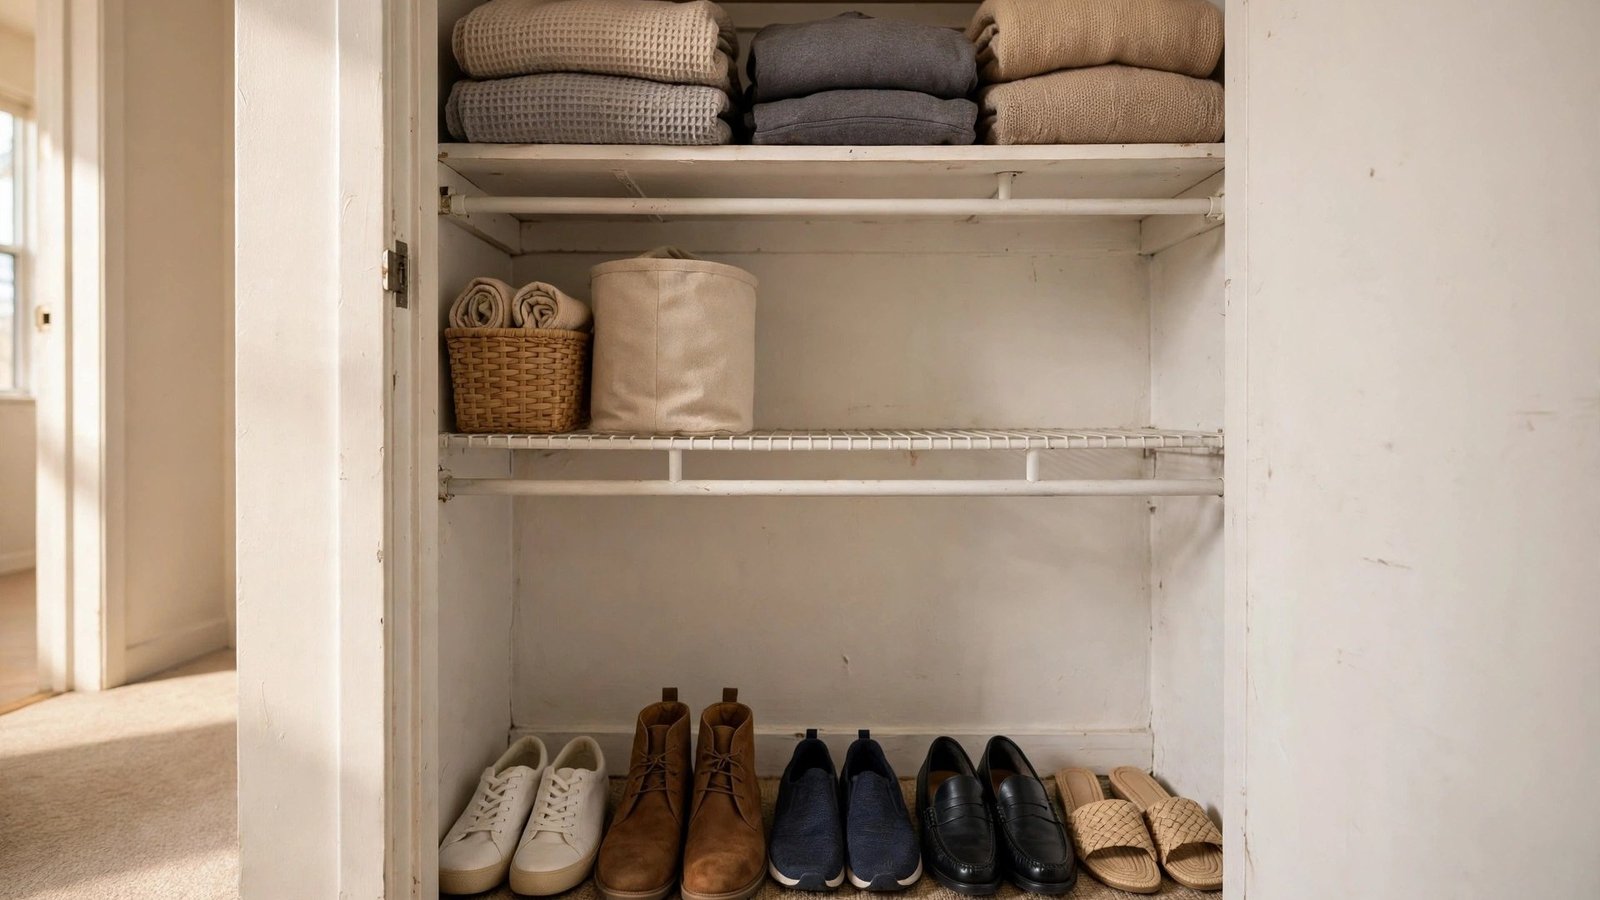
Intro
I've walked into dozens of rental closets where the shoe situation tells the whole story: a teetering pile by the door, sneakers kicked sideways under hanging coats, a pair of dress shoes flattened behind the trash bags of off-season stuff. If you rent a small apartment, you know the math — the closet is eight feet wide if you're lucky, your lease says no drilling, and your shoe collection keeps growing every time you "just grab one more pair."
I've helped dozens of renters fix exactly this, and here's what I've noticed: the problem is almost never the number of shoes. It's that rental closets are designed for clothes, not footwear, and every freestanding rack you've tried steals floor space you can't spare. When the shoes go somewhere on purpose — sorted by how often you actually wear them, stored off the floor, and kept visible enough that you stop digging — a tiny closet suddenly feels like it grew.
I've personally seen renters take a closet that looked like a footwear avalanche and turn it into something they open with actual pride, all without a single screw in the wall. These are the twelve storage ideas I recommend first for tiny rental closets, ordered by impact. Every one of them is removable or reversible, because your deposit matters as much as your style.
Executive Summary
- Tiny rental closets aren't short on space — they're short on shoe-specific structure. Vertical and door space are almost always unused.
- Over-the-door pocket organizers and under-shelf stacking racks give you the biggest win per dollar with zero tools.
- Tension rods and lean-to towers create adjustable, damage-free shelves that move with you from apartment to apartment.
- Sort shoes by wearing frequency and keep everyday pairs at hand height; seasonal and special-occasion pairs go high or low.
- An entry-adjacent overflow zone absorbs the three to five pairs in daily rotation so the closet stays tidy.
- Keep boots to a single contained weather-ready zone — everything else is your full collection, beautifully stored.
- A one-in, one-out rotation rule protects the whole system from creeping back into a pile.
1. Over-the-Door Pocket Organizers
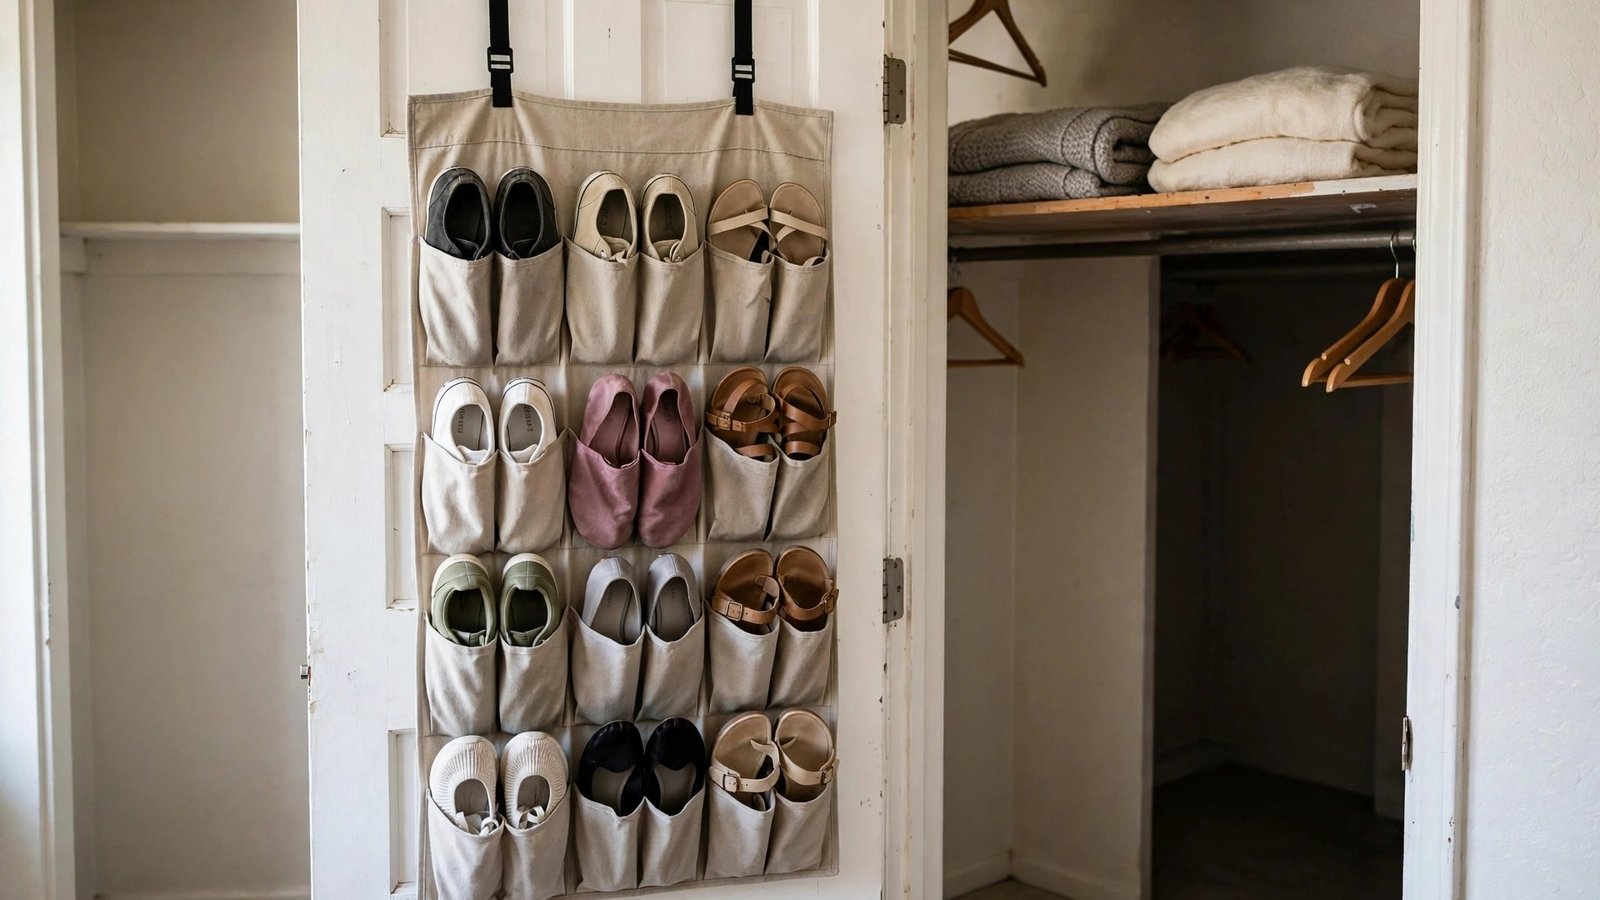
What it is: A fabric shoe organizer with deep pockets that hooks over the closet door, turning the back of the door into a full wall of individual shoe slots.
I've helped dozens of renters add instant storage with this one move, and I keep recommending it first because the door back is dead space in every closet I've ever seen. A standard organizer holds ten to twelve pairs, and because the pockets are individual, you can actually see what you own instead of excavating a pile. Flats, sneakers, sandals, and low heels fit best; anything with a tall shaft won't, and that's fine — boots get their own zone later.
Why it works for renters: It hangs on two slim metal hooks that slip over the top of the door. Nothing is screwed, glued, or nailed. When your lease ends, you lift it off in ten seconds and the door looks untouched. It's also one of the few organizers that works on a door that opens into a room as well as a door that opens outward — just make sure the closet door swings freely with the hooks in place before you fill it.
How to set it up:
1. Measure the width and swing of your closet door, then choose an organizer whose hook profile sits flat over the door's top edge without scraping the frame. 2. Hang the hooks first and close the door once to confirm it shuts cleanly and nothing rattles or wedges. 3. Sort the shoes you'll store here by season and height, reserving the tallest pockets (usually the top row) for sneakers and the lowest for flats. 4. Fill each pocket with one pair only, heels facing in, and step back to check the weight — if the door feels heavy, split your stash between two doors or move heavier boots elsewhere. 5. Once a month, pull every shoe out of the pockets and wipe the organizer's fabric down; dust collects faster than you'd think behind a door.
Approximate cost: $12–$25 for a good-quality 24-pocket organizer.
2. Under-Shelf Wire Stacking Racks
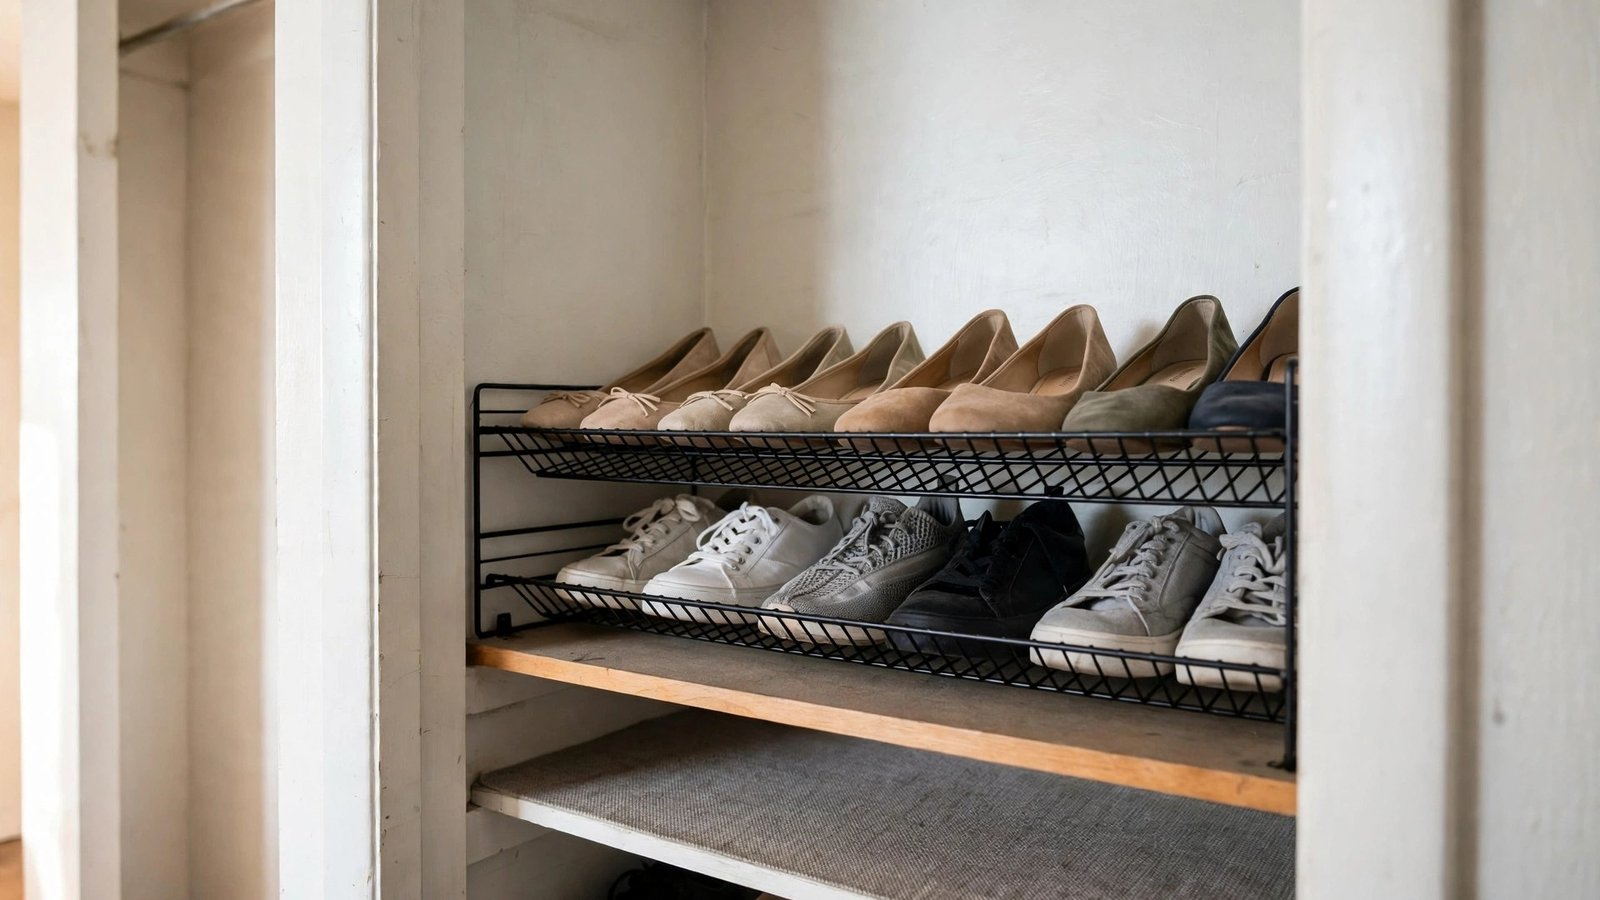
What it is: Low-profile metal wire racks that sit on an existing closet shelf or the closet floor, doubling each layer into two levels of shoes with a lift-and-tuck motion.
I've personally seen renters double their shelf capacity overnight with these. Most rental closet shelves are spaced for folded sweaters, which leaves a good six to eight inches of air above a row of flats. A stacking rack turns that wasted air into a second deck. Use them on the shelf for out-of-season pairs and on the floor for the ones you reach for every day.
Why it works for renters: They stand on their own feet, so there's nothing to mount and nothing to damage. They're also modular — start with one, and if it works, stack or line up more. When you move, they nest inside each other in a moving box in seconds.
How to set it up:
1. Measure the clear height between your shelf and whatever is above it, then pick racks that leave at least an inch of clearance for lifting shoes in and out. 2. Place the rack on the shelf and test the stability with a few pairs before loading it fully — uneven rental shelves sometimes need the feet adjusted. 3. Put one pair per slot, alternating toe direction on the upper level so the profiles interlock and don't collide. 4. Reserve the top deck for pairs you wear less often, since you'll instinctively reach for the bottom level first. 5. If the racks wobble on a slippery painted shelf, cut a strip of non-slip shelf liner and lay it underneath — liner peels off cleanly at move-out.
Approximate cost: $10–$20 for a set of two stackable racks.
3. Stackable Clear Shoe Boxes
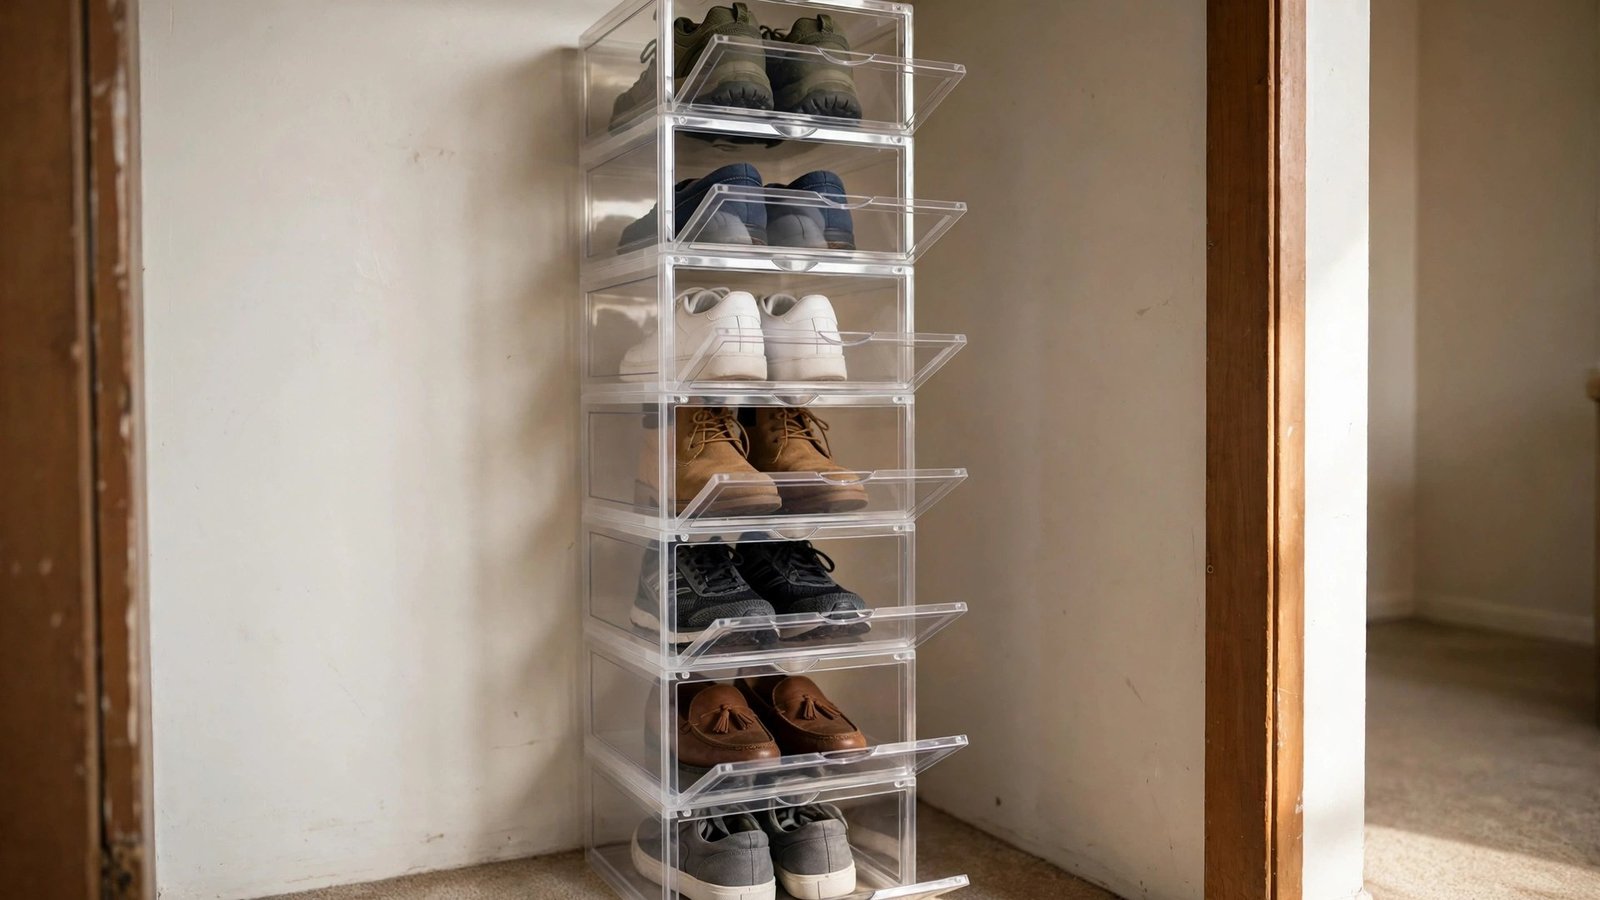
What it is: Transparent, ventilated storage boxes with drop-front doors that stack into a stable tower, keeping shoes dust-free while staying visible.
I've noticed that renters either love their shoe collection or feel guilty about it, and clear boxes serve both camps — collectors can admire their shoes and the rest of us can find a match in five seconds without unstacking anything. The drop-front design matters in a tiny closet: you open just one box, pull one pair, and the tower above never moves.
Why it works for renters: The boxes need no wall contact at all. They stack wherever you have floor space — beside the closet, at the closet's back wall, or under hanging clothes. A tower of eight boxes holds eight pairs in a footprint smaller than one moving box, and the whole thing travels to your next apartment fully loaded if you tape the stack together.
How to set it up:
1. Count the pairs you want boxed before buying, and buy them all at once — boxes from different batches can differ slightly in size and not stack well. 2. Start with the heaviest pairs (ankle boots, chunky sneakers) on the bottom of the stack and the lightest on top. 3. Place boxes with the drop-front facing the direction you approach the closet, so you can open one without pulling the tower forward. 4. Leave a half-inch gap between the tower and the closet wall so the doors can vent and nothing rubs the paint. 5. Stick a small removable label on the front of each box if the collection is large — the label peels off when you reorganize.
Approximate cost: $20–$40 for a set of six to eight boxes.
4. Tension-Rod Shoe Shelves
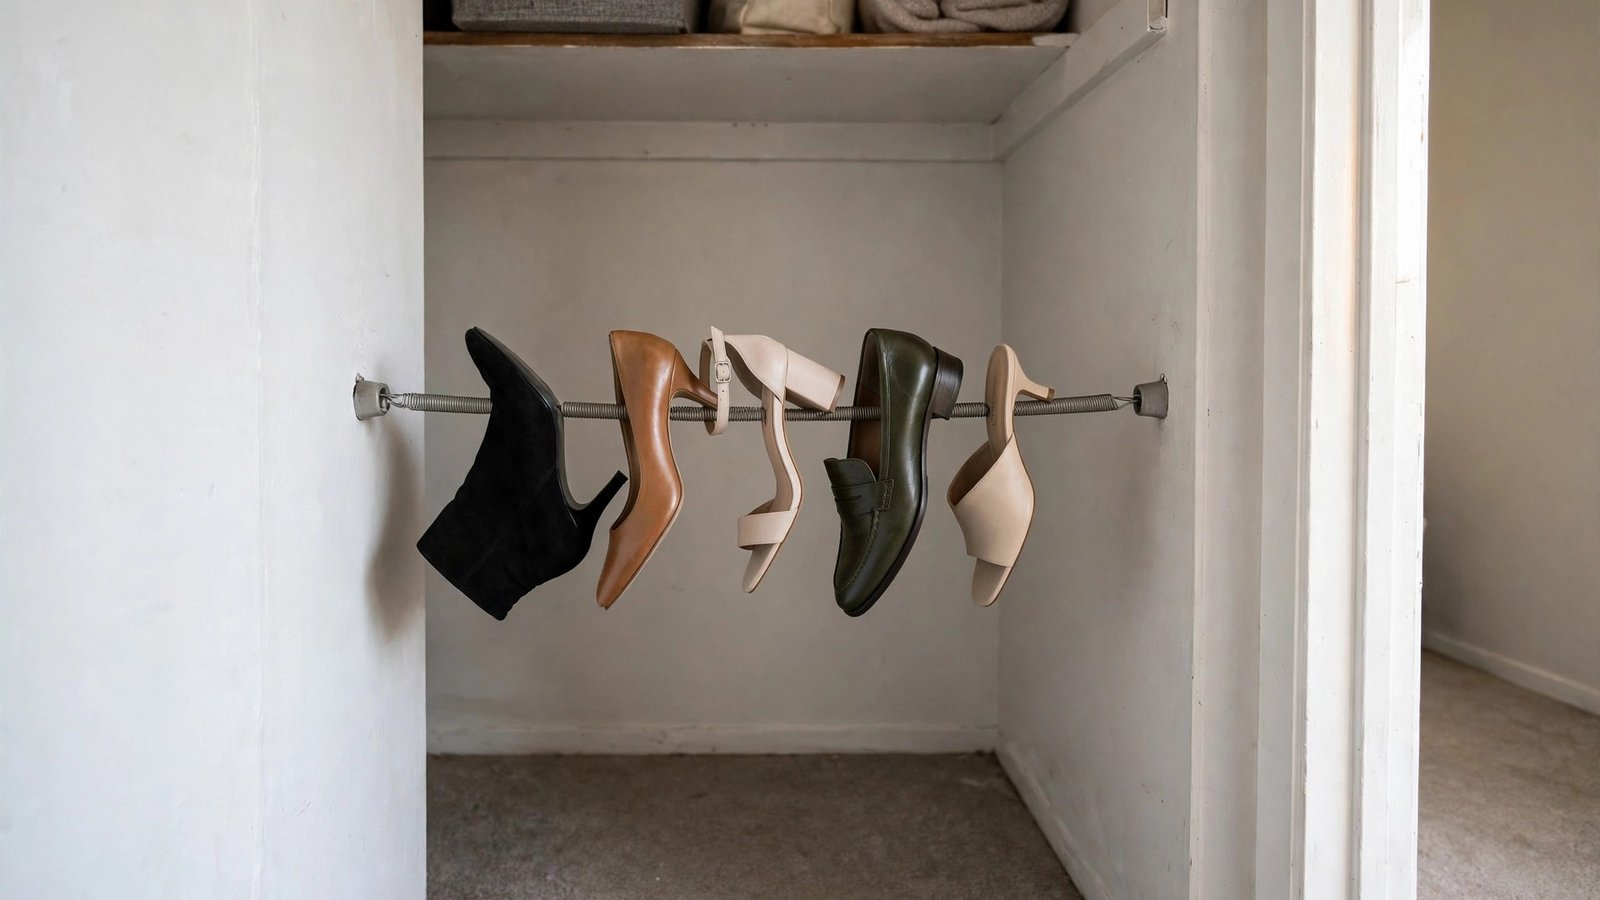
What it is: A sturdy spring-tension rod wedged between two walls or inside a closet nook, holding pairs across it heel-to-toe like a floating display shelf.
I've recommended tension rods for years for renters who need shelving without permission slips. One rod holds four to five pairs depending on width, and because you place the shoes with heels on the rod and toes pointing down, the pairs stay put through normal bumps. Two rods at different heights make an instant no-drill shoe rack inside a narrow closet alcove.
Why it works for renters: The rod grips by friction against the side walls, so there are no holes, no anchors, and no landlord conversation. It works especially well in the narrow dead zones at the sides of reach-in closets where nothing else fits. At move-out, twist to release and you're left with bare walls.
How to set it up:
1. Measure the span where the rod will go and buy a rod whose range sits comfortably in the middle of the span — never at its maximum extension, where the spring is weakest. 2. Twist the rod to lengthen it, then wedge it firmly and test it with firm pressure before trusting it with shoes. 3. Place the first pair with heels resting on the rod, then check from below that the rod doesn't slip under weight. 4. Start with lighter pairs on the top rod and heavier shoes lower down, so the upper span carries less load. 5. Re-tighten the rod every couple of months — temperature changes can loosen the tension slightly.
Approximate cost: $10–$18 per heavy-duty tension rod.
5. Lean-To Vertical Shoe Towers
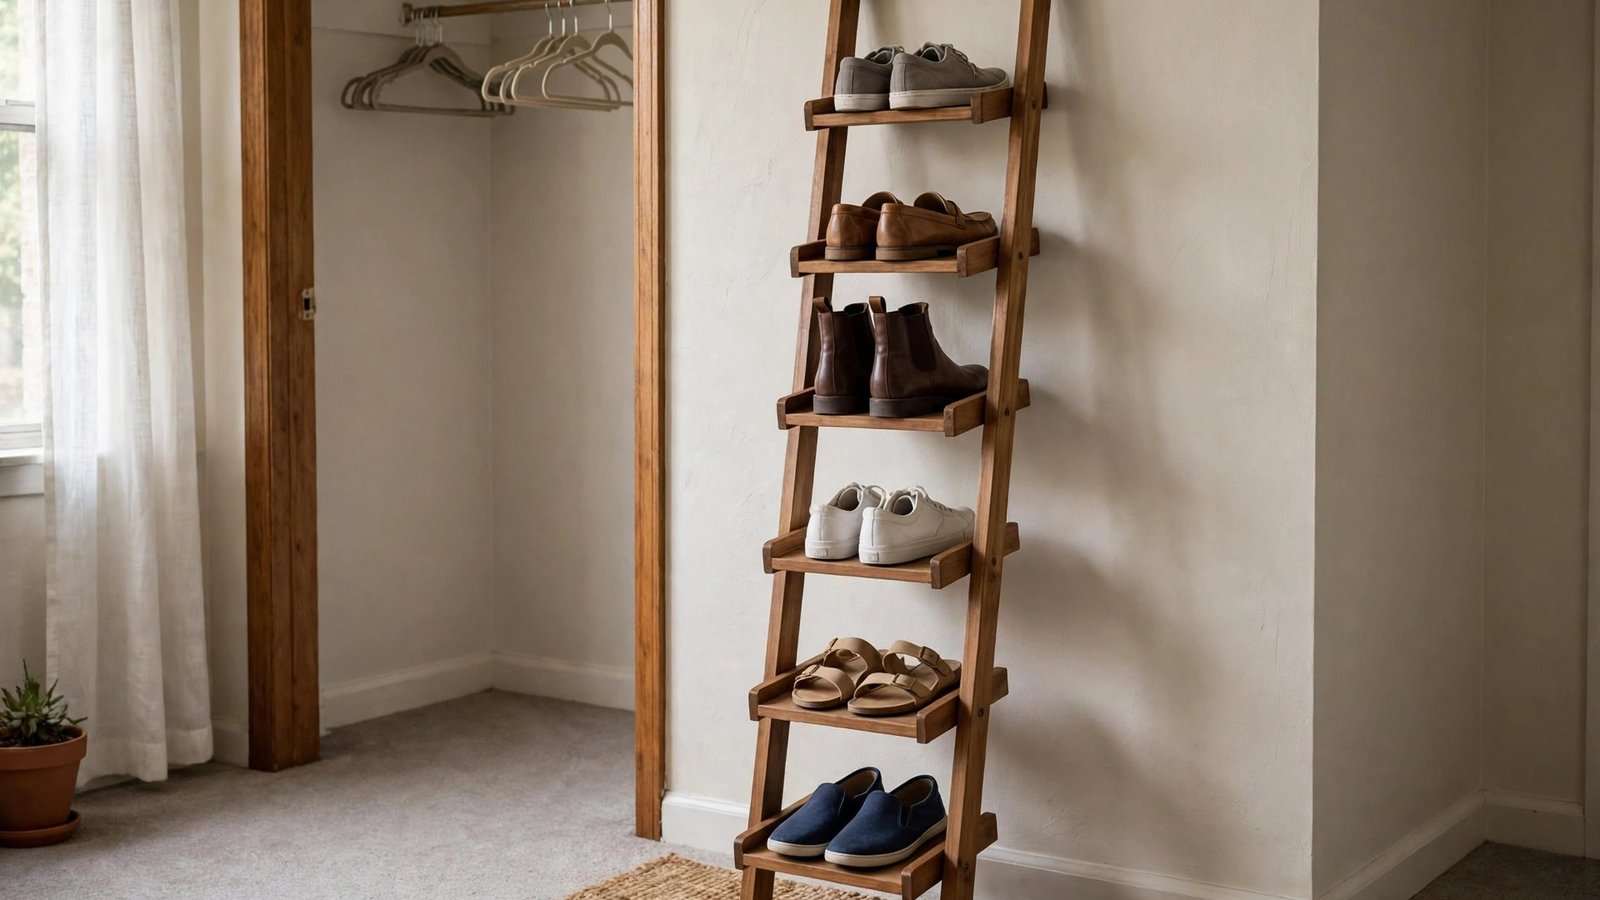
What it is: A tall, narrow ladder-style frame that leans against the closet wall, with slanted or flat shelves designed for shoes at a shallow angle.
I've personally seen this rescue closets where the floor space is the size of a bath mat. A lean-to tower takes up barely more floor than a single pair of shoes, but five shelves up the wall means five pairs — or ten if you tuck flats two to a shelf. The slanted versions display each pair like a little storefront, which makes choosing shoes in the morning genuinely faster.
Why it works for renters: It leans; it doesn't attach. The feet sit on the floor and the top rests against the wall with rubber pads, so there are no brackets and no marks. It's also the tallest storage-per-square-foot option on this list, which matters when your closet is wider than it is deep.
How to set it up:
1. Choose a tower width that clears your closet's side walls, and confirm the top will rest on the wall below the height of any shelving or sprinkler heads. 2. Place the rubber-padded feet on a rug-free spot on the closet floor so it can't slide, and press the top pads firmly against the wall. 3. Load the bottom shelves first and work upward, keeping the heaviest shoes low so the tower's center of gravity stays stable. 4. Angle taller heels or wedge pairs toward the back of each shelf so nothing topples when you grab a neighbor. 5. If the tower rocks on uneven floors, shim one foot with a folded piece of cardboard rather than forcing it level.
Approximate cost: $25–$55 for a five-tier lean-to shoe tower.
6. Entry-Adjacent Overflow Zone
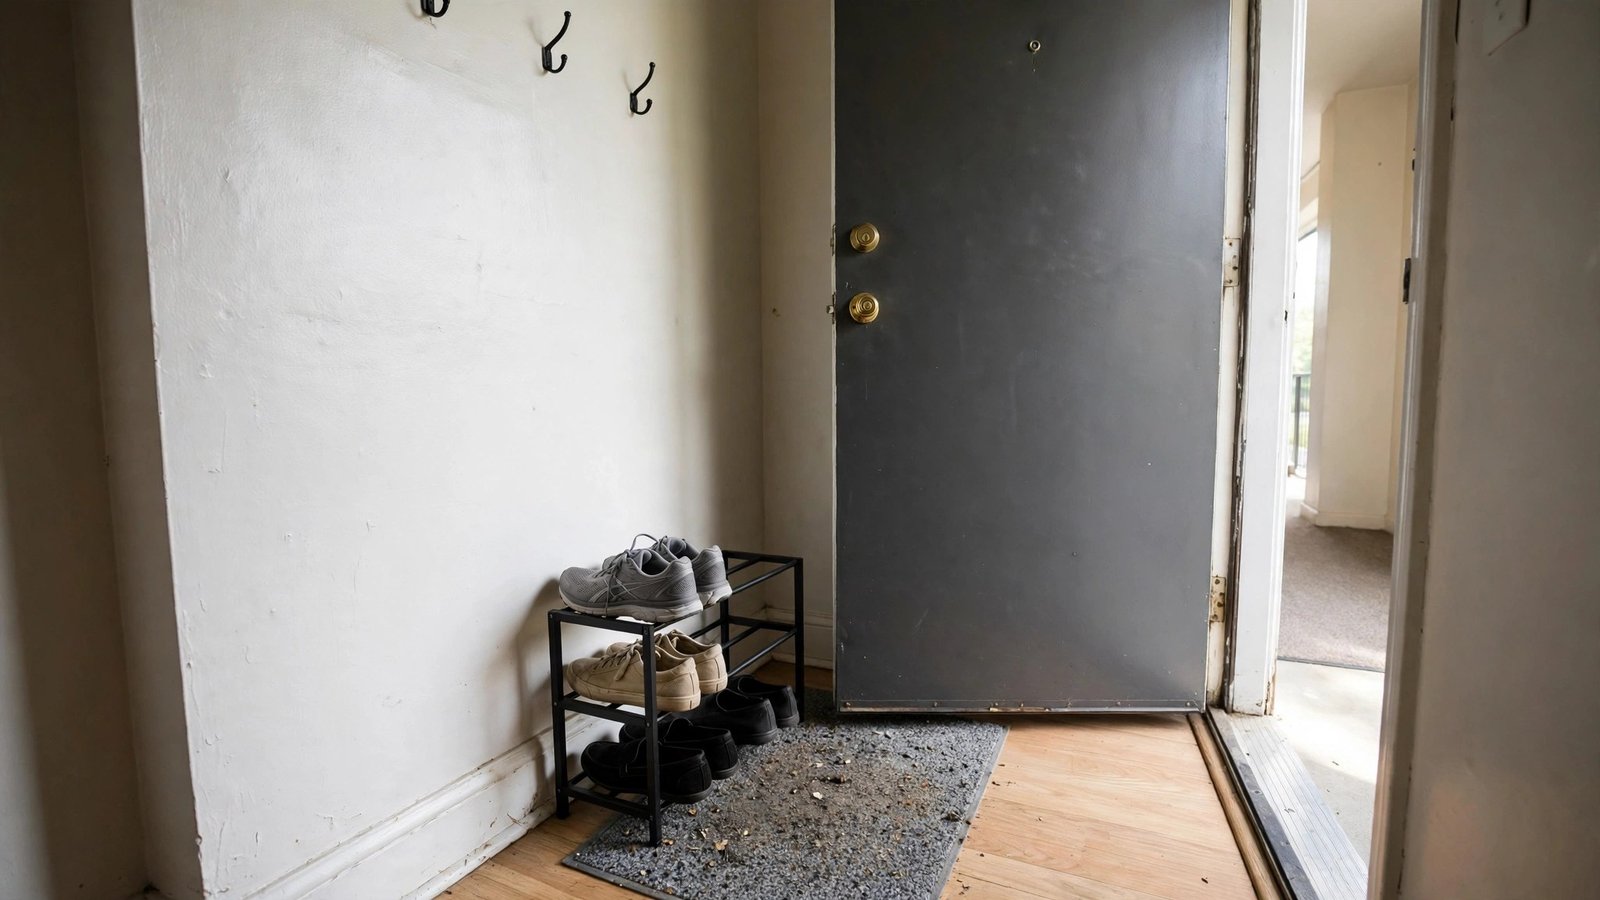
What it is: A slim, open shoe rack placed just inside your front door or on the wall of the hallway — a home for the three to five pairs in daily rotation so the closet never has to absorb the daily avalanche.
I've helped dozens of renters who kept their closets immaculate except for the part where daily life happened. Here's what I've noticed: you take shoes off at the door, and the door is never the closet. A dedicated overflow zone gives those daily pairs a real home, and your closet only stores the collection, not the chaos. It also keeps dirt and grit from migrating onto your closet shelves.
Why it works for renters: Freestanding slim racks and wall-leaning shelves need no installation. Place it against any wall within a few steps of the front door — even a three-inch gap beside a console table can hold a slim unit. If your lease forbids even leaning furniture in hallways (rare, but it happens), a low lidded storage bench does the same job and doubles as seating for tying shoes.
How to set it up:
1. Count the pairs you actually wear in a typical week — that number, plus one, is your overflow capacity. Never bigger. 2. Pick a rack shallow enough that it doesn't block the doorway's swing or the hallway's walking path; measure before you buy. 3. Line the rack's bottom with a washable mat or tray to catch rain and street grit, protecting rental floors from damage you could be charged for. 4. Put only this week's rotation here; everything else lives in the closet zones below. 5. Every Sunday, swap any pairs that didn't get worn back into the closet and bring out the week's real choices — the zone stays honest.
Approximate cost: $20–$50 for a slim two-to-three-tier open rack.
7. Frequency-Zone Floor Mapping
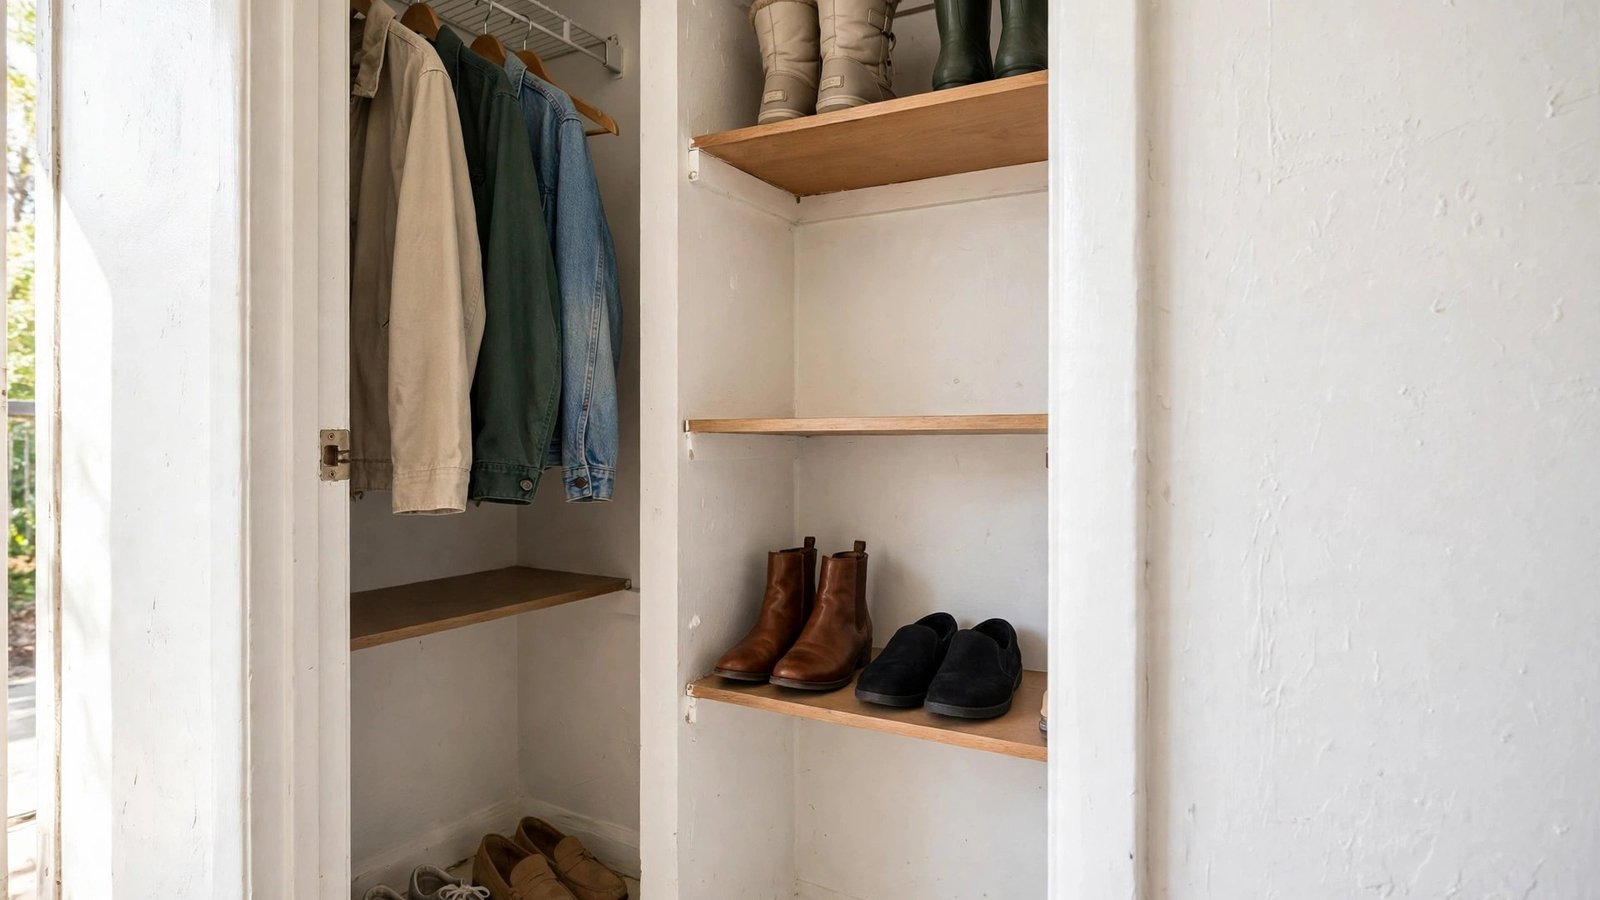
What it is: A system, not a product — you divide your closet floor into three zones by wearing frequency (daily, weekly, seasonal) and only ever store shoes where their zone dictates.
I've noticed this is the idea that makes all the other ideas work. Without it, the prettiest rack fills with random pairs and you're digging again in a month. The daily zone is whatever's within arm's reach at the closet entrance; the weekly zone is one step deeper; the seasonal zone is the back corners, top shelves, and under-hanging-clothes floor. It costs nothing and it transforms a closet overnight.
Why it works for renters: It's pure behavior with zero fixtures. You don't need permission, you don't need a budget, and you don't need a single new product to try it today. It's also the system that survives a move — your zones just redraw themselves in the new closet.
How to set it up:
1. Pull every shoe out of the closet onto the floor (yes, all of them) and sort them into three honest piles: worn this month, worn this season, worn rarely. 2. Assign the three zones in the closet before putting anything back — entrance-front for daily, middle for weekly, far corners and high spots for seasonal. 3. Return each pair to its zone, not its old spot, even if that feels wrong for a day. 4. Mark the seasonal zone's boundary with a strip of painter's tape on the shelf edge for the first month, so you don't drift. 5. Revisit the zones every season change — a winter daily boot becomes a summer seasonal pair, and the system stays honest.
Approximate cost: Free — this one is pure method.
8. Removable Hook-and-Rail Wall Storage
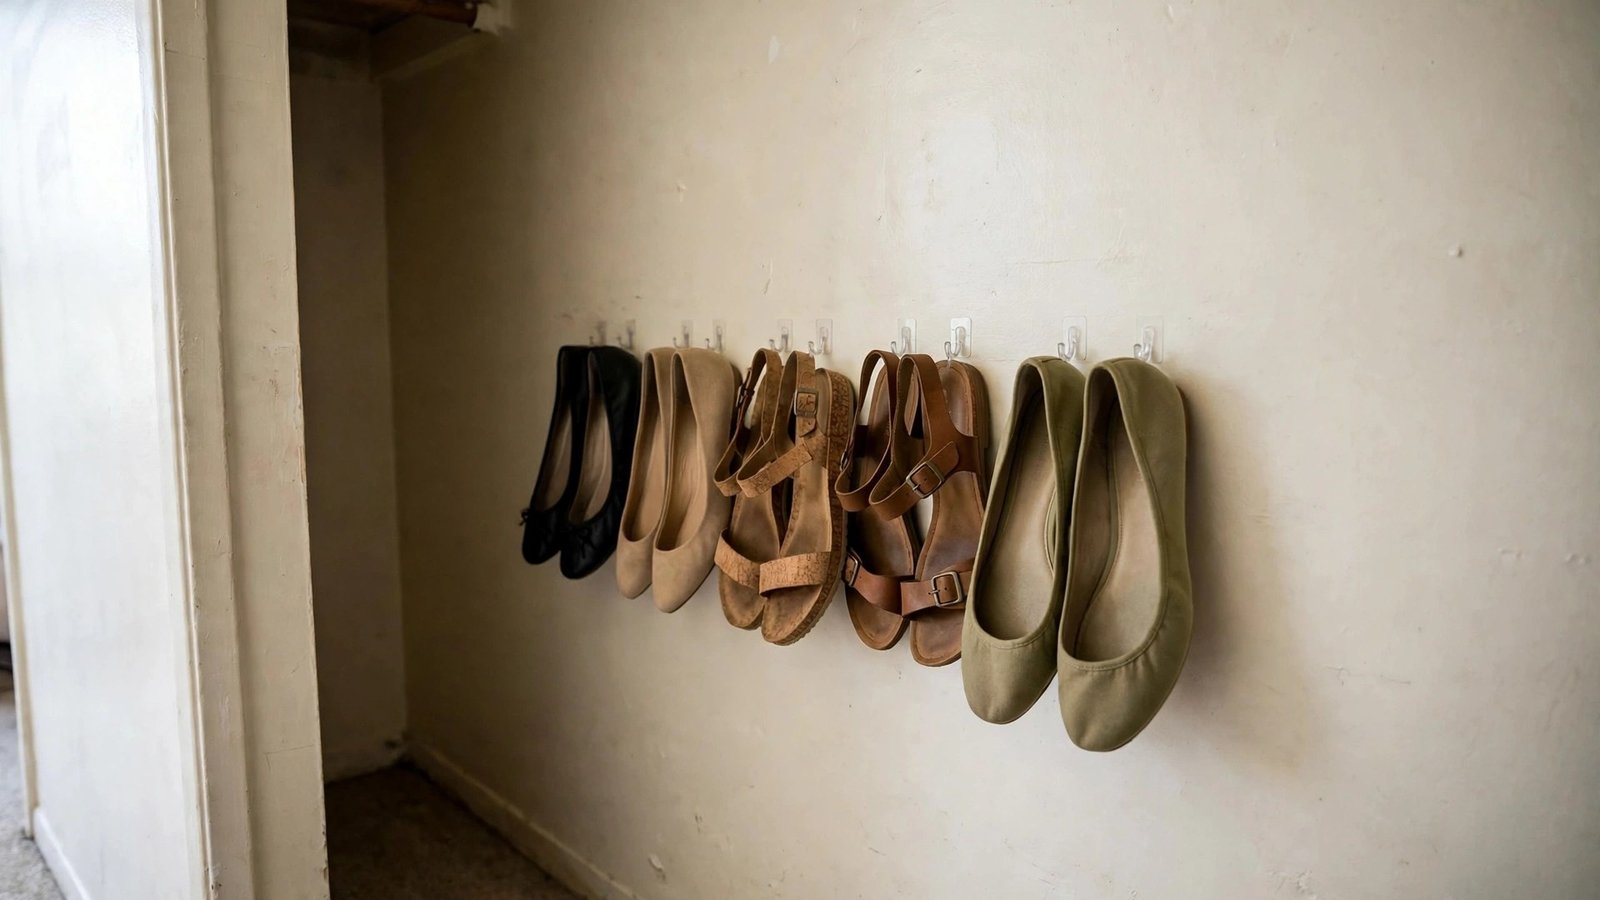
What it is: A row of strong removable adhesive hooks (or a tension-mounted rail) mounted on the closet's side wall, holding pairs of flats, sandals, and low heels by their straps or heels.
I've recommended this to renters whose closets have walls but no floor — and there are more of those than you'd think. Flats and sandals are light, flat, and hookable, which makes them perfect candidates for vertical wall space that otherwise does nothing. A row of six hooks holds six pairs in a strip of wall twelve inches wide.
Why it works for renters: Removable adhesive strips come off cleanly when heated gently with a hair dryer at move-out, leaving the paint untouched. This is the same product category most lease agreements already tolerate for picture hanging, so it rarely triggers landlord pushback. A tension-mounted rail between two walls is even safer — it uses zero adhesive.
How to set it up:
1. Clean the wall spot with rubbing alcohol and let it dry completely — adhesive strips grip painted closet walls far better on a clean surface. 2. Space the hooks so each pair has about five inches of clearance, and press each hook base firmly for thirty seconds. 3. Wait a full twenty-four hours before hanging any weight, per the strip manufacturer's instructions — early loading is the number-one cause of falls. 4. Hang shoes by their heel loops or ankle straps so they hang flat against the wall, and keep heavier shoes on hooks rated for their weight. 5. Test each hook with a gentle tug after the cure time, and re-press any that feel loose before trusting them.
Approximate cost: $8–$15 for a set of removable hooks; $15–$30 for a tension rail.
9. Under-Rod Hanging Shoe Cubbies
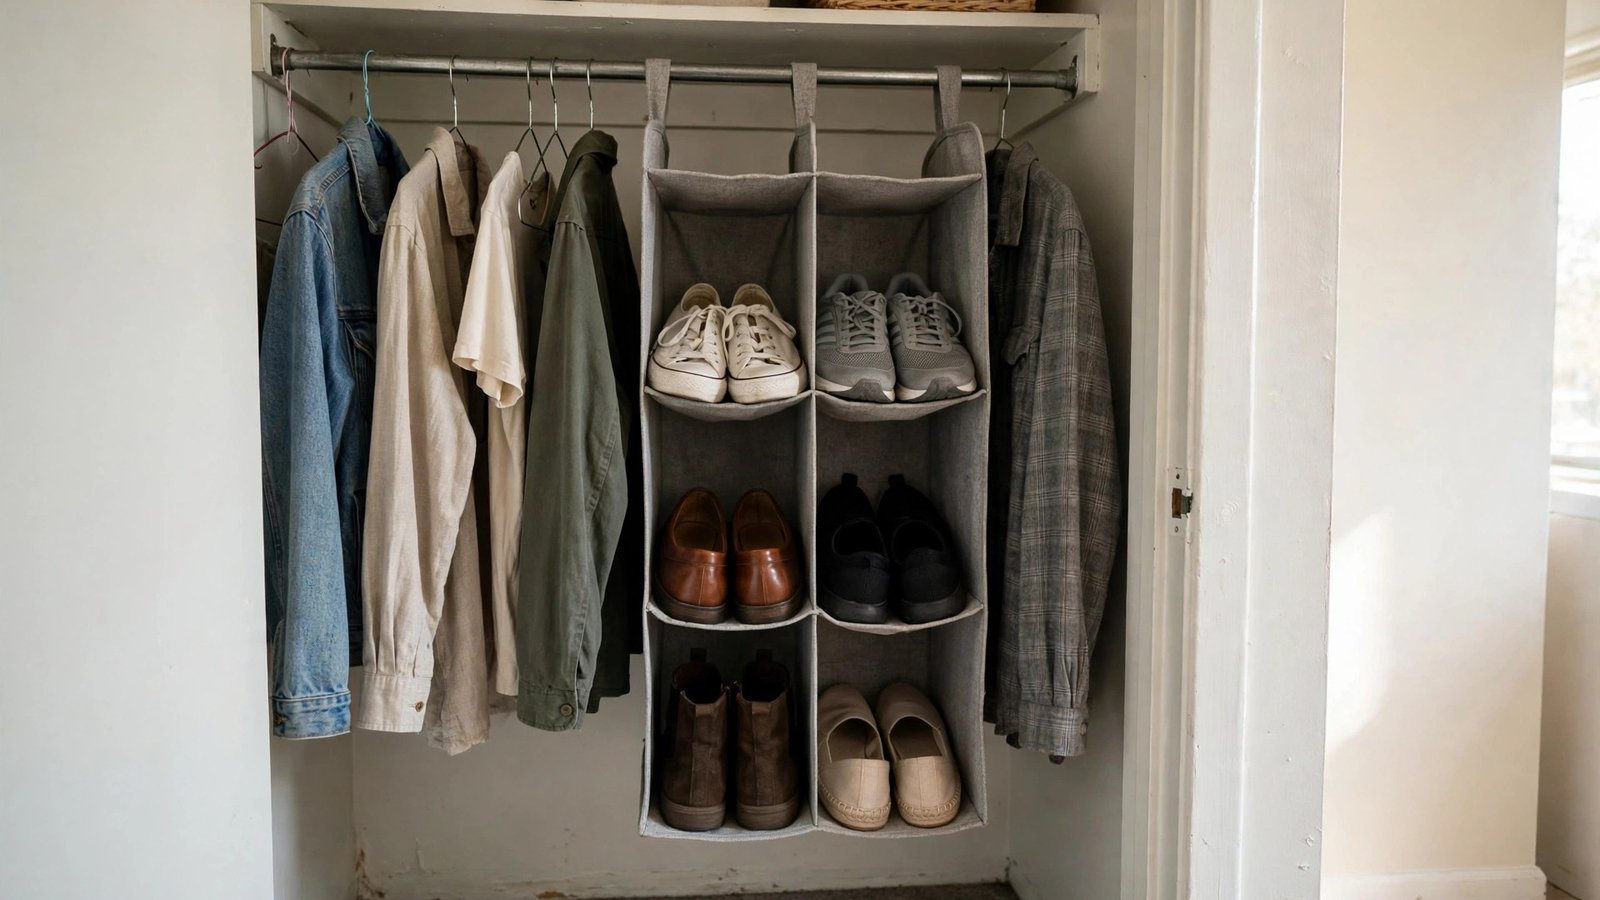
What it is: A fabric hanging shelf — usually six to ten cubbies — suspended from the closet rod, filling the airspace below your hanging clothes with shoe cubbies.
I've personally seen renters reclaim the dead zone between their hanging shirts and the closet floor. Your clothes occupy maybe the top half of that vertical space, and below them hangs nothing but air and your old shoe pile. A hanging cubby unit converts that air into structured, dust-covered storage that sways gently when you bump it instead of toppling.
Why it works for renters: It hangs from the rod by two fabric straps — no hooks into wood, no tools, no permission needed. It moves with the clothes: when you take the cubbies down for seasonal rotation, the rod is untouched. Choose a narrow unit for half-width coverage or two for a full rod.
How to set it up:
1. Measure the clear drop from the rod to the closet floor and choose a unit whose bottom cubby clears the floor by at least two inches. 2. Loop the straps over the rod and fasten them, then load the bottom cubbies first so the unit hangs straight. 3. Put one pair per cubby, and keep the heaviest pairs at the bottom to keep the unit hanging plumb. 4. Use the narrow side slots (most units have them) for tall folded scarves or single tall boots — bonus storage in the same footprint. 5. If the unit swings too much on a round rod, wrap a strip of non-slip liner over the rod under the straps.
Approximate cost: $12–$25 for a ten-cubby hanging unit.
10. Rolling Under-Closet Shoe Carts
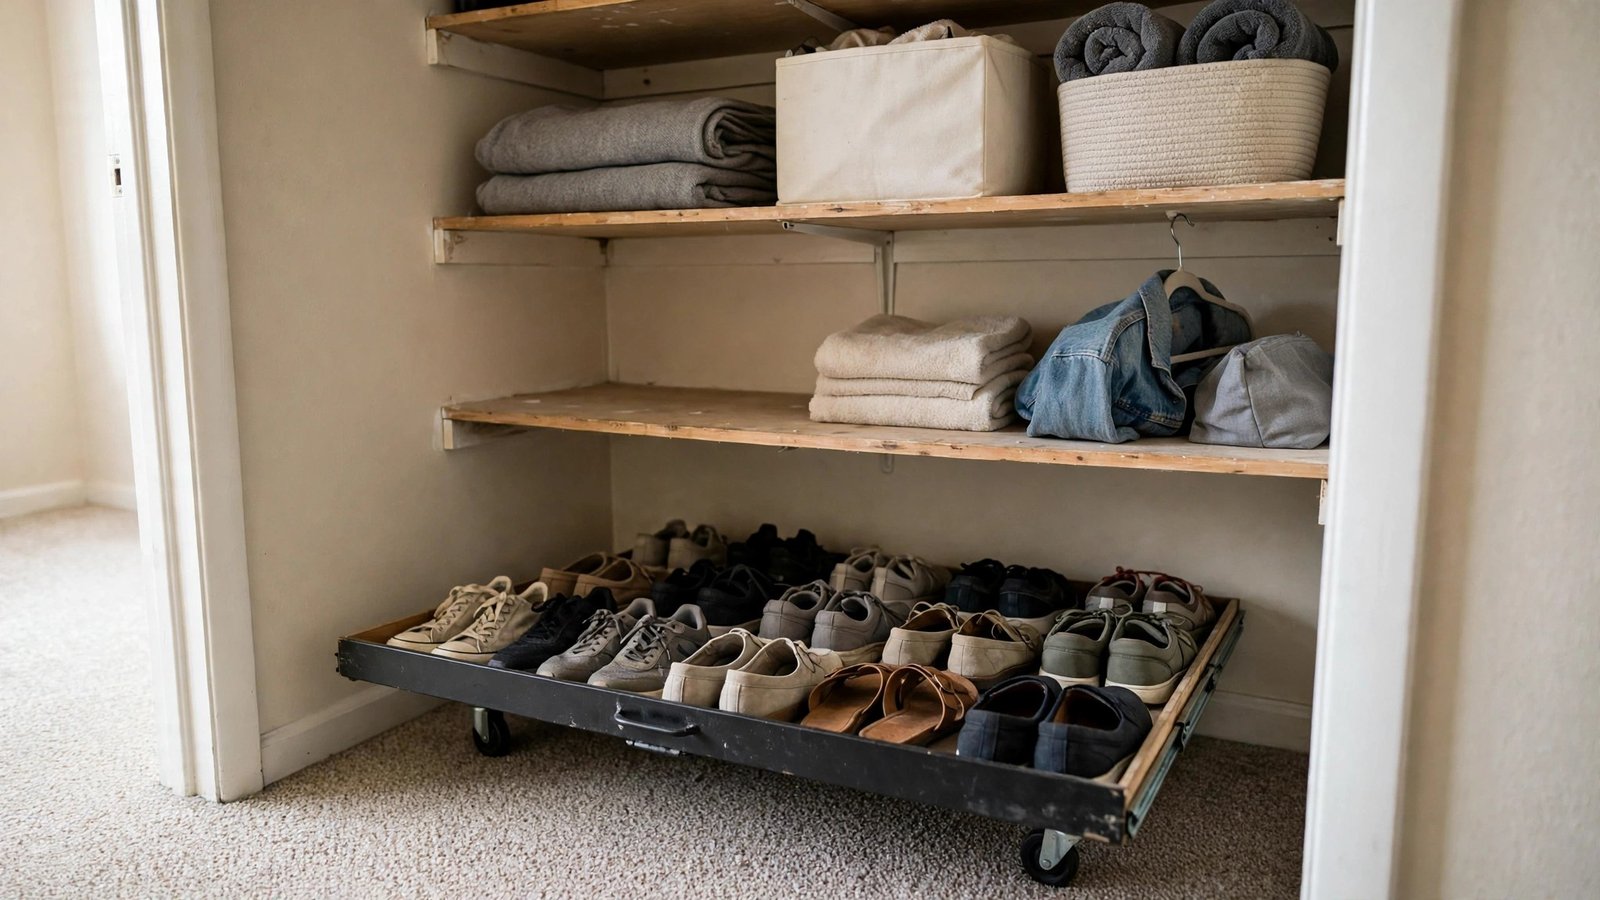
What it is: A low, wheeled cart — essentially a shallow rolling drawer — that slides under the closet's lowest shelf or under hanging clothes, rolling out for full access.
I've helped dozens of renters who had exactly four inches of nothing under their clothes and thought it was unusable. A low rolling cart turns that strip into real storage for flats, sandals, and even low heels. The wheels are the whole magic: you pull the entire cart out, pick your pair in the light, and roll it back in. No more kneeling on the closet floor to reach the back.
Why it works for renters: It touches nothing. The cart stands on its own casters, rolls on any floor, and goes with you to the next apartment. The low profile means it slides under spaces that shelves can't reach, including under the hanging cubbies from idea nine — layers of storage stacking on storage.
How to set it up:
1. Measure the clearance height under your lowest obstruction and buy a cart at least half an inch shorter than that measurement. 2. Test the roll on your closet floor before loading — thick carpet sometimes needs harder wheels, which most carts offer as a variant. 3. Arrange pairs toe-to-heel in rows so every shoe is visible from above when the cart rolls out. 4. Dedicate one cart per category (work flats in one, sneakers in another) so you're never sorting through a mixed cart. 5. Lock or chock the wheels once the cart is positioned so it doesn't creep forward and block the closet door's swing.
Approximate cost: $15–$35 per low rolling cart.
11. One Contained Weather-Ready Boot Zone
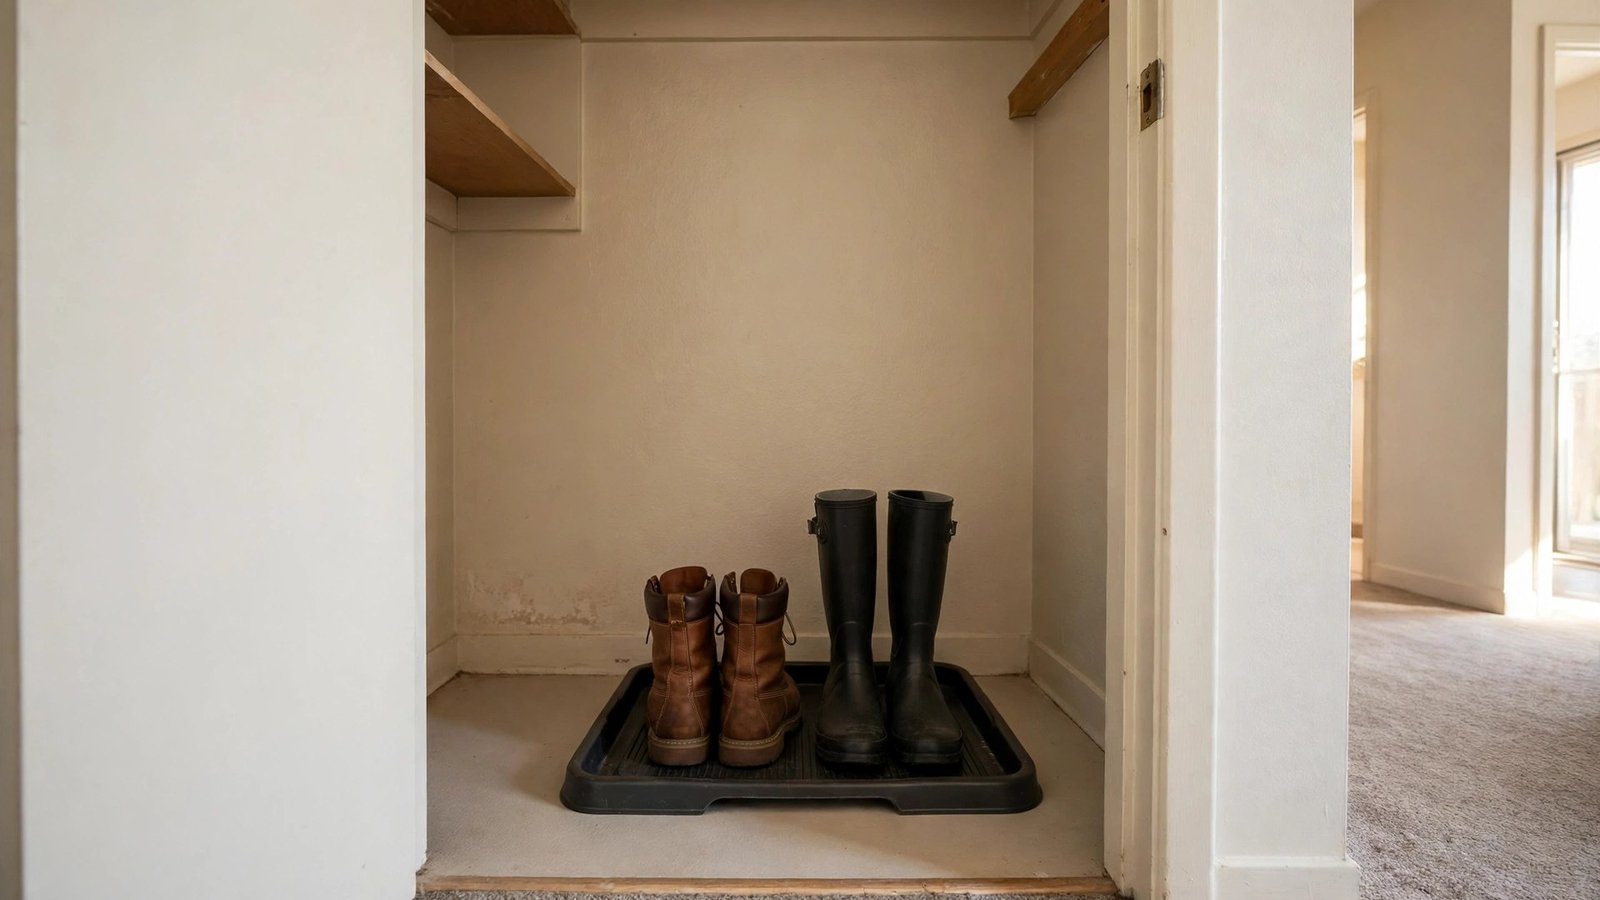
What it is: A single tray-lined floor section — one tray, one mat — where your current-season boots live upright or slanted, separated from the rest of the collection.
Boots are the closet-killers I've seen in every winter-rotation consultation, which is why they get exactly one dedicated zone here and nowhere else. A pair of tall boots takes the floor space of four pairs of flats and drags in slush, salt, and mud. Contain that damage in one washable tray and the rest of your closet stays pristine. This is also the only place wet footwear ever stands.
Why it works for renters: A boot tray sits on the floor — no installation, no wall contact, no permission. The tray catches the water and salt that would otherwise stain rental carpet or warp rental flooring, which is a genuine deposit-protection move. When boot season ends, the tray rinses off and stacks away flat.
How to set it up:
1. Pick a spot on the closet floor near the entrance — boots get the easiest access because they're the heaviest thing you'll reach for. 2. Lay a washable tray with a raised lip, sized to hold your current-season boots with a little elbow room between pairs. 3. Stand boots upright or slide them onto inexpensive boot shapers so the shafts don't fold and crack at the ankle. 4. Wipe the tray out weekly during wet months — standing water and salt are what actually damage rental floors. 5. When the season turns, move the boots to their off-season home (stacked in a box, stuffed with paper) and fold the tray away until next year.
Approximate cost: $12–$25 for a lipped boot tray; $8–$15 for a pair of boot shapers.
12. The One-In, One-Out Rotation Rule
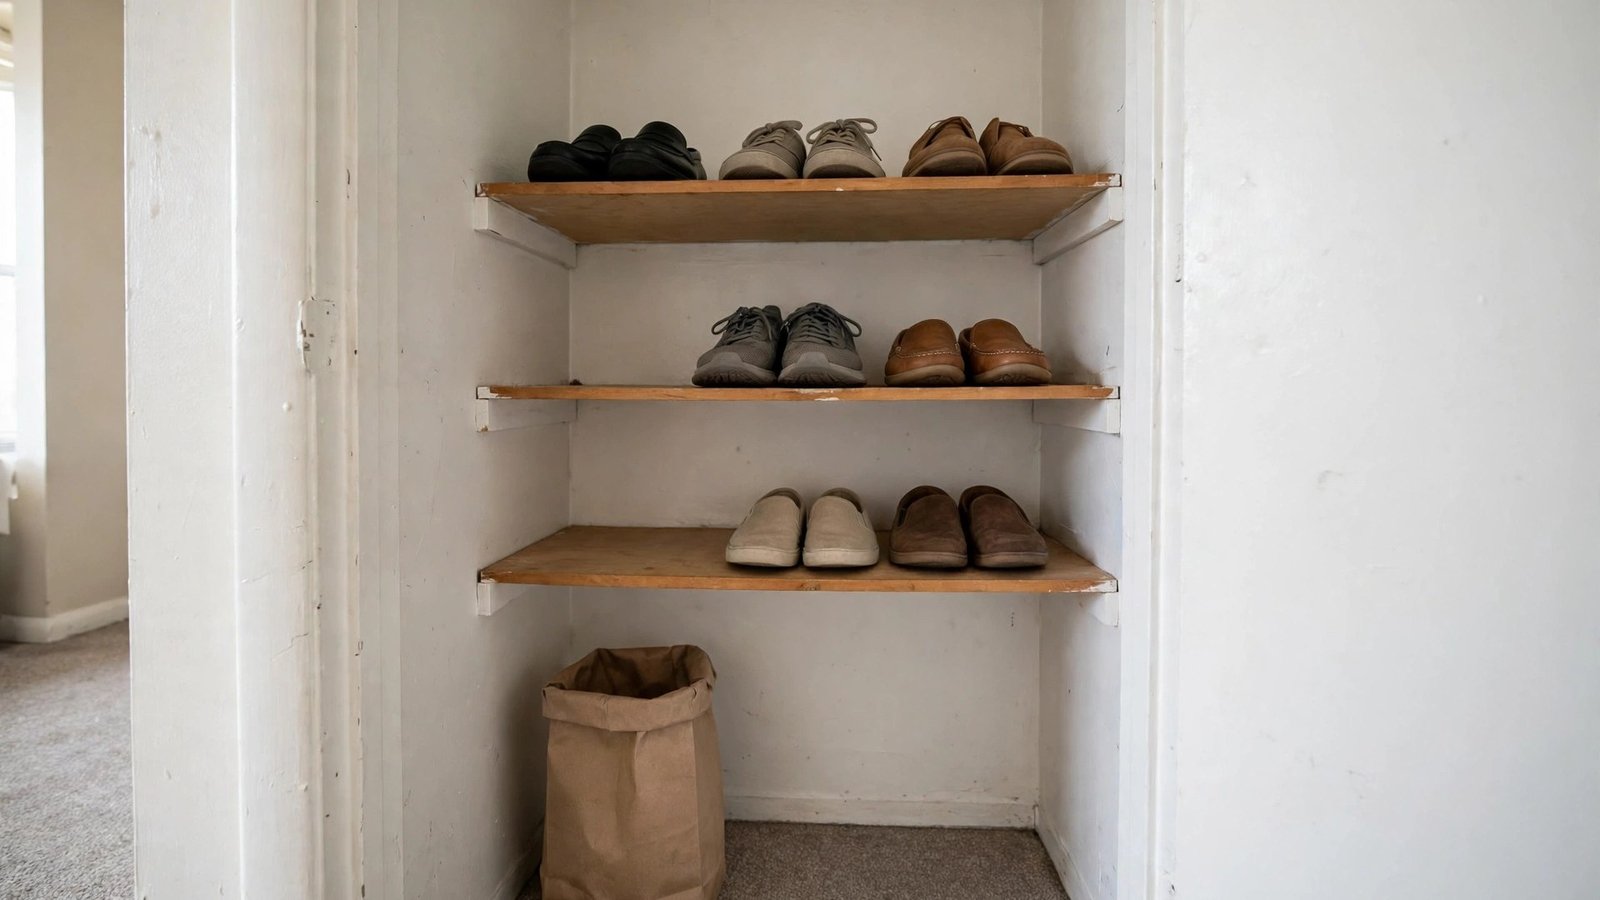
What it is: A personal policy — every new pair of shoes that enters the apartment means one pair leaves it (donated, recycled, or retired).
I've noticed that every storage system I've ever installed fails the same way: the collection quietly grows until the system overflows. This rule is the maintenance plan that protects the other eleven ideas. It costs nothing, requires no products, and honestly, it's the idea I'm proudest of recommending — because it turns a storage project into a closet that stays solved.
Why it works for renters: It caps your collection at whatever number fits your current system. When you know a new pair costs you an old pair, you buy better shoes and keep fewer of them — which means less floor space, less dust, and less packing when you move. It's fully within your control and survives every apartment change.
How to set it up:
1. Count your current pairs and write the number down — that's your cap. The number should match what your chosen storage ideas can actually hold. 2. Define what "out" means for you: donate wearable pairs, recycle worn-out ones through a shoe recycling program, or hand down to a friend. 3. Keep a small donation bag in the closet; when a pair underperforms, drop it in the bag immediately instead of "deciding later." 4. When you're tempted by a new pair, pick its replacement first — if nothing in the closet deserves to go, the new pair doesn't come home. 5. Review the cap once a year and adjust it only if your storage system genuinely grew (a bigger closet in a new apartment counts).
Approximate cost: Free — and it probably saves you money.
Conclusion
A tiny rental closet doesn't need more square footage — it needs every shoe to have a home it returns to without thinking. I've helped dozens of renters go from footwear avalanches to closets they open with pride, and the pattern is always the same: go vertical with doors, rods, and hooks, keep daily pairs near the door, contain the boots in one washable tray, and let a simple rotation rule protect the whole system.
You've got twelve ideas here, and you don't need all twelve. Pick the two or three that match your closet's actual shape — the over-door organizer if your door back is empty, the stacking racks if your shelves have air to spare, the rolling cart if you've got dead space under your clothes — and start there. A deposit-safe, drill-free shoe system is absolutely within reach in a single weekend.
Please save this visual guide on Pinterest and share it with a friend who's still kicking their shoes into a pile — because a beautiful, organized tiny closet is the kind of small win that makes renting feel like home.

Amelia leads HavenlyStyle’s editorial vision with a passion for elegant interiors and practical home living. With years of experience in home décor and lifestyle content, she ensures every article is accurate, inspiring, and easy to follow. From timeless decorating ideas to the latest interior design trends, Amelia is committed to helping readers create beautiful, functional spaces while maintaining HavenlyStyle’s trusted and welcoming voice.