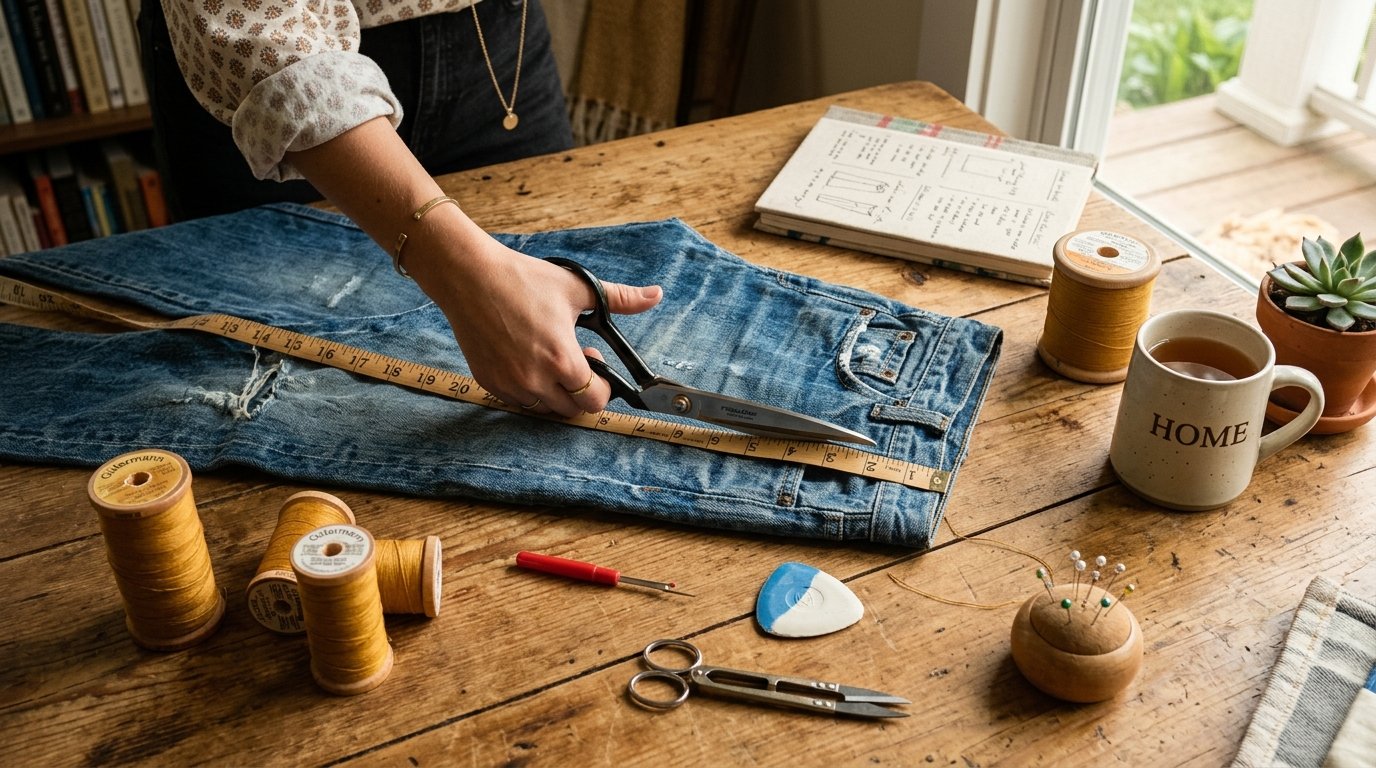
Creating stunning DIY clothes jeans completely transforms how you look at your wardrobe. You probably have three pairs of old pants sitting unused right now. Instead of throwing them away, you can breathe new life into thick denim fabrics. I remember tossing my favorite ripped pairs before realizing their hidden potential. The right techniques turn worn fabric into premium fashion statements. This guide reveals my absolute favorite methods for upgrading forgotten pieces. You will save money while building a completely custom closet. Sustainable fashion feels incredibly rewarding when you make it yourself.
Transforming these garments does not require advanced sewing skills or expensive equipment. I started with nothing but basic scissors and a simple needle. You will discover exactly how to execute these projects flawlessly today. We will cover everything from simple cuts to advanced restructuring methods. I’ve noticed people get overwhelmed by Pinterest photos that lack real instructions. That stops today because I am breaking down every single step clearly. You will learn the exact tools needed for professional results. Get ready to turn your discarded items into your most complimented daily outfits.
Executive Summary
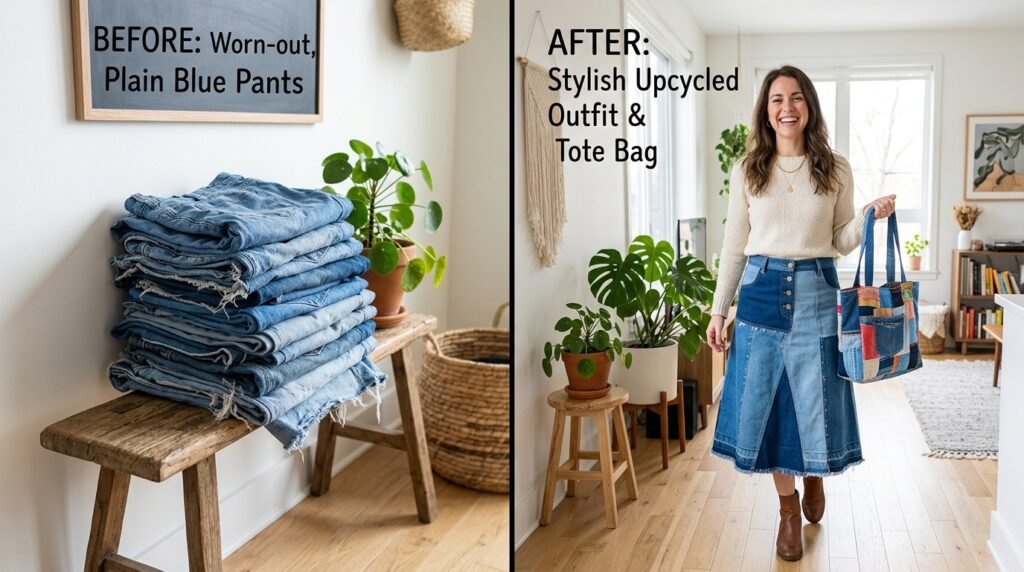
This comprehensive guide delivers ten specific methods to completely reinvent your denim collection. You will learn actionable steps for creating everything from simple cutoffs to complex structured garments. I will show you exactly how to avoid the catastrophic mistakes I made early on. We cover realistic timeframes ranging from ten minutes to weekend-long projects. You will also see precise cost breakdowns for necessary tools like fabric scissors and heavy-duty thread. Most projects cost under twenty dollars while yielding results that look incredibly expensive. I’ve tried these methods repeatedly to ensure they actually work.
You will discover why certain fabrics work better for specific projects than others. I am sharing my honest thoughts on popular tools from brands like Singer and Dritz. You will find detailed comparisons between hand sewing and machine techniques. Every section includes practical troubleshooting advice for when things inevitably go wrong. That is why many designers recommend starting with simple alterations first. We will explore various demographic trends to ensure your finished pieces look modern. By the time you finish reading, you will possess expert knowledge on fabric manipulation. Your wardrobe transformation begins right now.
1. Frayed Edge Shorts
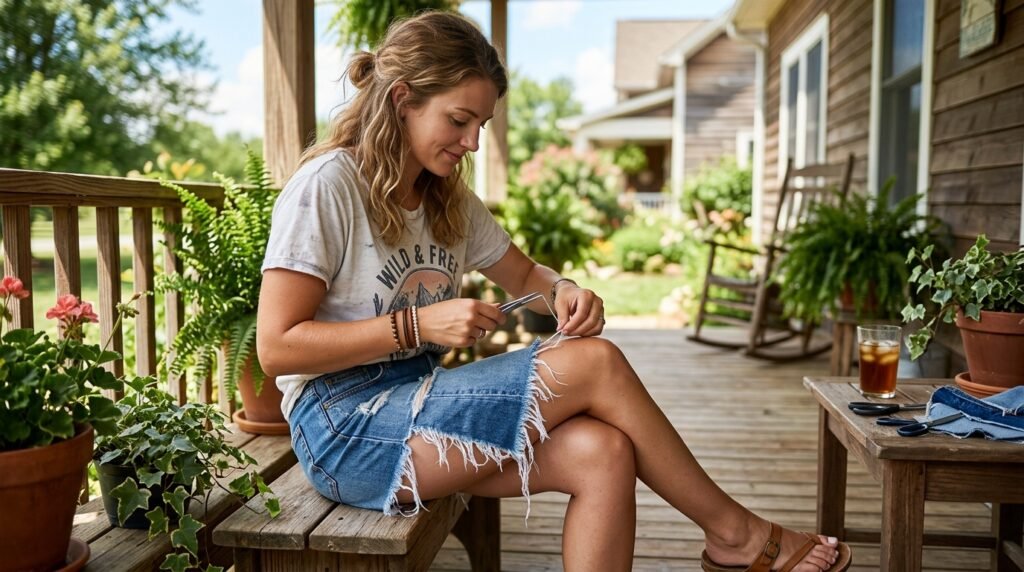
Creating the perfect summer staple starts with finding the right base garment. You want sturdy fabric that holds a raw edge without completely falling apart. I destroyed several pairs before realizing stretch blends do not fray well. Pure cotton gives that authentic vintage look everyone wants right now. You need sharp Gingher fabric shears to make the initial cuts cleanly. I’ve seen this work perfectly when you cut one inch below your desired length. The fabric shrinks slightly as the threads loosen up over time. Always mark your line with washable chalk before cutting anything.
Getting the fringe exactly right requires patience and a good pair of tweezers. Do not simply throw them in the washing machine and hope for the best. I manually pull the horizontal white threads while leaving the vertical blue ones intact. This creates that high-end designer look without the hefty price tag. You should wash them in cold water inside out to protect your new fringe. I highly recommend sewing a straight stitch just above the fray line. This prevents the shorts from unraveling completely during regular wear. Your new favorite summer outfit is ready.
Understanding the inseam angle completely changes how your final project fits your body. Most beginners cut straight across, which creates an unflattering boxy shape immediately. I always angle my cuts slightly downward toward the inner thigh area. This provides better coverage while keeping the outer edge playfully short. It is a subtle trick I learned from studying expensive boutique brands. You can practice this angle on paper before applying it to your actual garment. That is why many designers recommend creating a cardboard template first. Your proportions will look balanced and intentionally tailored every time.
Choosing the right distressing tools makes a massive difference in the final texture. I used to scrape fabric with cheap razors, which just ruined the weave. Now I use a proper Dritz distressing block for controlled, natural-looking wear. You gently rub the block over the pockets and hemline to soften the edges. This mimics years of natural wear in just about fifteen minutes of work. It costs around ten dollars but completely elevates your DIY clothes jean shorts. Always work on a flat, solid surface to maintain control over the abrasion. Your results will look professional.
Maintaining your new creation requires some specific laundry care habits going forward. I ruined my first successful project by tossing it into a hot dryer. High heat warps the raw edges and causes excessive, uncontrolled unspooling immediately. You should always air dry these pieces flat on a clean towel. If you must use a machine, select the delicate cycle with cold water. I’ve noticed people skip this advice and regret it after one wash. Proper care ensures your custom piece lasts for many future summer seasons. Treat your handmade items like expensive investments they truly are.
2. Two-Tone Midi Skirt
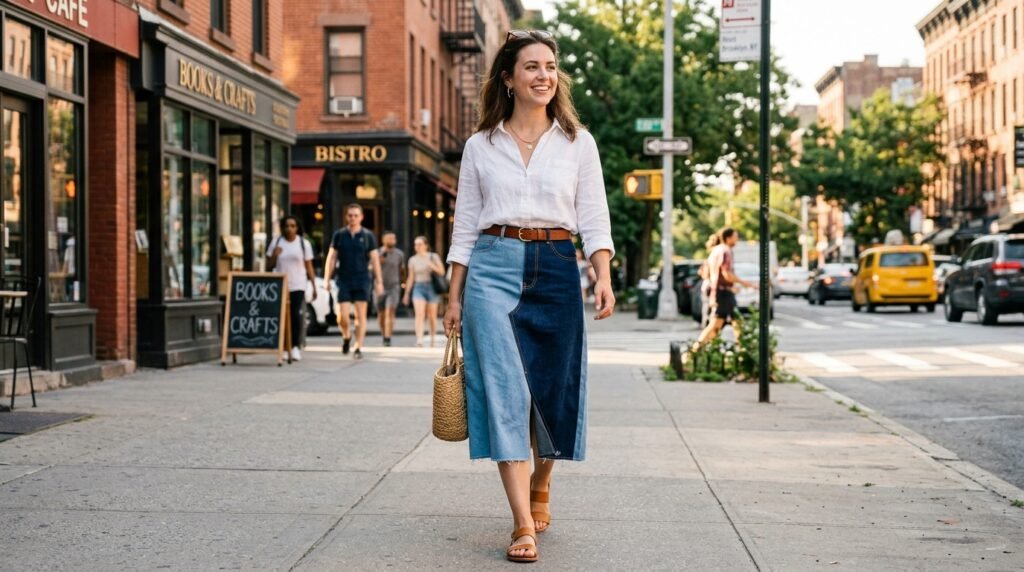
Creating a stunning midi skirt from old pants looks incredibly sophisticated. You will need two pairs of contrasting pants to achieve this striking design. I prefer mixing a light wash with a deep indigo for maximum impact. You must carefully unpick the inner seams using a sharp seam ripper tool. I remember rushing this step once and accidentally tearing the main fabric panel. That is why many designers recommend taking your time with the initial deconstruction. Use a reliable tool like the Clover seam ripper for smooth thread removal. Patience during prep prevents frustrating structural mistakes later.
Once you open the legs completely, you must pin the fabric flat. Lay the lighter denim underneath the open triangle gap of the darker pair. This creates a beautiful contrasting panel right down the center front. I always use glass head pins because they glide through thick fabric effortlessly. You want to pin generously to prevent the layers from shifting while sewing. I’ve tried using cheap plastic pins, but they bend and break instantly. Securing the fabric properly ensures your new DIY clothes jeans skirt drapes perfectly. Take time to smooth out any hidden fabric wrinkles.
Sewing The Panels
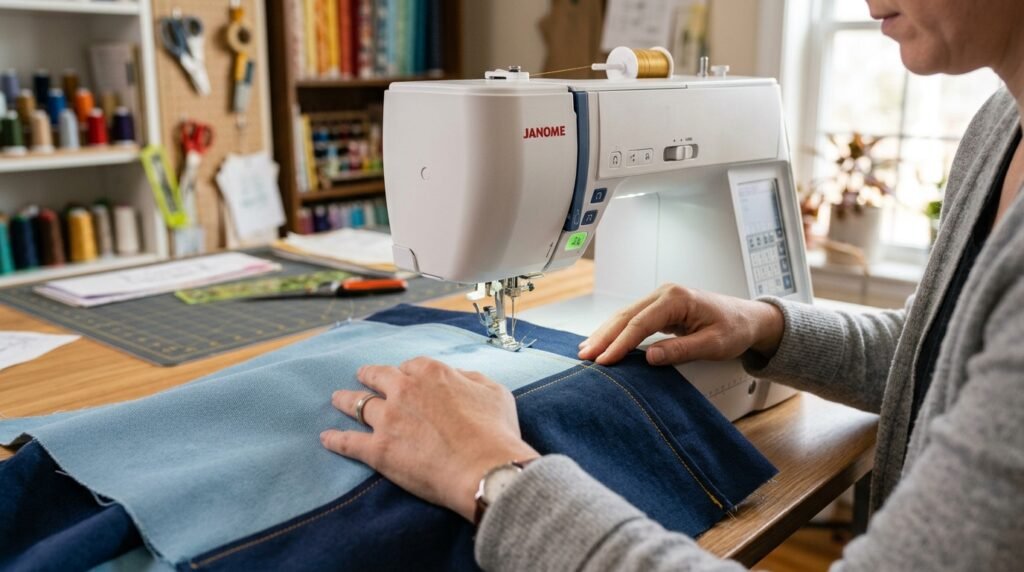
Sewing through multiple layers requires a heavy-duty machine needle designed for denim. I highly recommend the Schmetz denim needles in size one hundred for this. A standard needle will snap immediately and potentially damage your sewing machine. You should use a strong topstitching thread in a classic golden yellow color. I usually lengthen my stitch setting to three millimeters for a professional finish. Go incredibly slow when sewing over the thick central crotch seam area. I have broken countless needles by rushing through these dense fabric intersections. A steady pace guarantees a beautifully straight seam line.
Finishing the hem on a midi skirt dictates the entire aesthetic vibe. You can leave it raw for an edgy, relaxed weekend style look. I personally prefer a clean, folded hem for a more polished appearance. Fold the bottom edge up half an inch twice and press it flat. Use a hot iron with plenty of steam to crease the thick material. I’ve seen this work beautifully on skirts meant for casual office environments. Stitch close to the upper fold to secure the hem permanently in place. Your custom contrasting skirt is now ready to wear.
3. Patchwork Tote Bag
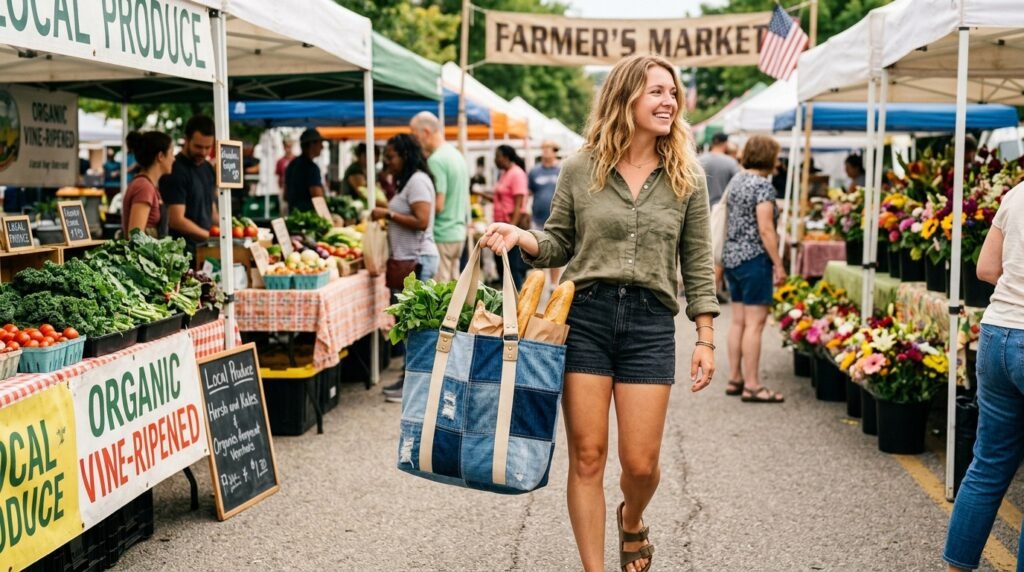
Repurposing small fabric scraps into a functional tote bag reduces textile waste beautifully. You can use all those leftover pieces from your previous short projects here. I love cutting various washes into identical four-inch squares for a uniform look. You will need roughly forty squares to construct a standard grocery tote bag. I once tried random shapes, but the final structure ended up horribly warped. That is why many designers recommend starting with uniform geometric blocks instead. Sewing them together creates a sturdy, visually striking textile that handles heavy items. It represents practical, sustainable fashion beautifully.
Assembling the patchwork panels requires precise quarter-inch seam allowances on every square. I always press my seams open flat after sewing each row together. This reduces bulky intersections that make bag construction incredibly difficult later on. You should cut a strong canvas fabric to line the inside properly. I’ve noticed unlined bags stretch out terribly when you carry heavy items. A simple cotton canvas liner adds crucial structural integrity to your finished piece. You can also add interior pockets using leftover back pockets from the original pants. This clever trick provides perfect storage for your phone.
Creating durable handles is the most critical step for bag longevity. I strongly advise against making handles from patchwork because they lack structural strength. Cut long, solid strips from the strongest part of your leftover fabric instead. Fold the edges inward and stitch down both sides for maximum durability. I always reinforce the attachment points with an extra box stitch pattern. My very first bag dropped a heavy laptop because I skipped this crucial step. Secure handles transform a basic craft project into a reliable daily accessory. You will use this custom tote bag constantly.
Adding hardware elevates your tote from a basic craft to a premium accessory. I like installing a heavy-duty magnetic snap closure at the top center. You can find excellent brass hardware kits from brands like Tandy Leather online. Installing these requires a simple craft knife and some basic hand strength. I also recommend adding metal feet to the bottom to protect the fabric. I’ve seen this work incredibly well for bags used during daily commutes. Small hardware details completely change how people perceive your handmade items. It looks like an expensive boutique purchase rather than upcycled trash.
4. Cropped Raw Hem
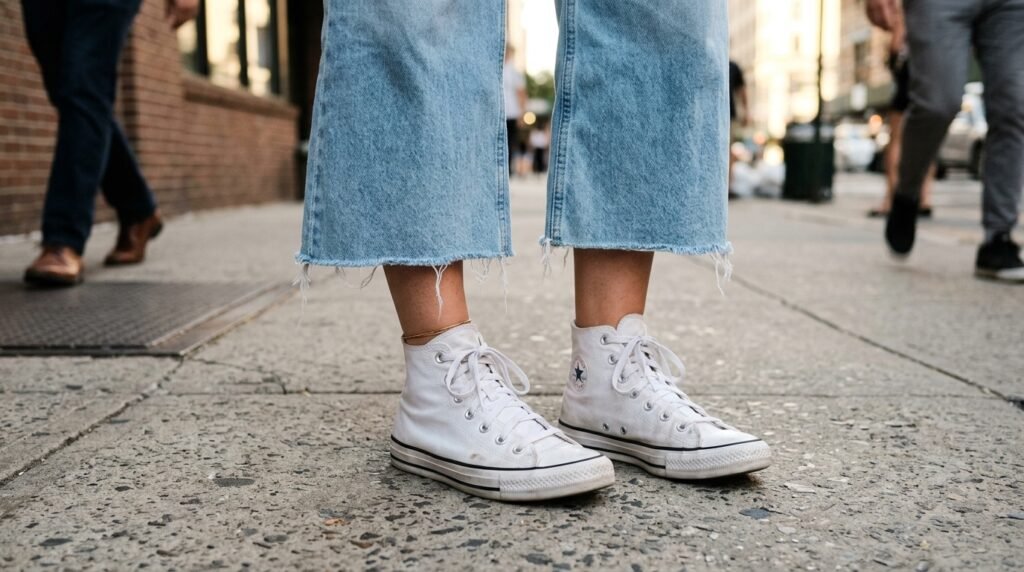
The cropped silhouette completely updates outdated pants hiding in your closet right now. This technique works exceptionally well on wide-leg styles that feel too heavy. I completely ruined a vintage pair by cutting them way too short once. Always try the pants on with your favorite shoes before making any marks. You want the hem to hit exactly right at the ankle bone. This specific length creates a flattering visual break that elongates your legs beautifully. Use a tailor’s chalk pencil to draw a perfectly straight line across. Precision during this step guarantees a balanced final look.
Cutting the fabric cleanly is crucial for achieving an intentional raw aesthetic. You must lay the pants completely flat on a large cutting mat first. I use a heavy acrylic ruler and a fresh rotary cutter for this. Scissors often create jagged, uneven lines that look sloppy rather than stylish. I’ve noticed people rush this step and end up with lopsided pant legs. A rotary cutter slices through both layers of fabric seamlessly in one motion. It costs about twenty dollars but dramatically improves your DIY clothes from jeans. The investment pays off instantly through professional results.
Managing the raw edge prevents your new crop from shrinking into shorts. You want a subtle fray without losing an entire inch of length. I run a simple straight stitch exactly one-quarter inch above the cut line. Choose a thread color that exactly matches the denim to keep it invisible. I tried skipping this step before, and the hem completely unraveled during laundry. That is why many designers recommend this invisible security stitch on raw edges. It locks the horizontal threads in place permanently while allowing minimal fraying. Your pants will maintain their perfect cropped length forever.
Styling cropped pants effectively changes based on the footwear you choose daily. I absolutely love pairing them with classic high-top sneakers during the spring months. The raw edge sits perfectly above the shoe collar without awkward bunching. You can also wear them with elegant ankle boots for a dressed-up look. I’ve seen this work nicely for casual dinners or creative office environments. It proves how versatile a simple alteration makes your previously unworn garments. You just created a trendy, highly wearable piece in under twenty minutes. This remains my most frequently recommended quick wardrobe fix.
5. Vintage Denim Corset

Transforming stiff pants into a structured corset requires intermediate sewing knowledge. This project leverages the natural rigidity of heavy fabrics for excellent body support. I recommend using non-stretch vintage material because spandex blends lack necessary structure. You will need to print a reliable corset sewing pattern online first. I highly recommend the digital patterns from Etsy sellers who specialize in upcycling. I completely botched my first attempt by trying to drape it without templates. Following a structured pattern ensures the final garment actually fits your torso securely. Proper planning is everything when sewing tightly fitted clothing items.
Cutting the pattern pieces requires strategic placement on your flat source fabric. You must align the grainline arrows on the pattern perfectly with the fabric. I always place the center front piece on a seamless flat section first. You can creatively incorporate existing flat-felled seams into the side corset panels. I’ve noticed this adds fantastic visual interest that highlights the upcycled nature perfectly. Always trace your pattern pieces with chalk before cutting anything out permanently. Adding a half-inch seam allowance around every piece is absolutely non-negotiable here. Precise cutting leads directly to a perfectly fitted final garment.
Adding Structural Boning
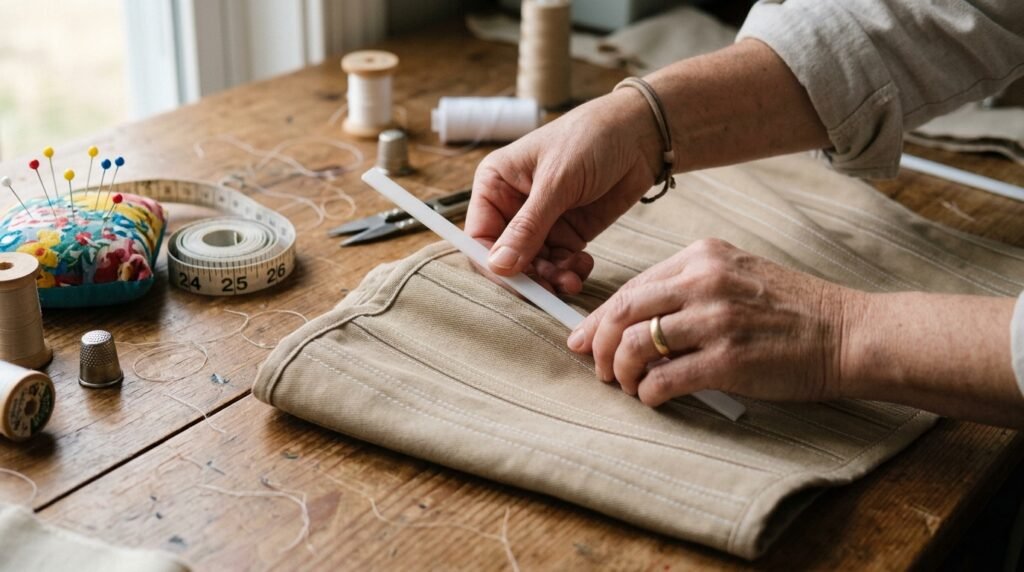
A corset needs internal structure to maintain its shape during daily wear. You must sew narrow vertical channels along the lining to hold the boning. I strictly use Rigilene polyester boning because it bends comfortably with your body. Metal boning pokes through the fabric easily and feels incredibly restrictive. I’ve tried cheap plastic substitutes, but they warp permanently from simple body heat. You simply slide the Rigilene strips into your sewn channels and cap the ends. This internal architecture transforms floppy fabric into a supportive, high-fashion statement piece. Your posture will automatically improve while wearing this.
Finishing the back closure gives you several distinct styling and hardware options. I personally prefer installing metal grommets for a traditional lace-up aesthetic. You need a specialized grommet setting tool, which costs around fifteen dollars locally. I remember hammering them incorrectly once, ruining the entire back panel instantly. Take your time punching the holes and securing the metal rings tightly. That is why many designers recommend practicing on scrap fabric multiple times first. Thread a beautiful silk ribbon through the eyelets for a stunning texture contrast. The lace-up back allows for adjustable sizing as your body changes.
Styling a denim corset opens up incredible layering opportunities for any season. You can wear it directly over a crisp white button-down shirt for work. I frequently pair mine with a matching skirt for a bold monochromatic look. It creates that highly sought-after structured aesthetic without spending hundreds of dollars. I’ve seen people layer these over loose floral dresses for amazing contrast. This project demands patience, but the unique result turns heads constantly. You completely elevated your wardrobe while keeping textiles out of local landfills. This represents the absolute pinnacle of sustainable DIY upcycling efforts.
6. Bleach Splatter Finish
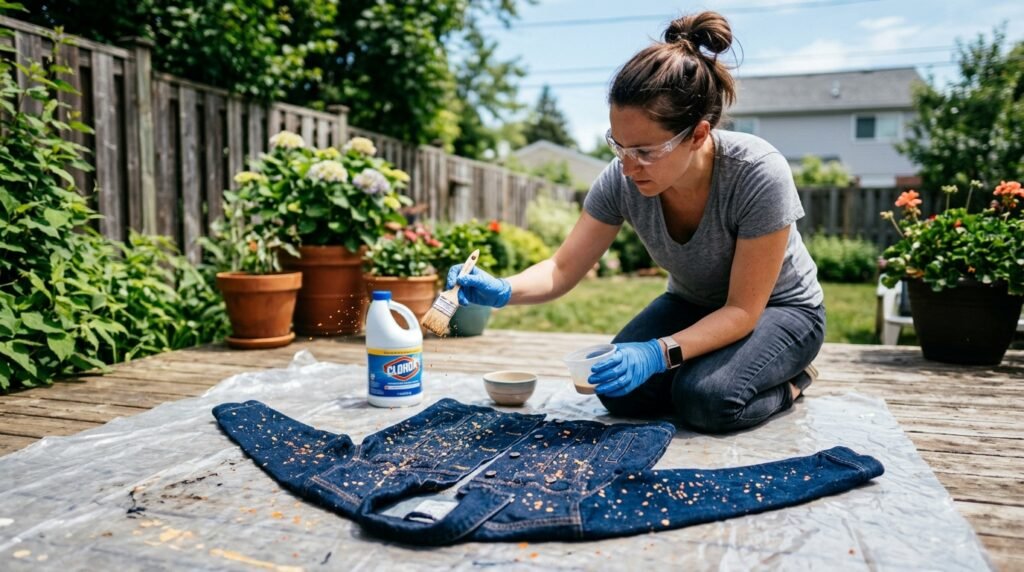
Applying household bleach completely transforms dark fabrics with dramatic, artistic visual effects. You must perform this project outdoors because the chemical fumes are dangerous indoors. I always wear thick rubber gloves and old clothes before opening the bottle. I once ruined my favorite shirt because a tiny bleach droplet splashed up. Protect your surrounding workspace with heavy plastic drop cloths to prevent property damage. You only need standard liquid bleach mixed with water in a spray bottle. A fifty-fifty dilution ratio provides perfect contrast without destroying the underlying fabric fibers. Safety precautions make this creative process completely stress-free.
Executing the splatter technique requires a balance of chaos and careful control. I lay the garment flat and use a stiff bristle paintbrush for application. You dip the brush into your solution and flick your wrist sharply downward. This creates natural-looking stars and speckles across the deep blue background. I’ve noticed people get heavy-handed and create giant, ugly white blobs instead. You should start with a light layer, wait ten minutes, and assess. The color lifts gradually, turning from blue to orange, then finally pale yellow. Patience ensures you achieve that perfect vintage punk rock aesthetic.
Neutralizing the bleach process is crucial to stop the chemicals from eating holes. Once you achieve your desired color, you cannot just leave it alone. I immediately submerge the garment in a bucket of cold water mixed with peroxide. Hydrogen peroxide instantly neutralizes the active bleach compounds, halting the lightening process entirely. I skipped this once, and the fabric literally crumbled apart three days later. That is why many designers recommend keeping a neutralizing bath nearby while working. After a ten-minute soak, you can wash the piece normally in your machine. Your fabric remains strong and safe.
You can utilize this technique to rescue garments stained by grease or paint. I intentionally bleach-splattered a jacket that had an unremovable coffee stain. The random pattern completely camouflaged the flaw while adding incredible edge. It perfectly demonstrates the brilliance of diy clothes upcycle jeans ideas. I frequently recommend this to friends who want to salvage ruined favorites. You can also use stencils to create sharp, deliberate shapes with the bleach. Small butterfly or star stencils look amazing on dark back pockets. You just saved a ruined garment through clever chemical manipulation and bold artistic vision.
7. Embroidered Back Pockets
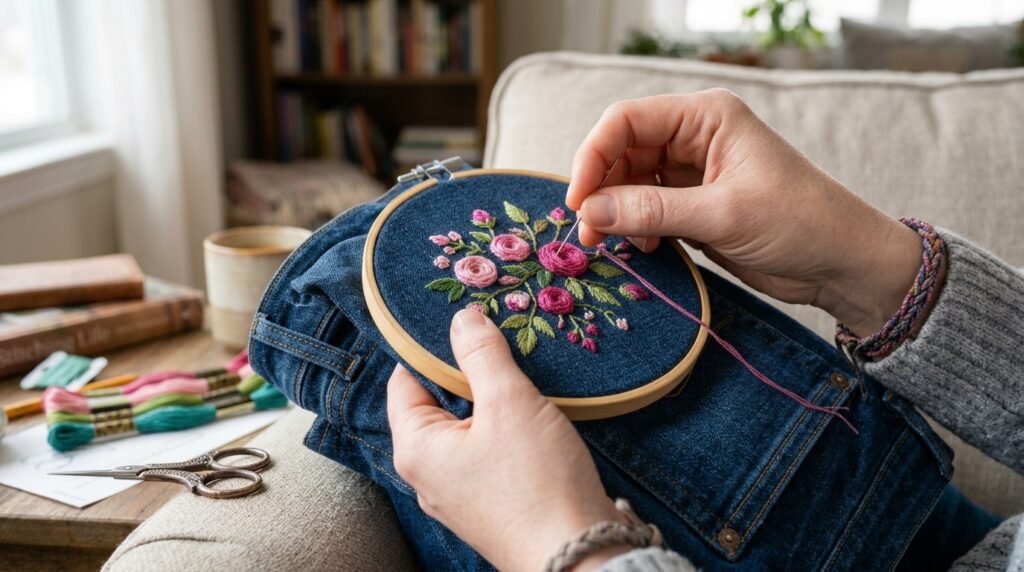
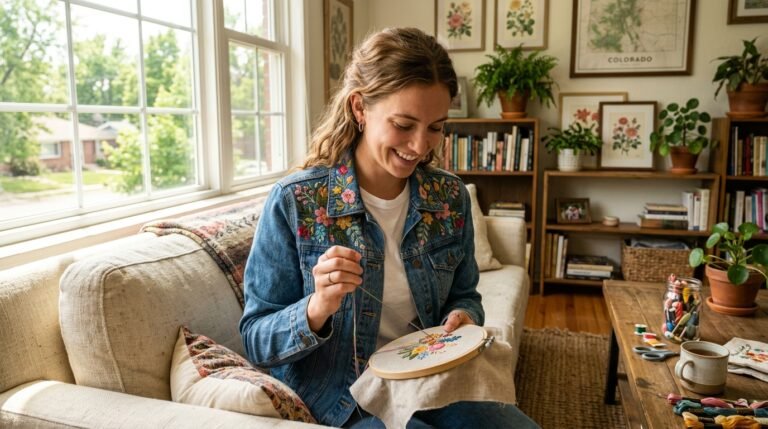
Adding hand embroidery injects distinct personality into plain, boring back pockets easily. You do not need expensive machines to create beautiful, customized floral designs. I started with a simple wooden embroidery hoop and some colorful cotton floss. You must remove the pocket from the garment partially to access the back. I use a seam ripper to detach the bottom and sides carefully first. Leaving the top edge attached ensures you can align it perfectly later. I’ve tried embroidering directly through the leg, but it sewed the pocket shut. Preparation prevents you from making basic functional errors.
Transferring your design onto thick material requires the right marking tools. I love using water-soluble stabilizers like Sulky Sticky Fabri-Solvy for intricate patterns. You simply print your design onto the sheet and stick it directly on. I remember struggling with carbon paper that completely smeared across the blue fabric. This stabilizer dissolves instantly in warm water once your stitching is complete. It provides a perfect template while supporting the heavy fabric during the process. That is why many designers recommend it for highly detailed custom pocket art. It makes complex floral patterns surprisingly achievable for complete beginners.
Selecting the right stitch types creates beautiful texture and depth visually. I rely heavily on the simple backstitch for clean outlines and sharp stems. You can use the satin stitch to fill in flower petals with vibrant colors. I strongly recommend using DMC embroidery floss because cheap threads bleed during washing. I washed a cheap thread project once, and red dye ruined everything instantly. Use three strands of floss for a delicate look or all six for boldness. A sharp embroidery needle glides through the thick denim without straining your fingers. Take your time placing each stitch carefully.
Reattaching the pocket securely guarantees your new artwork withstands daily practical use. Once the stabilizer dissolves and dries, pin the pocket back into its place. I use thick topstitching thread in my sewing machine to secure the edges. You must stitch slowly through the thick corners to prevent needle breakage. I’ve seen this work beautifully when you match the original thread color perfectly. Your customized garment now looks like an expensive artisan piece from a boutique. These small embroidered details generate more compliments than entirely new outfits. Hand-stitched elements bring immense joy and pride to your wardrobe.
8. Distressed Slit Knees
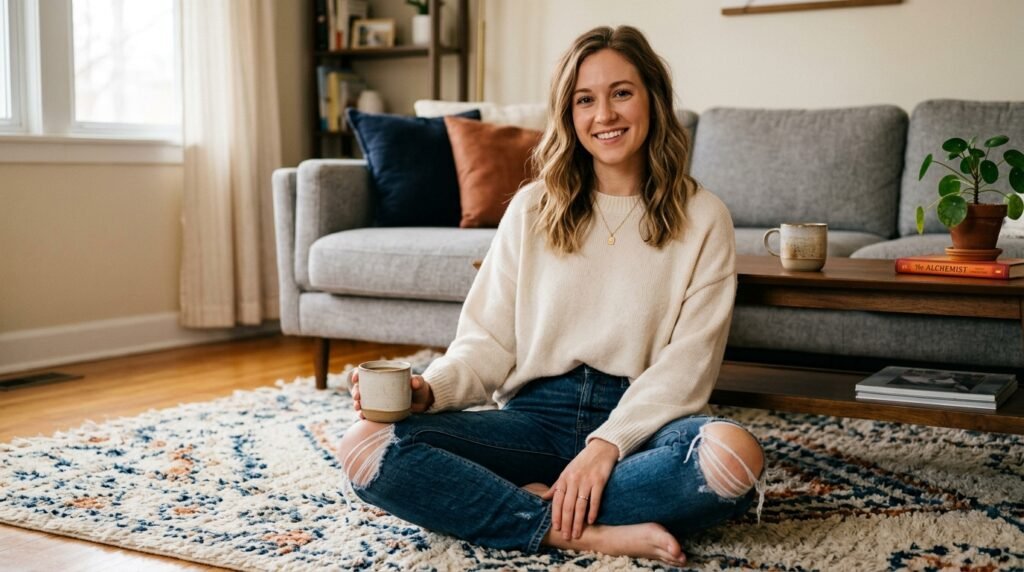
Creating perfect knee slits gives rigid pants a comfortable, relaxed, lived-in feel. You must determine the exact placement while actually wearing the pants standing up. I mark the center of my kneecap directly on the fabric with chalk. I once marked them while sitting down, and the holes ended up on my thighs. Your body geometry changes drastically between standing and sitting positions. Take the pants off and insert a thick piece of cardboard into the leg. This barrier prevents your scissors from cutting through the back panel accidentally. Proper setup guarantees a completely flawless distressing process.
Making the initial cut requires a sharp blade and a steady hand. I prefer using a standard utility box cutter rather than traditional fabric scissors. You slice horizontally across the chalk mark, extending about two inches wide. I’ve noticed people cut massive holes initially, which stretch out terribly over time. Always start small because the slit naturally widens with every single wear. Use tweezers to pull out the vertical blue threads along the freshly cut edge. This exposes the white horizontal threads, creating that classic distressed aesthetic instantly. The frayed edges look highly authentic and incredibly stylish.
Reinforcing the slit edges prevents the hole from tearing down to your shins. The tension on your knees when bending puts massive stress on raw fabric. I always apply a small strip of lightweight fusible interfacing inside the edges. You simply iron it onto the interior side just above and below the hole. I skipped this on my favorite pair, and the rip grew exponentially within weeks. That is why many designers recommend stabilizing any intentional destruction permanently. This invisible layer stops the tearing while maintaining the raw exterior look perfectly. Your pants stay fashionable without falling apart.
Washing distressed items properly preserves your hard work for much longer periods. You must turn the garments completely inside out before putting them in machines. I highly recommend placing highly distressed items inside a mesh lingerie laundry bag. The agitator inside standard washers will completely shred unprotected raw fabric edges. I learned this painful lesson after pulling out a tangled mess of blue threads. Wash them in cold water on the gentlest cycle available on your machine. Air drying is absolutely mandatory to prevent heat from warping the holes. Treat your distressed pieces with gentle respect always.
9. Paneled Wide Legs
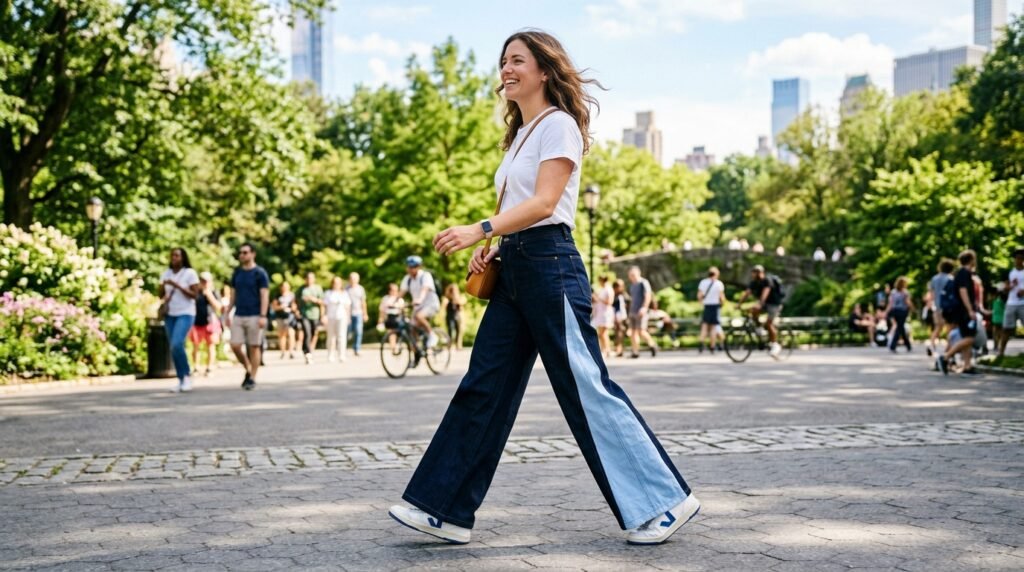
Converting tight skinny styles into trendy wide-leg silhouettes completely modernizes your closet. This project requires inserting a triangular fabric panel into the outer side seam. I usually buy a contrasting pair from a thrift store for the panel material. You must use a seam ripper to open the outer seam up to the hip. I completely destroyed a seam once by ripping it aggressively with dull scissors. Slow, methodical thread removal keeps the fabric edges clean and easy to sew. This technique adds comfortable volume to pants you previously deemed far too restrictive. It practically feels like magic.
Measuring the insertion panel correctly determines the final sweep of your new pants. I recommend a triangle that measures four inches wide at the bottom hem. The triangle should taper up smoothly to a sharp point at the hip. You must add a half-inch seam allowance around the entire perimeter before cutting. I’ve noticed people forget this step and the pants end up too tight again. Pin the new panel into the open seam with the right sides facing together. Use dozens of pins to ensure the thick layers do not shift at all. Careful pinning ensures straight seams.
Stitching the Side Seams
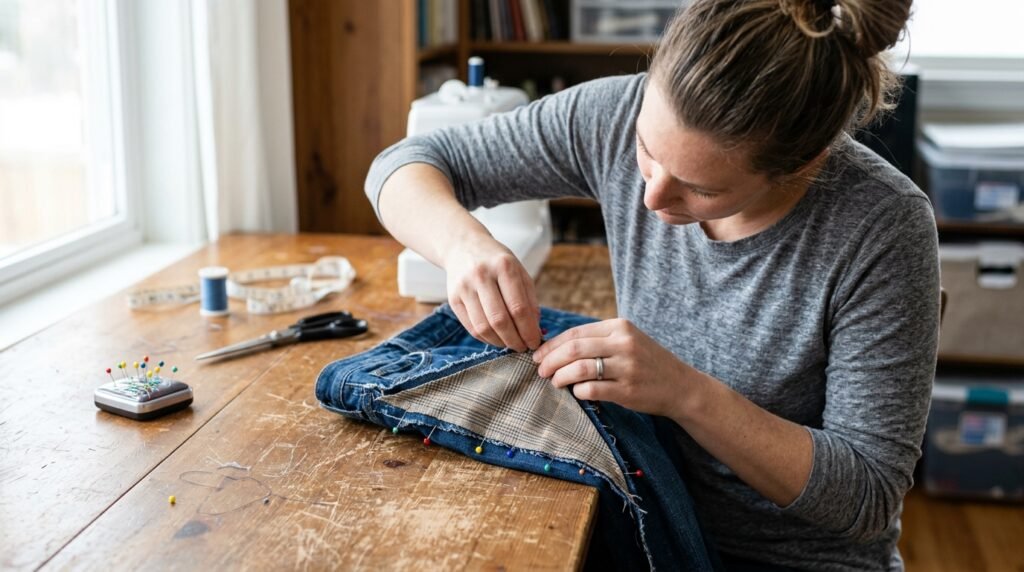
Sewing the new panels requires a heavy-duty machine and absolute concentration. I use a denim needle and standard all-purpose polyester thread for this structural seam. You sew down one side of the triangle from the hip to the hem. Then pivot and sew the other side, locking the point securely in place. I always finish the raw interior edges with a zigzag stitch to prevent fraying. Unfinished interior seams unravel during the first wash, ruining your structural handiwork completely. That is why many designers recommend serging or zigzagging every internal seam unconditionally. Your pants become highly durable again.
Hemming the new wide leg properly finalizes this massive silhouette transformation correctly. The new panel usually hangs slightly lower than the original pant leg hem. You must trim the inserted fabric so it perfectly matches the original hemline. I typically fold the new section up and stitch it to match the old style. Sometimes I prefer cutting the entire bottom off to create a uniform raw edge. I’ve seen this work wonderfully for a relaxed, bohemian summer festival look. Press the new seams flat with a hot steam iron to set the stitches permanently. Your pants look completely modernized.
Styling these dramatic wide-leg pants requires balancing your upper body proportions carefully. I love wearing them with a fitted bodysuit to highlight the new volume. You completely transformed an outdated, uncomfortable garment into a trendy fashion statement piece. It shows incredible resourcefulness and basic mastery of diy clothes jeans modifications. I frequently receive questions about where I purchased my custom paneled pants locally. You saved money and reduced waste while upgrading your personal style aesthetics simultaneously. This specific project delivers the highest visual impact of any upcycling method available. Wear your new creation with absolute pride everywhere.
10. Woven Denim Rug
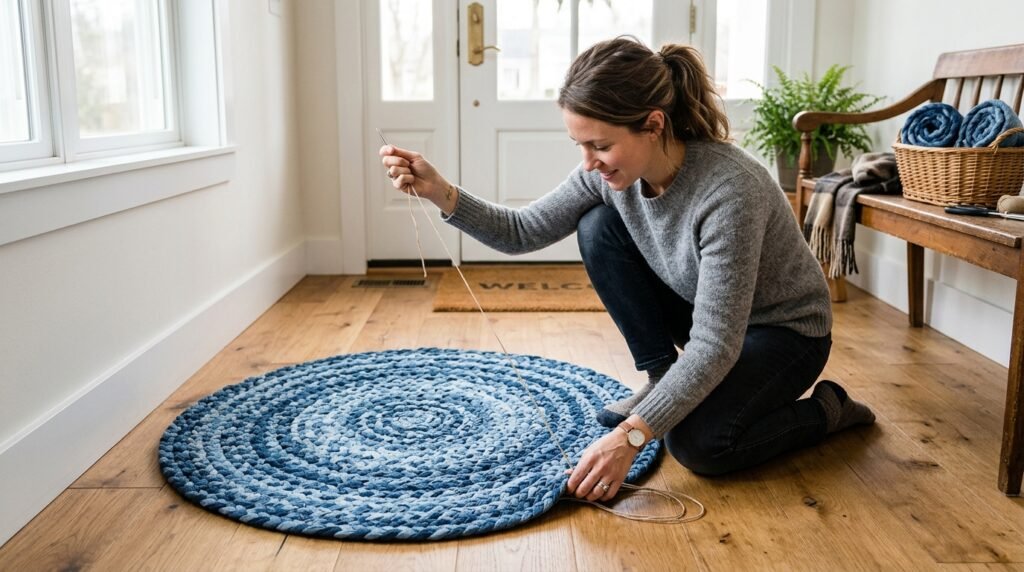
Utilizing the completely unwearable scraps creates incredible home decor items with zero waste. You can turn shredded pant legs and ripped pockets into a beautiful woven rug. I save every tiny scrap in a dedicated bin until I have enough material. You will need roughly ten pairs of destroyed pants to make a decent size. I tried making one with only three pairs and it barely covered a chair. Cut the material into long, continuous one-inch strips using fabric scissors. You can tie the strips together tightly to create massive balls of blue yarn. This reuses everything perfectly.
Braiding the strips provides the structural foundation for your new floor covering. I take three long strips and create a standard, tight braid from top to bottom. You must keep the tension consistent so the rug lies flat on the floor. I once braided too loosely, and the rug became an absolute tripping hazard immediately. When you reach the end of a strip, simply sew another one right on. I’ve noticed combining different washes creates a stunning, dynamic visual pattern overall. Keep braiding until you have one massive, incredibly long, continuous rope of fabric. The prep work is relaxing.
Coiling and sewing the braid together forms the actual rug shape effectively. I start in the center, winding the braid around itself in a tight spiral. You use a large tapestry needle and heavy carpet thread to stitch the sides. I push the needle through the adjacent braided edges to lock them together securely. I tried using hot glue originally, but it cracked apart within just two days. That is why many designers recommend hand-stitching coiled rugs for maximum lifetime durability. Work on a large flat table to ensure the rug does not warp upward.
Finishing the outer edge requires securing the final tail flat against the circle. I taper the end of the braid and tuck it neatly under the side. You must stitch this specific area aggressively to prevent it from kicking up. I’ve seen this work as a beautiful rustic mat for a laundry room space. It handles heavy foot traffic brilliantly because the fabric is inherently incredibly tough. You just turned destined trash into a functional, beautiful piece of home decor. This project proves that no piece of fabric should ever enter a landfill. Your creativity knows absolutely no bounds.
FAQs
How do you soften stiff denim before starting a project? Softening rigid fabric makes your DIY clothes jeans projects significantly easier to handle. You should soak the garment in a mixture of cold water and white vinegar. I use one cup of standard white vinegar for every gallon of water used. Let the pants sit submerged for at least four hours before washing them normally. I once tried using excessive fabric softener, but it left a weird chemical residue. The vinegar naturally breaks down stiff fibers without degrading the fabric integrity completely. That is why many designers recommend this natural method for vintage pieces. Your material becomes buttery soft quickly.
What is the best needle size for sewing thick denim? Choosing the correct needle prevents massive frustration and potential machine damage during projects. You absolutely need a specialized denim needle, usually sized 90/14 or 100/16. I exclusively use Schmetz brand needles because they pierce thick layers without snapping instantly. A standard universal needle will deflect, bend, and eventually break on thick crotch seams. I ruined an expensive machine timing belt by ignoring this basic hardware requirement once. Always sew slowly over intersections where multiple folded layers meet in the garment. Proper hardware ensures your stitches look professional and securely hold your upcycled creations together. Precision is totally key.
Can you upcycle stretch jeans the same way as rigid cotton? Working with stretch blends requires slightly different techniques than pure vintage cotton fabrics. Stretch fabrics containing elastane do not fray beautifully like traditional rigid materials do. I recommend avoiding raw hem or distressing projects on highly elastic skinny pants entirely. They tend to look rubbery and melt slightly if you use aggressive abrasion tools. However, they work perfectly for paneled wide legs or simple cropped hem alterations. I’ve noticed people get disappointed when their stretch shorts look messy instead of chic. Match your specific project to the fabric composition for guaranteed high-quality results. Read the interior care tags first.
How do you prevent raw edges from completely unraveling? Securing raw edges allows you to enjoy the distressed look without total destruction. You must run a straight security stitch exactly one-quarter inch above your cut line. I match my thread color precisely to the indigo wash for an invisible finish. This locks the vertical threads firmly while allowing horizontal threads to fray naturally underneath. I skipped this crucial step before, and my shorts completely dissolved in the washing machine. You can also apply liquid seam sealant, like Fray Check, to problem areas. These simple preventative measures guarantee your handmade items survive years of regular laundry cycles.
How much does it cost to start upcycling clothes at home? Starting your upcycling journey requires minimal upfront investment compared to buying new clothes. You only need a sharp pair of fabric shears, which cost roughly twenty dollars. I recommend buying basic glass head pins and heavy-duty thread for under ten dollars. If you already own an iron and basic sewing machine, your costs remain incredibly low. I’ve seen this work wonderfully for teenagers building a custom wardrobe on a tight budget. Most projects utilize garments you already own or cheap thrift store finds locally. You can easily complete multiple amazing transformations for under thirty dollars total investment.
What is the easiest project for a complete beginner? The cropped raw hem remains the absolute best starting point for total beginners. It requires absolutely zero sewing machine skills and provides instant gratification within minutes. You simply need a ruler, chalk, and incredibly sharp scissors to execute this perfectly. I always recommend this to friends who feel intimidated by complex structural sewing projects. It teaches you how fabric drapes and responds to being cut without massive risk. If you make a mistake, you can always turn them into summer shorts instead. That is why many designers recommend starting your journey with simple length modifications. Confidence builds quickly.
How do you fix a mistake if you cut too much? Making cutting mistakes happens to everyone, but creative problem-solving saves the garment easily. If you crop pants too short, you can immediately pivot to making summer shorts. I once ruined a hem line, so I added a contrasting fabric cuff instead. You can sew a band of printed cotton around the bottom to extend length. This accidental design choice often becomes the most complimented feature of the finished piece. I’ve noticed people panic and throw away garments that are easily salvaged with creativity. Embrace the errors and allow them to guide your DIY clothes upcycle jeans ideas organically.
Can I use regular thread for topstitching denim projects? Using standard polyester thread for structural seams leads to rapid garment failure unfortunately. You must purchase specialized heavy-duty thread, often labeled specifically for denim or topstitching. I prefer Gutermann heavy thread because it mimics the factory golden-yellow stitching perfectly everywhere. I tried using regular thread once, and the back pockets detached after three days. Regular thread simply lacks the tensile strength required to hold thick fabrics together properly. You should use a longer stitch length on your machine when using thick thread. Your projects will look professionally manufactured and withstand heavy daily physical wear effortlessly.
How do I bleach denim safely without ruining the fabric? Bleaching requires strict adherence to safety protocols and precise chemical neutralization afterward always. You must dilute standard liquid bleach with equal parts water before applying it anywhere. I always perform this outside while wearing protective gloves and old play clothes. Once you achieve the desired color, immediately dunk the garment in hydrogen peroxide water. I learned the hard way that un-neutralized bleach continues eating the fabric fibers permanently. Your favorite pants will literally turn to dust if you skip the neutralizing bath. Safe chemical handling guarantees your customized bleach projects last for many years safely.
Where is the best place to source cheap materials? Finding affordable raw materials makes your creative projects sustainable and incredibly budget-friendly overall. I frequent local thrift stores on their half-price tag days to stock up cheaply. You can easily find large men’s pants with plenty of yardage for five dollars. I also ask friends and family to donate their torn or outgrown items directly. I’ve seen this work perfectly for building a massive stash of diverse fabric washes. Garage sales and church rummage sales offer incredible bulk deals during summer months. Building a steady supply of cheap materials removes the fear of messing up projects.
How do you distress pockets without cutting the pants underneath? Protecting the underlying layers is the most critical rule of distressing pocket details. You absolutely must insert a rigid barrier into the pocket before using sharp tools. I cut down thick cardboard boxes and slide them securely inside the pocket pouch. I once sliced right through my pocket bag and stabbed my thigh while walking. Use a Dritz distressing block or sandpaper to carefully wear down the outer edges. This creates realistic friction wear without destroying the functional integrity of the pocket. Proper preparation ensures your DIY clothes from jeans look stylish without losing practical utility.
Why does my sewing machine skip stitches on thick layers? Skipped stitches usually indicate an incorrect needle type or improper presser foot pressure. You must use a fresh, sharp denim needle for every new heavy project undertaken. I always use a bulky seam jumper tool, sometimes called a clearance plate, here. It levels the presser foot when you sew over massive hurdles like flat-felled seams. I struggled with broken threads constantly until discovering this incredible little plastic tool. That is why many designers recommend sewing manually by turning the handwheel over thick spots. Adjusting your technique prevents skipped stitches and protects your expensive sewing machine completely.
Share Your Success
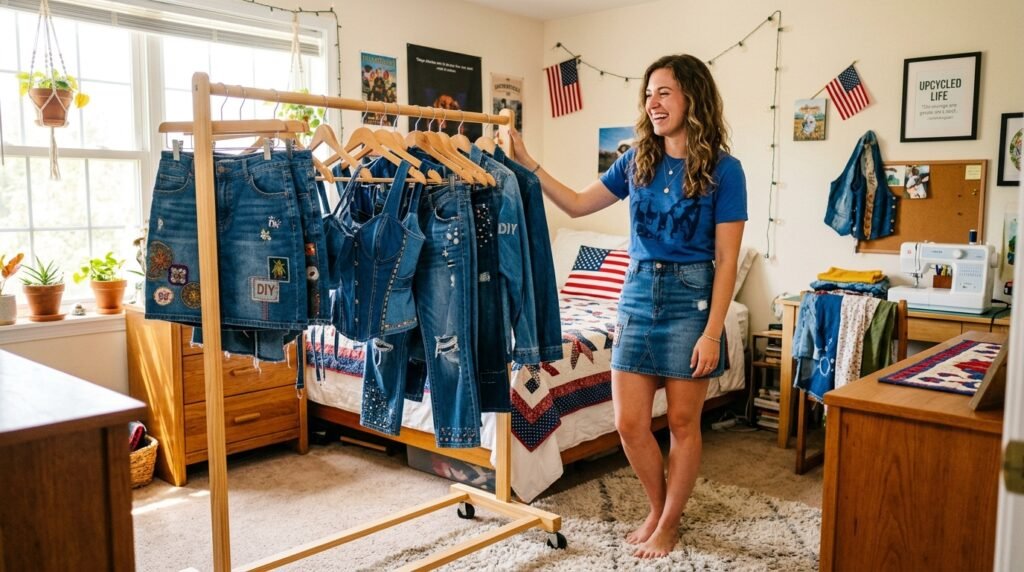
Reinventing your wardrobe through these creative methods provides immense personal satisfaction and style. You now possess the exact knowledge required to transform outdated pieces into modern treasures. I strongly encourage you to grab those forgotten pants and start cutting today. Your unique DIY clothes jeans projects will undoubtedly turn heads and spark amazing conversations. Sustainable fashion relies on creative individuals willing to experiment with existing materials bravely. Please save this post to your Pinterest boards for quick reference during weekend projects. Share your incredible transformations online because your creativity inspires others to rethink textile waste entirely.

Amelia leads HavenlyStyle’s editorial vision with a passion for elegant interiors and practical home living. With years of experience in home décor and lifestyle content, she ensures every article is accurate, inspiring, and easy to follow. From timeless decorating ideas to the latest interior design trends, Amelia is committed to helping readers create beautiful, functional spaces while maintaining HavenlyStyle’s trusted and welcoming voice.