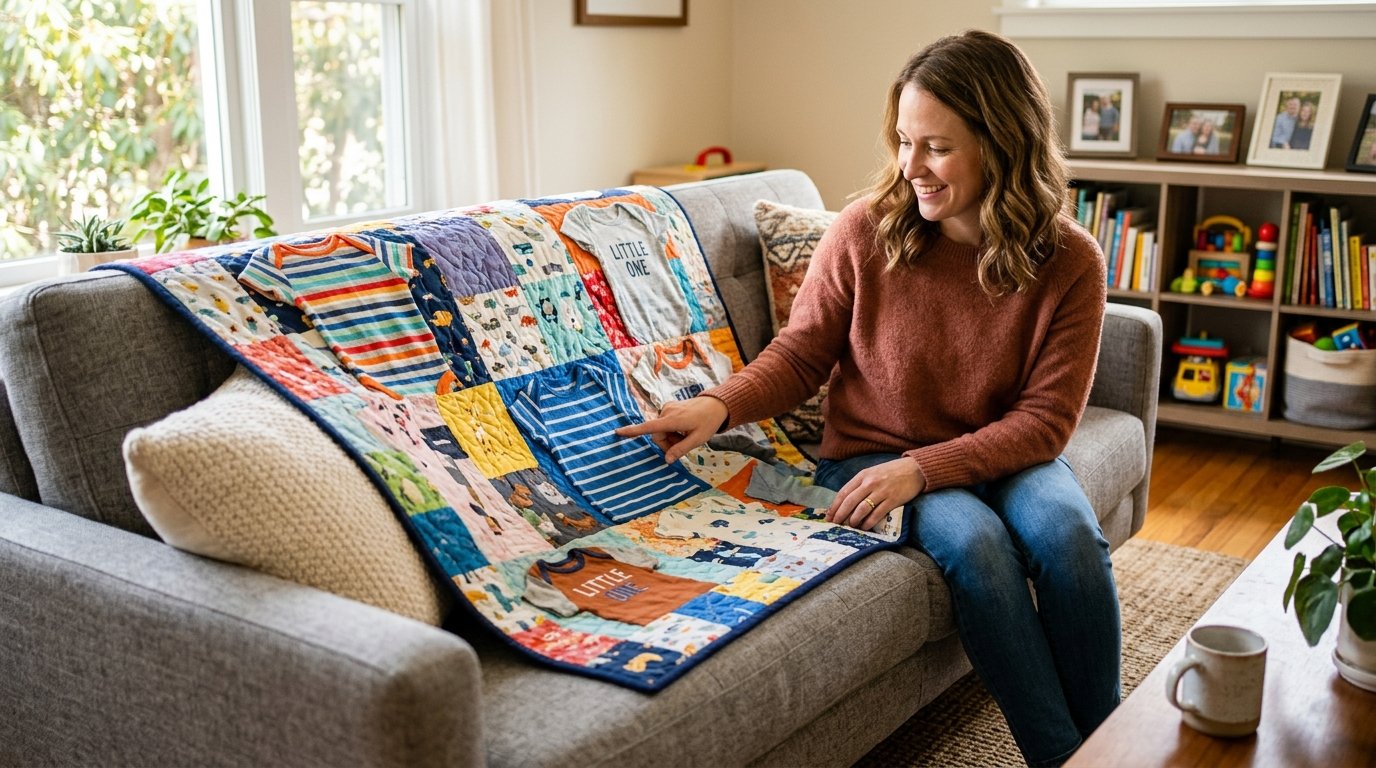
Every parent knows the deep emotional attachment we form with tiny onesies and hospital receiving blankets. Those precious garments represent fleeting moments you want to remember forever. Creating beautiful diy baby clothes quilt tutorials helps you transform stuffed boxes of fabric into a functional keepsake. The primary challenge most beginners face involves handling delicate materials without ruining those irreplaceable memories. I have seen many people completely destroy their favorite pieces by skipping crucial preparation steps entirely. You need a reliable strategy to protect these fragile textiles while building a stunning heirloom that your family will actually use daily.
This comprehensive guide reveals the exact techniques professionals use to handle stretchy cotton knits and slippery silk ribbons. We will explore proven methods for stabilizing difficult fabrics so they sew together perfectly flat. You will discover practical solutions for common sizing mistakes that often warp the final blanket shape. In my experience, properly preparing your materials cuts frustration in half and guarantees a much better result. Let me show you how small changes in your cutting process will elevate the entire project. Grab those storage bins and prepare to start sewing something truly meaningful for your living room.
Executive Summary
This expert resource provides actionable solutions for transforming stored infant garments into durable household treasures. You will learn specific stabilization techniques that prevent frustrating stretch issues during the sewing process. We analyze critical tools required for precision cutting, comparing various interfacing brands and rotary blade options available today. By implementing these exact strategies, you can expect to finish your project significantly faster while avoiding costly material mistakes. These foundational principles apply to all design variations and complex pattern choices perfectly. You will discover how specific thread selections directly impact the longevity of your finished handmade family heirloom over time.
Beyond just stitching fabric squares, we dive into essential layout strategies that create stunning visual balance. You will learn how to troubleshoot common tension issues, select appropriate backing materials, and properly finish binding edges securely. I will share my personal failures, revealing why standard cotton thread often outperforms synthetic alternatives in these applications. By the end of this resource, you will possess the confidence required to construct a gorgeous heirloom memory blanket completely from scratch. This journey will fundamentally change how you approach preserving sentimental fabrics, making the entire crafting process highly enjoyable and incredibly rewarding for everyone.
1. Essential Fabric Prep
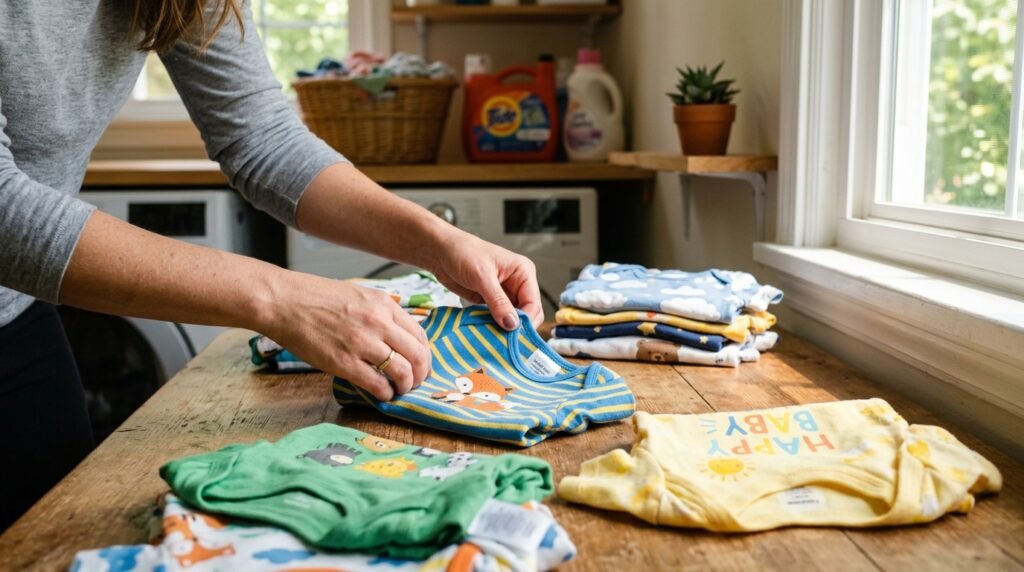
Preparing your materials correctly determines the overall success of your entire sewing project before you make any cuts. Unwashed garments often harbor hidden residues that can severely damage your sewing machine over an extended period. I always recommend washing every piece using a gentle, unscented detergent to remove dust and lingering stains completely. Skipping this foundational step often leads to uneven shrinkage once the final blanket goes through the laundry cycle. Carefully inspect each item for structural damage, loose buttons, or broken zippers that might interfere with your needle. Proper preparation saves countless hours of frustrating repair work later.
Sorting your washed garments by color and material weight makes the upcoming design process significantly easier to manage. I have noticed that grouping similar stretch levels together helps prevent disastrous puckering during the final piecing phase. Discard any items containing excessive mold, permanent dry rot, or severe fabric degradation that compromises structural integrity. You must press every single garment flat using a dry iron to remove stubborn wrinkles before applying any interfacing. Taking your time during this crucial initial phase completely eliminates ninety percent of construction frustrations encountered later. This careful attention guarantees a perfectly flat, professional result.
2. Choosing Stabilizer Types
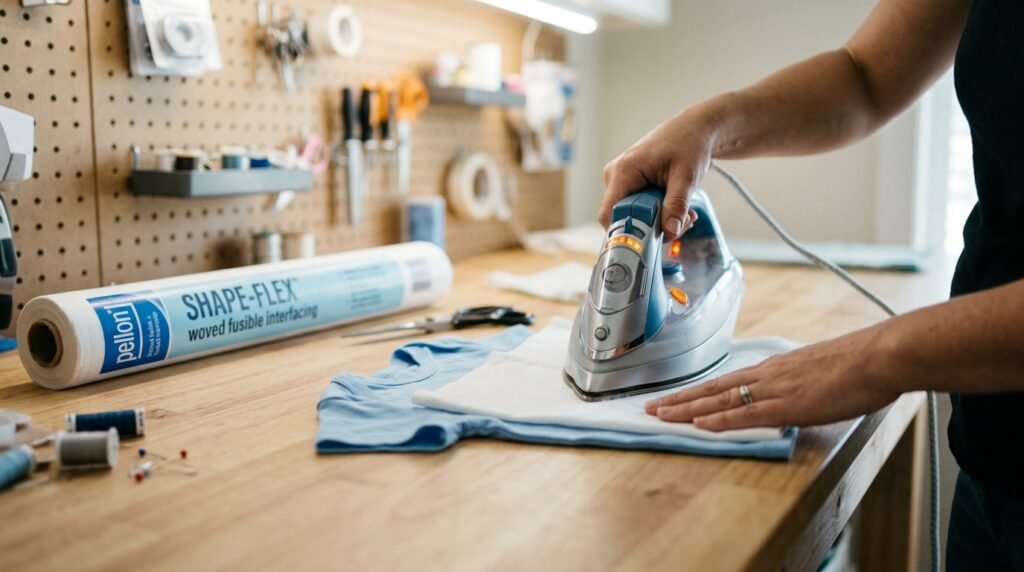
Selecting the correct interfacing material remains the most critical decision when constructing diy memory quilts from clothes successfully. Most infant garments feature incredibly stretchy jersey knits that instantly warp out of shape under a presser foot. You absolutely must apply a supportive layer behind these stretchy fabrics to make them behave like woven cotton. In my experience, Pellon Shape-Flex ninety-five offers the perfect balance of structural support and soft drape for these projects. This specific product bonds securely to the delicate clothing fibers without making the final square feel overly stiff. Proper stabilization prevents your seams from looking wavy.
Applying your chosen interfacing requires precise temperature control and steady pressure to achieve a permanent, flawless material bond. You should never iron directly over plastic graphics, raised puff paint, or delicate vinyl lettering found on onesies. I always place a thin cotton pressing cloth over the garment face to protect these sensitive decorative elements entirely. Press your iron down firmly for ten seconds without sliding it back and forth across the delicate fabric surface. Sliding the hot iron will instantly distort the stretchy material, causing permanent ripples that ruin the square completely. Take your time pressing every piece.
Lightweight Fusible Options
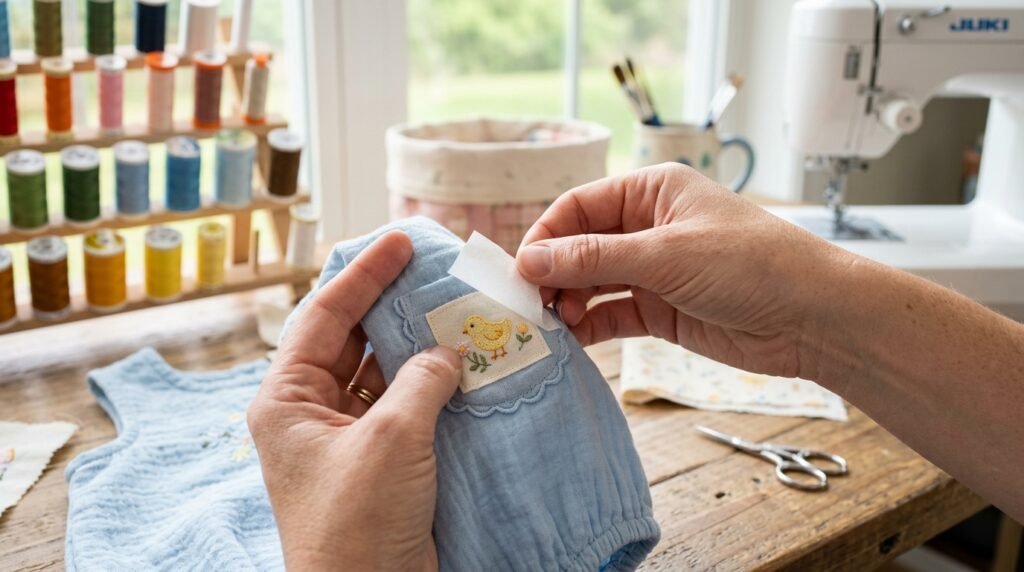
Fusible web products provide an incredibly fast solution for stabilizing thin fabrics without adding unnecessary bulk or weight. Brands like HeatnBond Lite allow you to secure delicate appliques perfectly flat before topstitching them into place permanently. I have seen this work exceptionally well when saving tiny embroidered pockets or small logo patches from ruined garments. You simply iron the adhesive paper to the back, peel away the protective liner, and press the patch down. This brilliant technique prevents tiny pieces from shifting around while you sew, ensuring absolute precision throughout your design. Always test scrap fabrics first beforehand.
Navigating the massive variety of available fusible products often overwhelms beginners trying to purchase their initial sewing supplies. You must avoid heavy-duty bonding agents because they create a rigid plastic texture that ruins the soft blanket feel. Lightweight interfacing costs roughly four dollars per yard, making it an affordable investment for protecting your precious memories properly. I highly recommend purchasing an entire bolt if you plan to construct a massive king-sized diy quilt with baby clothes eventually. Having excess stabilizer on hand prevents frustrating midnight supply runs when you inevitably miscalculate your material requirements. Proper supplies guarantee flawless execution.
Woven Cotton Alternatives
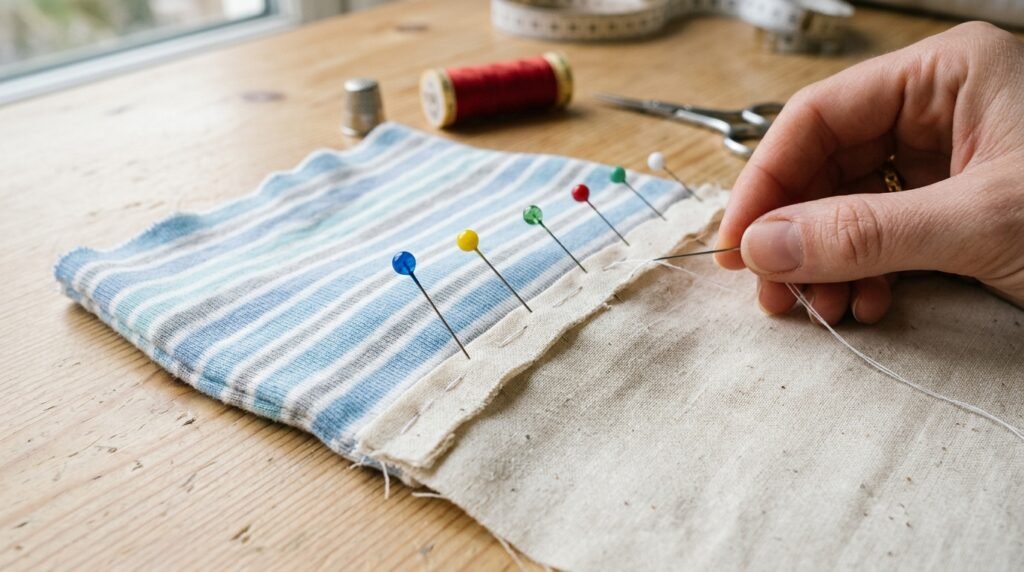
Some crafters prefer avoiding synthetic chemical adhesives entirely by utilizing traditional woven cotton fabrics as a natural stabilizer backing. This historical method involves basting a square of standard muslin directly behind your stretchy knit clothing piece carefully. I have tried this classic approach, and it provides a beautiful, traditional drape that feels wonderfully soft and authentic. However, this technique requires significantly more time and precision pinning to prevent the top layer from shifting during sewing. You must use a walking foot attachment on your machine to feed both fabric layers through evenly simultaneously. This prevents nasty puckering around seams.
Utilizing muslin requires you to pin the edges securely using ultra-fine glass head pins every single inch along the perimeter. You then stitch a narrow basting line roughly one-eighth of an inch away from the raw edge completely around. This temporary stitch holds the stretchy clothing material firmly to the stable cotton backing until you assemble the blocks. While this manual process feels incredibly tedious, it costs significantly less than purchasing expensive rolls of premium iron-on interfacing. Many experienced quilters swear by this exact method for preserving fragile vintage garments that might melt beneath high iron heat temperatures.
3. Planning Layout Designs
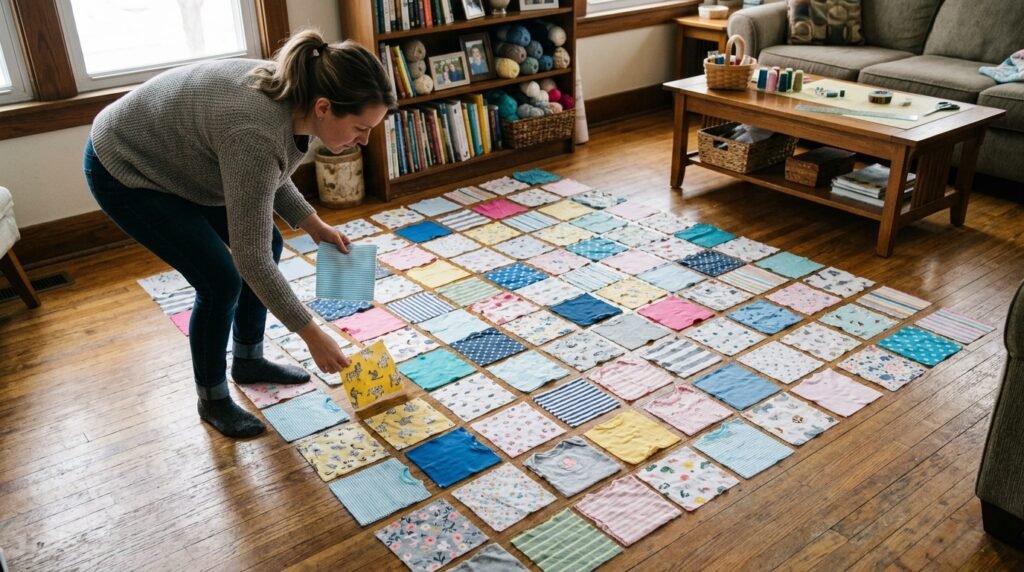
Creating a visually balanced layout requires careful consideration of color distribution, pattern variety, and overall square block size. Throwing random pieces together usually results in a chaotic, messy appearance that fails to highlight the special individual garments. I always recommend clearing a large floor space to arrange your stabilized squares visually before sewing anything together permanently. You can easily stand back, analyze the color flow, and swap clashing blocks around until the design looks perfect. Taking photos of your arranged layout with a smartphone provides a helpful reference map for the actual sewing phase. Planning prevents massive assembly mistakes.
Mixing different block sizes adds wonderful visual interest, but it requires precise mathematical calculations to ensure everything fits together. Beginners should definitely stick to uniform square sizes for their very first project to avoid intense structural sewing headaches. A standard six-inch square works perfectly for capturing most center graphics on infant onesies and tiny toddler shirts beautifully. If you must incorporate a massive graphic, consider surrounding it with smaller pieced borders to match your standard block dimensions. I have noticed that placing your most cherished outfits near the physical center creates a stunning focal point instantly. Balance dictates beauty.
4. Cutting Consistent Squares
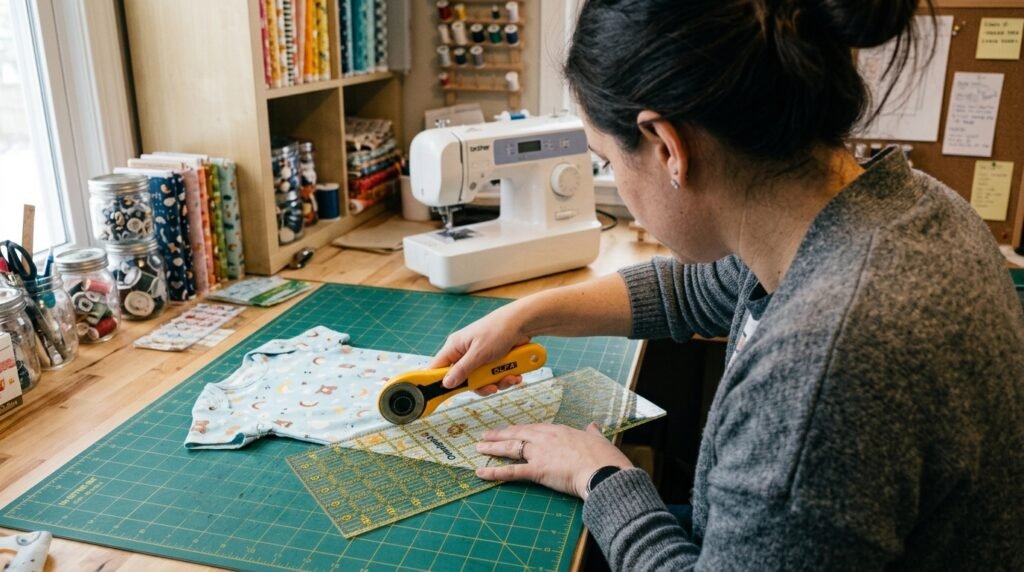
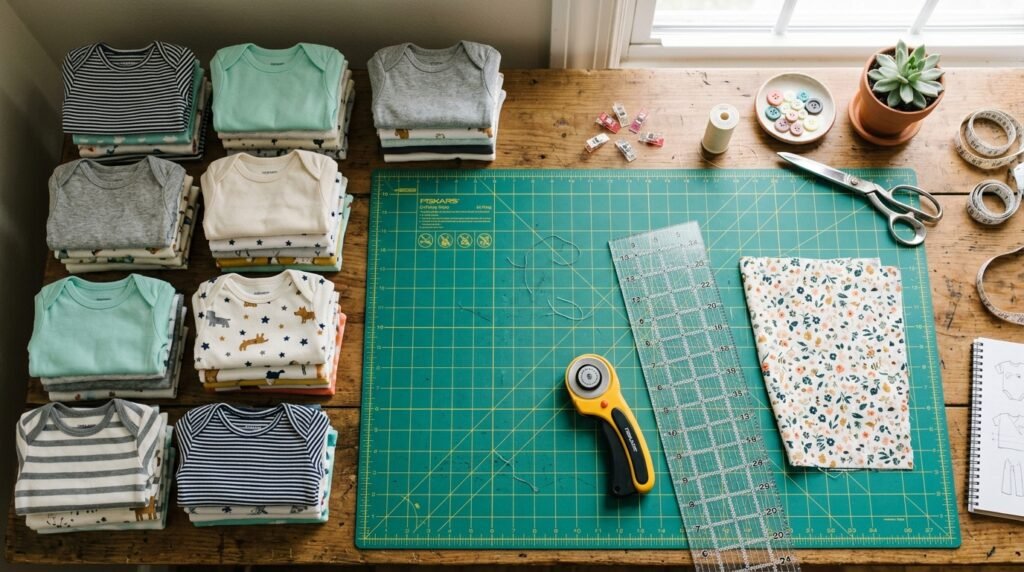
Precision cutting represents the absolute most important technical skill you must master to ensure your final project lays flat. Using standard household scissors inevitably creates jagged, uneven edges that absolutely refuse to align perfectly during the sewing process. You must invest in a high-quality rotary cutter, a large self-healing mat, and a thick clear acrylic measuring ruler. I have ruined several precious garments by attempting to cut them quickly without properly securing my rigid acrylic template first. Always apply firm downward pressure on the ruler to prevent the fabric from slipping away from your sharp blade. Consistency matters deeply.
When centering your acrylic ruler over a specific clothing graphic, always leave at least a half-inch of extra space. This vital buffer zone becomes your seam allowance, which disappears entirely once you sew the block to its neighboring piece. I frequently see beginners cut exactly along the edge of a beloved picture, completely losing the image in the seams. You should change your rotary blade after cutting roughly thirty squares to maintain a crisp, flawless edge without snagging threads. A dull blade requires excessive force, causing dangerous slips that could easily ruin your fabric or cause severe injury.
5. Managing Stretchy Knits
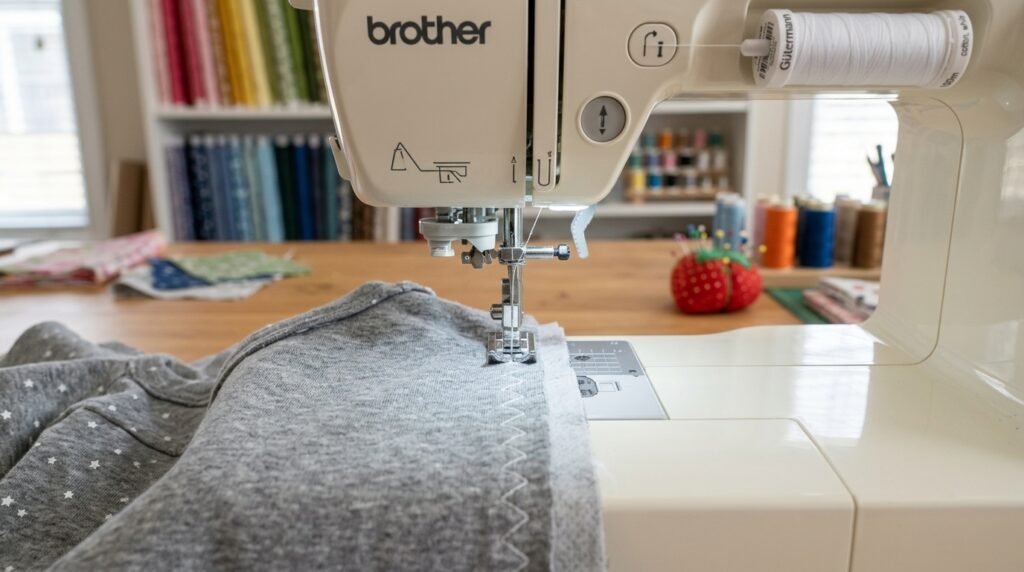
Sewing stabilized knit fabrics together still requires careful machine adjustments to prevent skipped stitches and nasty thread tension issues. Standard universal needles often struggle to pierce dense layers of thick interfacing and tightly woven cotton clothing materials cleanly. You must switch to a brand new ballpoint or stretch needle specifically designed to slide between delicate knit fibers gently. In my experience, a size eighty twelve needle handles these complex material sandwiches perfectly without punching massive destructive holes. Adjust your presser foot pressure slightly lower to prevent the machine from stretching the soft fabric as it feeds through.
Selecting the correct thread dramatically impacts the structural integrity and visual appeal of your finished diy baby clothes blanket memory quilts. Heavy-duty upholstery thread will actually slice through delicate infant cotton fibers over time, completely destroying your precious handmade heirloom. I always use a high-quality fifty-weight cotton thread for piecing the blocks together smoothly without adding excessive bulky volume. Polyester thread offers incredible strength, but it lacks the soft, natural drape that premium pure cotton varieties provide beautifully. Always use a coordinating neutral thread color that blends seamlessly into your fabrics to hide tiny construction imperfections completely.
6. Adding Sashing Borders
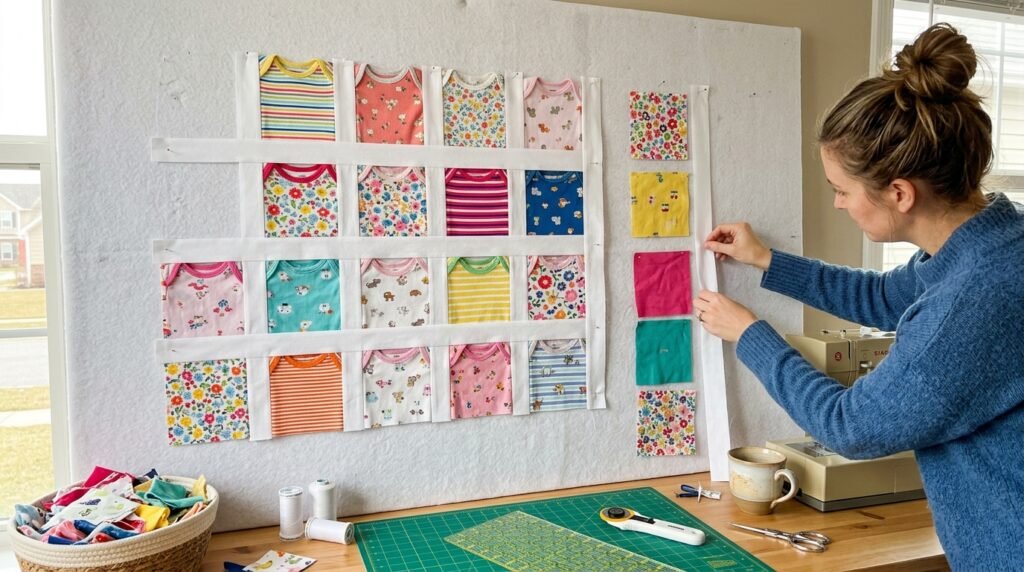
Incorporating fabric sashing between your clothing blocks provides essential visual breathing room that makes the busy graphics stand out. Sashing involves sewing thin strips of solid-colored cotton fabric between each individual square to frame them like tiny pictures. I highly recommend using a crisp white or soft gray fabric to unify chaotic, brightly colored infant clothing designs beautifully. Without these solid borders, complex prints often clash aggressively, creating an overwhelming visual mess that hurts the eyes completely. Measuring your sashing strips precisely ensures your rows align perfectly when you assemble the final massive blanket top section.
Constructing your rows with sashing requires pinning the corners meticulously to achieve perfectly crisp, flawless intersection points every time. You should always press your seam allowances towards the darker sashing fabric to prevent dark shadows from showing through. I have seen many people skip this pressing step, resulting in bulky, lopsided corners that refuse to lay perfectly flat. Utilizing small sewing clips instead of traditional metal pins helps manage thick intersections without distorting the delicate clothing materials. Taking your time to match these critical corner points separates mediocre crafting attempts from exceptional, museum-quality textile artistry instantly.
7. Selecting Quilt Backing
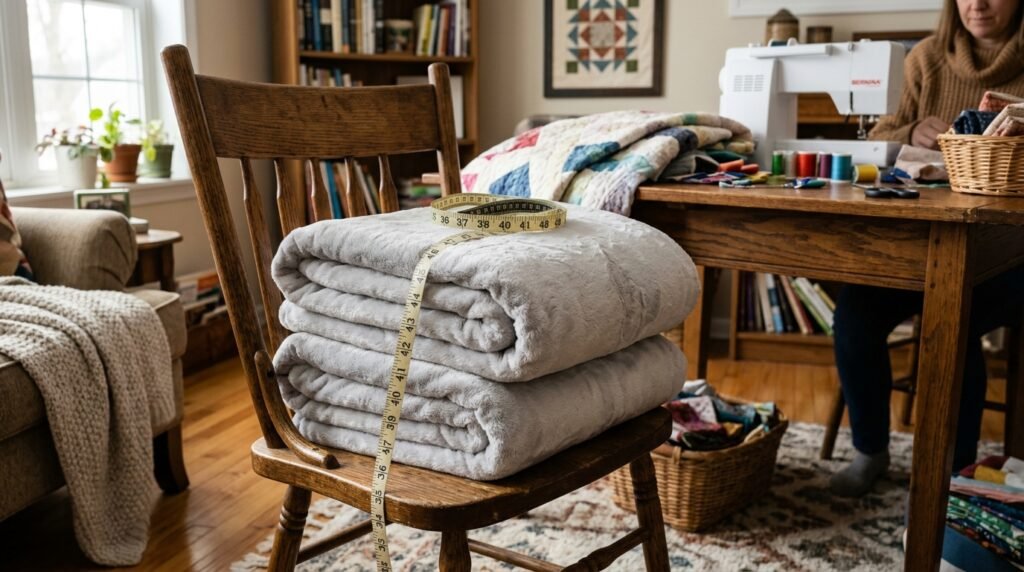
Choosing the perfect backing material determines how comfortable and cozy your finished family keepsake will feel during actual daily use. Many traditional quilters prefer standard woven cotton because it breathes beautifully and handles complex machine stitching with absolute perfection. However, memory blankets designed for children often benefit from ultra-soft backing materials that provide superior tactile warmth and deep comfort. I have noticed that investing in high-quality backing fabric significantly improves the overall durability of the completed handmade textile project. You must select a material width that extends at least four inches beyond your finished top measurements completely.
Preparing your backing fabric correctly requires washing and drying the yardage to remove chemical sizing and pre-shrink the material. Failing to pre-shrink your backing guarantees that the final blanket will pucker violently after its very first trip through the laundry. I always press the backing fabric meticulously flat, removing every single wrinkle before attempting to baste the heavy layers together. Buying wide-width backing fabric entirely eliminates the annoying need to sew a seam directly down the center of your blanket. This simple purchasing decision saves considerable time and creates a much more professional, seamless back appearance effortlessly.
Minky Fabric Comfort
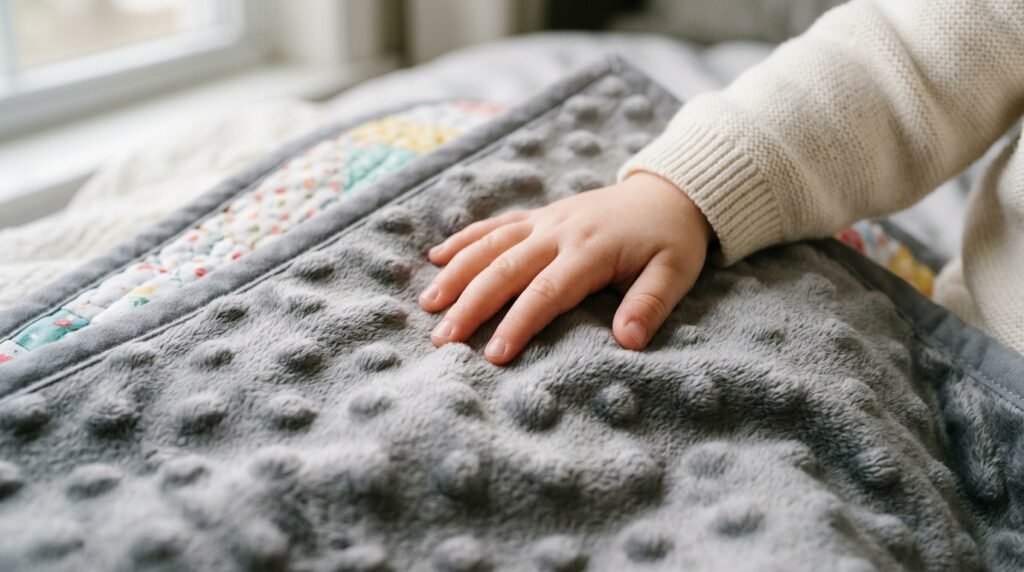
Minky fabric offers an incredibly luxurious, velvet-like texture that children absolutely adore snuggling against during cold winter evening hours. This plush polyester material features a distinct nap direction that you must manage carefully while cutting and sewing it together. I have tried using cheap minky alternatives, but they shed excessive fuzz and stretch uncontrollably beneath the standard sewing machine needle. You must heavily pin this slippery material every single inch along the perimeter to prevent it from sliding out of place completely. Using a walking foot attachment is absolutely mandatory when quilting through this thick, challenging luxury material.
Cleaning up your craft room after working with plush minky fabric often requires a heavy-duty vacuum and significant patience. The raw edges shed thousands of tiny synthetic fibers that instantly cling to your clothing, carpets, and surrounding work surfaces. I strongly advise taking the material outside to shake it vigorously immediately after cutting your required massive backing panel size. Despite the messy preparation phase, the resulting ultra-soft blanket provides unparalleled comfort that traditional woven cotton simply cannot match. This premium textile upgrade transforms a basic memory project into a highly coveted household treasure that everyone fights over constantly.
Traditional Flannel Warmth
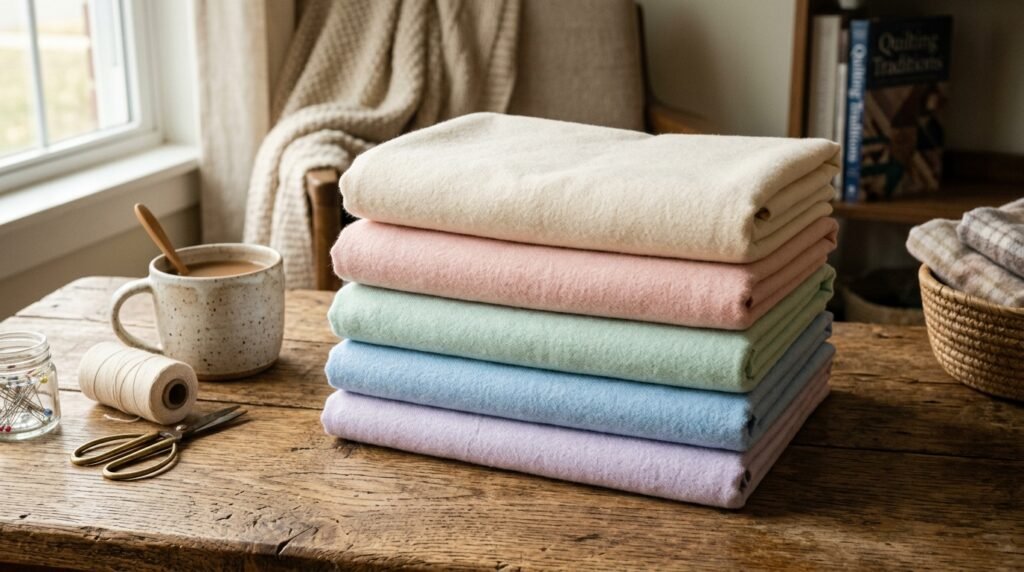
High-quality cotton flannel provides a fantastic, breathable alternative to synthetic plush materials while maintaining exceptional warmth and extreme softness. Flannel features a gently brushed surface that grips the internal batting layer perfectly, preventing unwanted shifting during the quilting process. I always recommend purchasing premium quilt-shop quality flannel because cheap craft store variations pill horribly after just three normal washes. You must pre-wash flannel on high heat twice to completely exhaust its dramatic shrinkage potential before basting the layers together. This natural material handles incredibly well beneath the needle, making it an ideal choice for nervous beginner crafters.
Working with flannel requires slightly wider seam allowances if you need to piece multiple panels together for a large backing. The brushed cotton fibers tend to fray significantly more than standard tightly woven poplin or crisp lawn dress materials do. I have successfully used vintage flannel receiving blankets as backing pieces to incorporate even more sentimental meaning into the final design. Simply trim away any worn edges, square up the usable fabric, and stitch them together into a massive colorful patchwork panel. This creative approach maximizes your sentimental materials while keeping project costs incredibly low and highly sustainable.
8. Basting Layers Together
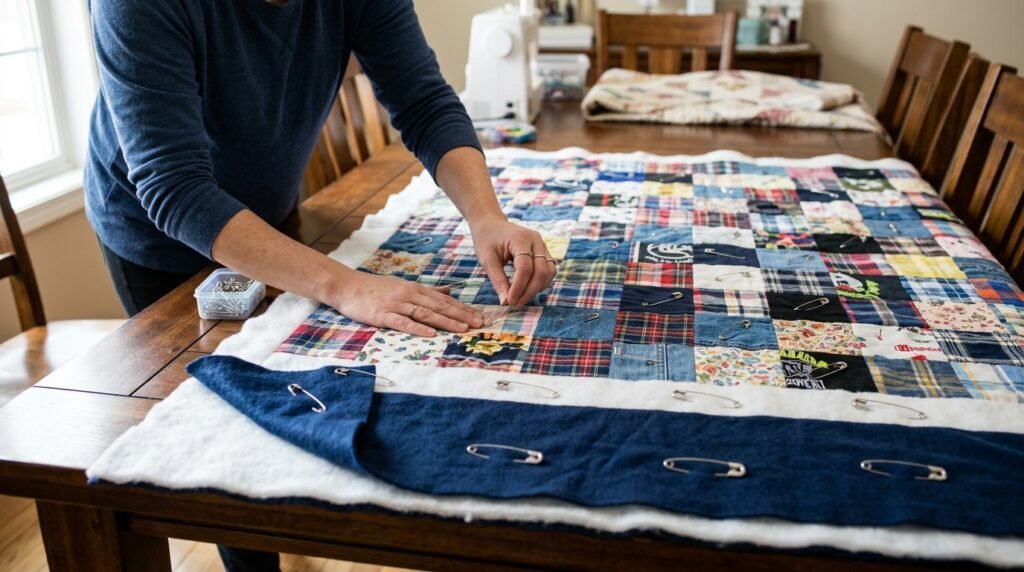
Basting represents the crucial physical process of temporarily securing your backing, batting, and top layer together before permanent machine stitching. You must find a large, clean floor space or massive dining table to spread these three layers out completely flat. I highly recommend using curved safety pins specifically designed for this exact purpose rather than traditional straight sewing pins. Straight pins inevitably slip out and painfully stab your fingers while you wrestle the heavy textile through your small machine throat. Place one curved safety pin every four inches across the entire surface to prevent the layers from shifting entirely.
Spray basting offers a significantly faster alternative to pinning, utilizing a temporary fabric adhesive to bond the heavy layers instantly. You simply spray the sticky aerosol glue lightly across the batting surface and smooth your fabric layers down gently by hand. I have seen this technique completely revolutionize the process for crafters who suffer from terrible arthritis or severe hand pain. However, you must perform this chemical step outside or in a highly ventilated garage to avoid inhaling dangerous toxic fumes. The adhesive washes out completely during the final laundry cycle, leaving behind a perfectly flat, beautiful heirloom textile.
9. Simple Machine Quilting
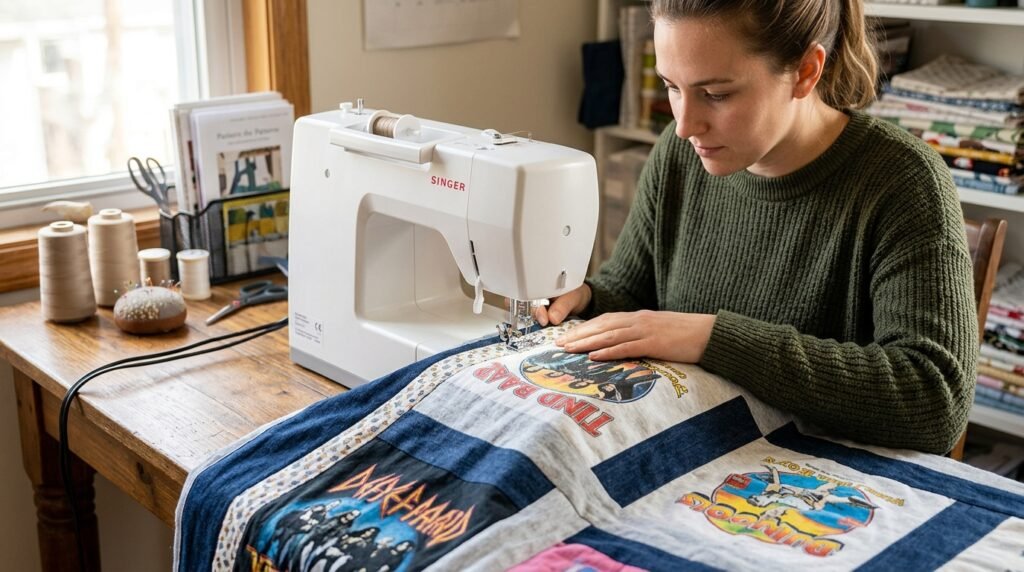
Quilting the layers together permanently provides the necessary structural integrity that allows the heavy blanket to survive aggressive daily washing. Beginners should start with simple straight-line quilting rather than attempting complex free-motion designs that require intense practice and perfect tension. I usually utilize my walking foot to stitch straight lines exactly in the ditch right where the fabric sashing seams meet. This invisible stitching technique secures the internal batting perfectly without drawing unnecessary visual attention away from the precious clothing graphics. Always start sewing from the exact center and work slowly outward to push any hidden wrinkles away.
Managing a massive, heavy textile bundle beneath a standard home sewing machine requires clever rolling techniques and immense physical patience. You must tightly roll the right side of the blanket into a firm cylinder to fit it through the narrow machine throat. I always wear specialized rubber-gripped quilting gloves to help maneuver the heavy fabric bulk without straining my tired hand muscles. Increase your standard stitch length slightly to accommodate the extreme thickness of three compressed fabric layers feeding through simultaneously. Taking frequent breaks prevents intense shoulder fatigue and guarantees your stitching lines remain perfectly straight and consistently beautiful.
10. Applying Binding Edges
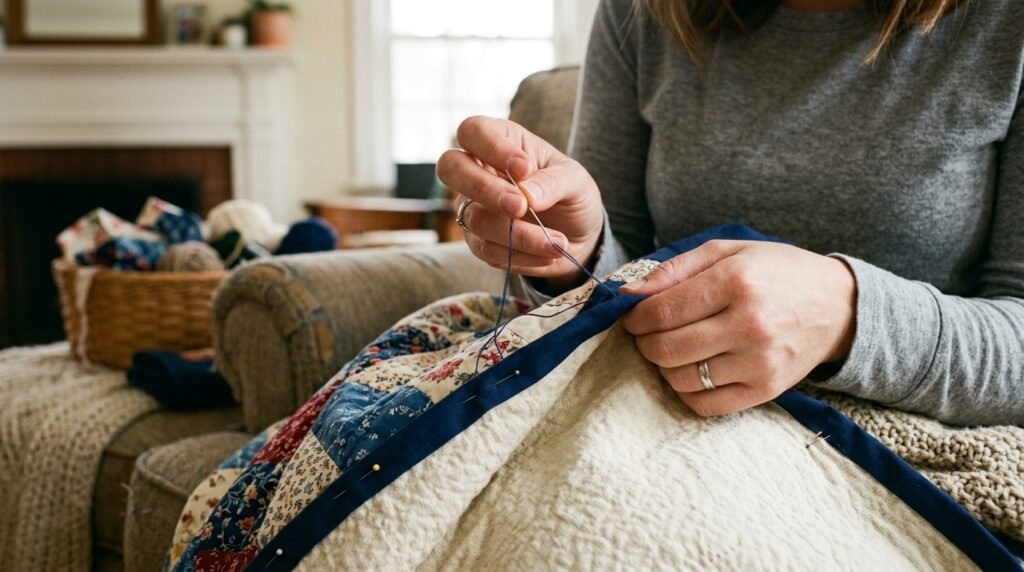
Finishing the raw exterior edges with a sturdy fabric binding perfectly seals the blanket and frames the entire beautiful design. You must cut long strips of woven cotton exactly two and a half inches wide to create a durable, thick double-fold binding. I strongly advise against using flimsy satin blanket binding from the craft store because it shreds rapidly under normal daily use. Sew the binding strip onto the front edge of the blanket first, utilizing a precise quarter-inch seam allowance completely around. Mitered corners require a specific folding technique that creates a crisp, professional forty-five-degree diagonal angle finish.
Securing the final binding fold to the back of the blanket offers two distinct methods depending on your desired aesthetic result. Hand-stitching the binding down using a blind hem stitch produces an invisible, flawless, museum-quality finish that looks absolutely stunning. I have spent countless relaxing evening hours slowly hand-sewing bindings while watching television, finding the repetitive physical process incredibly meditative. Alternatively, machine-stitching the binding down provides a much faster, highly durable finish perfect for rugged children play blankets. Whichever method you select, ensure your stitches catch the backing fabric securely to prevent the edge from unrolling during heavy use.
FAQs
What is the best fabric for diy memory quilt from baby clothes? The absolute best material involves using a high-quality, lightweight fusible interfacing to stabilize the stretchy cotton knits perfectly before sewing. Infant clothing typically features soft jersey materials that stretch wildly out of shape under a standard sewing machine presser foot. I have noticed that applying Pellon Shape-Flex ninety-five transforms these unpredictable knits into stable, easy-to-manage squares that resemble woven cotton. For the backing, premium quilting cotton or ultra-soft minky fabric provides excellent durability and superior warmth for daily household usage. Always avoid using thick denim or heavy canvas, which create bulky seams that distort the tiny clothing graphics entirely.
How many clothing pieces do I need for a blanket? Determining the exact number of garments required depends entirely on your desired final dimensions and your specific block size choices. A standard throw-sized project measuring fifty by sixty inches generally requires roughly thirty to forty individual infant clothing pieces completely. I always recommend gathering at least fifty items, allowing you to discard stained or damaged pieces during the final selection process. If you plan to create a massive king-sized layout, you might need over one hundred distinct tiny shirts and onesies. Measuring your acrylic cutting template against the garments beforehand helps calculate your exact mathematical material requirements perfectly.
Can I use clothing with plastic snaps or zippers? Incorporating garments featuring thick plastic snaps, metal buttons, or rigid zippers requires highly specialized cutting techniques to avoid machine damage. You absolutely cannot sew directly over these hard plastic elements without shattering your needle and potentially destroying your sewing machine timing. I always carefully cut around the zippers or remove the snaps entirely using a specialized seam ripper before applying any interfacing. Sometimes, leaving a decorative pocket or a cute button intact adds wonderful three-dimensional texture to the final design layout. Just ensure these bulky elements sit squarely in the center, far away from your quarter-inch seam allowances completely.
How do I prevent the fabrics from stretching while sewing? Preventing disastrous stretch requires utilizing a premium iron-on stabilizer behind every single piece of knit clothing before you cut anything. This crucial preparation step firmly locks the delicate fibers in place, completely eliminating the bouncy stretch that ruins straight seams. Furthermore, installing a walking foot attachment on your machine ensures the top and bottom fabric layers feed through the dogs evenly. I have seen many people try to pull the fabric aggressively through the machine, which instantly creates permanent, ugly wavy ripples. Let the machine pull the material naturally, maintaining a light, guiding touch with your fingertips constantly.
What type of needle is best for this project? Selecting the correct sewing needle drastically reduces frustration and prevents skipped stitches when working through thick layers of stabilized knit materials. A standard universal needle often struggles to pierce dense cotton fibers cleanly, causing ugly snags and loud popping noises during operation. I highly recommend purchasing a brand new size eighty twelve ballpoint or jersey stretch needle for the entire piecing process. This specialized needle features a slightly rounded tip that gently separates the knit threads rather than violently slicing through them. Always change your needle after eight hours of sewing to maintain a flawless, perfectly sharp edge.
How do I clean a finished memory blanket safely? Properly laundering your completed heirloom requires gentle temperature settings and mild detergents to protect the delicate, historical clothing fibers perfectly. You should always wash the heavy textile in cold water on a delicate cycle using a color-catching dye sheet inside the drum. I strongly advise against using harsh chemical bleach or strong fabric softeners, which actively break down vintage cotton threads over time. Tumble dry the massive piece on a low heat setting, or simply lay it flat across a large drying rack outside. Gentle washing guarantees your precious memories remain vibrant and structurally intact for upcoming generations.
Do I need a special sewing machine for quilting? You absolutely do not need an expensive industrial machine to successfully construct a beautiful, durable keepsake right at your kitchen table. A standard, well-maintained domestic sewing machine handles these stabilized cotton fabrics effortlessly if you utilize the correct needle and thread. I have pieced massive projects using a basic beginner machine simply by taking my time and adjusting the presser foot tension correctly. However, a walking foot attachment represents a mandatory ten-dollar upgrade that prevents your heavy layers from shifting during the final quilting. Consistent speed and clean machine tension matter far more than buying luxurious, expensive digital equipment.
What is the easiest way to cut perfect squares? Achieving flawlessly straight edges requires abandoning traditional scissors and investing in a sharp rotary cutter paired with a large self-healing mat. You must purchase a rigid, thick acrylic ruler measuring exactly six and a half inches square to use as a template. I have noticed that placing specialized non-slip adhesive grips on the back of the acrylic ruler prevents it from sliding completely. Apply firm, even downward pressure with your non-dominant hand while slicing the fabric smoothly with the sharp circular steel blade. Changing the blade frequently ensures a crisp, clean cut without pulling or distorting the stretchy fabric.
Can I mix different types of fabric together? Mixing different textile materials adds incredible visual interest, but it requires stabilizing every single piece to achieve a uniform structural weight. You can successfully combine stretchy cotton knits, slippery silk ribbons, and stiff denim jeans if you back the thinner materials properly. I always apply a heavy-duty interfacing to sheer fabrics and a lightweight fusible web to thick sweaters to balance them out. This equalization process ensures that all blocks behave identically when you finally run them under the fast-moving machine presser foot. Careful preparation allows you to incorporate a massive variety of sentimental textures without sacrificing construction quality.
How much does it cost to make one blanket? The total financial investment varies significantly based on your current supply stash and the specific quality of finishing materials you choose. Generally, purchasing premium cotton backing fabric, high-quality interior batting, and sufficient iron-on interfacing costs roughly eighty to one hundred dollars entirely. I have tried using cheap craft store alternatives to save money, but they inevitably shrink horribly and pill after one wash cycle. Investing in high-quality thread and brand new sharp rotary blades adds another twenty dollars to your initial project material budget. This reasonable cost yields a priceless, highly durable family heirloom that lasts for many decades.
Should I pre-wash all the baby clothes first? You absolutely must pre-wash every single garment using a gentle detergent before your scissors ever touch the delicate, sentimental fabric pieces. Stored clothing often develops musty odors, hidden mildew spots, and chemical residues that degrade the natural cotton fibers over several years. I always run the vintage pieces through a gentle cold water cycle to remove these dangerous contaminants completely before applying heat. Pressing unwashed fabric with a hot iron permanently sets invisible stains, turning them into ugly brown marks that never wash out. Clean materials ensure your final heirloom looks spectacular and smells wonderfully fresh upon absolute completion.
What size should I make the individual blocks? Selecting a uniform block size requires evaluating the average dimension of the graphic designs printed on your specific infant clothing collection. I have found that cutting a six-and-a-half-inch square provides the perfect frame for most newborn onesies and tiny toddler t-shirt logos. This specific measurement leaves exactly six inches of visible fabric after you sew the standard quarter-inch seam allowances on all sides. If you possess mostly large toddler shirts, upgrading to an eight-inch block size prevents you from accidentally cutting off cute phrases. Maintaining one consistent block size makes the mathematical assembly process incredibly easy for nervous beginners.
Preserving Your Most Treasured Memories
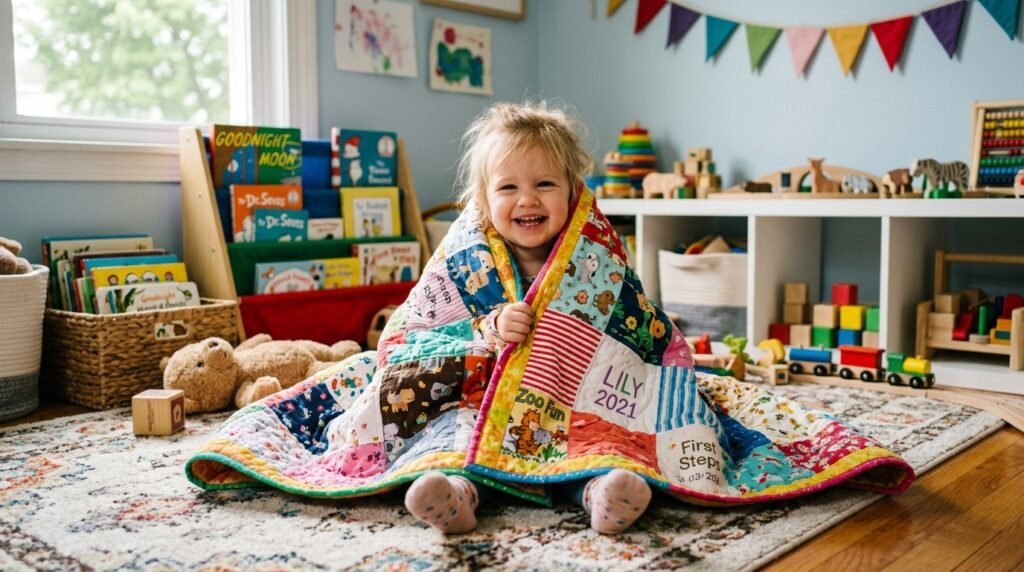
Transforming stuffed boxes of outgrown infant garments into a stunning heirloom textile provides an incredibly emotional and deeply rewarding crafting experience. By carefully stabilizing your delicate materials and utilizing precise rotary cutting techniques, you guarantee a beautifully flat, highly professional final result. I have seen how small changes in preparation completely eliminate frustration, making the entire sewing process joyful and deeply fulfilling. Please save these actionable tips on Pinterest and share this comprehensive guide with other parents seeking creative preservation methods. Grab your favorite onesies today and begin designing a magnificent, cozy keepsake your family will cherish forever.

Amelia leads HavenlyStyle’s editorial vision with a passion for elegant interiors and practical home living. With years of experience in home décor and lifestyle content, she ensures every article is accurate, inspiring, and easy to follow. From timeless decorating ideas to the latest interior design trends, Amelia is committed to helping readers create beautiful, functional spaces while maintaining HavenlyStyle’s trusted and welcoming voice.