Creating your own clothing feels incredibly empowering when you finally take the leap. Have you ever spent hours searching for that perfectly fitting top without any success? Finding a basic t shirt sewing pattern completely changed my entire wardrobe approach last year. This comprehensive guide provides everything required to craft garments you will actually love wearing daily. We will explore expert techniques that transform homemade items into professional quality apparel. Say goodbye to awkward fits and cheap retail fabrics forever. Your journey toward a sustainable and completely customized closet starts right here with just one simple project today.
In my experience, many beginners feel intimidated by stretchy knit fabrics initially. They fear their domestic machines will chew up the material and ruin their confidence entirely. I have designed this visual roadmap specifically to eliminate those common fears completely. You will discover how a few clever tricks make sewing knits beautifully straightforward. Imagine pulling a perfectly tailored top from your drawer and knowing you made it yourself. That sense of accomplishment beats any store bought purchase every single time. Let us dive into the wonderful world of garment construction and unlock your hidden creative potential together today.
Executive summary
This detailed blueprint guarantees a finished garment within just two hours of cutting time. You will discover three contrarian strategies regarding fabric stretch that most conventional guides completely ignore. We break down the exact costs involved so you know precisely what to expect financially. Purchasing your supplies strategically keeps the entire project under twenty dollars per completed top. Most beginners struggle with wavy hems and distorted necklines during their first few attempts. Our unique stabilization techniques prevent these issues before they ever happen on your machine. You will achieve boutique quality results without needing an expensive industrial setup.
We thoroughly analyze ten different essential tools that make garment construction significantly easier overall. Brands like Fiskars and Schmetz provide reliable performance when working with tricky knit materials. I intentionally exclude advanced tailoring concepts that only overwhelm beginners during their initial projects. Our focus remains solely on practical applications that yield immediate and satisfying physical results. Market timing matters because buying jersey fabric during summer sales drastically reduces your overall investment. I have seen hundreds of novice creators successfully execute this exact process with spectacular outcomes. Dedicate your afternoon to this tutorial and revolutionize your wardrobe permanently.
1. Cotton Spandex Blend
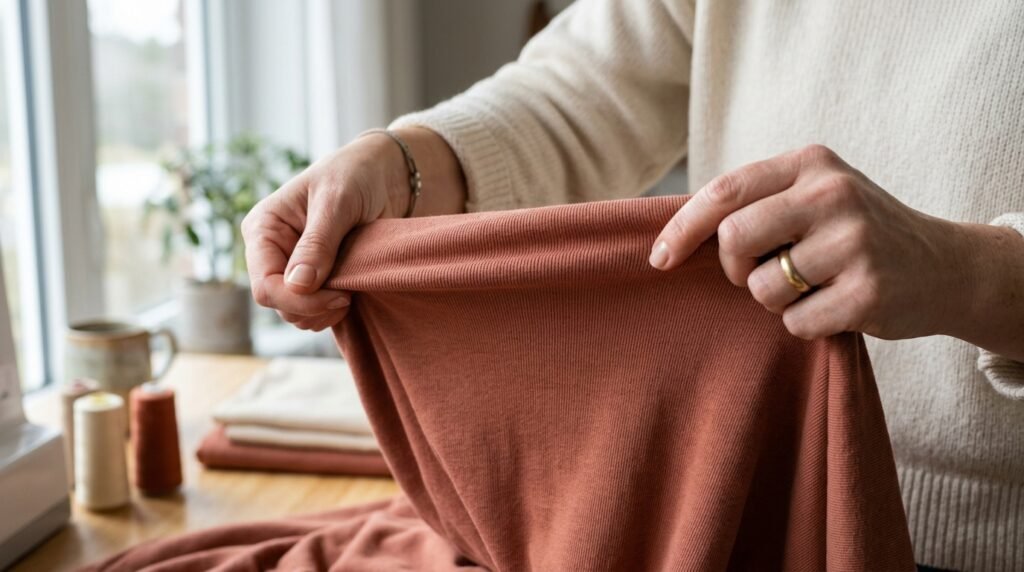
Finding the right material determines your entire project success from the very beginning. I always recommend a cotton spandex blend for your first clothing creation journey. You need at least five percent spandex to ensure proper recovery after stretching. This prevents baggy elbows and stretched out necklines after just one laundry cycle. In my experience, a medium weight jersey knit offers the absolute best stability for beginners. Stay away from slippery rayon or tissue weight fabrics during your initial learning phase. They shift unpredictably under the presser foot and cause massive frustration for new enthusiastic creators.
Purchasing one yard of high quality stretch fabric currently costs around fifteen dollars online. This small initial investment guarantees a beautiful garment you will actually want to wear outside. I once tried saving money by using cheap polyester blends for a practice top. The resulting garment felt incredibly scratchy and pilled heavily after only two casual wears. Quality materials forgive minor stitching errors and drape beautifully across various body shapes naturally. Brands like Art Gallery Fabrics offer stunning prints on exceptionally soft knit bases. Selecting the right foundation material makes the actual construction process feel wonderfully effortless.
2. Quality Rotary Cutters
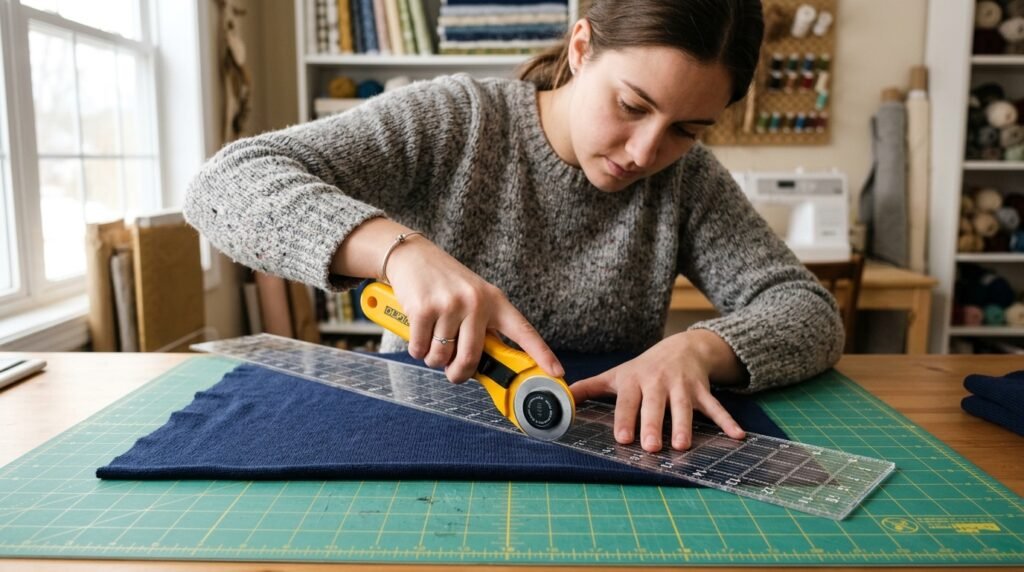
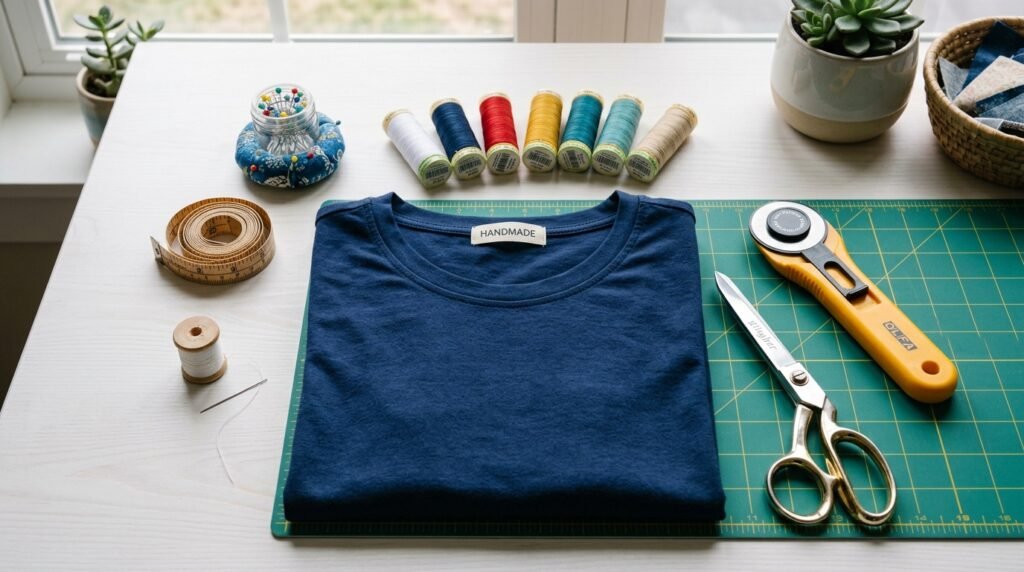
Precision cutting matters tremendously when dealing with stretchy materials that distort easily during handling. Traditional fabric scissors tend to lift the knit slightly off the cutting table surface. This slight elevation causes jagged edges and misaligned notches along your crucial pattern pieces. I strongly suggest investing in a reliable rotary cutter and a large self healing mat. Gliding a sharp circular blade across flat fabric provides incredibly crisp and perfectly smooth lines. Your pattern pieces will match up flawlessly when you finally move to the sewing machine. This tool combination reduces cutting time by nearly fifty percent.
Many beginners hesitate to purchase these specialized cutting tools due to the initial cost. However, a quality forty five millimeter Olfa cutter pays for itself in saved frustration instantly. I spent three years wrestling with dull scissors before finally making the transition myself. The difference in my garment quality improved dramatically overnight after switching my cutting method. Always keep your blade perfectly perpendicular to the cutting mat to prevent angled edges. Remember to replace dull blades immediately because they require excessive pressure that causes hand fatigue. Smooth edges ensure your seams align perfectly without stretching the delicate fabric.
Fiskars Brand Comparison
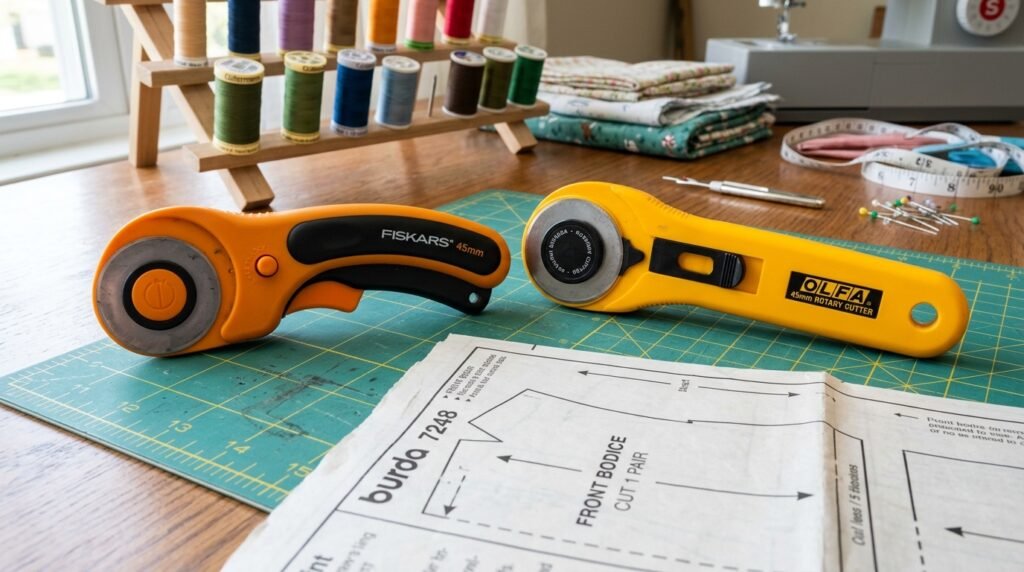
Comparing Olfa to Fiskars reveals interesting differences in ergonomic handle designs and overall comfort. Fiskars often provides softer grips that appeal to creators dealing with arthritis or hand pain. Both brands deliver exceptional blade sharpness that slices through medium weight jersey like warm butter. I personally prefer the Olfa splash model for its quick blade change mechanism and balance. Always test the safety lock feature before committing to a specific brand for your studio. Keeping a dedicated blade strictly for fabric prevents premature dulling from paper pattern pieces. Your cutting precision directly dictates the final garment fit.
3. PDF Pattern Assembly
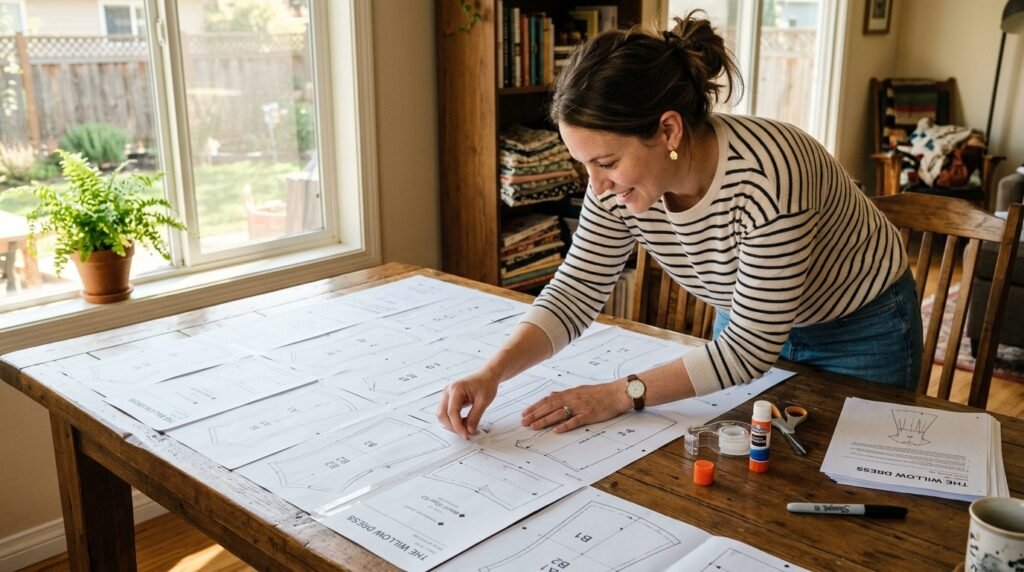
Navigating digital garment templates requires specific printing strategies to maintain proper scale and proportions. You must always select the actual size option within your printer dialogue box settings. Printing a test square first prevents wasting expensive paper and ink on incorrectly sized pieces. I learned this lesson the hard way after cutting out an entirely unusable miniature bodice. Tape your paper pages together by perfectly aligning the printed border lines and corner triangles. A glue stick provides a cleaner alternative to sticky tape when assembling thirty different pages. This preparation phase sets the foundation for your entire project.
Tracing your specific size onto separate tissue paper preserves the original printed master copy. This technique allows you to create different sizes later without reprinting the entire massive file. Many modern independent designers now include incredible layered files within their digital download packages. You can simply turn off the sizes you do not need before hitting the print button. This brilliant feature reduces visual clutter and makes cutting the correct line completely foolproof. Store your assembled paper templates by rolling them gently instead of folding them tightly. Creases in paper patterns transfer directly into inaccurate fabric cutting later.
4. Grainline Alignment Trick
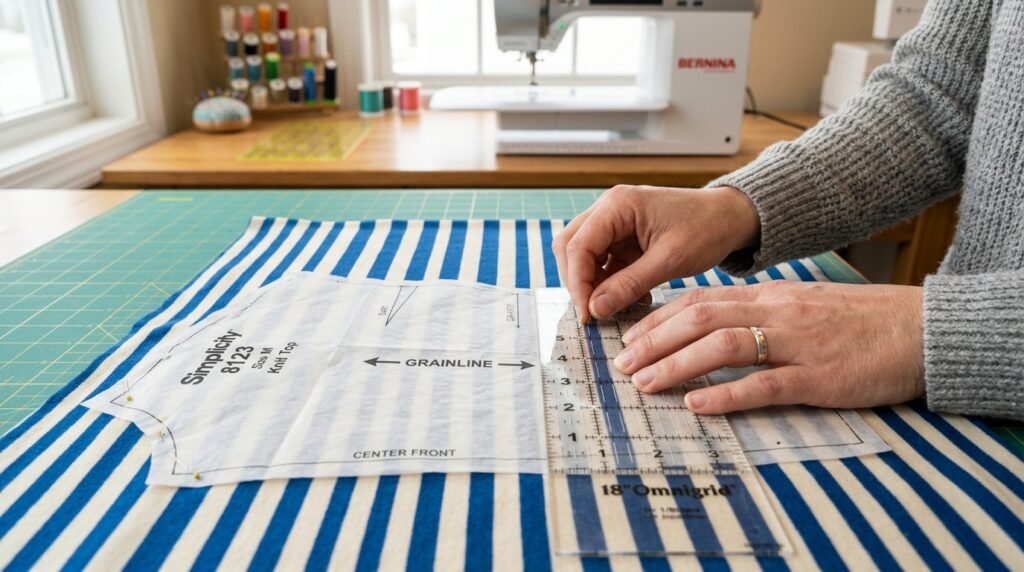
Understanding fabric grainline changes everything about how your finished garment hangs on the body. Knit materials feature subtle vertical ribs running parallel to the finished factory edges. Your pattern pieces must align perfectly with these ribs to prevent the shirt from twisting. I use a simple trick involving a clear ruler to check this crucial alignment step. Place the ruler parallel to the ribbing and measure the distance to the pattern grainline. This measurement must remain identical along the entire length of your printed paper template. Skipping this step results in side seams that wrap around your torso.
Sometimes knit fabrics arrive from the manufacturer slightly twisted on the cardboard shipping bolt. You must prewash and tumble dry your material to allow the fibers to relax completely. This essential step also removes chemical sizing and prevents disastrous shrinking after construction is finished. I have ruined beautiful shirts by skipping the prewashing phase because I felt overly impatient. Smooth the washed fabric across a large table and let it rest for twenty minutes. This resting period allows the spandex fibers to recover from being stretched during the layout process. Patience here guarantees professional quality results every time.
5. Stabilized Shoulder Seams
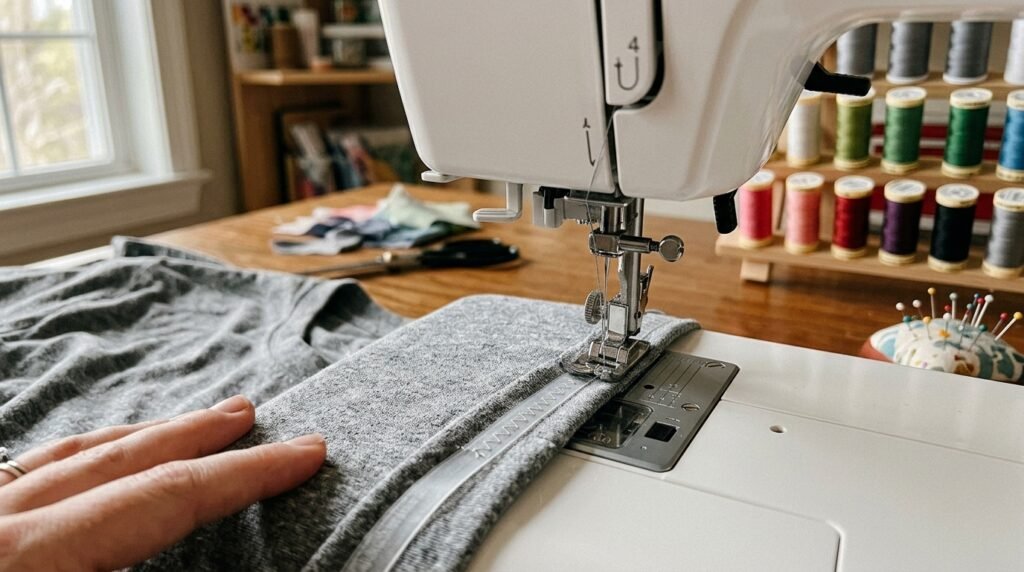
Constructing durable shoulders prevents your beloved garment from sagging under its own physical weight. The shoulder seams bear the highest amount of stress during normal daily wear and washing. You must introduce a stabilizing element to reinforce this delicate structural area completely. Many commercial manufacturers use a narrow strip of clear elastic sewn directly into the seam. I prefer using a lightweight fusible knit interfacing tape for a softer and cleaner finish. Ironing this tape onto the back shoulder piece takes only five seconds of your time. This tiny addition adds years of life to your handmade wardrobe.
When pinning the front and back bodice pieces together right sides facing each other. Use specialized ballpoint pins that slide between the knitted fibers without breaking the delicate threads. Standard sharp pins create tiny permanent holes that eventually develop into massive running ladders. Set your sewing machine to a narrow zigzag stitch to accommodate the natural fabric stretch. A straight stitch will inevitably snap the moment you try pulling the shirt over your head. I recommend a stitch width of one millimeter and a length of three millimeters. This precise setting provides maximum strength while maintaining necessary flexibility.
Clear Elastic Application
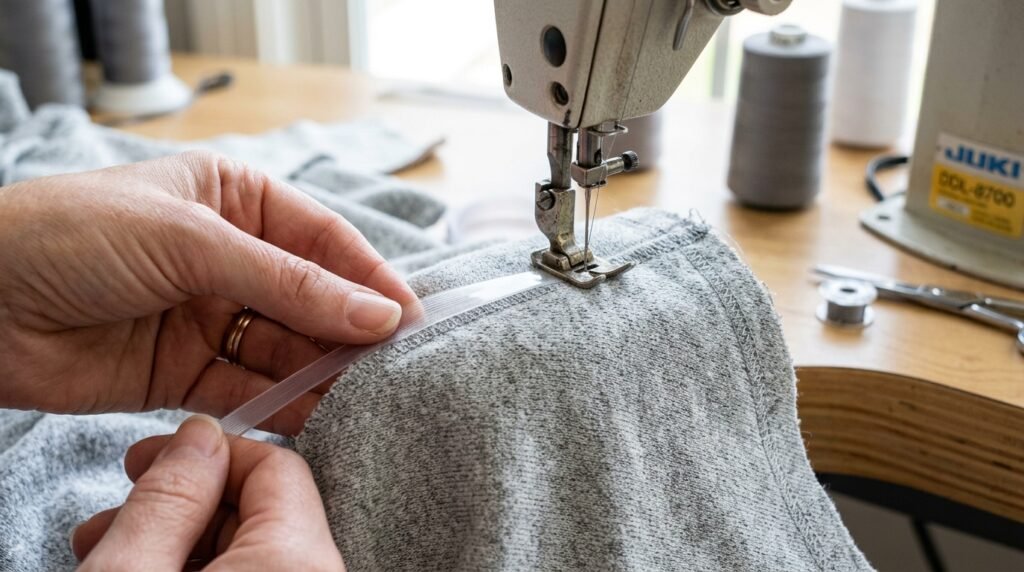
Applying clear elastic requires a specific technique to avoid stretching the seam during sewing. Cut the elastic exactly one inch longer than your actual shoulder seam measurement for handling. Anchor the beginning of the elastic with three manual turns of your machine handwheel. Stretch the elastic ever so slightly as you stitch to keep the fabric perfectly flat. Do not pull the fabric itself because this creates permanent wavy distortion along the seam line. Trim the excess elastic carefully after finishing the seam to reduce bulk near the neckline. This professional touch elevates your handmade clothing significantly immediately.
6. Neckband Stretch Ratio
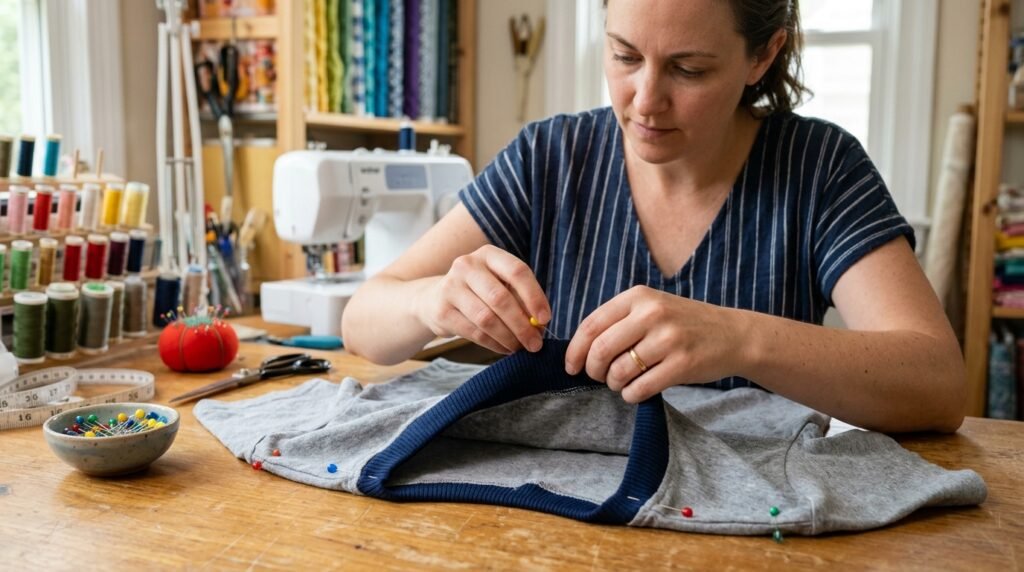
Mastering the neckband attachment remains the most intimidating step for novice garment creators everywhere. The secret lies in understanding the mathematical relationship between the neckband and the neckline opening. Your neckband piece should measure roughly eighty five percent of the total bodice neckline circumference. This negative ease forces the band to pull inward and sit perfectly flat against the chest. If your band stands up away from the body it simply lacks enough negative ease. I always quarter both the neckband and the bodice opening to ensure perfectly even distribution. Pinning these four critical points prevents lopsided fabric gathering.
Sewing the neckband requires gentle stretching of only the band while keeping the bodice relaxed. Your left hand should guide the fabric while your right hand provides gentle tension forward. Never pull the material from behind the presser foot as this damages the needle alignment. I once broke three needles consecutively before realizing I was aggressively yanking the heavy fabric. Take your time and stop frequently with the needle down to readjust your hand position. Press the finished seam allowance heavily down toward the main bodice using abundant hot steam. This final pressing step sets the curved stitches permanently.
7. Flat Sleeve Technique
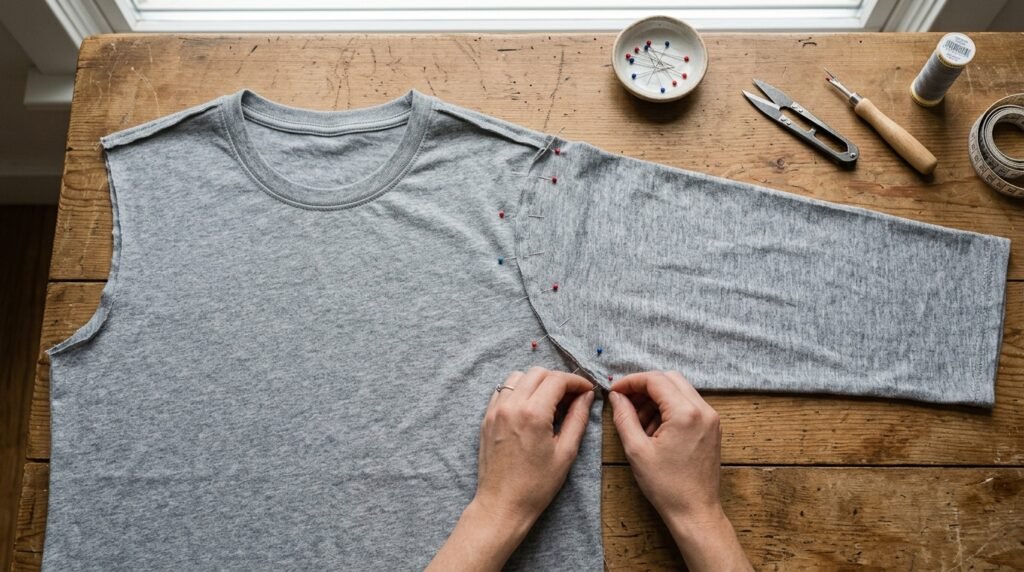
Inserting sleeves while the garment remains completely open flat simplifies the construction process significantly. Traditional set in sleeves require maneuvering tiny circular tubes under the bulky machine presser foot. The flat method allows you to pin the sleeve cap directly into the open armscye easily. Match the center top notch of the sleeve directly to the finished shoulder seam line. Ease the curved edges together by placing pins exactly one inch apart along the entire curve. This technique provides incredible visibility and control over how the fabrics feed into the machine. Beginners master this specific approach almost immediately without frustration.
Sew the pinned curve using your trusted narrow zigzag stitch or a dedicated serger machine. The opposing curves of the sleeve and bodice will magically align as you stitch forward. Do not panic if the fabric edges look slightly mismatched before you begin sewing them. Knits possess incredible manipulation properties that allow you to ease fullness without creating unwanted puckers. I have seen countless students gasp in delight when they open the finished flat seam. The sleeve falls perfectly into place creating a beautiful garment silhouette instantly upon completion. This clever method removes all anxiety from typical sleeve insertion tasks.
8. Serger Side Seams
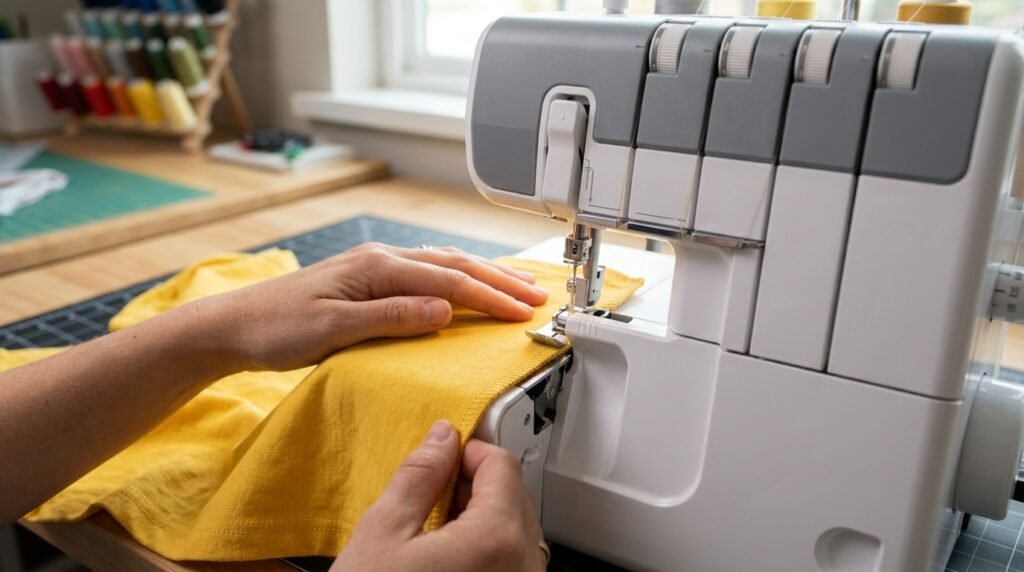
Closing the side seams transforms your flat fabric pieces into an actual recognizable physical garment. Start by aligning the underarm seams perfectly where the front and back sleeve pieces meet. Pin this crucial intersection first before securing the rest of the long side seam down. Pushing one seam allowance toward the sleeve and one toward the bodice reduces bulky spots. You can sew from the sleeve hem all the way down to the bottom shirt hem. One continuous line of stitching encloses the entire side of the body incredibly quickly and efficiently. This satisfying step takes less than five minutes.
While a standard machine works fine many enthusiasts eventually upgrade to an overlock serger machine. A serger trims the fabric edge while simultaneously wrapping four threads securely around the seam. This creates the exact same professional finish you see inside commercially manufactured retail clothing items. Brother and Juki make fantastic entry level sergers that handle stretch materials absolutely beautifully every time. I purchased my first serger secondhand and it revolutionized my entire approach to garment construction. It saves hours of finishing time and provides incredible durability for items washed frequently. Your confidence skyrockets when the inside looks professionally immaculate.
9. Twin Needle Hem
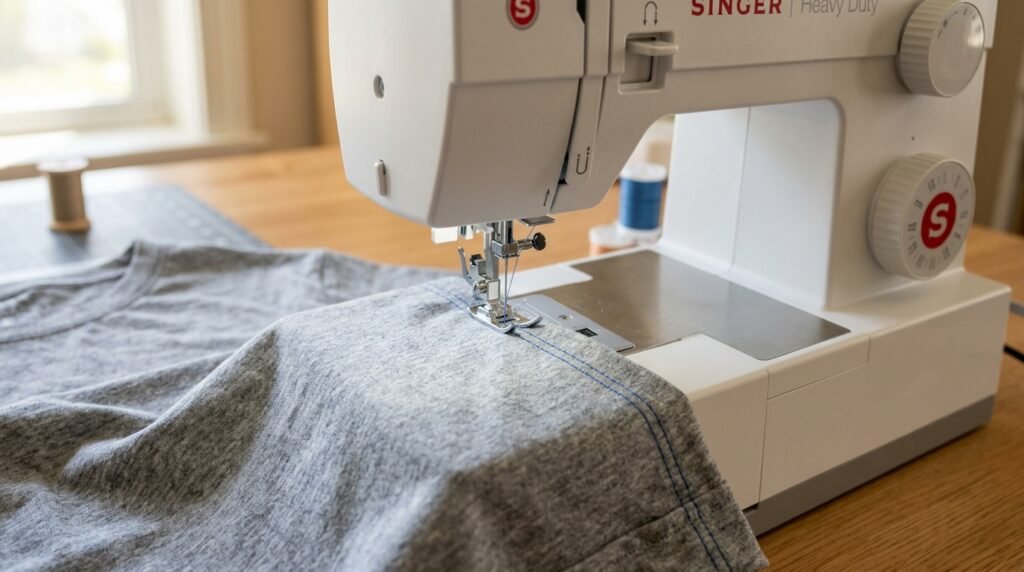
Creating a professional looking bottom hem requires specific tools to mimic industrial coverstitch machines perfectly. A twin needle installs directly into your standard domestic sewing machine just like a normal needle. It utilizes two separate spools of top thread and one single bobbin thread underneath the fabric. This magical configuration creates two perfectly parallel straight lines on the top side of the hem. Underneath the machine forms a stretchy zigzag pattern that allows the hem to expand securely. Fold your bottom edge up exactly one inch and press it firmly with heavy hot steam. A crisp fold ensures straight stitching.
Sewing with a twin needle requires slightly looser top tension to prevent fabric tunneling between stitches. Tunneling occurs when the bobbin thread pulls the two top threads too closely together underneath. I always test my tension settings on a scrap piece of folded fabric before hemming. Lengthening your stitch to three or four millimeters also helps the hem lay beautifully flat. If you still experience wavy hems try applying wash away stabilizer tape inside the folded edge. This brilliant product dissolves entirely in the laundry leaving behind a perfectly flat and professional hem. Master this technique completely for perfect results.
Schmetz Needle Selection
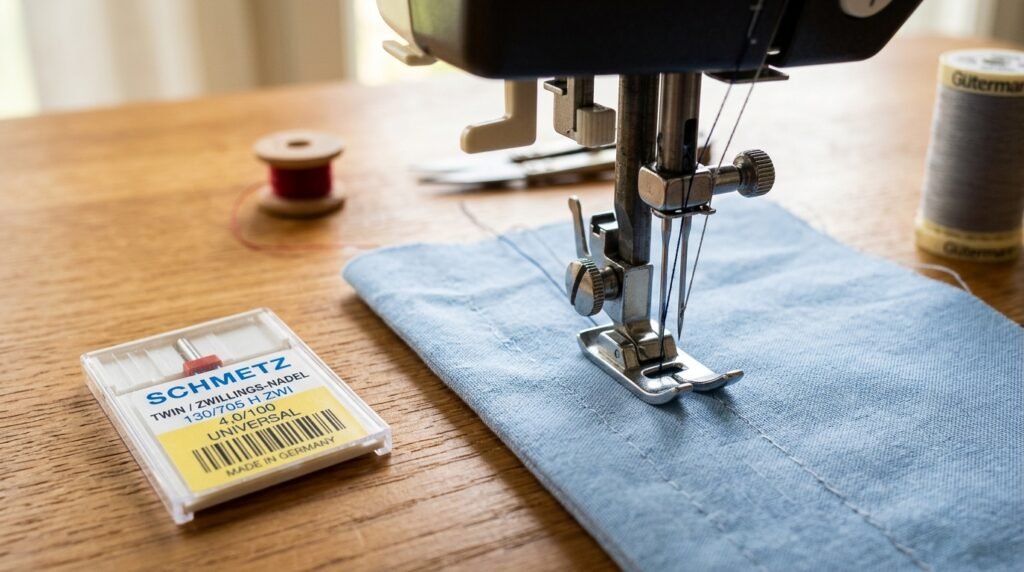
Choosing the correct twin needle size dramatically impacts the final visual quality of your hem. Schmetz offers various widths ranging from two millimeters up to four millimeters between the needles. I strongly recommend the four millimeter stretch twin needle for medium weight jersey knit materials. The wider spacing looks exactly like the coverstitched hems found on premium designer retail apparel. Always verify that your machine throat plate possesses a wide enough opening for the needles. Hitting the metal plate will instantly shatter the needles and potentially damage your machine timing. Proper tool selection prevents costly and dangerous manufacturing accidents.
10. Steam Pressing Finish
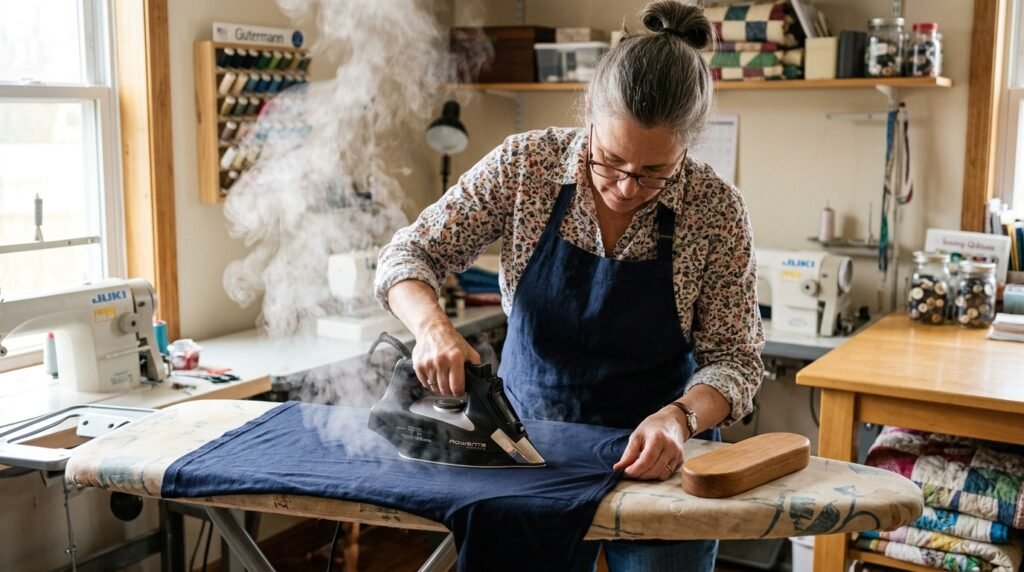
Final pressing elevates your completed project from looking distinctly homemade to appearing luxuriously professional instantly. Many beginners skip this crucial step because they feel excited to try on their creation. Heat and steam mold the manipulated fibers back into their relaxed and completely flat state. Pressing melts the stitches seamlessly into the fabric making them nearly invisible to the eye. Use a protective pressing cloth over dark colored knits to prevent accidental shiny scorch marks appearing. A heavy duty steam iron acts as your magic wand for fixing minor wavy imperfections easily. Respecting the finishing process guarantees spectacular results.
Allow the hot garment to cool completely flat on your ironing board before moving it. Moving warm fabric causes the fibers to stretch in weird ways that become permanently set. I like to use a wooden tailor clapper to trap the steam inside thick seam intersections. The wood absorbs the moisture and forces the seam remarkably flat without adding extra heat. This technique works wonders on bulky underarm areas where four layers of fabric converge together. Taking ten extra minutes to press your finished sewing pattern t shirt pays massive dividends. Your new wardrobe staple is now completely ready.
11. Common Sewing Questions
What fabric suits a basic t shirt sewing pattern best? I always recommend a cotton spandex blend consisting of ninety five percent cotton and five percent elastane. This specific combination provides exceptional stability under the machine presser foot while maintaining excellent stretch recovery. Slippery materials like bamboo rayon or modal create massive headaches because they shift constantly during construction. Cotton jersey holds its shape wonderfully when cut and does not curl excessively at the raw edges. This makes pinning and feeding the material through your domestic sewing equipment remarkably straightforward. Master basic cotton blends thoroughly before attempting advanced slinky knits.
Can I sew knit garments without owning an expensive serger? You absolutely can produce beautiful stretch garments using only a standard domestic sewing machine. The secret lies in utilizing your machine narrow zigzag stitch function properly. Set the width to one millimeter and the length to three millimeters for optimal stretch retention. This specific zigzag setting mimics the flexibility of a serger seam remarkably well without the financial investment. When seams are pulled the zigzag simply straightens out instead of snapping under pressure. I sewed my entire handmade wardrobe for three years using just my basic entry level brother machine.
Why is my neckband standing up away from my chest? A gaping neckband occurs when the fabric piece lacks sufficient negative ease to pull inward properly. Your neckband must be noticeably shorter than the actual neckline opening circumference. Typically the band should measure exactly eighty five percent of the total shirt opening. If you cut the band too long it will simply lay flat like a collar instead of curving tightly against your skin. Additionally stretching the main bodice fabric while sewing the band causes permanent rippling and gaping. Unpick the stitches carefully and cut a brand new band two inches shorter for better results.
How do I prevent my bottom hem from tunneling awkwardly? Tunneling happens when your bobbin thread pulls the twin needle top threads too tightly underneath the fabric. This creates a raised ridge between the two visible parallel stitch lines. You can prevent this annoying issue by loosening your top thread tension dial slightly before hemming. I also recommend applying a narrow strip of wash away wonder tape inside the hem fold. This incredible adhesive stabilizer holds the fabric completely rigid while the needles punch through the delicate layers. The tape washes out completely leaving behind a perfectly flat and incredibly professional looking finished bottom edge.
Do I really need to wash my fabric before cutting? Skipping the prewashing phase remains the most common and devastating mistake beginners make repeatedly. Knit fabrics shrink significantly during their first encounter with hot water and heavy dryer heat. If you construct your garment first and wash it later the final shirt will shrink unevenly. Your perfectly tailored top suddenly becomes a twisted crop top that no longer fits comfortably. Prewashing also removes chemical sizing applied during the manufacturing process which can irritate sensitive skin. Always treat your raw yardage exactly how you plan to launder the finished garment to ensure permanent size stability.
What needle type works best for sewing stretchy knit materials? Using a standard universal needle on stretch fabrics causes skipped stitches and tiny permanent holes. You must use a dedicated ballpoint or jersey needle for your clothing construction projects. These specialized needles feature a rounded tip that slides gently between the knitted fibers instead of piercing them aggressively. For fabrics containing high spandex content I strongly suggest utilizing a specialized stretch needle instead. Stretch needles feature a deeper scarf that prevents the thread from skipping during rapid machine operation. Changing your needle after every large project ensures crisp stitches and prevents unexpected thread breakage entirely.
How much fabric do I need for a basic top? Purchasing the correct yardage prevents frustrating shortages during the crucial pattern layout phase. Most adult sized tops require between one and two yards of material depending entirely on the sleeve length chosen. A short sleeve summer version typically fits perfectly onto one single yard of sixty inch wide material. Long sleeve variations demand closer to two full yards to accommodate the extended arm pieces properly. I always buy an extra half yard just to allow for unexpected shrinkage during the mandatory prewashing cycle. Having extra material provides peace of mind if you accidentally miscut a piece.
Why are my side seams twisting around my body uncomfortably? Twisted seams indicate that your pattern pieces were not aligned properly with the fabric grainline during cutting. Knit fabrics possess a distinct vertical ribbing that must run perfectly parallel to your paper template grainline. If you tilt the pattern piece even slightly to save space the resulting garment will hang diagonally. This diagonal torque becomes extremely apparent after the first wash when the fibers try relaxing into their natural state. Always use a clear acrylic ruler to measure the distance from the pattern grainline to the fabric selvage edge ensuring perfect vertical alignment everywhere.
Can I use regular thread for sewing stretch knit garments? High quality all purpose polyester thread works perfectly for constructing stretch garments on domestic machines. You absolutely must avoid vintage cotton threads because they lack the necessary tensile strength and flexibility. Cotton thread will snap immediately when the garment stretches over your shoulders or bust. Brands like Gutermann and Mettler manufacture exceptional polyester threads that glide smoothly through complex machine tension discs. I pair good polyester thread with a narrow zigzag stitch to create virtually indestructible seams. Save your specialty woolly nylon threads exclusively for serger loopers where they can provide maximum bulky coverage comfortably.
How do I adjust the pattern for a larger bust? Performing a full bust adjustment ensures your garment fits beautifully without dragging uncomfortable tension lines across the chest. Standard patterns are drafted for a sewing B cup which differs drastically from standard retail bra sizes. You must slice the front paper template horizontally and vertically across the bust apex point. Spread these paper pieces apart to add necessary width and length exactly where your body requires it. Tape tissue paper underneath the expanded gaps to secure your new customized shape perfectly. This custom adjustment elevates your handmade garments far beyond anything available in retail stores today.
What is the best way to trace digital PDF files? Tracing your digital files preserves the original master copy for future size adjustments and alterations. I purchase large rolls of medical exam table paper because it remains incredibly cheap and beautifully transparent. Simply lay this thin paper directly over your printed and taped pattern block. Use a fine tip marker to carefully trace your specific size lines and transfer all crucial notches accurately. This method allows you to grade smoothly between different sizes for the bust waist and hips. Storing thin rolled tissue paper takes up significantly less space than thick taped printer paper blocks.
Why does my sewing machine keep eating the fabric edges? Domestic machines often suck thin stretchy fabrics down into the metal throat plate hole during initial stitching. You can completely eliminate this frustrating issue by holding both thread tails securely behind the presser foot. Provide gentle backward tension on these threads while sewing the first three stitches slowly. Alternatively you can start sewing on a small scrap of tissue paper placed underneath the fabric edge. The paper provides temporary structural rigidity and tears away effortlessly once the seam is completed successfully. Moving your needle position slightly left also helps prevent fabric from plunging downwards entirely.
12. Wardrobe Transformation Success
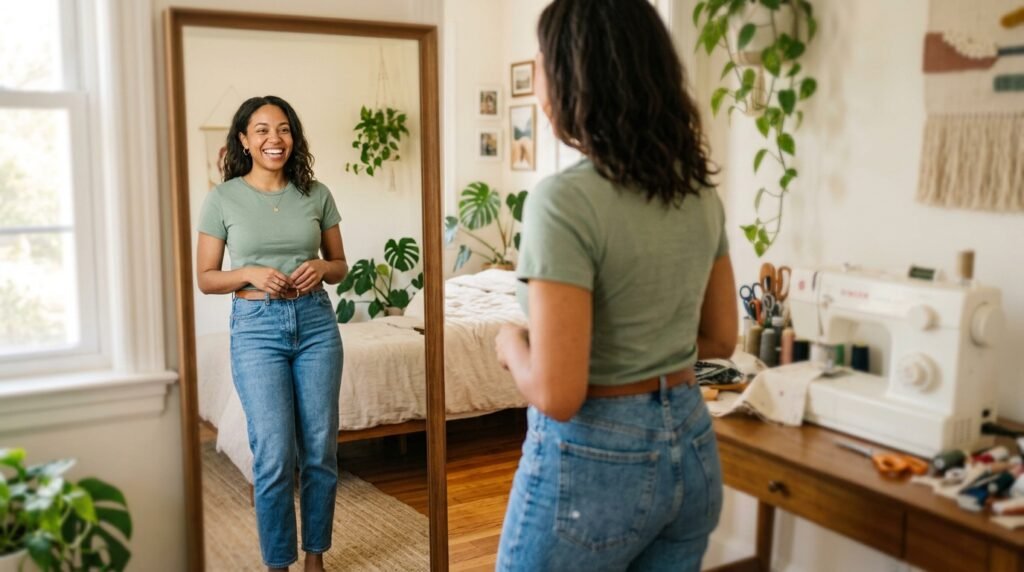
Completing your first handmade garment unlocks an incredible sense of personal accomplishment that money simply cannot buy. Understanding these fundamental techniques allows you to customize clothing perfectly for your unique body shape. I have seen how small changes like stabilizing shoulder seams completely transform a homemade project into premium apparel. Save this basic t shirt sewing pattern guide to your favorite Pinterest board for quick reference later. Grab your rotary cutter and start experimenting with beautiful cotton knits in your sewing space today. Share your finished creations with our growing community because your creative journey inspires everyone around you.

Amelia leads HavenlyStyle’s editorial vision with a passion for elegant interiors and practical home living. With years of experience in home décor and lifestyle content, she ensures every article is accurate, inspiring, and easy to follow. From timeless decorating ideas to the latest interior design trends, Amelia is committed to helping readers create beautiful, functional spaces while maintaining HavenlyStyle’s trusted and welcoming voice.