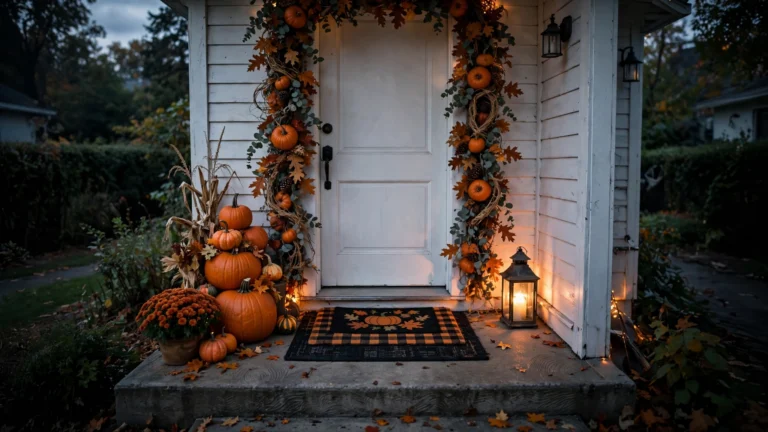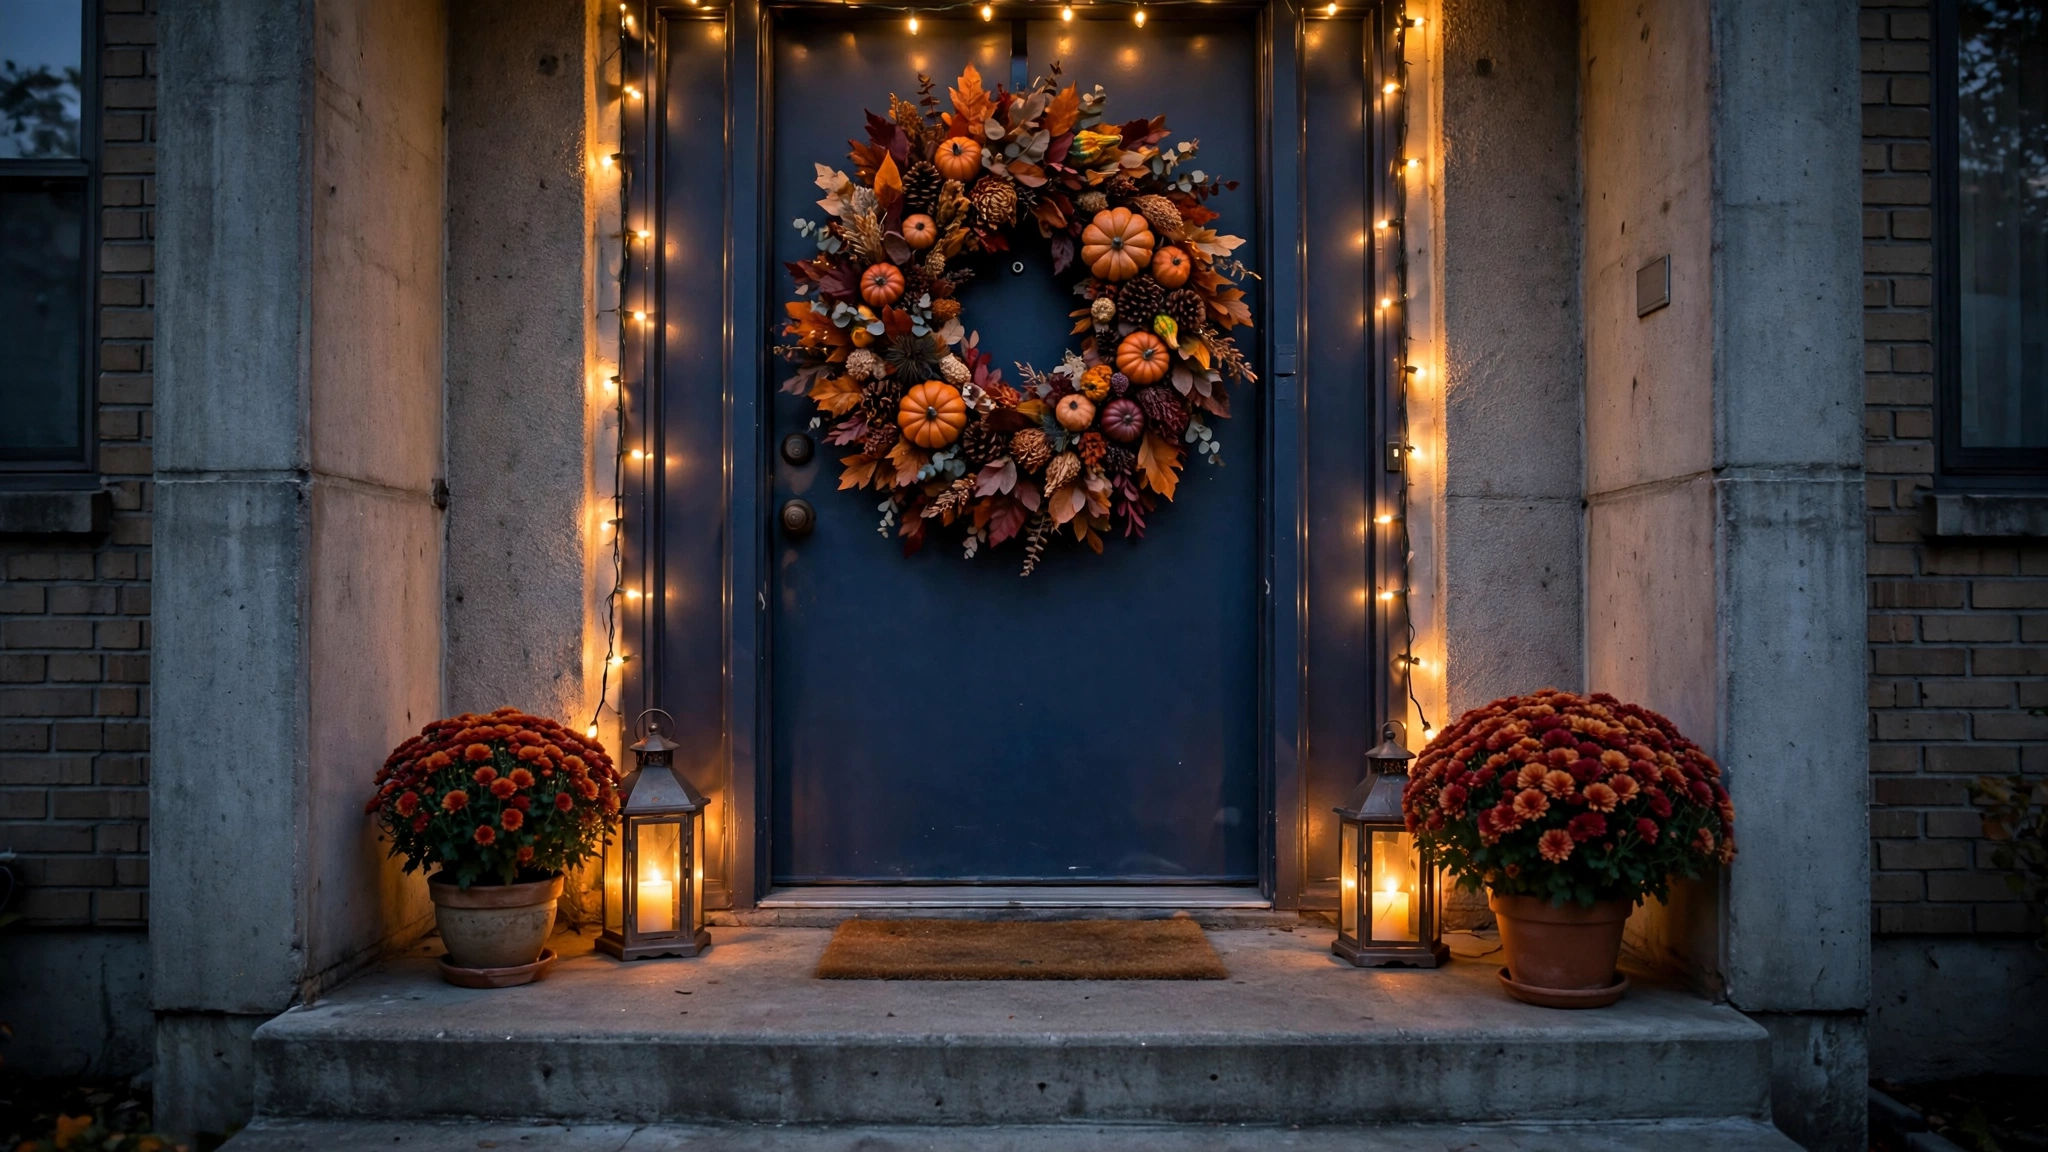
Your front door is the only part of your apartment the whole building sees, and in October it can be the best-decorated corner of your rental for less than the cost of a grocery run. I know what you’re thinking, though: strict landlord, no drilling into the door frame, no adhesive that eats the paint, no taping anything that won’t come off in November. I’ve helped dozens of renters navigate exactly that, and the truth is Halloween is the most renter-friendly holiday to decorate for. Everything — wreaths, garlands, pumpkins, lights — is designed to come down in a few weeks, which means every decoration you hang should be removable by design. You can go as dramatic as a full door wrap or as simple as a single great wreath, and none of it has to threaten your security deposit. Here are the 15 ideas I recommend most, ordered from highest impact to finishing touches, each one tested against the renter test: removable, reversible, and deposit-safe unless I explicitly flag otherwise.
Executive Summary
- Your front door is your highest-impact Halloween canvas, and every idea here is fully removable — no drilling, no permanent adhesive, no paint damage.
- A single oversized Halloween wreath on an over-the-door hook delivers more transformation per dollar than anything else (approximately $25–$45 total).
- Command-style hooks, over-the-door hangers, and suction anchors do all the heavy lifting for wreaths, garlands, and signs — buy them once and reuse them every season.
- Layer the floor around your door with a doormat, potted mums, and a foam-pumpkin cluster for a “finished” look that costs under $50 and takes twenty minutes.
- Battery-operated lights and lanterns make a door visible after dark, which is when Halloween decorating actually pays off.
- Everything comes down cleanly in November; store the reusable pieces in one labeled bin and you’ll decorate next year in under an hour.
1. The Statement Halloween Wreath
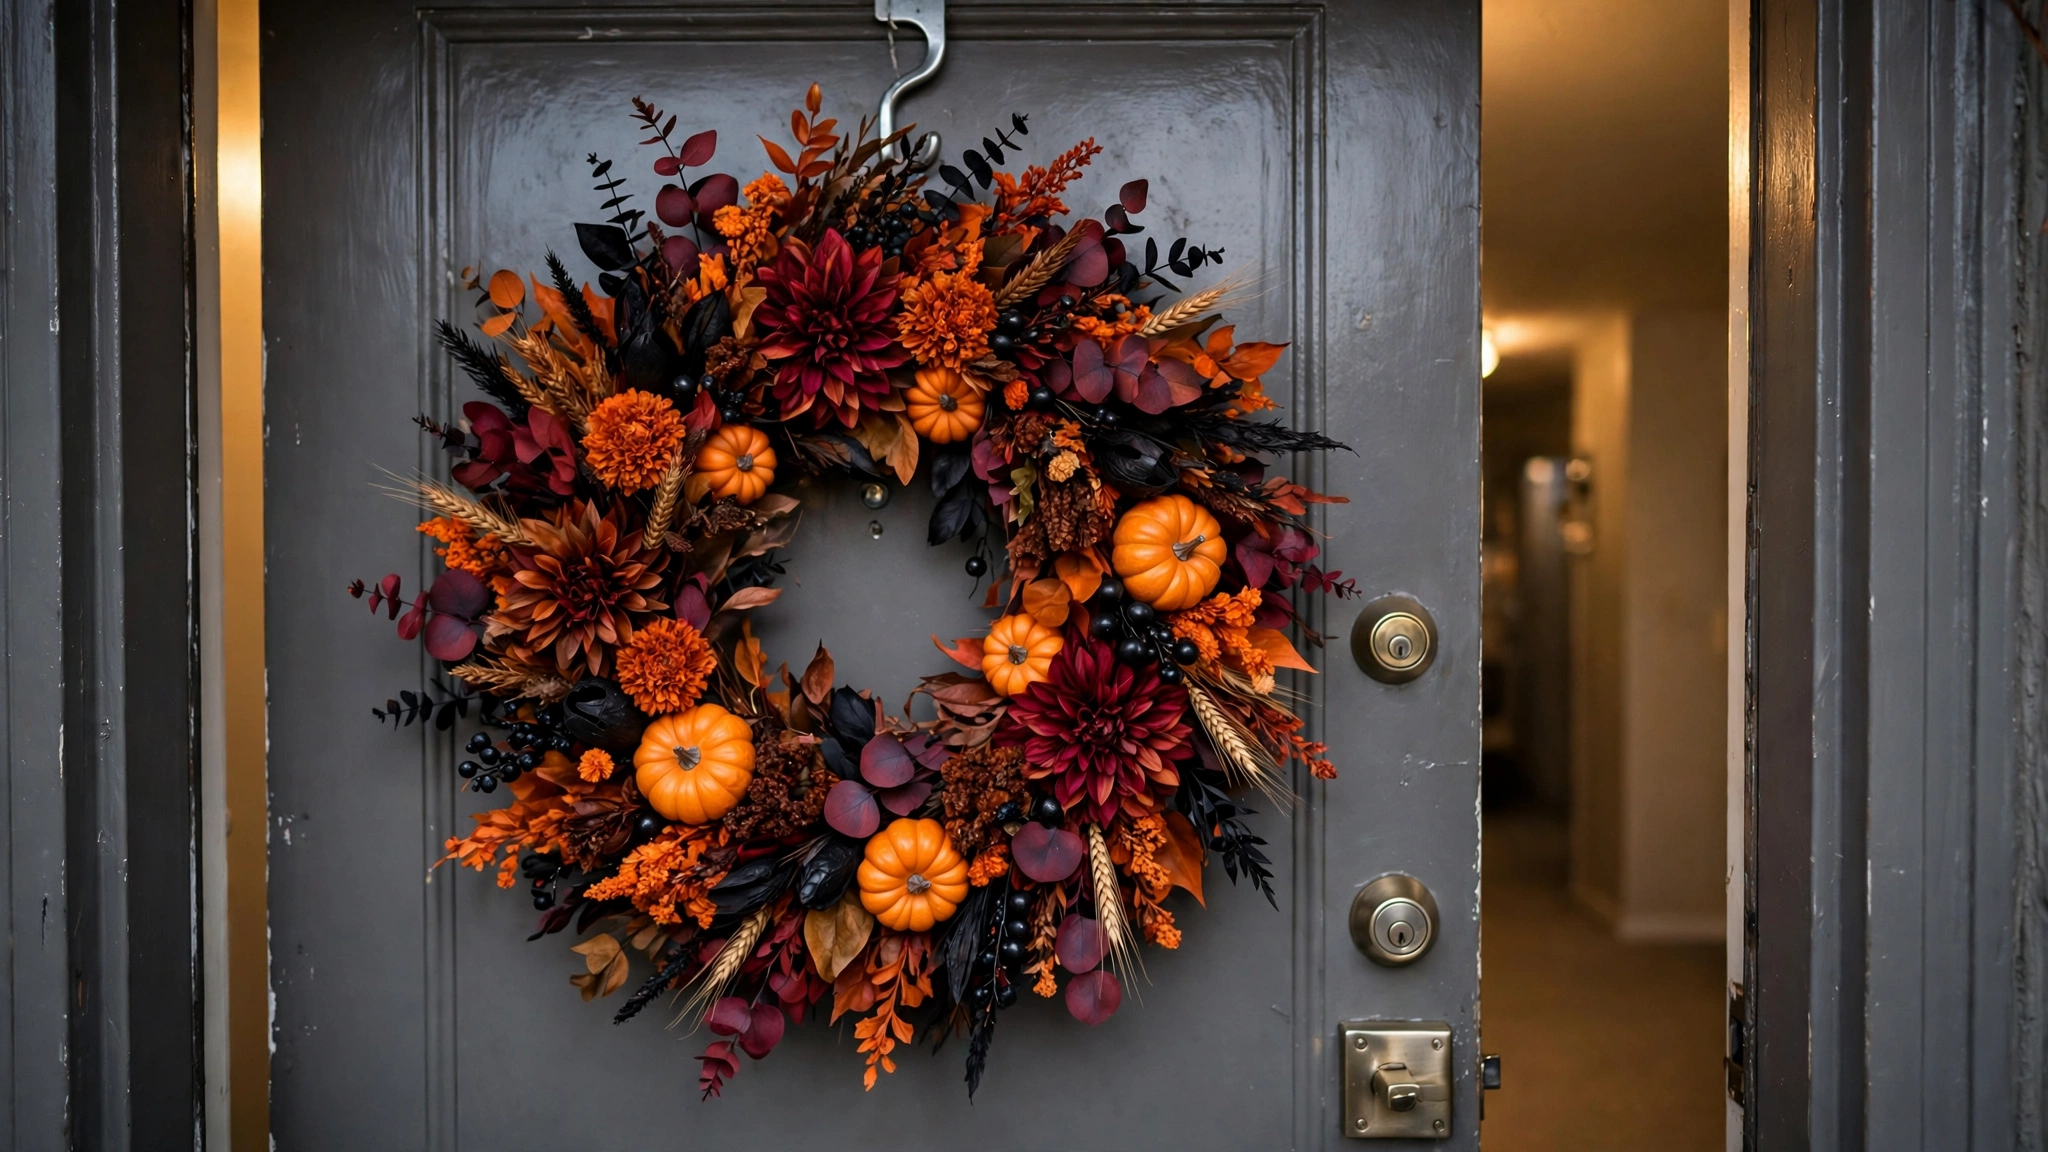
Nothing changes a door faster than a wreath — it’s the single focal point every eye lands on, and a Halloween wreath does triple duty as decor, seasonal signal, and curb appeal. What I love about this for renters is that wreaths hang from the top of the door on an over-the-door hook or an adjustable wreath hanger, which means zero holes, zero adhesive, and zero negotiation with your landlord. Choose a wreath with real visual weight: deep orange and burgundy florals mixed with black accents, miniature pumpkins, or a witch-hat topper will read from down the hallway in a way a sparse thin wreath never will. Look for one roughly 20–24 inches across — big enough to own the door, not so big it overwhelms a standard apartment door.
How to do it:
- Measure your door’s thickness (most apartment doors are 1¾ inches) and buy an over-the-door wreath hanger sized to fit snugly so it doesn’t rattle.
- Hang the hanger over the top of the door and let it rest on the inside face, not the weatherstripping, so the door still closes fully.
- Hook the wreath onto the hanger and step back at least ten feet — this is how your neighbors will see it.
- Adjust the wreath’s height so its center sits at roughly eye level, then rotate it until the fullest side faces out.
- If your door is metal, swap the hanger for a heavy-duty magnetic hook, which holds firm and leaves no mark.
Approximate cost: $25–$45 for a quality faux Halloween wreath, plus $8–$12 for the over-the-door hanger (reusable for years).
2. A Draped Fall Garland Over the Frame
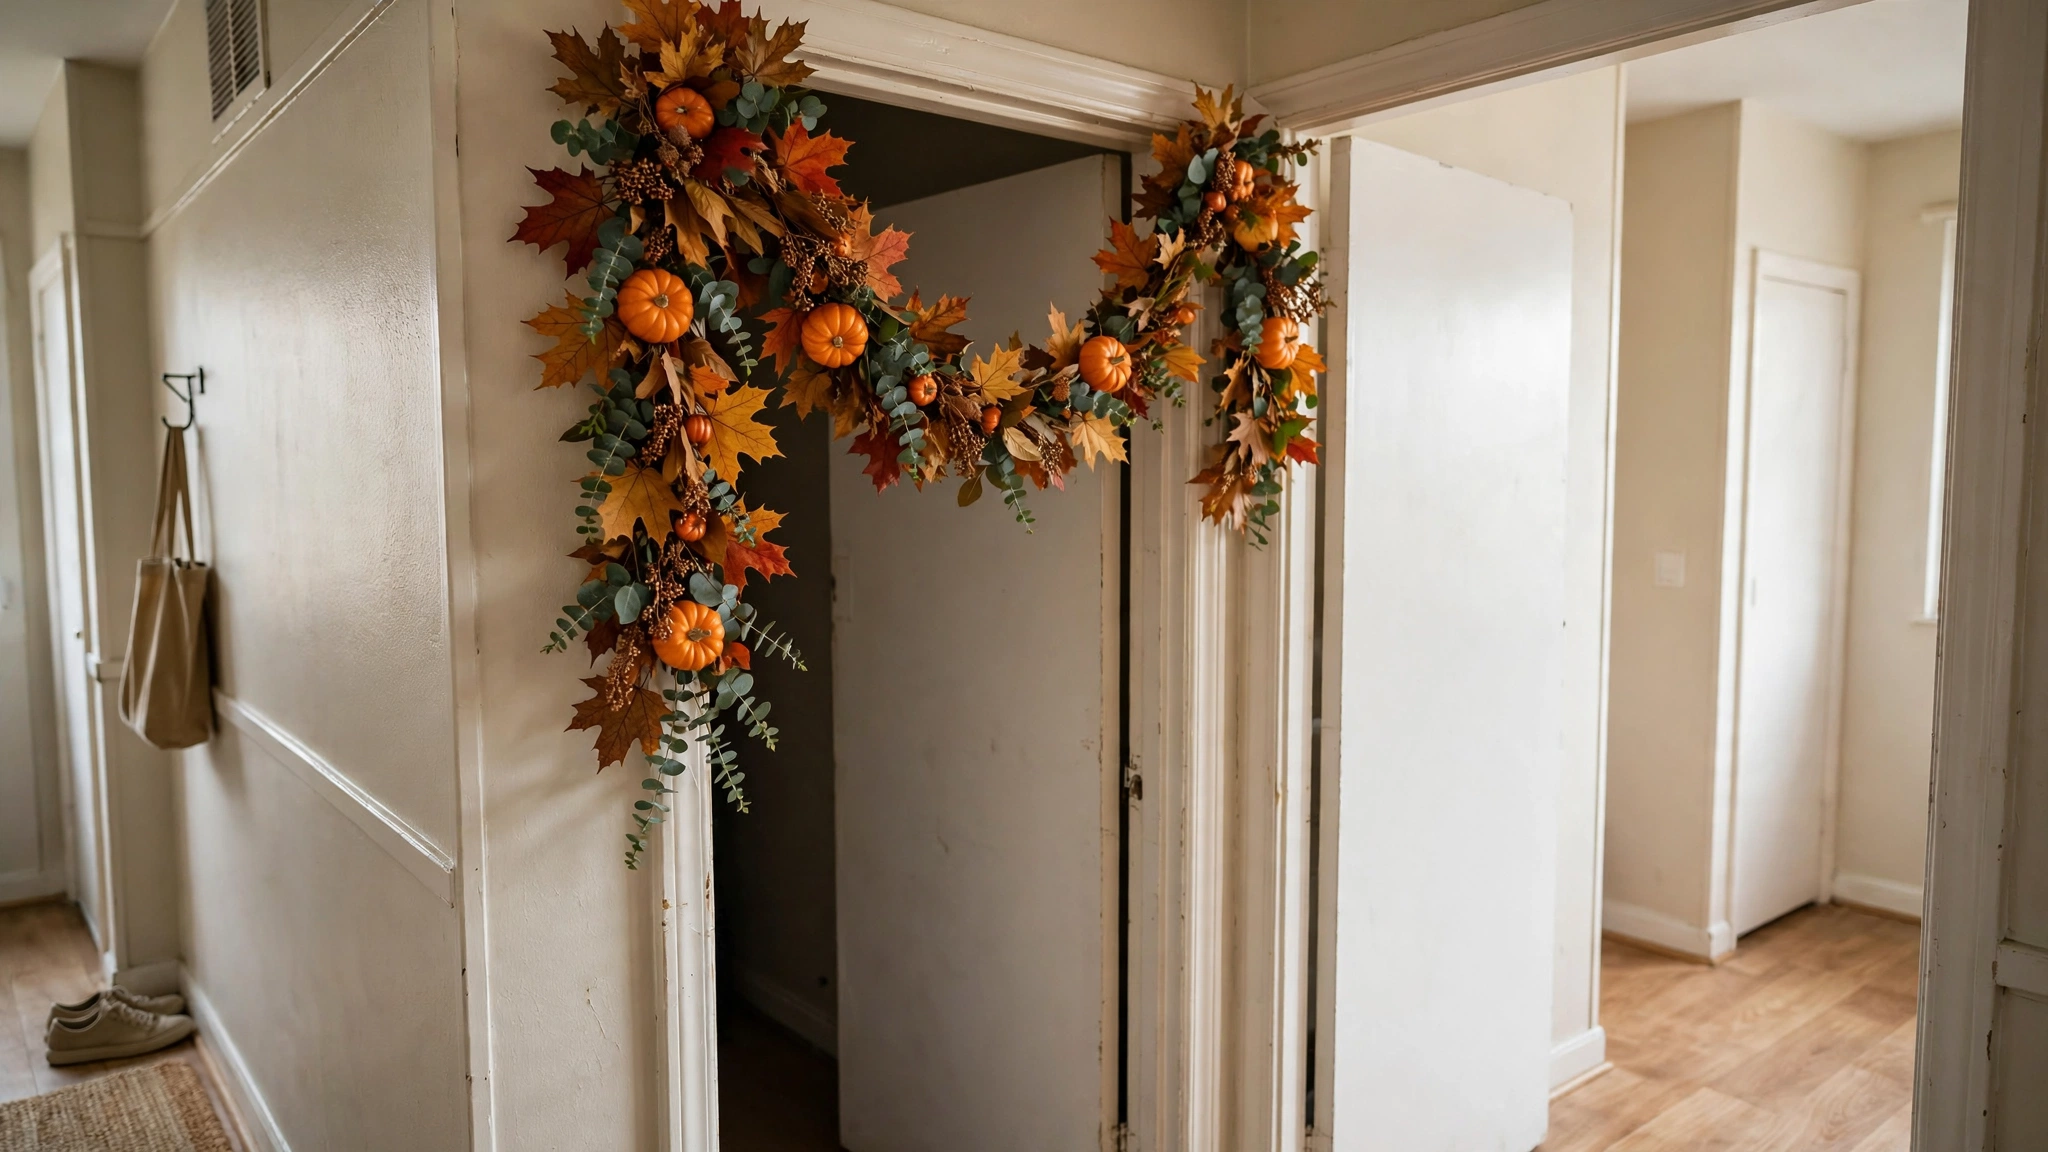
If a wreath is the statement piece, a draped garland is the frame that makes the whole doorway feel styled. A 6-foot eucalyptus or maple-leaf garland with mini pumpkins woven in, swagged across the top of the door frame like a curtain valance, instantly makes a plain rental door look intentional. This works beautifully for renters because the garland hangs from removable adhesive hooks stuck to the trim or the wall beside the frame — never to the door itself — so there’s nothing to peel off painted surfaces at move-out. Choose a garland with bendable wire branches so you can shape the drape exactly the way you want it.
How to do it:
- Buy two large removable adhesive hooks rated for at least 5 pounds and press them onto clean, dry trim at each top corner of the door frame.
- Let the adhesive cure for the time the package specifies (usually about an hour) before hanging anything.
- Drape the garland across, letting it dip about 8–10 inches in the center for that classic swag shape.
- Tuck 3–5 mini foam pumpkins into the garland branches so they peek out at intervals.
- Add a strand of battery fairy lights through the garland if you want it to glow after dark.
Approximate cost: $20–$35 for the garland, $8–$10 for the hooks, $5–$8 for foam pumpkins.
3. Peel-and-Stick Halloween Door Decals
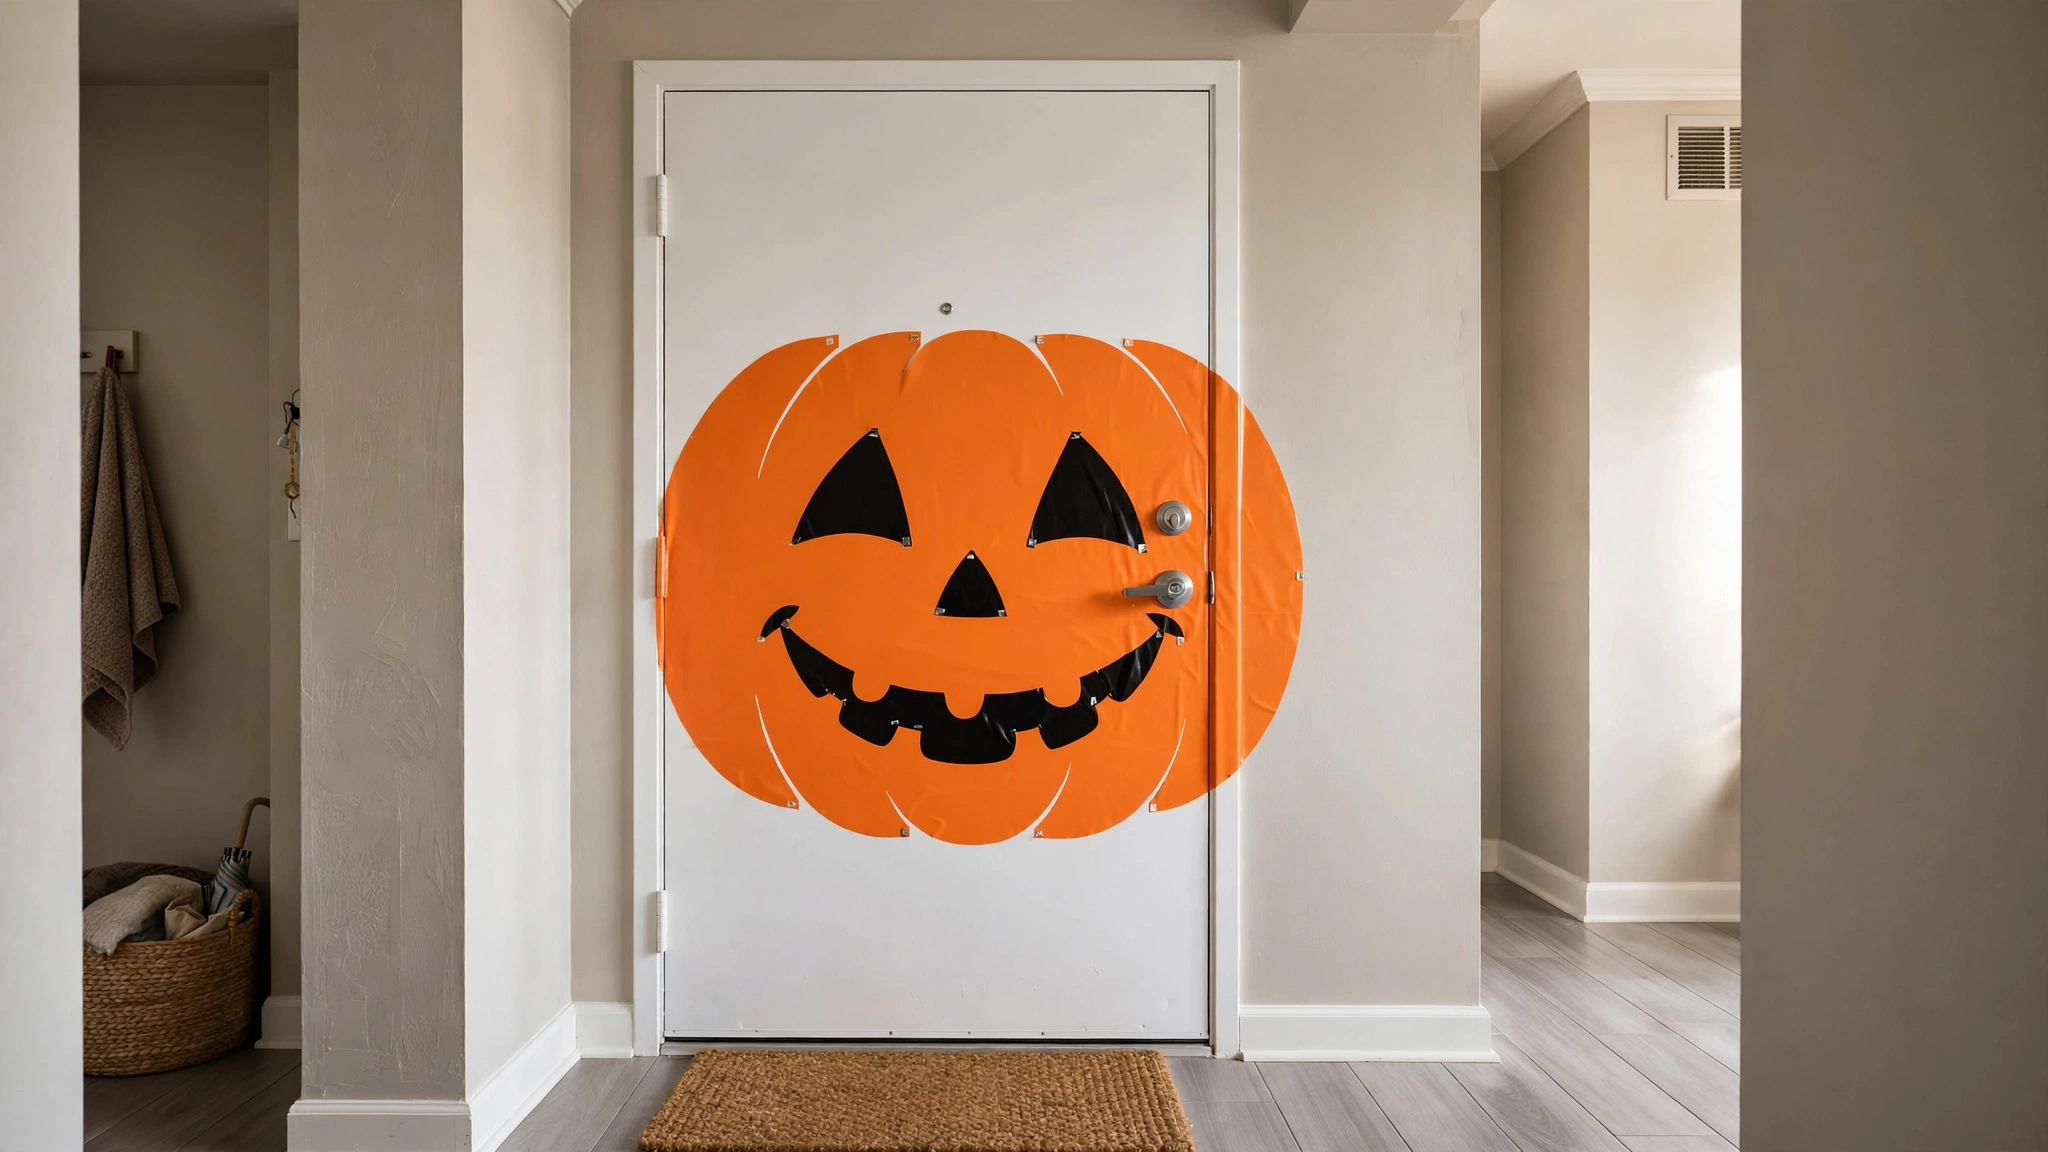
This is the highest-impact trick nobody believes until they try it: large peel-and-stick vinyl decals that turn a flat white rental door into a haunted scene — a giant jack-o’-lantern face, a haunted house silhouette, or a “creepy castle” panel — and peel off cleanly in November. Quality removable vinyl is genuinely residue-free on painted doors; it’s designed for exactly this. The key for renters is buying decals labeled “removable” or “static cling” rather than permanent vinyl, and doing a small test patch on the inside bottom edge of the door first. In one afternoon you get the most dramatic door on the floor for the price of two lattes.
How to do it:
- Wipe the door clean and dry — decals bond best to dust-free surfaces and release cleanest from them too.
- Lay the decals on the floor first to plan the layout before anything touches the door.
- Start with the largest piece at eye level, peeling the backing away a few inches at a time.
- Smooth outward from the center with a credit card to push out air bubbles as you go.
- In November, warm each decal with a hair dryer on low for 30 seconds and peel slowly from one corner — they’ll come off in one piece.
Approximate cost: $12–$25 per decal set, depending on size and coverage.
4. A Layered Doormat Welcome
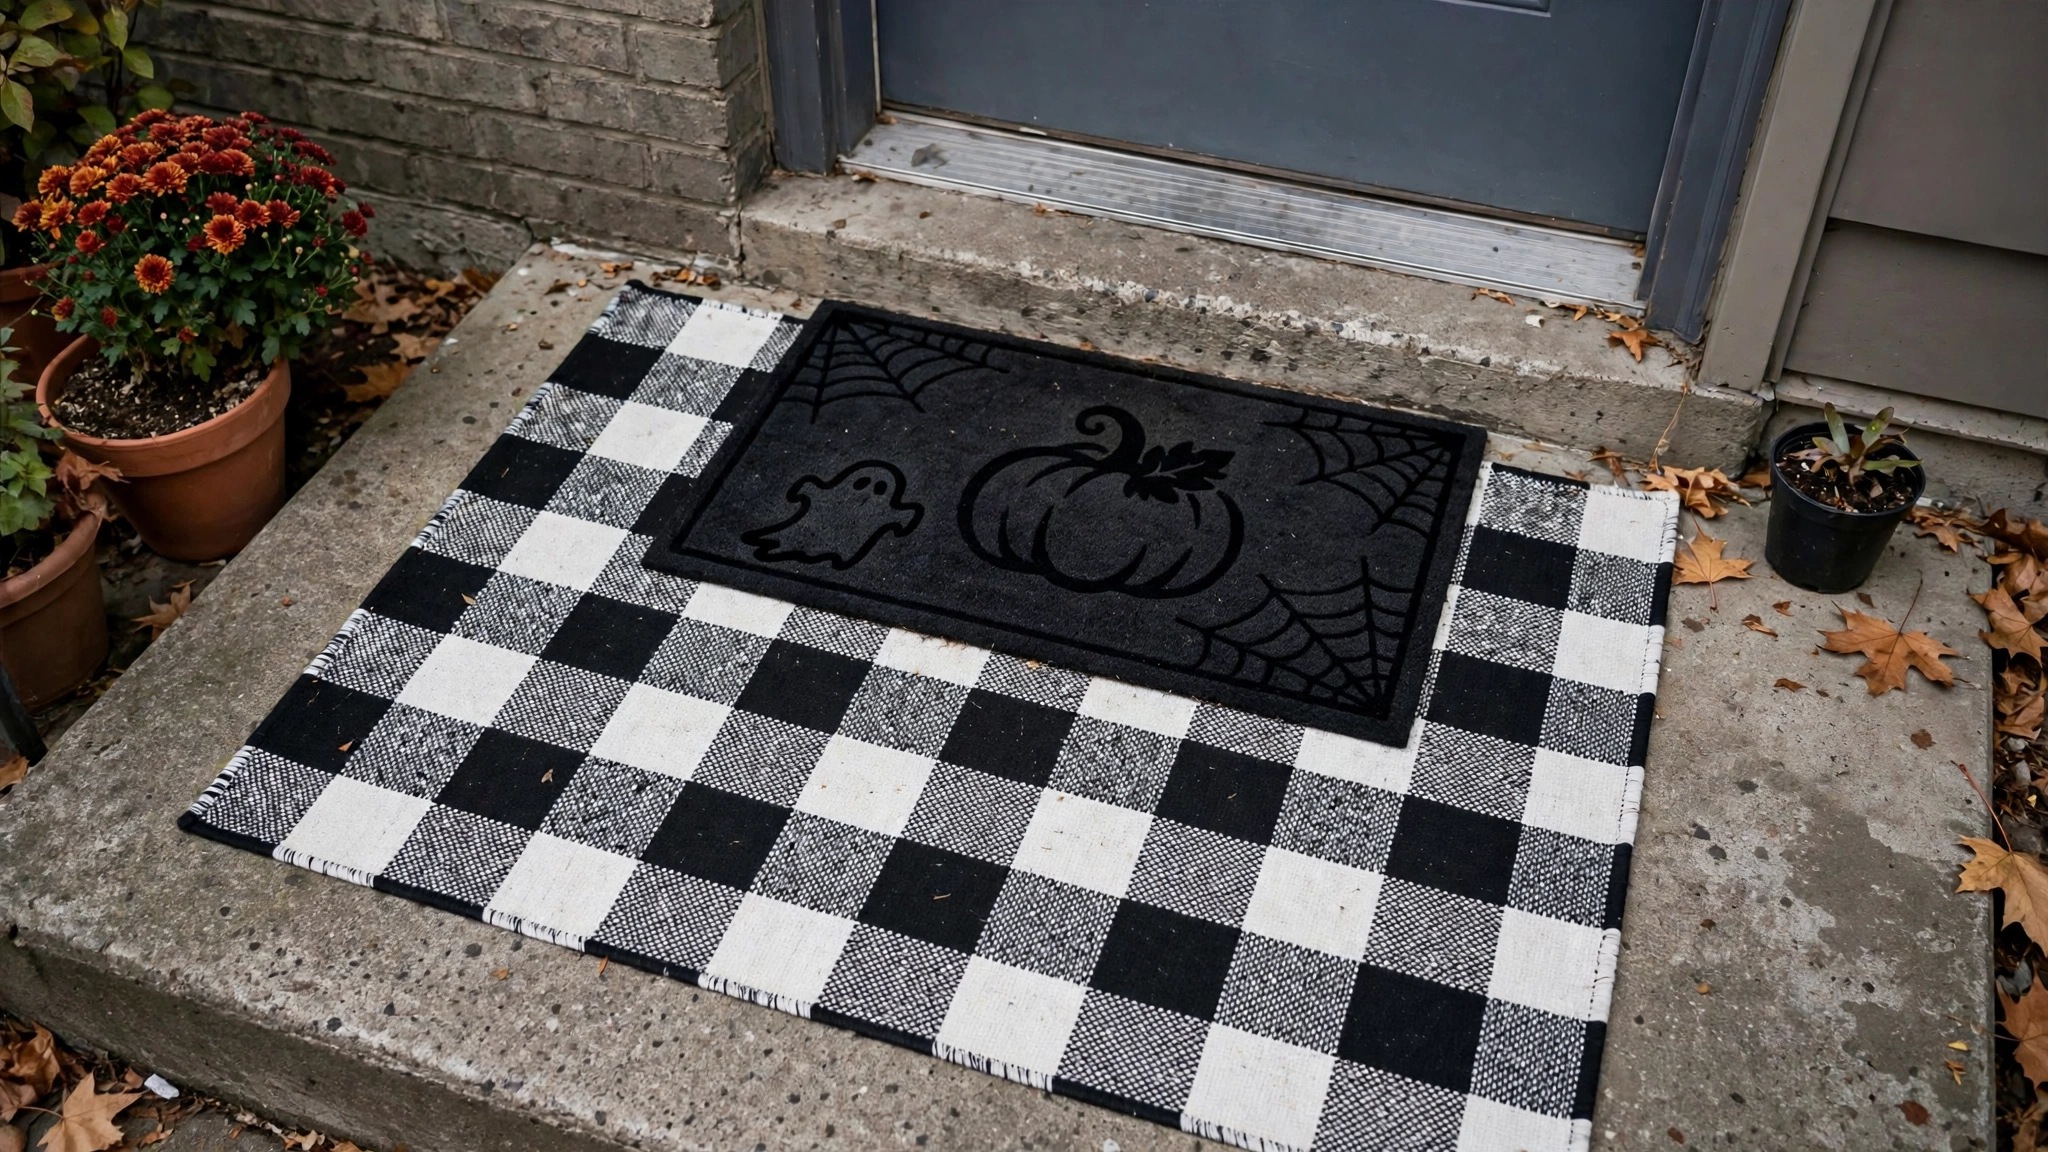
Doormat layering — placing a larger patterned outdoor rug underneath a smaller Halloween doormat — is the stylist trick I see transforming rental entryways more than almost anything else, and it takes about thirty seconds. The layered look adds instant pattern, color, and “someone decorated this on purpose” energy to a concrete apartment stoop, and a doormat is the one decoration no landlord has ever objected to since it touches nothing. Pick a buffalo-check or striped base rug and top it with a Halloween mat (a playful “hey boo” or pumpkin design) slightly offset so both layers show. The base layer also catches the dirt the top mat misses, which your hallway carpet will thank you for.
How to do it:
- Measure your stoop and choose a base rug at least 27×45 inches so it visibly extends beyond the top mat.
- Lay the base rug first, then center (or slightly angle) the Halloween doormat on top.
- Make sure both mats lie flat and don’t overlap your neighbor’s space or block the walkway — keep hallways clear per fire codes.
- Hose or shake out the mats weekly so they keep looking fresh through the season.
- Store the Halloween mat in November and keep the base layer as year-round decor.
Approximate cost: $15–$25 for the base rug, $12–$20 for the seasonal doormat.
5. Battery-Operated String Lights Around the Frame
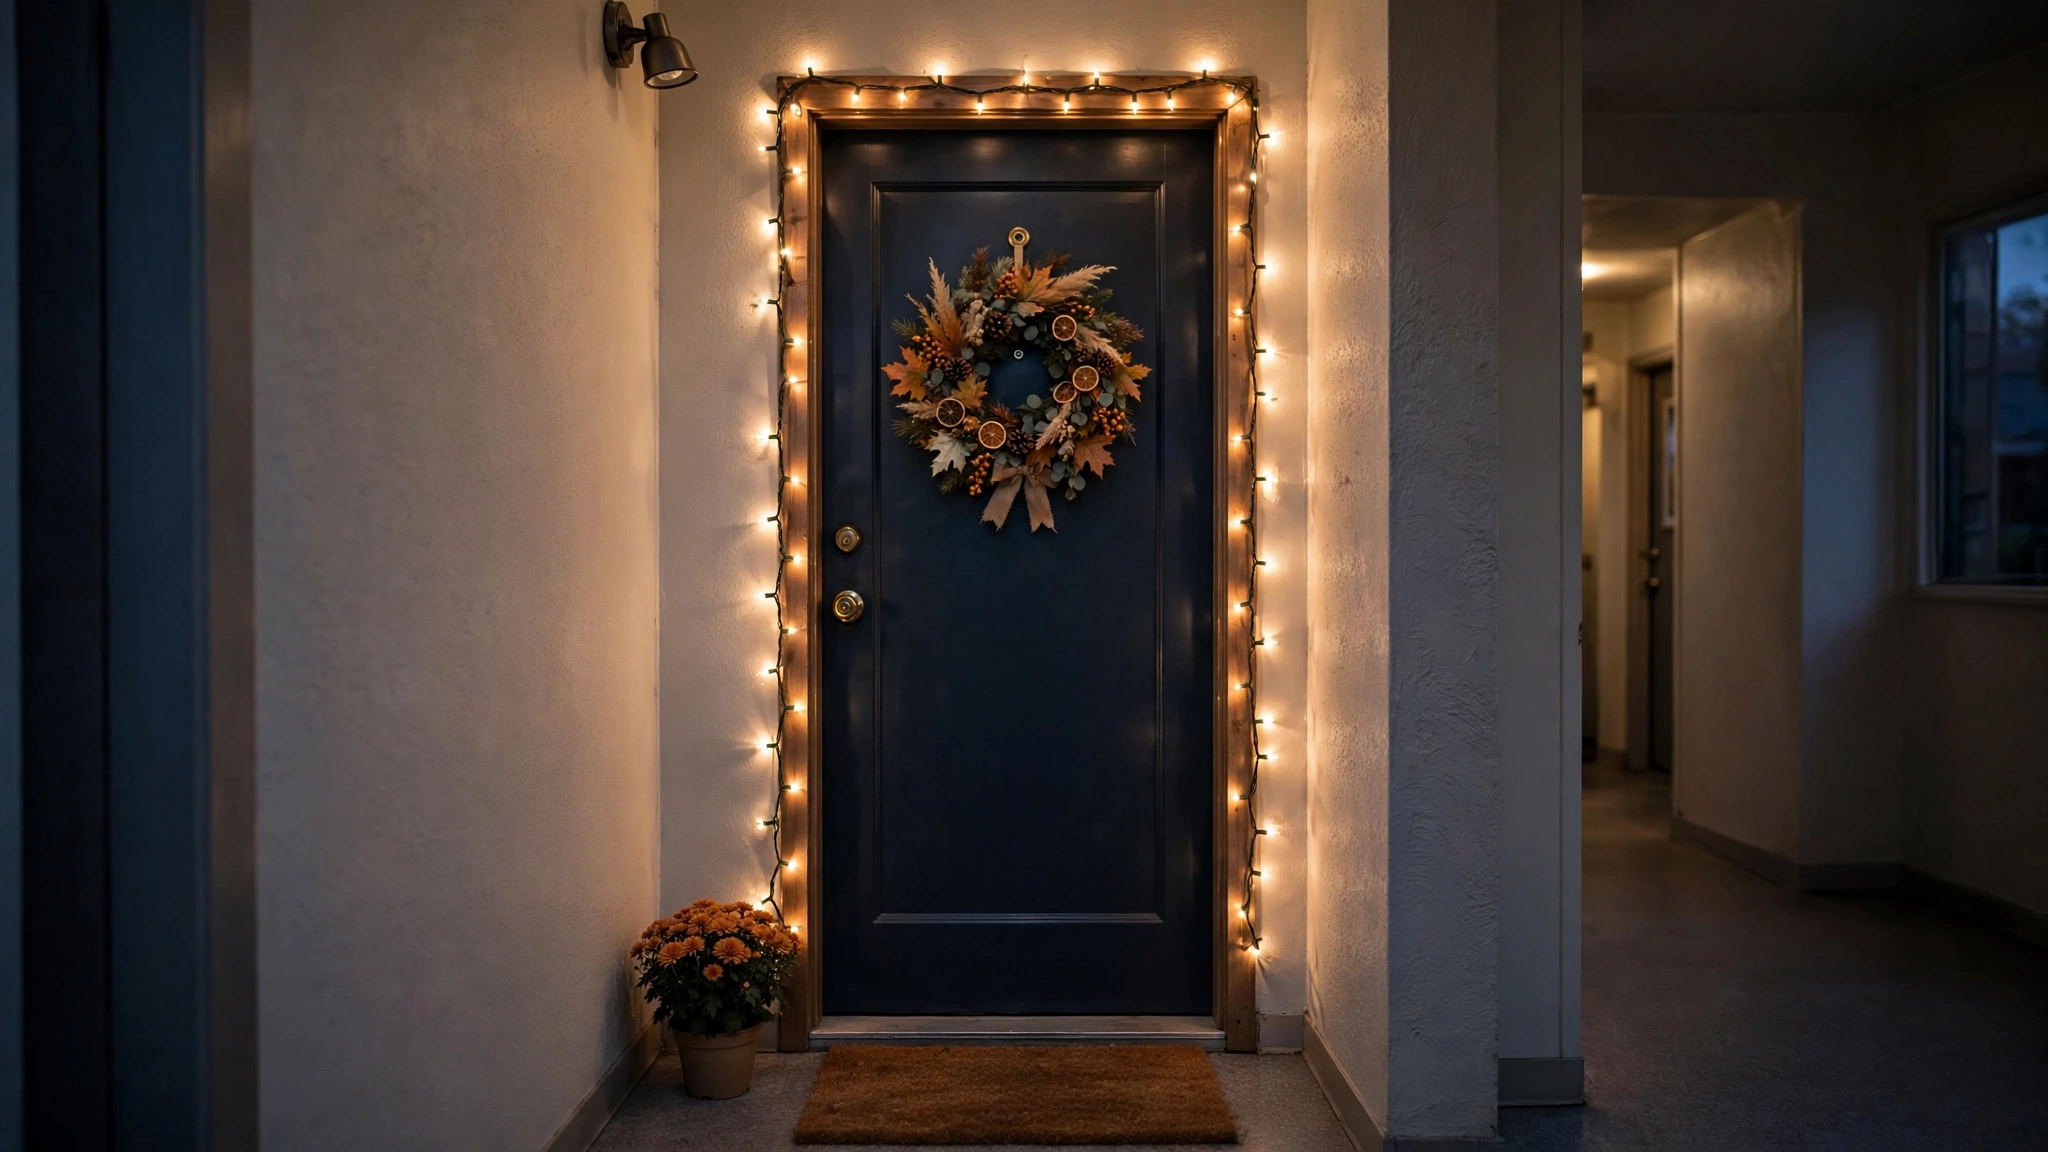
Here’s the renter truth about Halloween decorating: most of the viewing happens after dark, and a door with no lighting might as well be undecorated. Battery-operated LED string lights — pumpkin-shaped, orange globe, or warm white — woven around the door frame or through a garland make your doorway glow for trick-or-treaters and evening dog-walkers. LEDs stay cool to the touch, batteries last the whole season on a timer setting, and there’s no cord to trip over and no outlet needed. The lights attach with the same removable clips or adhesive hooks you’d use for a garland, so removal takes minutes.
How to do it:
- Choose a battery strand at least 20 feet long with a built-in 6-hour timer so it lights itself nightly.
- Weave the strand through your garland or drape it along the top and sides of the door frame using removable mini clips.
- Tuck the battery pack behind a pumpkin or inside a lantern so it’s invisible from the front.
- Set the timer so the lights come on around dusk and switch off after six hours to save batteries.
- Keep one spare set of batteries on hand — the set will likely need one change before Halloween night.
Approximate cost: $10–$18 per strand, $4 for batteries.
6. A Chalkboard “Welcome, Witches” Sign
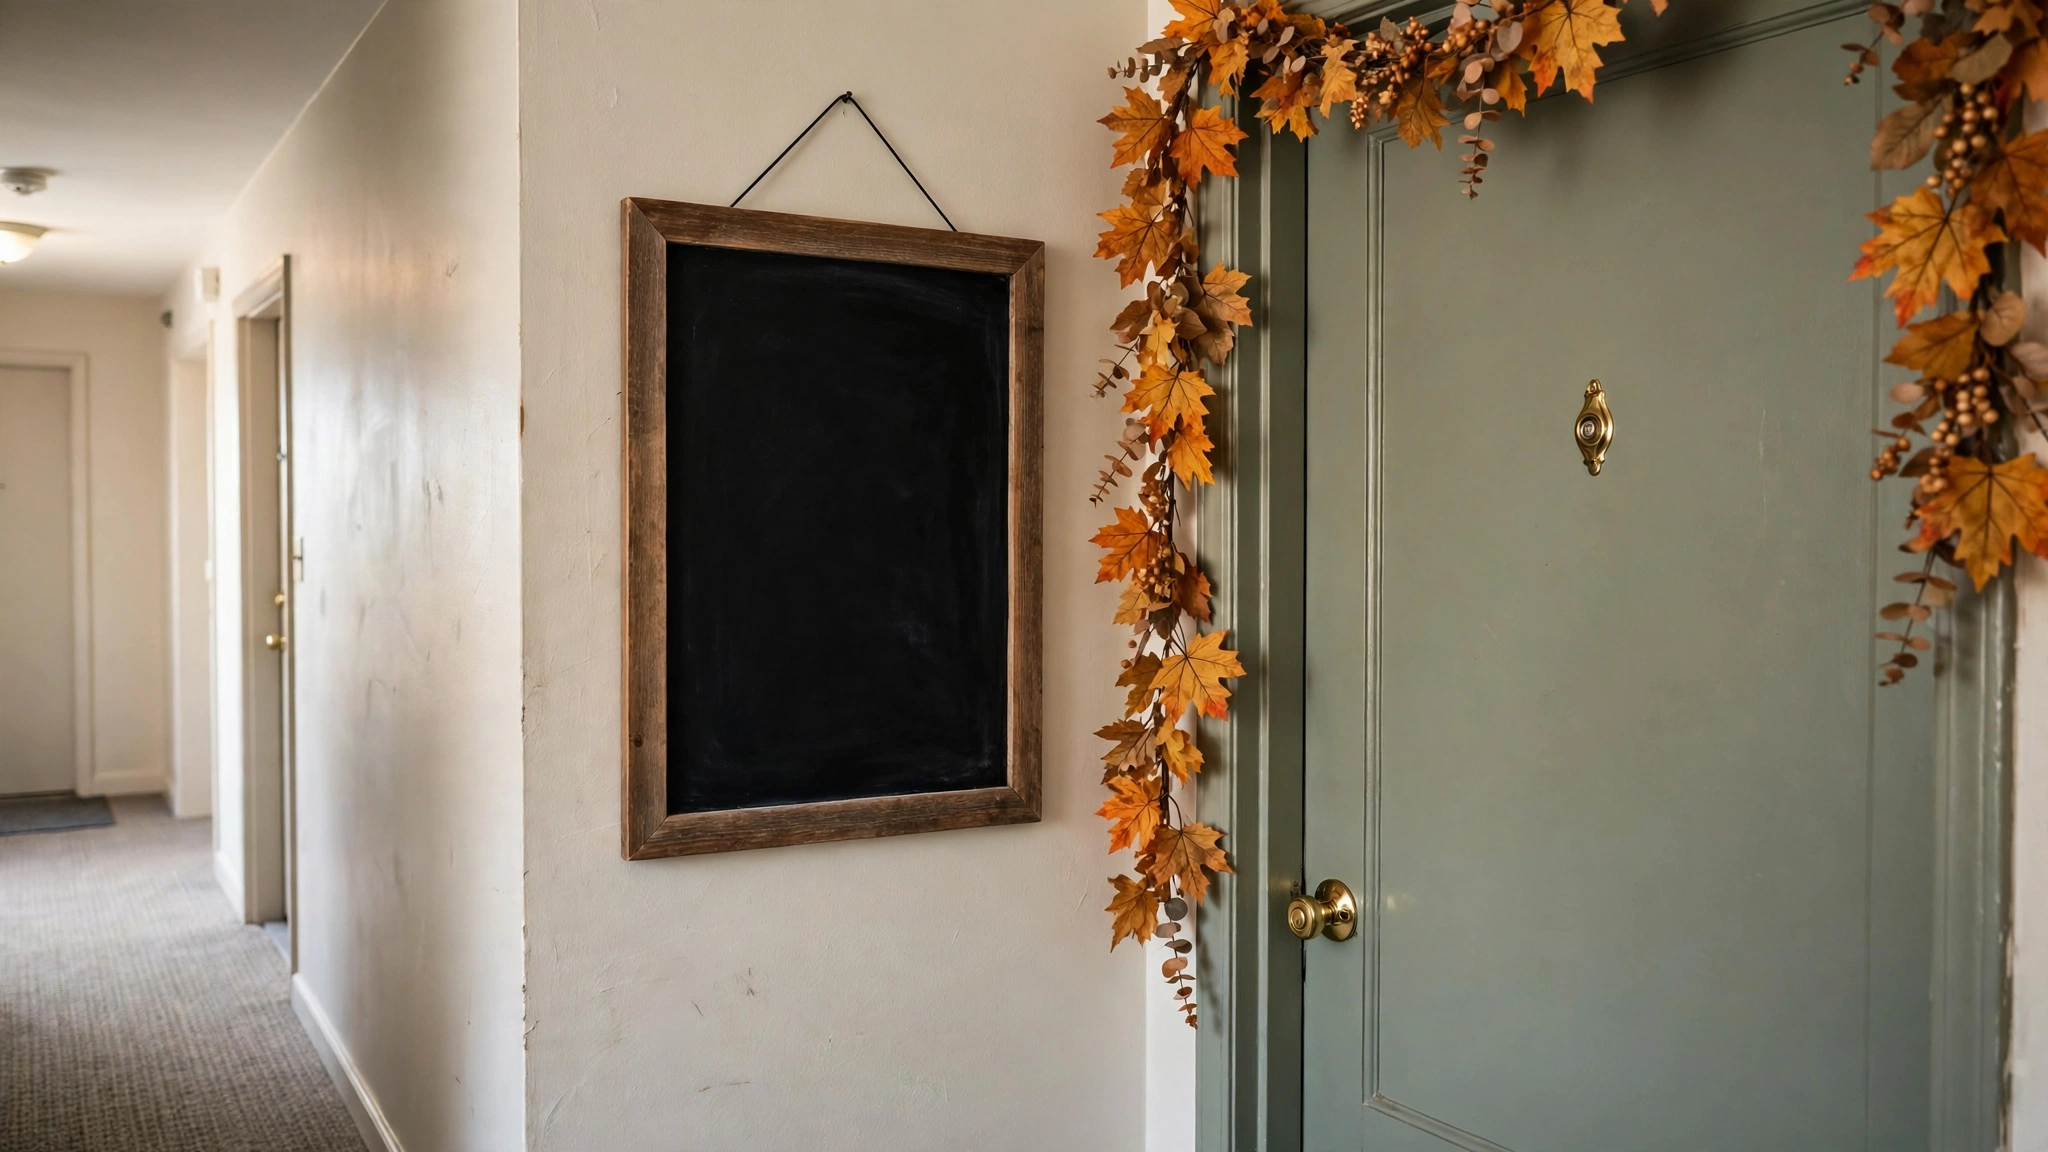
A chalkboard sign hung beside or on the door gives you the one thing mass-produced Halloween decor doesn’t: personality. I’ve seen renters write their apartment number in spider-web lettering, draw a little haunted house, or put up a rotating message for trick-or-treaters (“take two, we won’t tell”). Because it’s chalk, the message changes whenever you want — a fun detail guests notice. Hang it from an over-the-door hook or a removable adhesive hook beside the frame, and it never touches the door’s paint. Buy a sign with a proper wood or metal frame rather than a bare board; the frame is what makes it look like decor instead of a craft project.
How to do it:
- Choose a framed chalkboard roughly 12×16 inches — large enough to read from a few feet away.
- Season the board first by rubbing the side of a chalk stick over the whole surface and wiping it off, so your first design erases cleanly.
- Sketch your design lightly in chalk, then go over the final lines with a chalk marker for boldness.
- Hang it from an over-the-door hook (on the door) or a removable adhesive hook (on the wall beside the door).
- Refresh the message the week of Halloween with something trick-or-treater specific.
Approximate cost: $15–$25 for the sign, $3–$5 for chalk markers.
7. A Flanking Pair of Glowing Lanterns
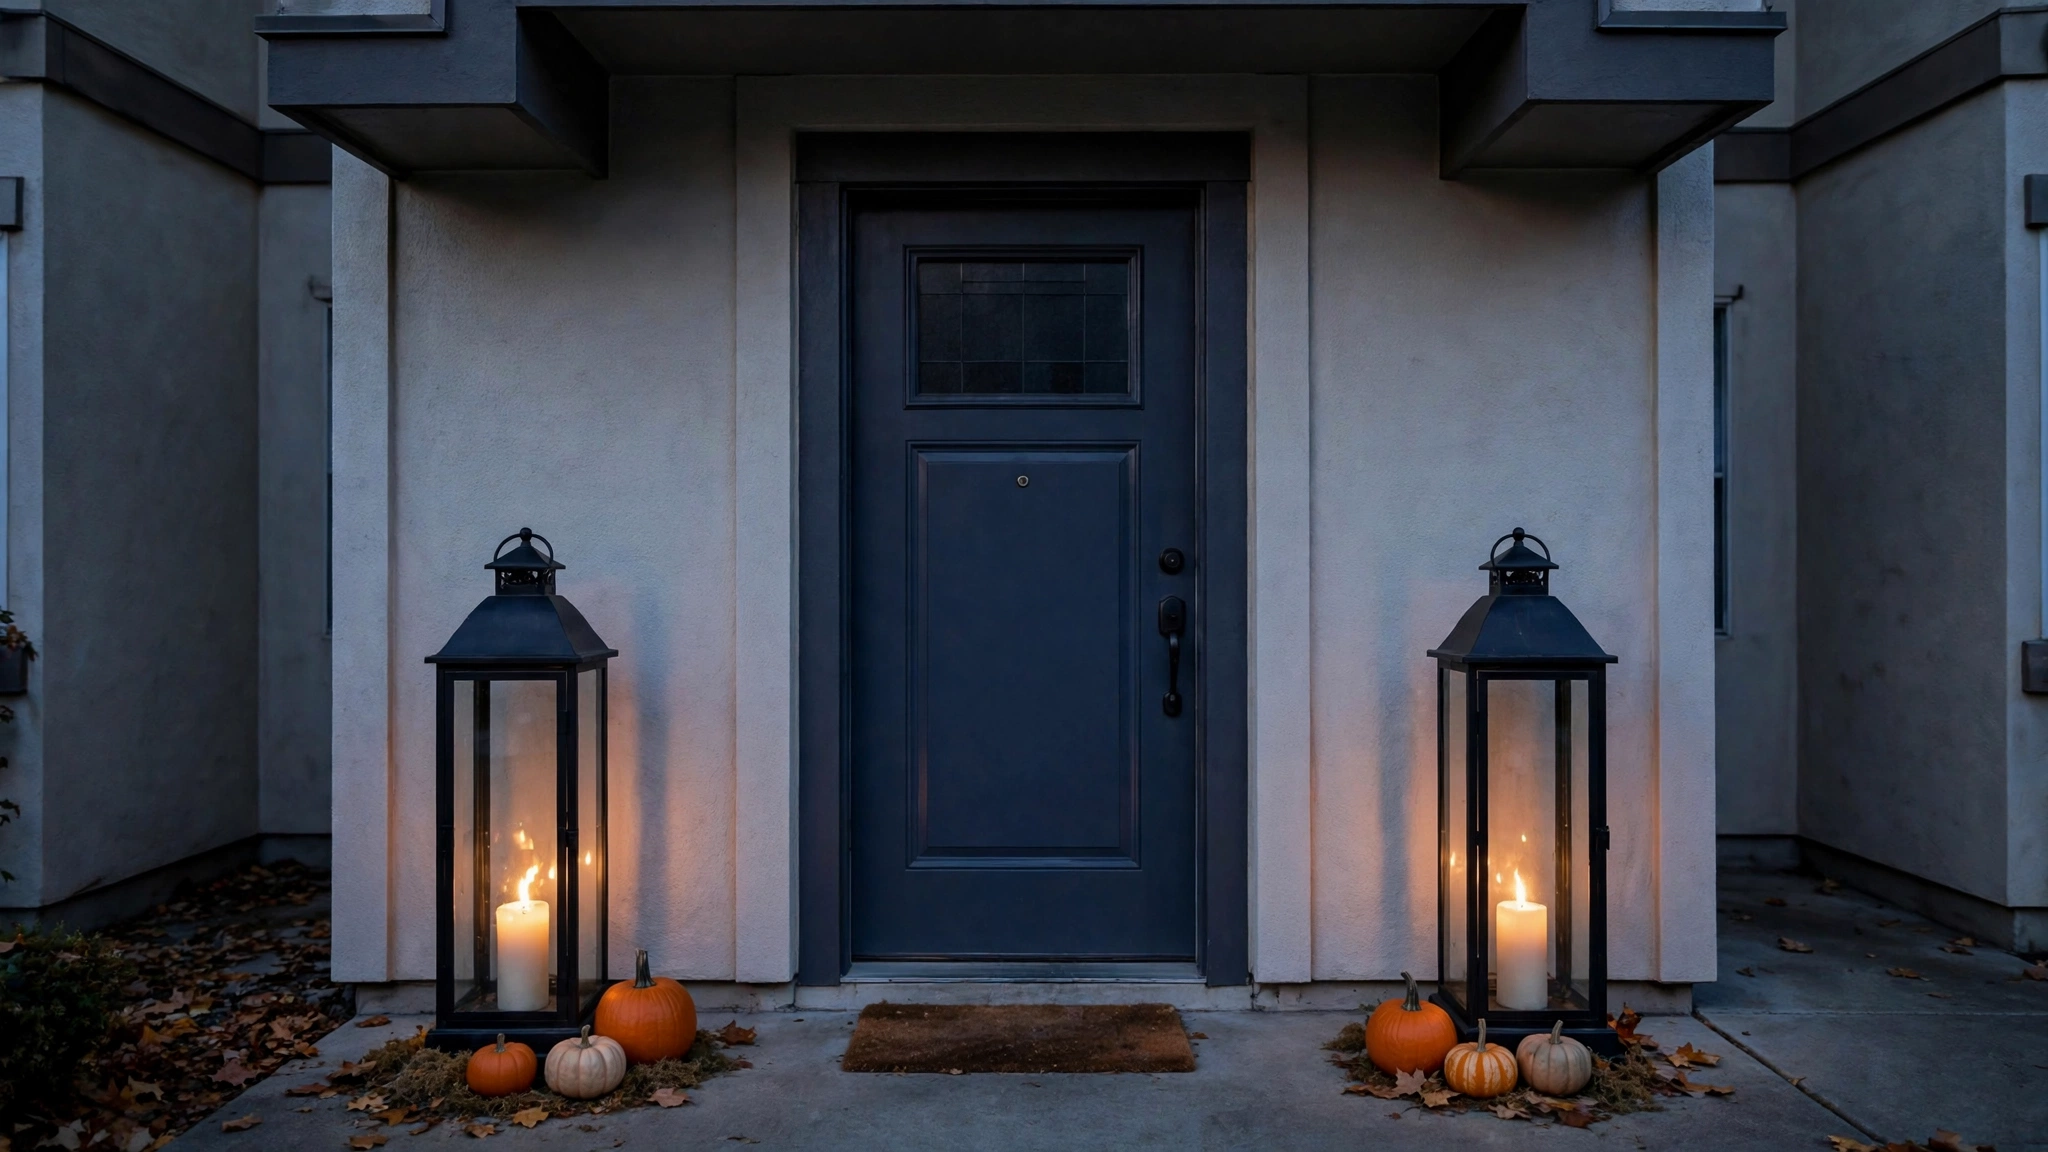
Symmetry is the fastest way to make a doorway look expensive, and a matching pair of black lanterns with battery candles on either side of the door gives you instant, polished Halloween styling. This is pure floor decor — the lanterns sit on the ground, so there is literally nothing attached to the door, the frame, or the wall, which makes this the most landlord-proof idea on this list. Choose lanterns with glass panels so the flickering candle glow shows through, and use candles with a timer function so your entryway lights itself every evening. The same lanterns work for Thanksgiving with different candles, so this is an investment, not a one-month purchase.
How to do it:
- Buy a matching pair of lanterns at least 12 inches tall — scale matters; tiny lanterns disappear on a doorstep.
- Place them symmetrically, about 12 inches out from each side of the door frame, on a flat stable surface.
- Drop in battery pillar candles with a flicker effect and set the timer to turn on at dusk.
- Add a few dried leaves or a small foam pumpkin at the base of each lantern for seasonal context.
- Bring the candles (not necessarily the lanterns) inside during heavy rain if your entry is uncovered.
Approximate cost: $30–$50 for the pair, $8–$12 for the battery candles.
8. A Mums-and-Hay-Bale Porch Vignette
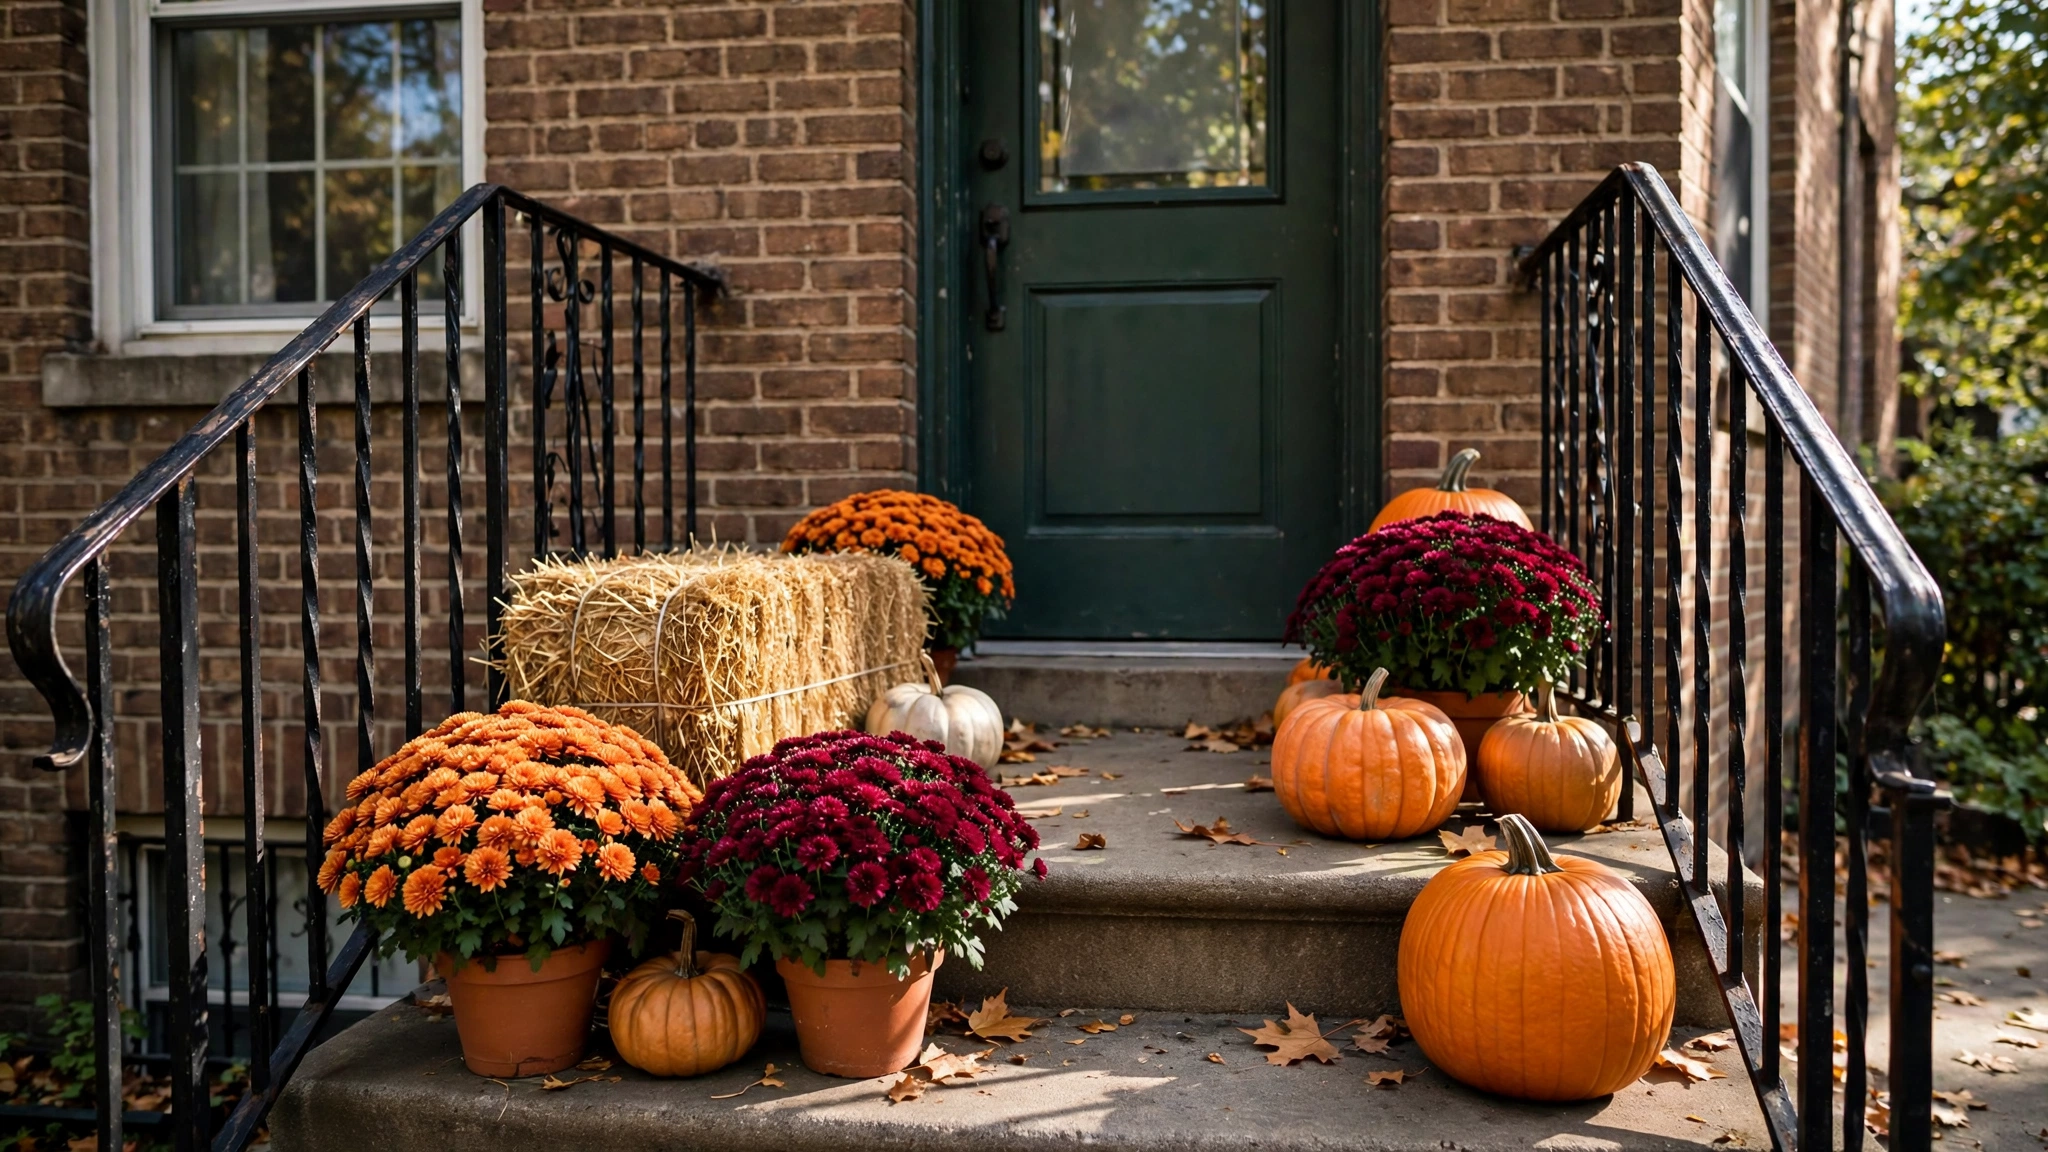
Nothing says October like chrysanthemums, and a classic fall porch cluster — two potted mums, a small hay bale, and a few pumpkins — turns a bare apartment stoop into a seasonal postcard. Every single element here is freestanding, so there’s zero renter risk; you’re essentially arranging a temporary still life. Buy mums in bud rather than full bloom so they open over several weeks and look good through Halloween. The hay bale is the stylist’s secret: it adds height variation for almost nothing and gives the pumpkins something to sit on. Orange, burgundy, and bronze mums photograph beautifully against any door color.
How to do it:
- Start with the hay bale as your anchor piece, set to one side of the door so the walkway stays clear.
- Place one large mum on the ground beside the bale and one smaller mum on top of it for two levels of height.
- Tuck 3–5 real or faux pumpkins of varying sizes around the bases at different angles.
- Water the mums every other day — potted mums dry out fast on a sunny stoop.
- In November, compost the mums and hay and donate or store the pumpkins; nothing was ever attached to the building.
Approximate cost: $25–$40 total (mums $6–$10 each, hay bale $8–$12, pumpkins $3–$8 each).
9. A Mini-Pumpkin Topiary
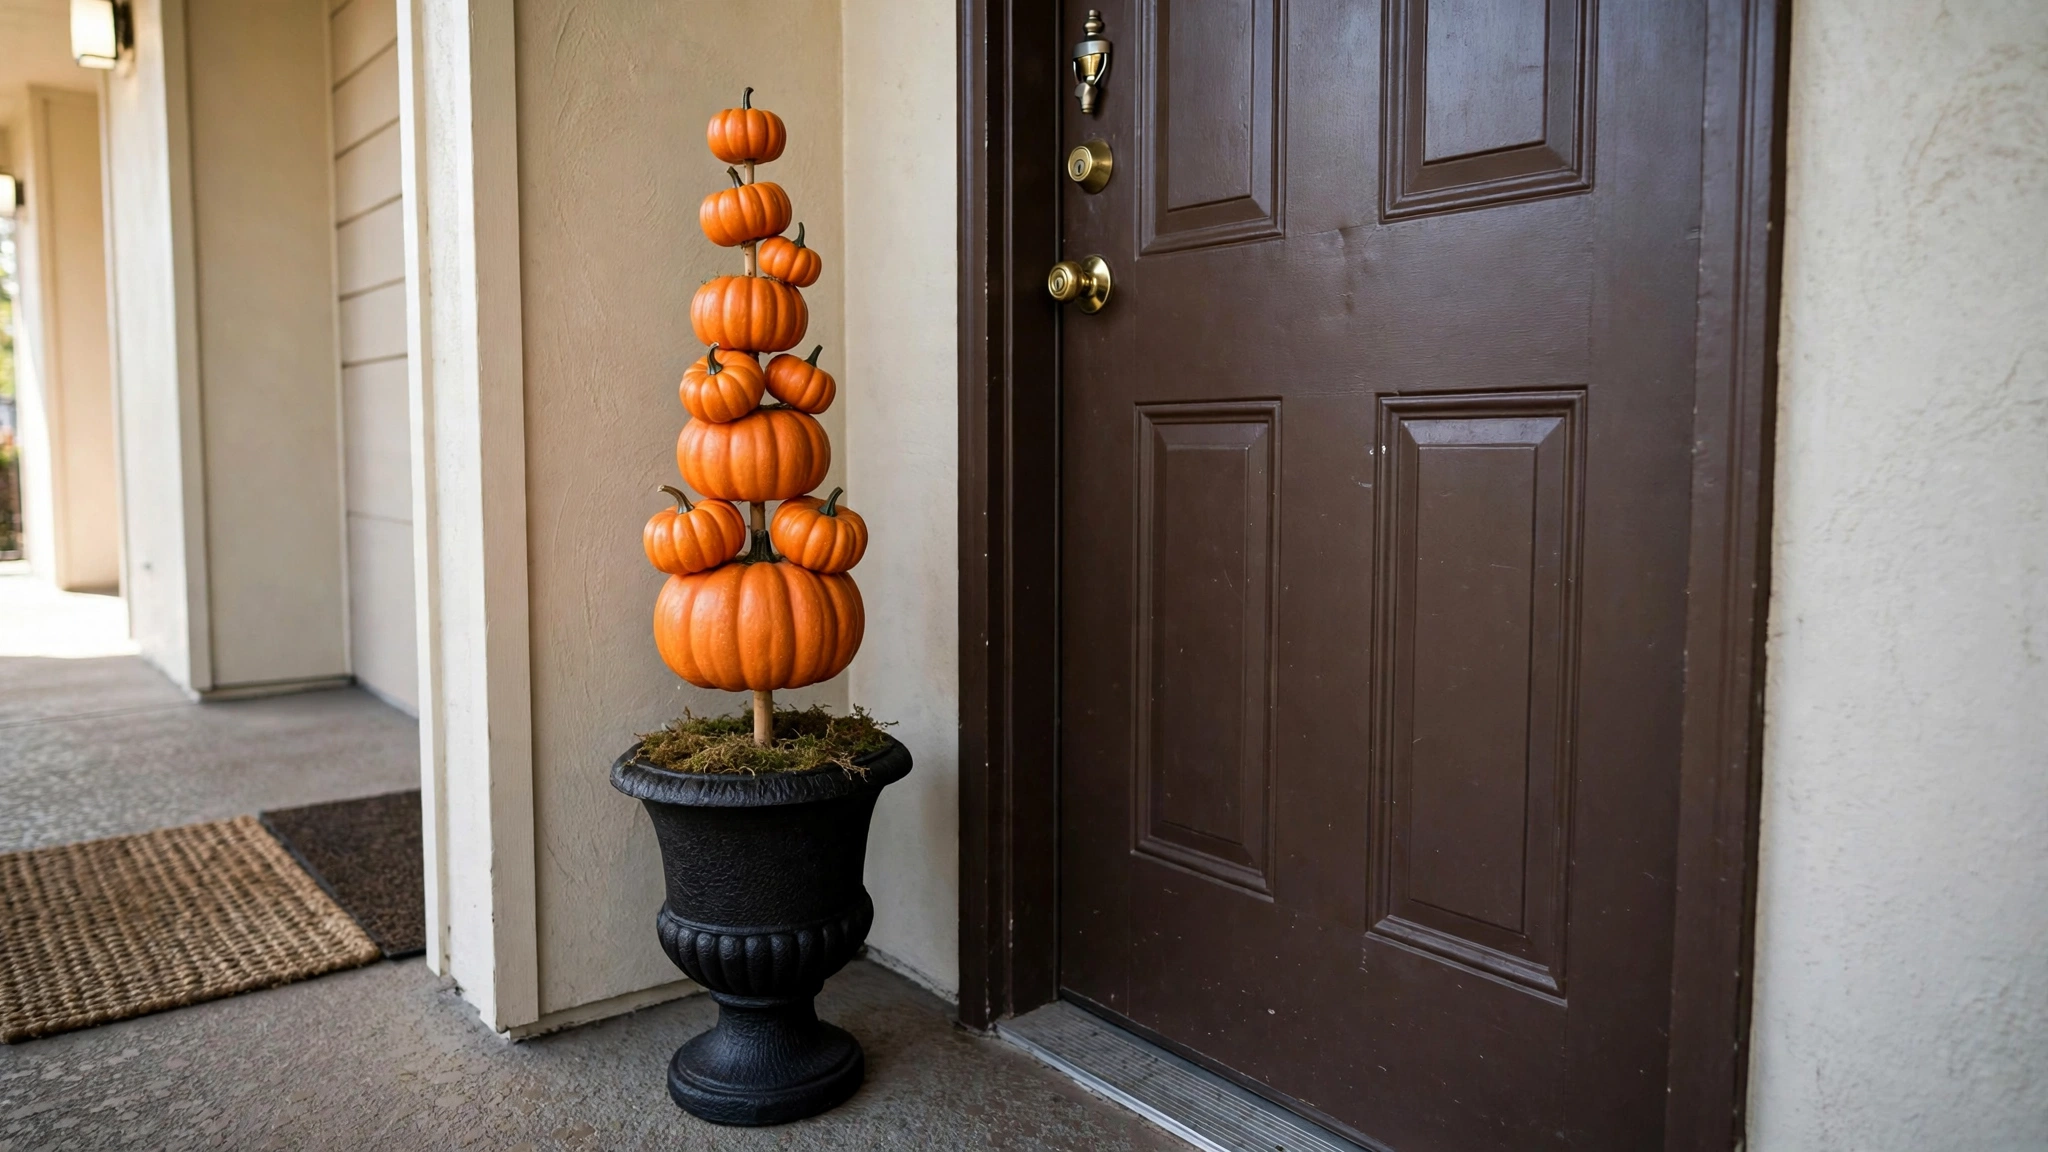
Topiaries read as “fancy front porch” in a way loose pumpkins don’t, and a mini-pumpkin topiary — small pumpkins stacked on a dowel in a weighted pot — is a fifteen-minute project with a boutique look. It works for renters because the whole thing lives in a pot on the floor; nothing attaches to the building, and it comes inside in one lift on November 1st. Use faux pumpkins (they last forever and stack securely) in graduated sizes, largest at the bottom. A black or bronze urn-style pot keeps it Halloween-elegant rather than craft-fair.
How to do it:
- Fill a 10–12 inch pot with sand or gravel so it’s heavy enough not to tip in wind.
- Push a wooden dowel firmly into the center, deep enough that it stands straight on its own.
- Thread or stack 4–6 faux pumpkins onto the dowel, largest at the bottom and smallest on top.
- Add a small bow or a crow figurine on top as a finisher.
- Set it to one side of the door so it doesn’t block the swing or the walkway.
Approximate cost: $20–$35 (pot $8–$12, faux pumpkins $10–$18, dowel and filler $3–$5).
10. Corn Stalk Bundles on the Porch Columns
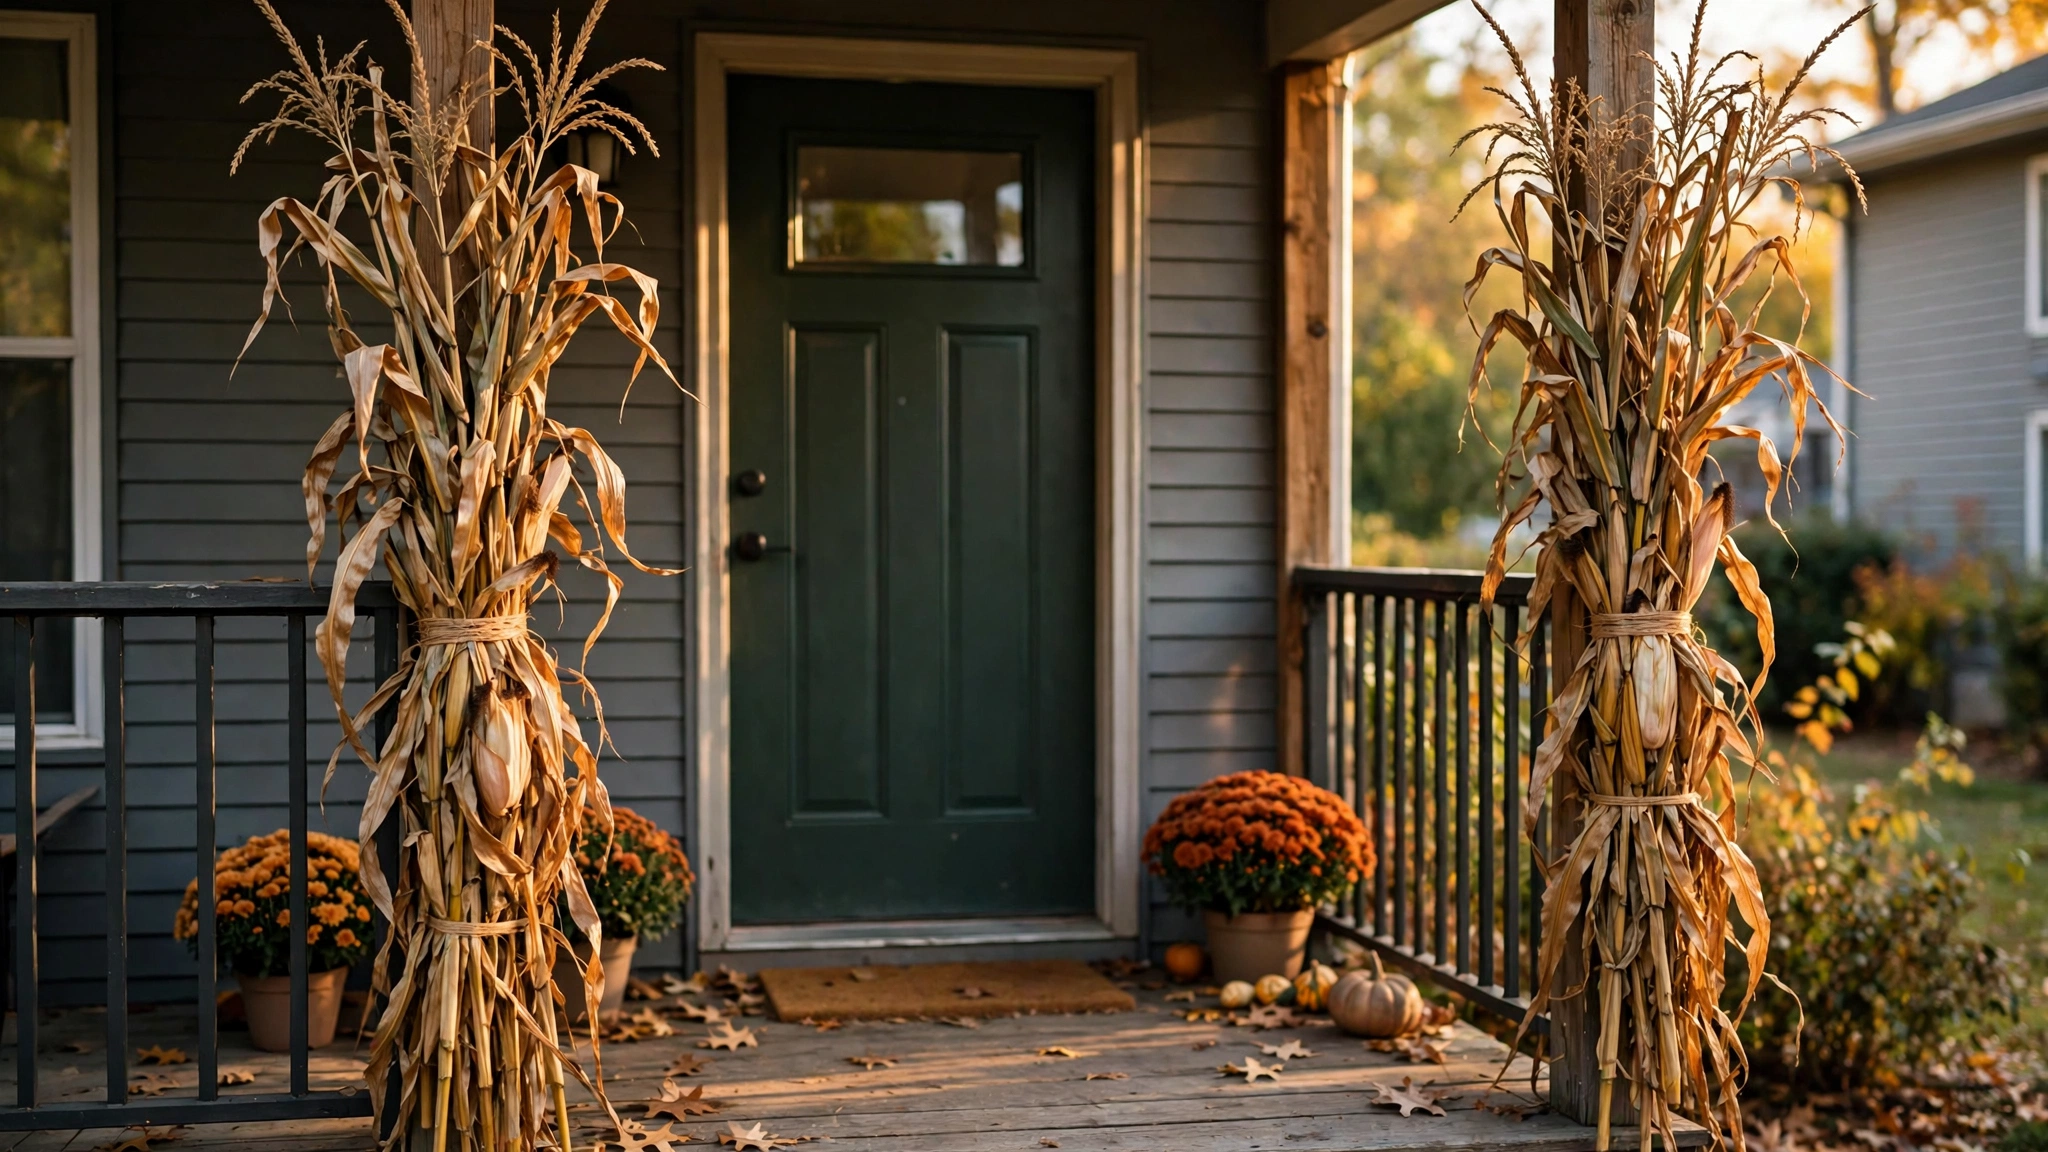
If your apartment has porch posts, railings, or even a sturdy wall beside the door, corn stalk bundles are the cheapest way to add height and harvest atmosphere — and they tie on with twine, not hardware. I’ve watched renters turn the saddest concrete entryway into a farmhouse Halloween scene with two $10 bundles of dried corn stalks. They stand about 6 feet tall, which is exactly the vertical drama a flat apartment facade needs. This is fully reversible (cut the twine and they’re gone), but one renter flag: if the stalks are against painted wood or vinyl siding, check after a rain — wet stalks can stain, so keep them tied where they don’t rest directly on painted surfaces.
How to do it:
- Buy two dried corn stalk bundles (sold at garden centers and farm stands every October).
- Stand each bundle upright against a porch post or railing and tie it firmly at two points with natural twine.
- Fan the stalks outward slightly at the top so they look full rather than flat.
- Weave a strand of battery lights through the stalks for evening impact.
- Remove them before they get soaked repeatedly — dried stalks turn mushy and can stain if left against siding.
Approximate cost: $8–$15 per bundle, $3 for twine.
11. Hanging Pumpkin Baskets From an Over-Door Hook
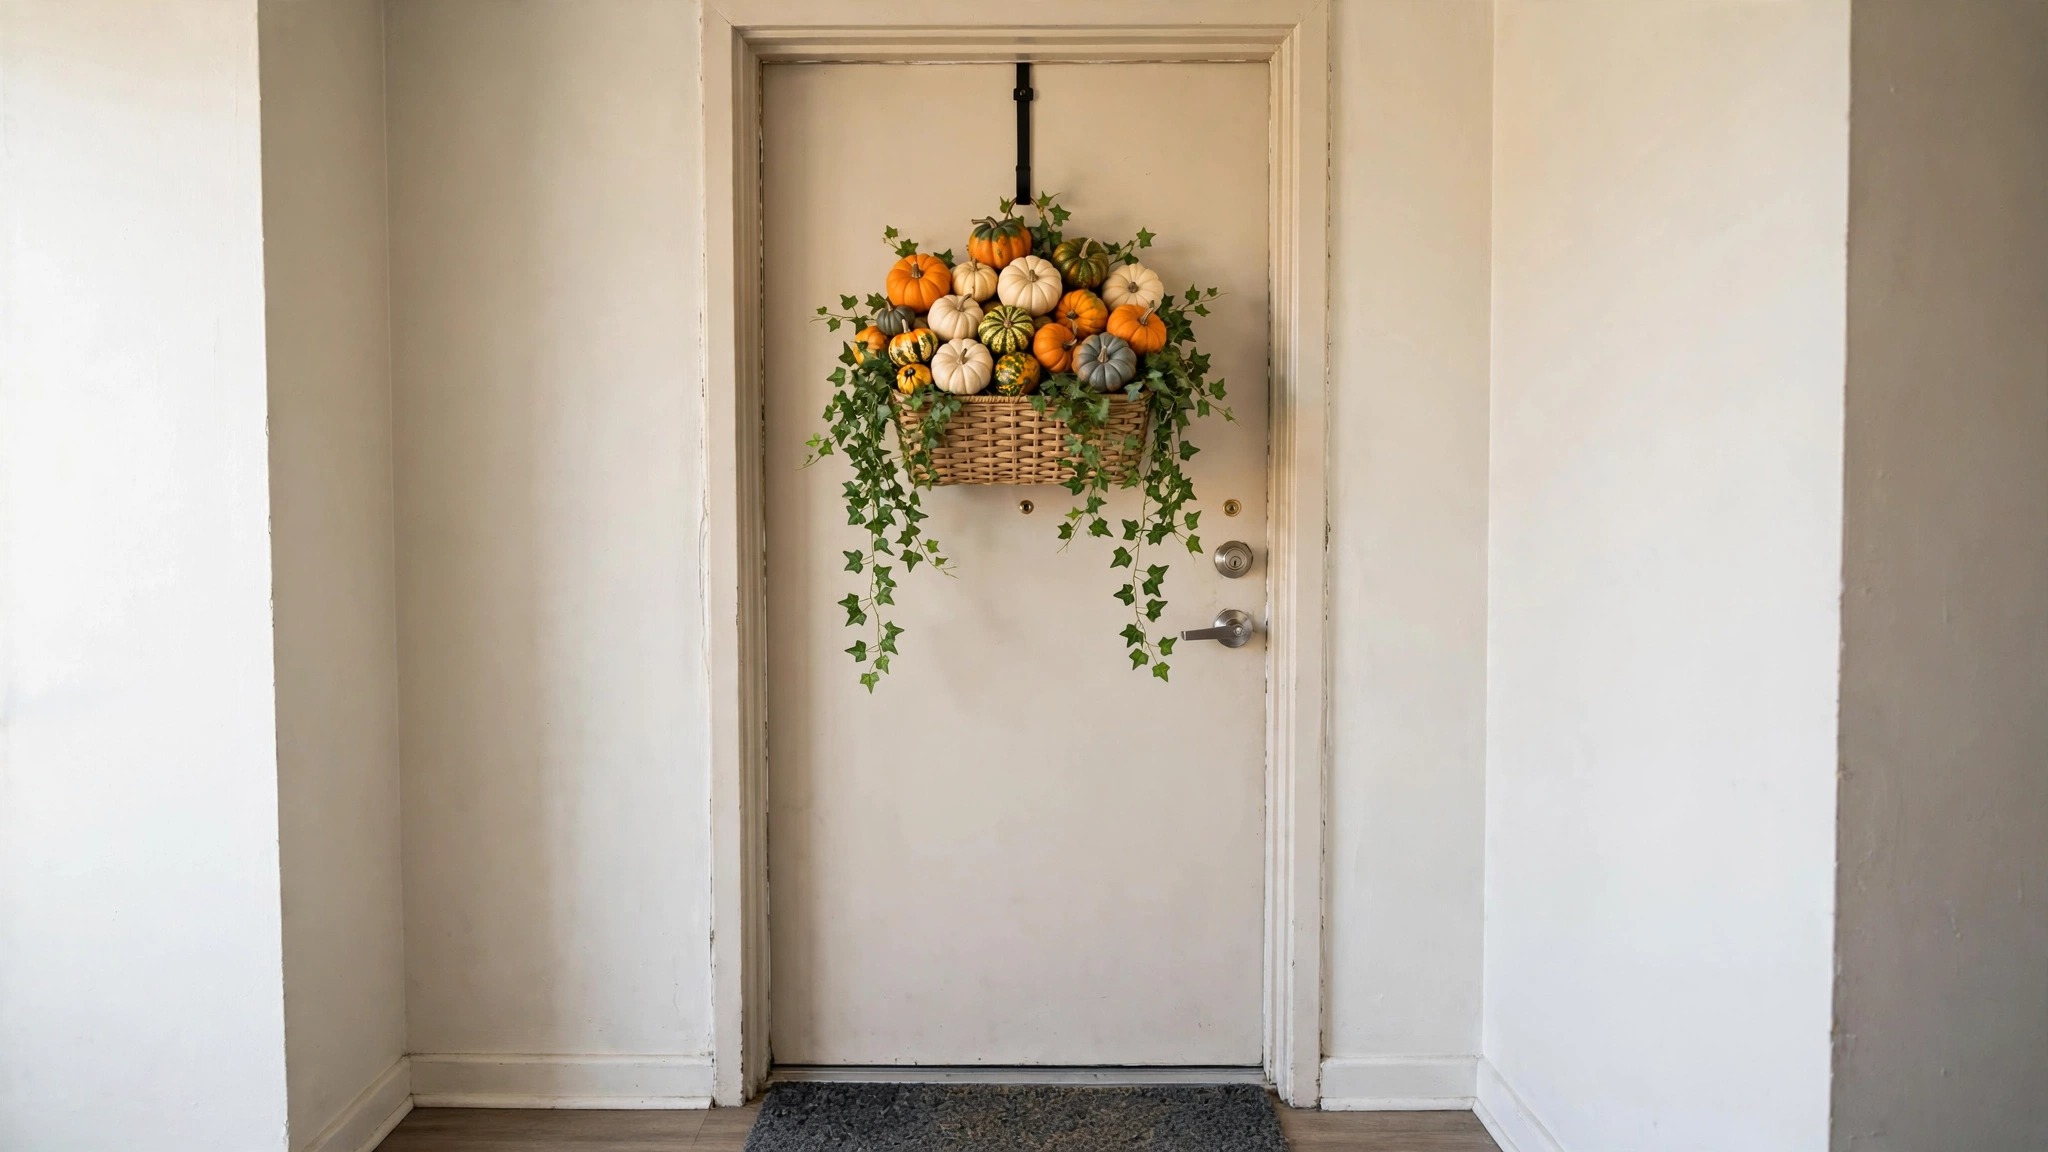
An over-the-door hook isn’t just for wreaths — hang a small wire or woven basket from one and fill it with mini pumpkins, gourds, and trailing faux ivy for a living-decoration effect right at eye level. This is distinct from a wreath because it has dimension: the basket juts out, the pumpkins tumble naturally, and it reads as abundant rather than composed. The hook carries the weight (keep it under 5 pounds), the door carries nothing permanently, and the whole arrangement lifts off in one motion. Choose a basket with a flat back so it hangs flush against the door.
How to do it:
- Hang an over-the-door hook at the top of the door and test that the door still closes and locks.
- Choose a flat-backed basket roughly 10–12 inches wide with a sturdy handle or hanging loop.
- Line the basket with a plastic bag or moss so small items don’t fall through the weave.
- Fill with mini pumpkins and gourds, largest at the bottom, tucking faux ivy or dried leaves between them.
- Keep the total weight under the hook’s rating and check the arrangement weekly — gourds shift as they dry.
Approximate cost: $15–$30 (basket $8–$15, mini pumpkins and gourds $7–$15).
12. A Removable Spider Web Across the Door Surround
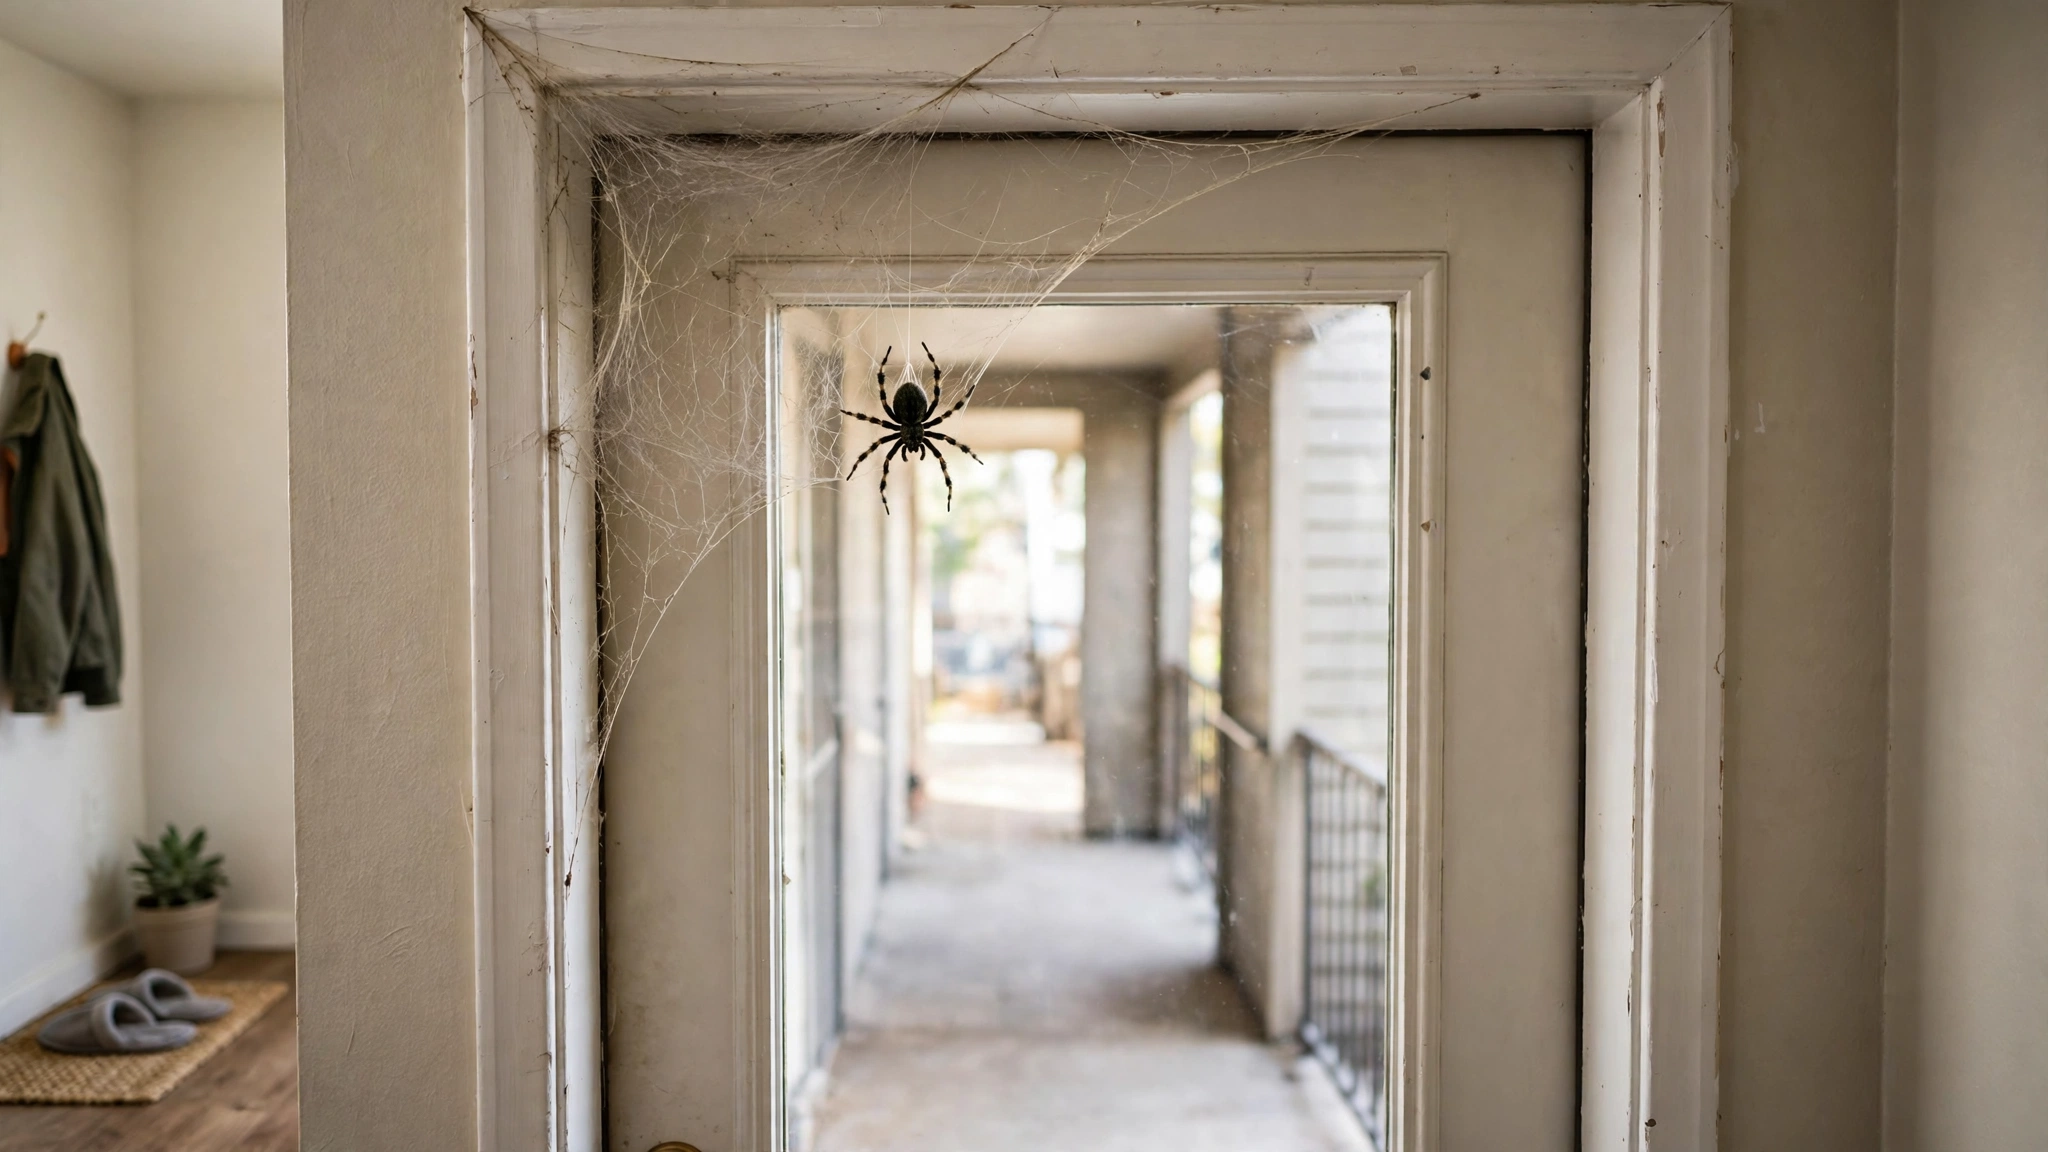
Giant stretchy spider webs are Halloween’s greatest renter decoration because they cost almost nothing, install in minutes, and vanish without a trace. Stretch a web across the top corner of the door surround — not across the door itself, so you can still get in and out — anchoring it with removable adhesive hooks or suction cups on the trim. The trick is in the stretch: pull the web wide and thin so the strands separate into that authentic wispy look, then add one oversized spider hanging from a thread. Keep the web off painted door surfaces (adhesive hooks go on trim or glass) and off walkways where guests could snag it.
How to do it:
- Plan the web for one upper corner of the door surround so the door opens freely underneath.
- Stick 4–6 removable adhesive hooks or suction cups to the trim around that corner.
- Drape the web’s center over the top hooks and stretch the edges outward to each anchor point.
- Pull gently to thin the webbing into fine strands, and trim any excess.
- Hang a large faux spider from a clear thread in the web’s center for the finishing scare.
Approximate cost: $5–$10 for the web and spider, $5–$8 for hooks or suction cups.
13. Spooky Window-Film Silhouettes on Door Glass
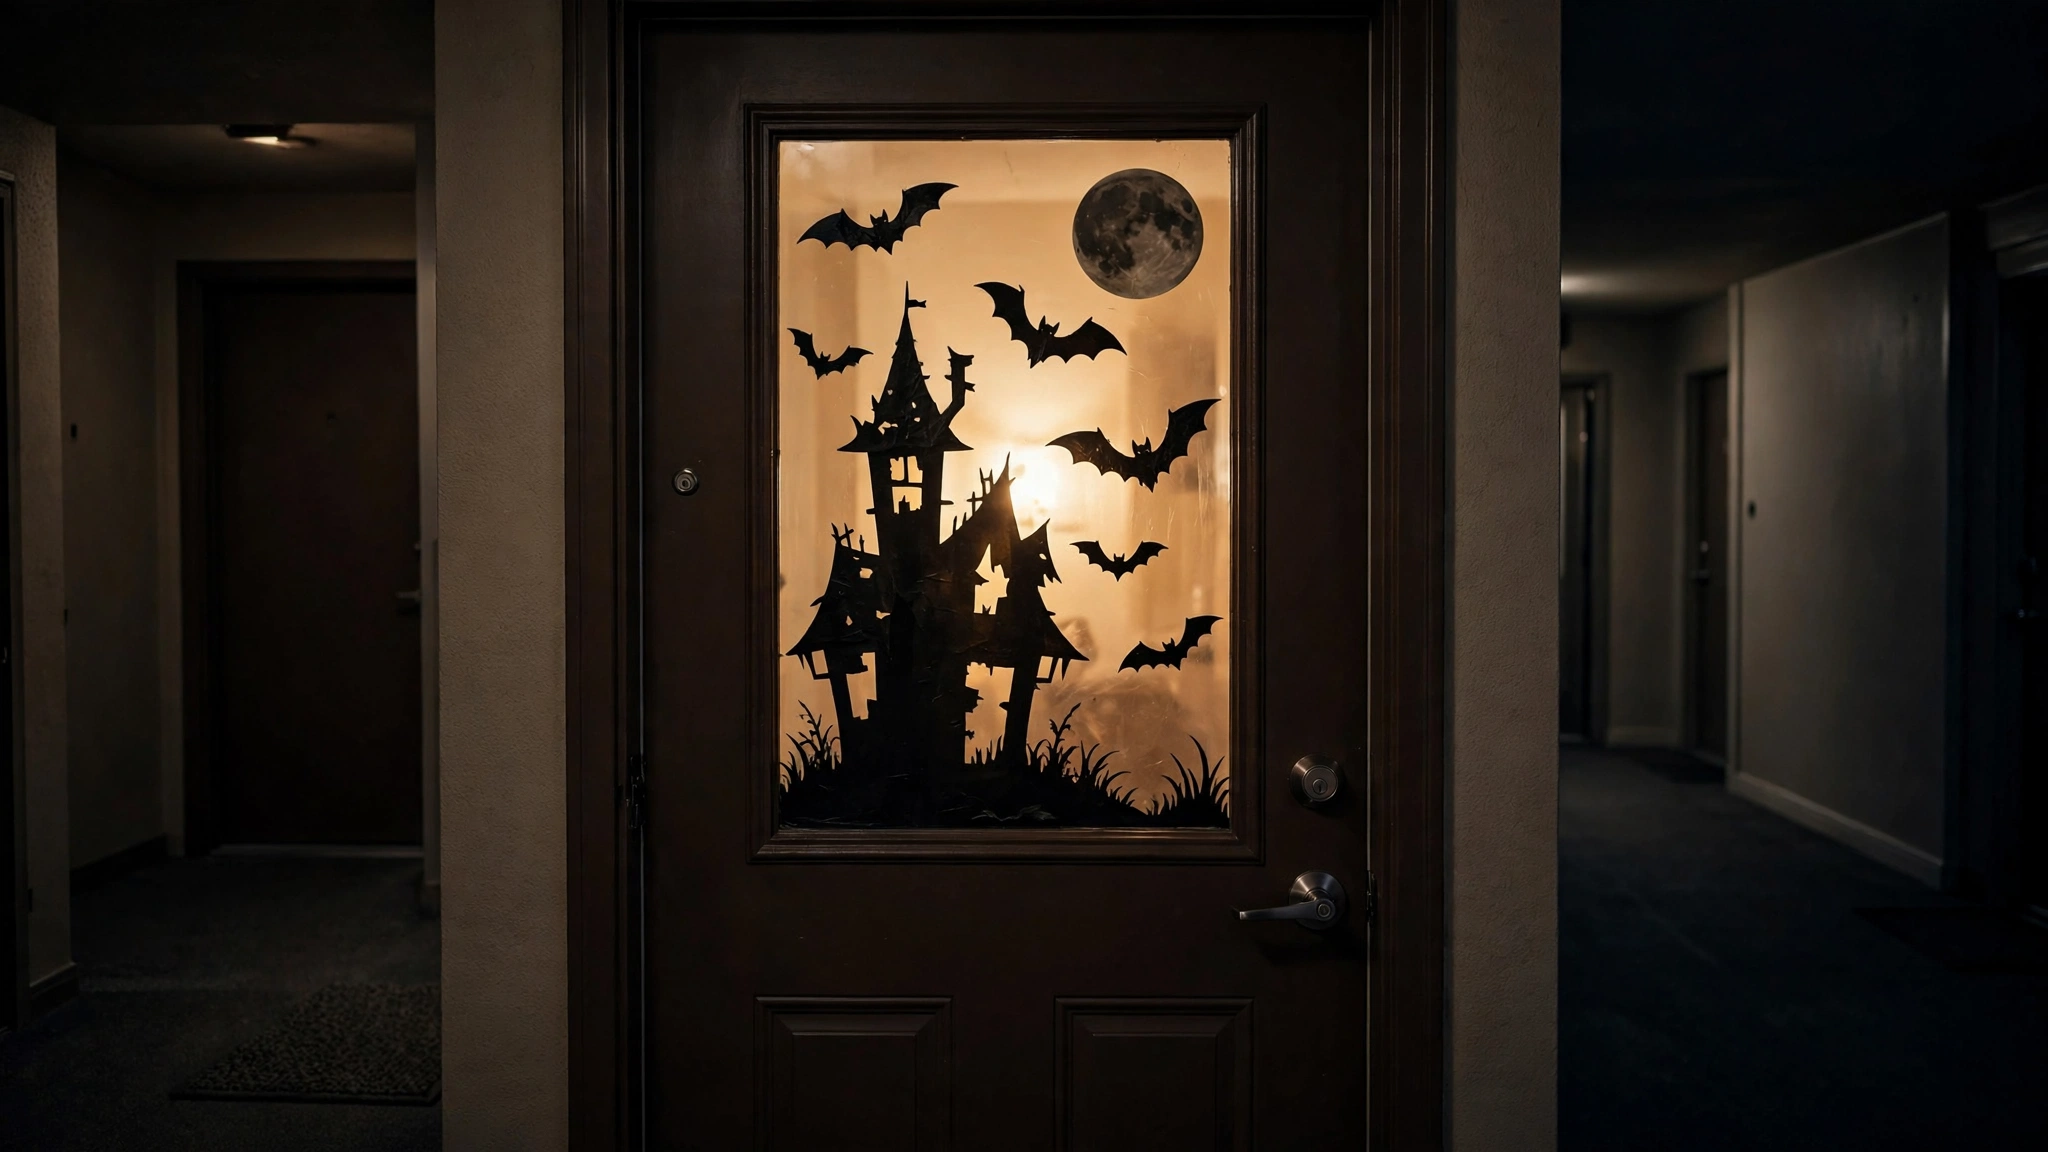
If your apartment door has a window, a sidelight, or a glass storm door, static-cling window film is your secret weapon. Black cat silhouettes, a haunted house scene, or a full-moon-and-bats panel clings to glass with nothing but water — no adhesive at all — and peels off leaving the glass pristine. This is the single cleanest-removing decoration on this list; there’s genuinely nothing to damage. It also works from both sides: your entryway gets a spooky silhouette and the hallway gets a glowing scene when your interior light shines through at night. Cut the film slightly smaller than the glass so the edges don’t catch.
How to do it:
- Clean the glass thoroughly — static cling fails on dusty glass.
- Spray the glass with a fine mist of water from a spray bottle.
- Position the film on the wet glass and smooth out bubbles with a soft cloth from the center outward.
- Trim any overhang with a craft knife for a clean edge that won’t peel.
- To remove, lift one corner and peel — wipe the glass once and it’s like it was never there.
Approximate cost: $8–$15 per film sheet.
14. A Small Halloween Inflatable (Lease-Checked)
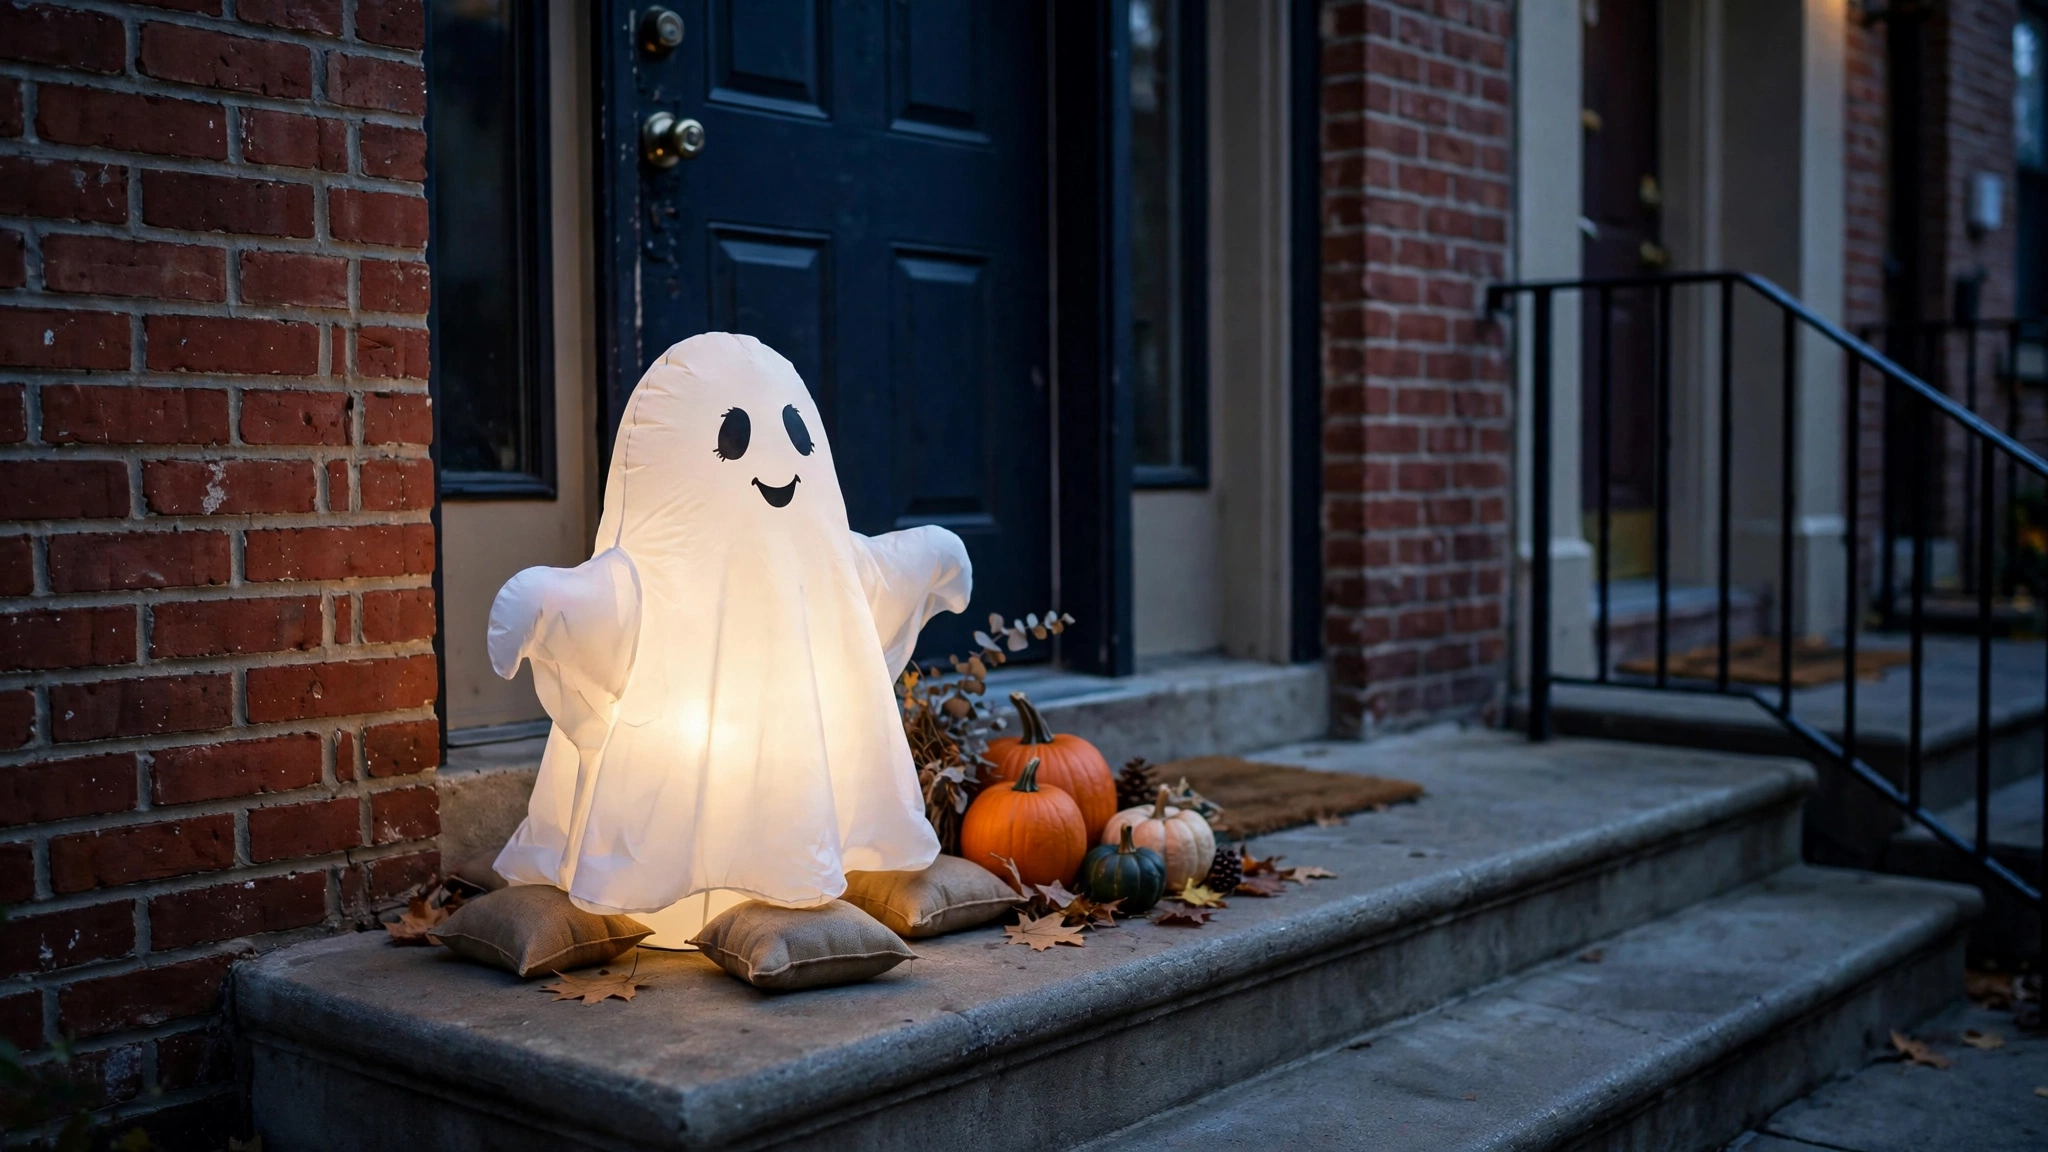
Okay, the inflatable is the fun wildcard — a 3-foot ghost or pumpkin that lights up at night will make your door the one kids drag their parents toward. For renters, the rules are simple: keep it small (under 4 feet), tether it with the included ground stakes only if your lease allows stakes in the lawn or planter bed, and otherwise weigh it down with sandbags. The one explicit renter flag on this list: some leases prohibit yard decorations or anything visible from the street, so check your lease or ask your landlord before a big inflatable — a 3-footer on your own stoop is usually fine, but “usually” isn’t a lease clause. Plug it into a battery pack or run the cord through a cracked window rather than drilling for an outlet.
How to do it:
- Check your lease for rules on outdoor/yard decorations before buying — this is the one idea worth a two-minute check.
- Choose an inflatable under 4 feet tall with built-in LED lighting.
- Secure it with sandbags or the included tethers, keeping all stakes out of common lawn areas unless permitted.
- Run power from a battery pack or an indoor outlet via a flat extension cord under the door (never prop a fire door open).
- Deflate and store it dry after Halloween — mold is the real enemy of inflatables.
Approximate cost: $25–$45 for a small LED inflatable, $10 for sandbags if needed.
15. A Full Removable Halloween Door Wrap
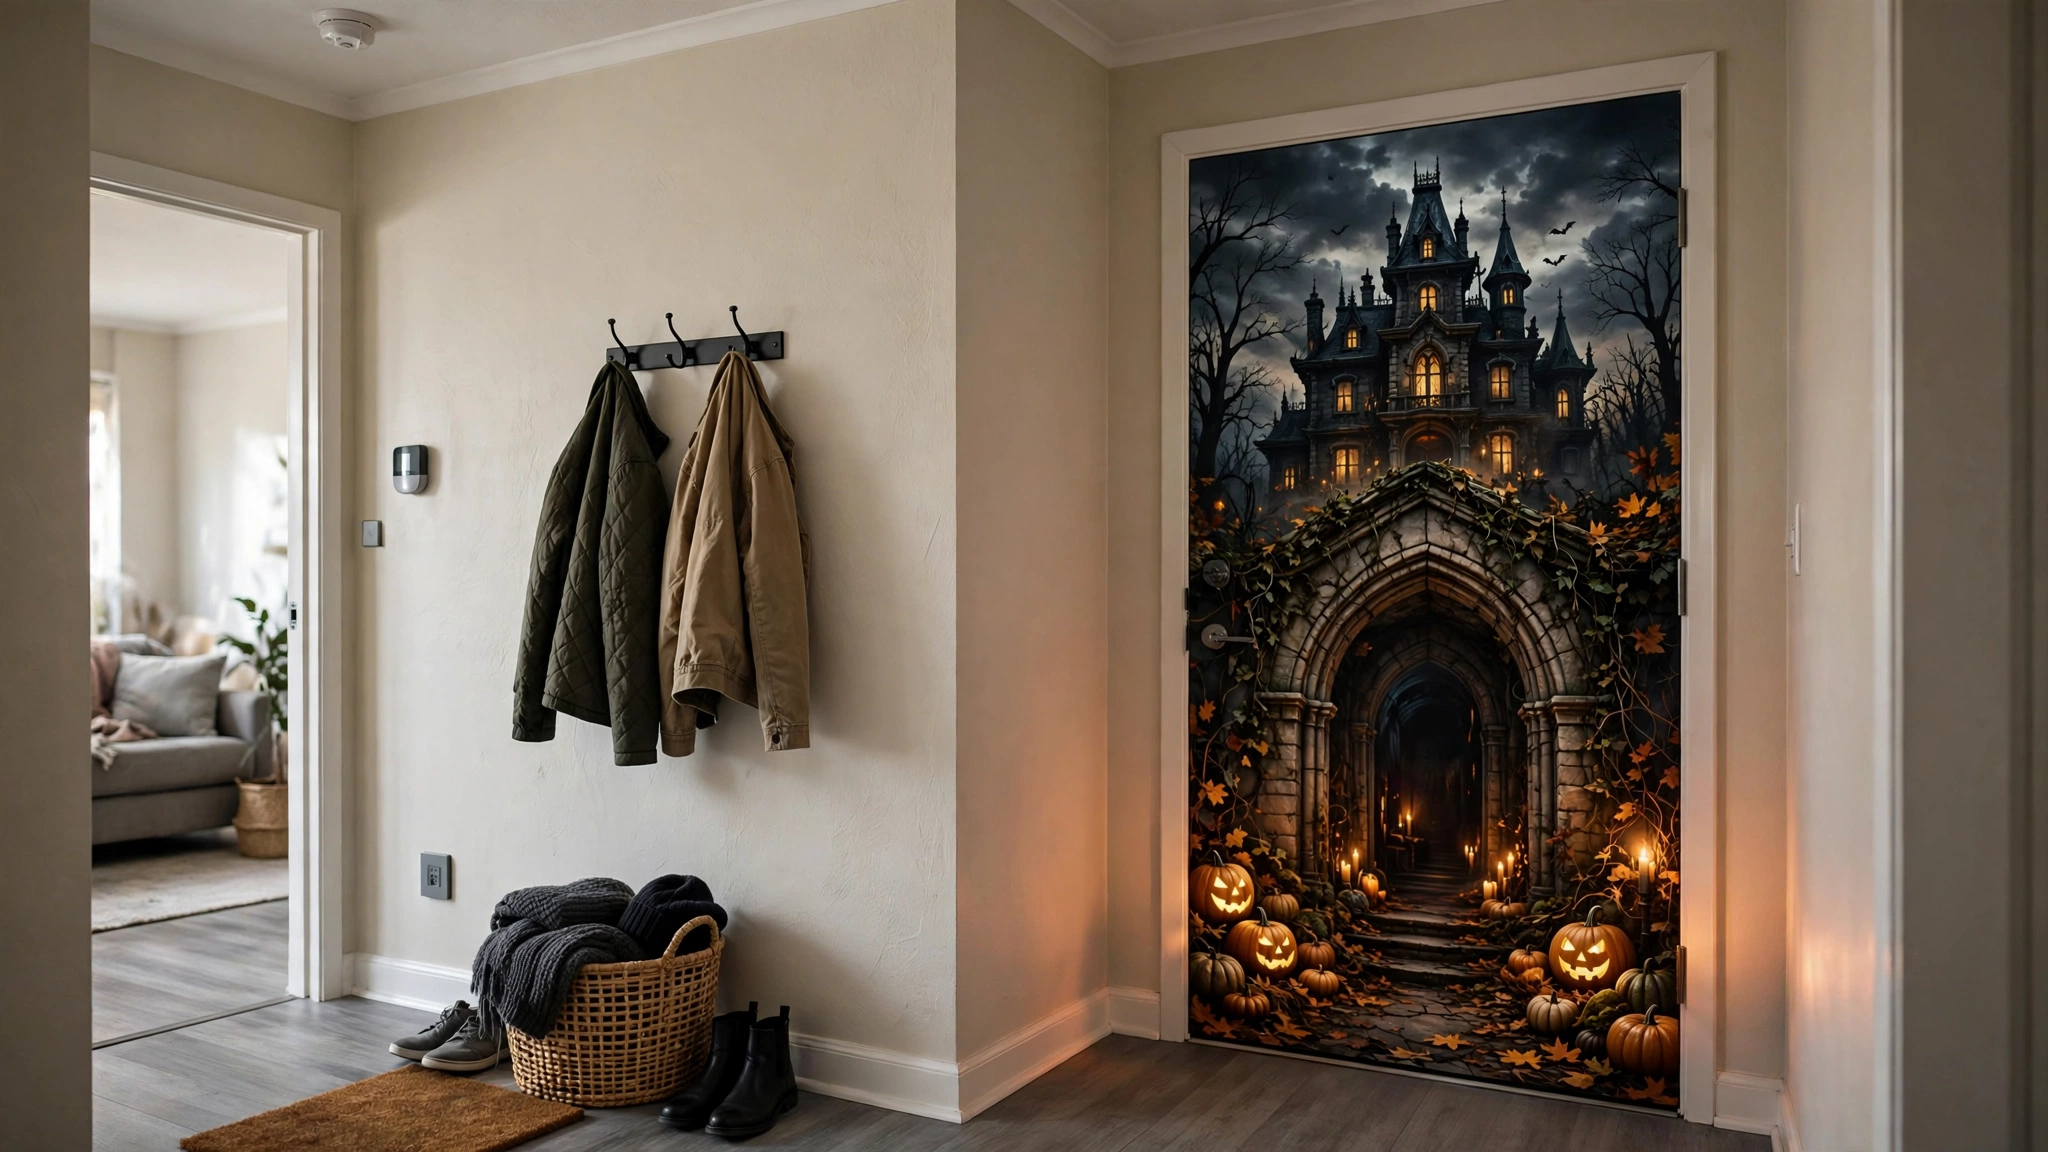
The grand finale: a full-door vinyl wrap that turns your entire door into a haunted mansion entrance, a giant mummy, or a spooky forest scene. This is the highest-commitment idea on the list and the most dramatic — from the hallway, it looks like a different door entirely. The renter test still passes because quality wraps use the same removable adhesive as the decals in idea 3, just at full-door scale — but this is the one idea where I’d insist on the test patch and on reading the product’s removal instructions before you buy. Measure your door carefully (standard apartment doors are 36×80 inches) and buy a wrap sized to fit without trimming if possible.
How to do it:
- Test a small corner of the vinyl on the inside bottom edge of your door; leave it 48 hours, then peel to confirm clean removal.
- Clean and dry the entire door surface, removing the wreath hook or hardware that would sit under the wrap.
- Have a helper hold the top of the wrap while you align it — full-door vinyl is a two-person job.
- Smooth downward with a squeegee or credit card, working out bubbles as you go.
- Trim around the handle and peephole with a craft knife, and warm the vinyl with a hair dryer on removal day for a clean peel.
Approximate cost: $30–$60 for a full-door removable wrap.
Make Your Door the One They Remember
Here’s what I want you to take away from all fifteen ideas: a great Halloween door isn’t about spending the most money or owning a house with a porch — it’s about picking the one or two high-impact pieces that fit your door and your lease, then executing them well. A $35 wreath hung straight at eye level beats a $150 pile of decorations thrown at a doorway every single time. I’ve watched renters with the strictest landlords in the building pull off doors that stopped neighbors in the hallway, because every one of these ideas was designed around the constraint instead of fighting it. Start with your statement piece this weekend, add your lighting before the last week of October, and give yourself the full month to enjoy it.
You’ve got this — and your security deposit stays exactly where it belongs. Please save this visual guide on Pinterest and follow HavenlyStyle there for more renter-friendly seasonal decor ideas you can actually use in a rental.

Amelia leads HavenlyStyle’s editorial vision with a passion for elegant interiors and practical home living. With years of experience in home décor and lifestyle content, she ensures every article is accurate, inspiring, and easy to follow. From timeless decorating ideas to the latest interior design trends, Amelia is committed to helping readers create beautiful, functional spaces while maintaining HavenlyStyle’s trusted and welcoming voice.