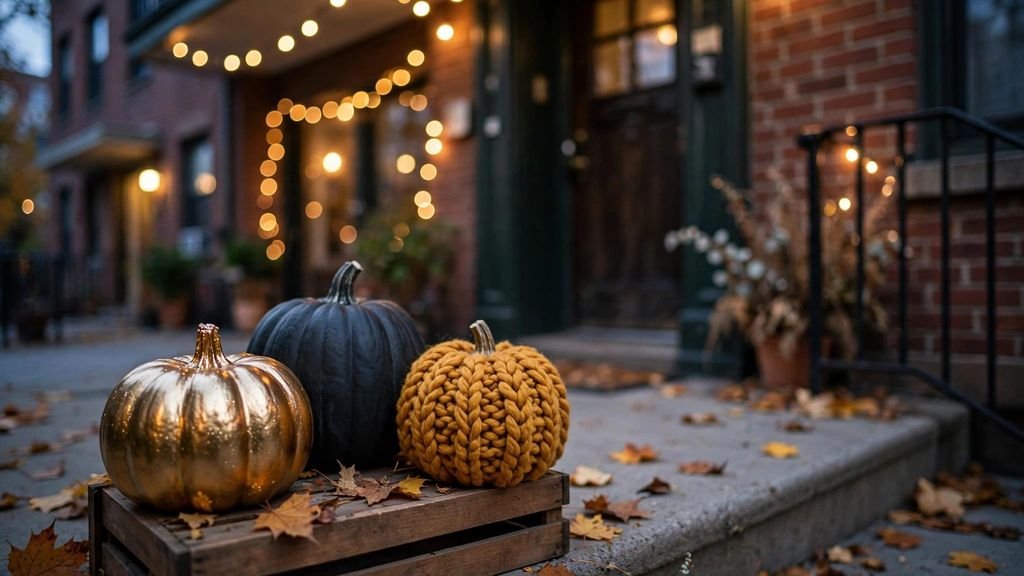
Every October, the same thing happens in my apartment building. The management office announces the annual pumpkin decorating contest, and within days the lobby fills with lopsided jack-o’-lanterns — all triangle eyes, all gap-toothed grins, all starting to cave in on themselves by judging day. I’ve watched renters lose this contest year after year for the same three reasons: they carve a real pumpkin (which rots in three to five days), they stick a real candle inside it (which most leases and balcony fire rules flat-out ban), and they scoop the guts out in a tiny rental kitchen and regret every life choice that led to that moment.
Here’s what I’ve learned after helping dozens of renters prep for building, office, and neighborhood pumpkin contests: the winners almost never carve. They decorate. No-carve techniques look more expensive, photograph better, survive the full week until judging, and — this is the part your landlord cares about — they involve zero open flames, zero power tools, and zero mess ground into a rental carpet.
Every idea below passes the renter test. They’re all removable, reversible, and sized for apartment life — a doorstep, a balcony railing, a windowsill. No landlord permission needed for a single one. Pick the technique that matches your craft comfort level, give yourself one relaxed evening, and go take that trophy.
Executive Summary
- No-carve beats carve for renters: a carved real pumpkin starts rotting in 3–5 days, but contest judging usually happens a full week after decorating weekend. Decorated pumpkins still look perfect on judging day.
- Battery LEDs only, always: real candles inside pumpkins violate most apartment leases and balcony fire codes. Every glowing idea here uses a battery tea light or string lights.
- Foam craft pumpkins are the renter’s secret weapon: they carve like the real thing, never rot, make zero mess, and you can reuse them every October.
- Judges vote from six feet away: the entries that win have high contrast, bold shapes, or height. Fine detail nobody can see from the sidewalk is wasted effort.
- Every idea below is deposit-safe: no drilling into walls, no staining surfaces, no landlord permission required — just removable craft techniques sized for apartment spaces.
A quick note on how I’ve ordered these: the ideas at the top are the ones I’ve seen win most often, because they combine visual punch with foolproof execution. As you move down the list, the techniques get more crafty and more niche — which can be an advantage if your building’s contest has a “most creative” category. Skim for the one that fits your evening, your budget, and your tolerance for glitter.
1. The Gold-Dip Metallic Pumpkin
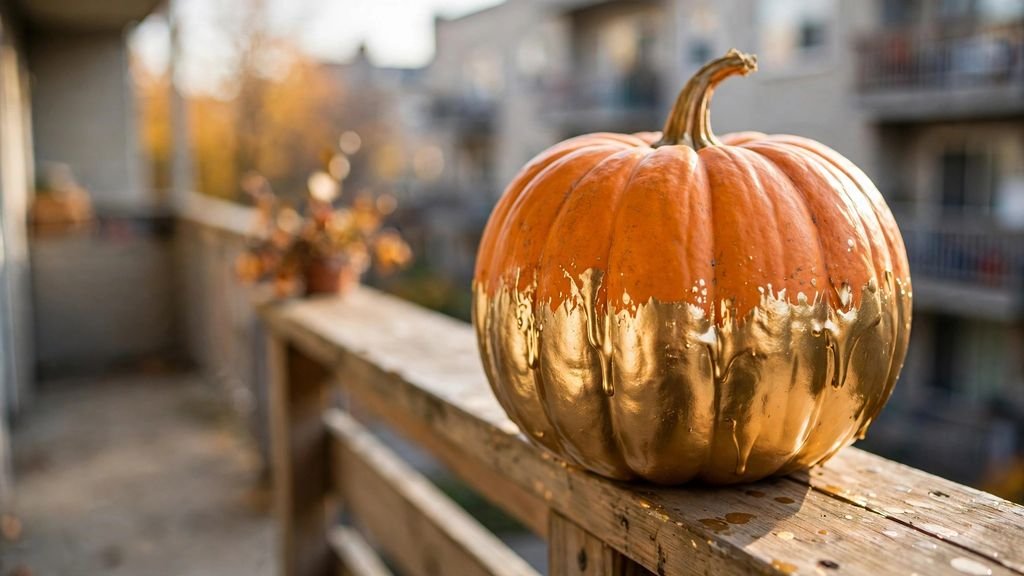
This is the single highest-impact technique I recommend to renters, because it takes about twenty minutes and looks like something from a boutique home store. You dip the bottom third of a pumpkin into metallic gold paint, and the contrast between the gleaming gold and the natural orange top stops people mid-stride. I’ve personally seen a gold-dipped pumpkin win a 40-unit building contest against entries that took their makers an entire weekend.
Why it works for renters: there’s no carving, no mess beyond a sheet of newspaper, and acrylic paint dries fast on a balcony. If you hate it, one more coat of paint covers everything. Nothing touches your apartment itself.
How to do it:
- Wipe your pumpkin clean with a damp cloth and let it dry completely — paint won’t grip a dusty rind.
- Pour metallic gold acrylic craft paint into a wide disposable bowl, about an inch deep.
- Grip the pumpkin firmly by its stem, turn it upside down, and dip the bottom third straight into the paint. Give it a slow quarter-twist as you lift so the paint line looks intentional rather than accidental.
- Set it stem-up on newspaper to dry for about an hour, then touch up any thin spots with a foam brush.
- Optional contest upgrade: dip a second, smaller pumpkin in copper or rose gold and display them as a pair — judges love a “collection.”
Approximate cost: approximately $8–$14 (pumpkin plus one bottle of metallic acrylic paint; the bowl and newspaper you already own).
2. The Chalkboard Vote-Getter Pumpkin
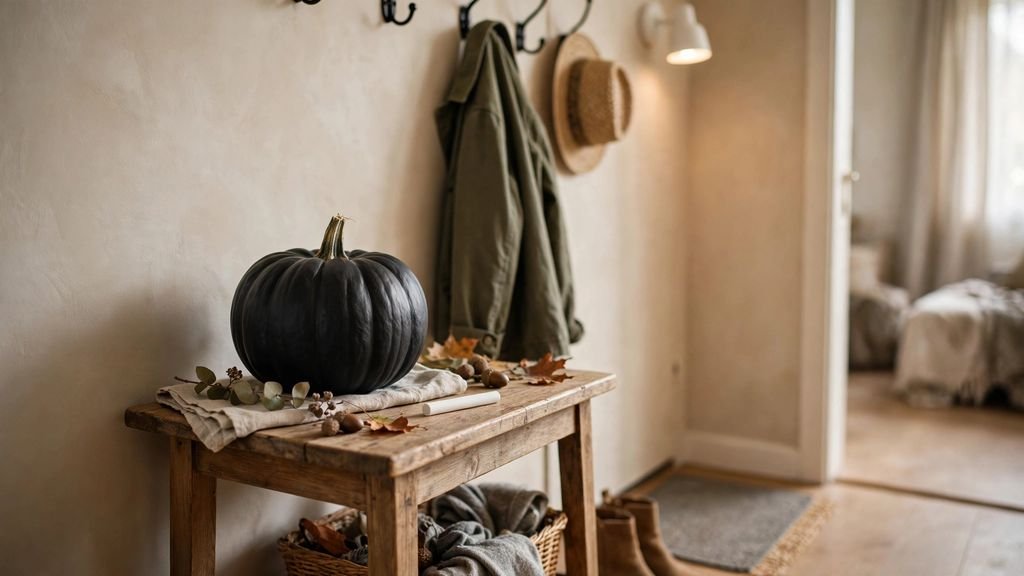
A pumpkin painted in chalkboard paint becomes a blank black canvas you can letter, doodle on, and — here’s the contest trick — use to campaign. Write your entry number big, add “Vote #7!” in curly script, or draw a tally chart and let neighbors add their own chalk votes all week. Interactive entries get remembered, and remembered entries win. I’ve noticed the pumpkins people touch and photograph always outscore the ones they just glance at.
Why it works for renters: it’s endlessly redoable. Smudged your lettering? Wipe and rewrite. Want to change the message the night before judging? Thirty seconds with a damp cloth. Zero carving, zero rot, zero commitment.
How to do it:
- Apply two thin coats of brush-on chalkboard paint to a clean pumpkin, letting each coat dry about 30 minutes. Thin coats won’t crack; one thick coat will.
- “Season” the surface by rubbing the side of a chalk stick over the whole pumpkin and wiping it off — this prevents ghosting of your first design.
- Letter your design with chalk markers (brighter and crisper than stick chalk) or classic chalk for a softer look. Big entry numbers and short phrases read best from a distance.
- Set it by your door a full day early so neighbors see it, talk about it, and start rooting for it before judging even begins.
Approximate cost: approximately $10–$16 (chalkboard paint and chalk markers; one small can covers three or four pumpkins).
3. The Pressed-Flower Botanical Pumpkin
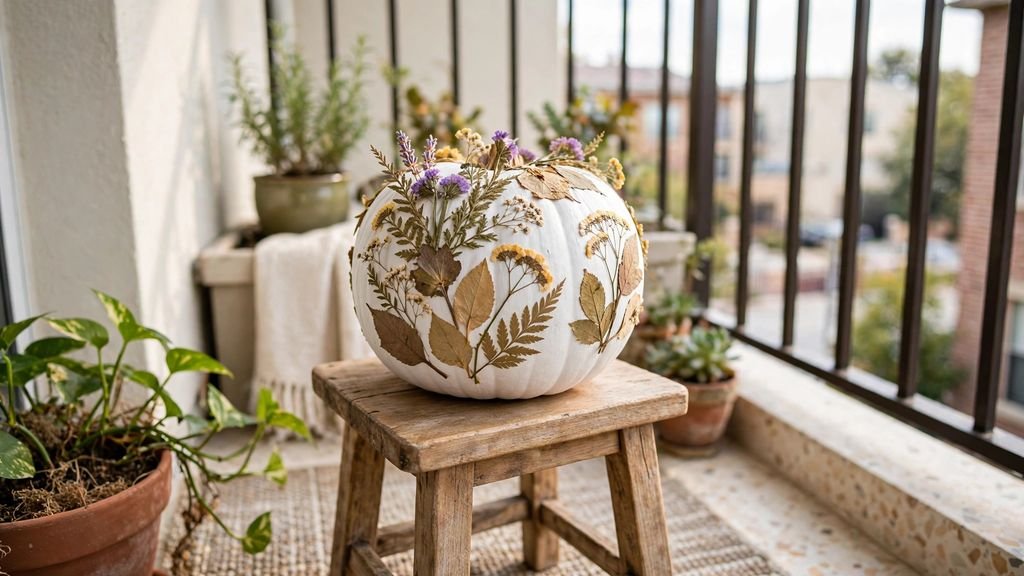
This one wins the “most beautiful” vote in contests that have one, and many do. You glue real dried pressed flowers and leaves onto a white pumpkin, and the result looks like hand-painted porcelain from three feet away. Against a table of orange jack-o’-lanterns, a delicate botanical pumpkin looks like it arrived from another, fancier contest entirely — which is exactly why judges pick it up for a closer look.
Why it works for renters: it’s a silent, fume-free craft you can do at your kitchen table while watching TV. No paint, no heat, no sharp tools. Everything peels or washes off your surfaces, and the finished pumpkin is completely mess-free to display indoors or out.
How to do it:
- Gather your botanicals — press your own flowers between book pages for a week, or buy a pack of dried pressed flowers (they’re inexpensive and available everywhere in fall).
- Brush a thin layer of decoupage medium or clear-drying craft glue onto a small section of a white or pale pumpkin. White pumpkins make colors pop; orange ones work but mute the palette.
- Place each bloom with tweezers, gently pressing from the center outward so petals lie flat against the curves. Overlap leaves and tiny filler flowers to hide gaps.
- Once the design is set, brush one more thin sealing coat over everything and let it cure overnight before moving it to your doorstep.
Approximate cost: approximately $7–$15 (white pumpkin, pressed flowers, and decoupage medium if you don’t already craft).
4. The Thumbtack Mosaic Pumpkin
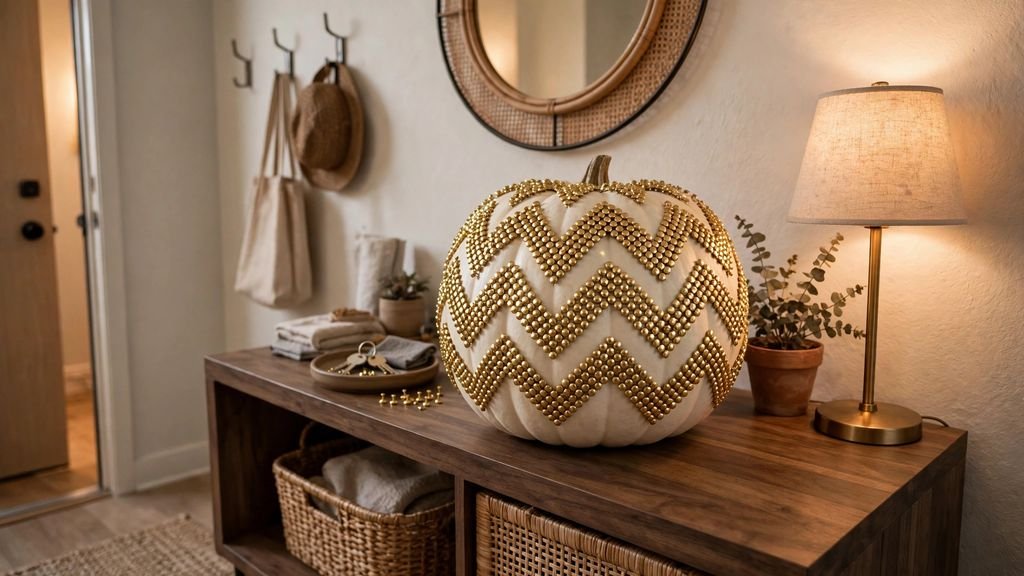
Push shiny gold thumbtacks into a white pumpkin in a bold chevron or diamond pattern, and you get a piece that literally sparkles every time someone walks past with their phone flashlight. This technique wins on texture and shine — two things flat-painted competitors can’t match. I’ve seen this take “most creative” three times in different buildings because nobody expects office supplies to look this good.
Why it works for renters: there’s no paint and no fumes, which matters in a small apartment with the windows closed. It’s also nearly silent and meditative — just you, a pumpkin, and a box of tacks on the couch. If a tack goes in crooked, pull it out; the hole is invisible.
How to do it:
- Lightly sketch your pattern on the pumpkin with a pencil — chevrons, diamonds, or radiating lines from the stem all read beautifully. Keep shapes big and bold.
- Push gold thumbtacks along your pencil lines first to establish the design, spacing them evenly. A thimble saves your thumb on pumpkin number two.
- Fill in the shapes row by row, keeping the tacks snug so no white rind shows through inside the pattern.
- Optional: mist with clear sealer on the balcony for extra shine and weather protection — or skip it, since this lives fine without.
Approximate cost: approximately $6–$12 (white pumpkin plus one to two boxes of gold thumbtacks).
5. The Stenciled Silhouette Pumpkin
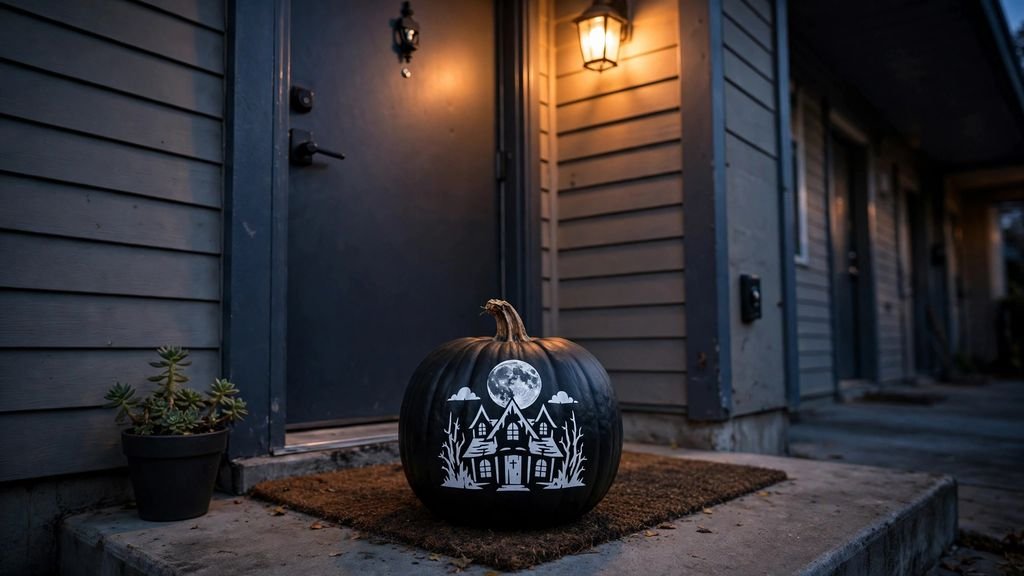
Paint a pumpkin matte black, then stencil a crisp white haunted house, black cat, or full moon onto it. This is graphic-design thinking applied to a gourd: one strong silhouette, maximum contrast, readable from across the courtyard. Contest judges walking a row of entries at dusk will spot yours first, and first impressions do half the voting work. I’ve noticed bold black-and-white entries consistently land in the top three.
Why it works for renters: stencils do the artistic heavy lifting, so “I can’t draw” is no excuse. The whole project happens on newspaper on your balcony or kitchen floor, and a matte black pumpkin doubles as chic fall decor long after the contest ends.
How to do it:
- Paint your pumpkin matte black with two thin coats of acrylic craft paint. Let it dry fully — at least an hour — or the stencil will pull paint up.
- Position an adhesive stencil (haunted houses, cats, bats, and moons are all easy to find in fall) smooth against the pumpkin’s flattest face. Press edges down firmly.
- Dab white acrylic paint over the stencil with a nearly-dry foam pouncer — dabbing, not brushing, keeps paint from bleeding under the edges.
- Peel the stencil off while the paint is still slightly tacky for the crispest lines, then let it cure before displaying.
Approximate cost: approximately $9–$15 (pumpkin, black and white acrylic paint, and a reusable adhesive stencil).
6. The Melted-Crayon Drip Pumpkin
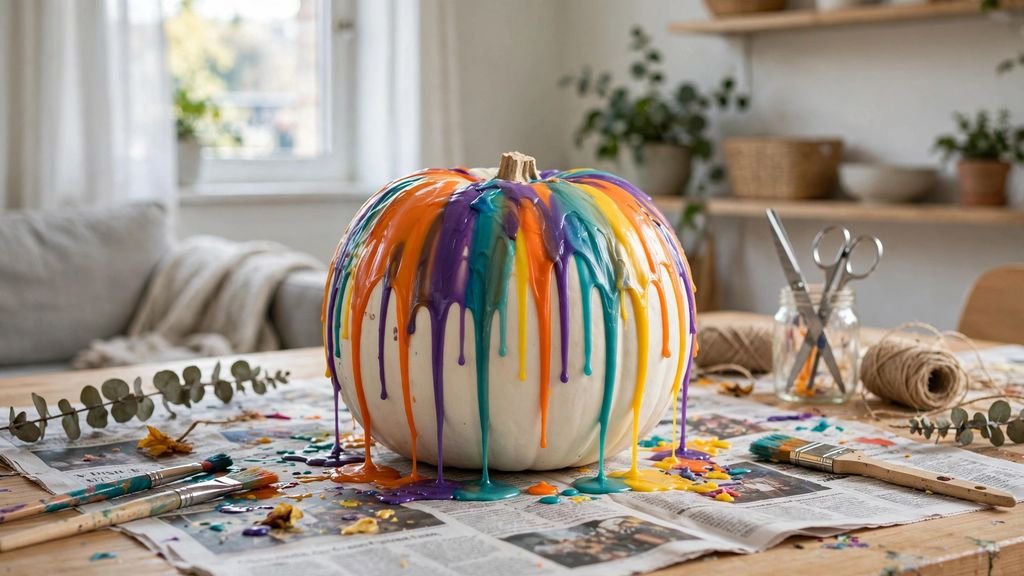
Glue crayon stubs around the top of a white pumpkin and melt them with a hair dryer, and gravity paints you a psychedelic drip masterpiece in about fifteen minutes. No two ever look alike, which is catnip for “most creative” categories. Kids’ building contests especially — but adult judges love it too, because it looks joyful and takes genuine nerve to commit to the mess.
Why it works for renters: the materials probably already live in your junk drawer, and a hair dryer is the only “tool.” Do it over a thick layer of newspaper and the wax never touches your rental. One honest flag: melted wax is permanent on fabric, so keep throw blankets and upholstery far from your work zone.
How to do it:
- Unwrap a handful of crayons in fall colors (plus a few wildcards like teal or purple) and hot-glue them upright around the pumpkin’s top, leaning slightly outward.
- Cover your table in newspaper, set the pumpkin in the center, and aim a hair dryer on low heat at the crayons, working in slow circles.
- As the wax softens, tilt the pumpkin gently to guide drips down the sides. Stop when you love it — restraint is the whole game here.
- Let it cool and harden completely (about 30 minutes) before moving it; warm wax smudges if you rush.
Approximate cost: approximately $3–$8 (a white pumpkin and a box of crayons; the hair dryer and glue gun are standard apartment gear).
7. The Ombré Spray-Painted Pumpkin
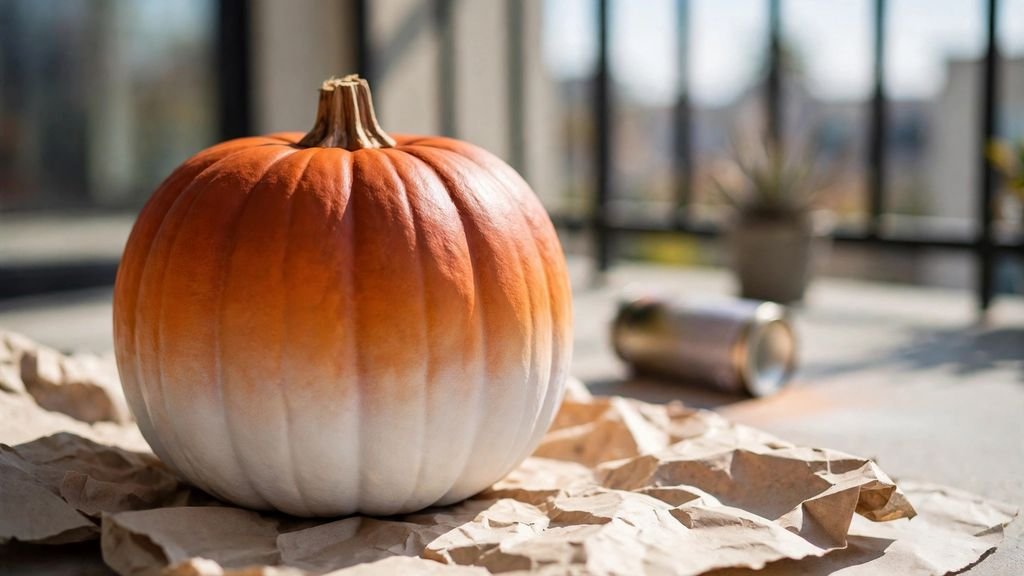
A smooth gradient — deep burnt orange melting into creamy white — gives a pumpkin the kind of finish people assume took professional equipment. It didn’t. It took two cans of spray paint and ten minutes. Ombré entries photograph beautifully for the “post your pumpkin” social voting rounds many buildings run now, and a photogenic pumpkin collects online votes while you sleep.
Why it works for renters: it’s fast and the learning curve is flat. One renter-specific flag: spray paint needs real ventilation, so do this on your balcony or in the parking lot with a drop cloth underneath — never inside the apartment. If your building frowns on spray paint outdoors, you can get a softer version of the same effect by dry-brushing two acrylic shades with a foam brush.
How to do it:
- Set the pumpkin on a drop cloth outdoors, on a calm day — wind is the enemy of a smooth gradient.
- Spray the entire pumpkin your lighter color (cream or white) and let it dry 20 minutes.
- Holding the darker can 10–12 inches away, mist the top third in light sweeping passes, overlapping each pass slightly lower to build the fade. Multiple light coats beat one heavy coat.
- Let it cure an hour, then display it somewhere the gradient catches the light — the blend looks different (and better) at every angle.
Approximate cost: approximately $8–$14 (pumpkin plus two cans of spray paint, which will cover several pumpkins).
8. The Decoupage Napkin Pumpkin
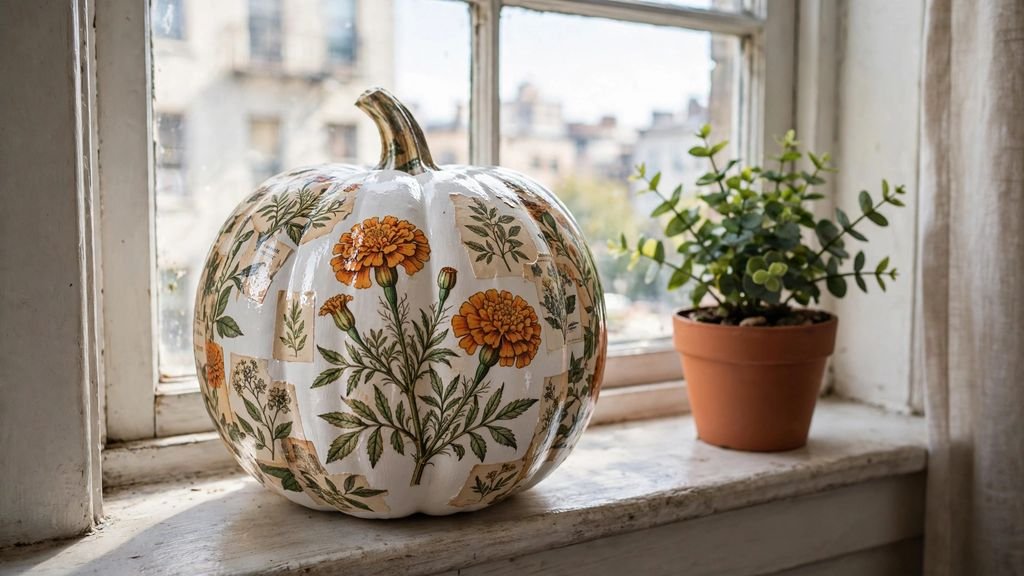
Tear floral or Halloween-print paper napkins into pieces, glue them onto a pumpkin with decoupage medium, and the result genuinely passes for hand-painted ceramic at contest-viewing distance. This is the dollar-store dark horse of pumpkin contests — I’ve watched a $5 napkin pumpkin beat a $40 carving-kit masterpiece because it looked delicate and expensive next to everything orange.
Why it works for renters: the entire supply list fits in a sandwich bag, cleanup is soap and water, and there’s nothing your landlord could possibly object to. It’s also the quietest, most apartment-neighbor-friendly craft on this list — no fumes, no noise, no mess.
How to do it:
- Choose paper napkins with a pattern you love and peel apart the plies — you only want the thin printed top layer, which molds to curves without wrinkling.
- Tear (don’t cut) the napkin into rough 2-inch pieces; torn edges blend invisibly while cut edges show lines.
- Brush decoupage medium onto a section of the pumpkin, lay a napkin piece down, and brush another thin coat over the top to seal it. Overlap pieces slightly like shingles.
- Work your way around the whole pumpkin, then let it cure overnight. It’ll feel dry in an hour but reaches full toughness by morning.
Approximate cost: approximately $5–$10 (pumpkin, a pack of pretty napkins, and decoupage medium).
9. The Yarn-Wrapped Sweater Pumpkin
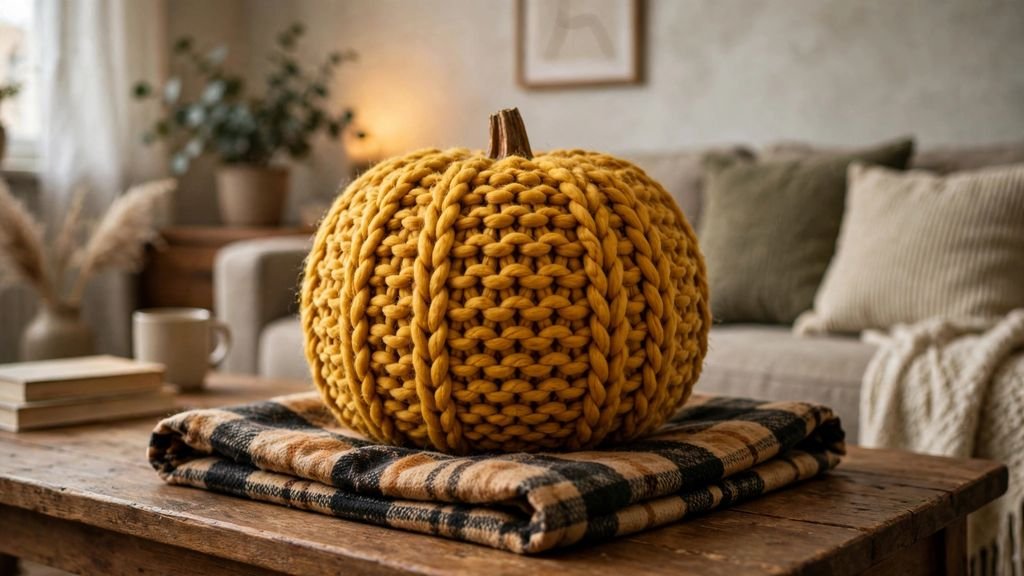
Wind chunky yarn tightly around a pumpkin until it’s fully covered, and you’ve made the coziest object in the contest — a pumpkin in a sweater. In a lineup of spooky and shiny entries, cozy stands out. Judges (and everyone else) will want to pick it up, and anything people touch gets extra votes. I’ve personally seen texture-based entries like this win “crowd favorite” because they’re just so satisfying to look at.
Why it works for renters: zero chemicals, zero drying time, zero tools beyond scissors. It’s pet- and kid-safe to make, makes no noise for thin apartment walls, and when October ends you can unwind the yarn and reuse it. Try getting that deal from a can of spray paint.
How to do it:
- Dab a spot of craft glue near the stem and press the yarn end into it — this anchor keeps everything from unraveling later.
- Wind the yarn snugly around the pumpkin in neat horizontal rows, working from top to bottom and nudging each row tight against the last. Chunky yarn covers faster and looks plusher.
- When the pumpkin is fully covered, cut the yarn, dab glue on the end, and tuck it under a neighboring row.
- Finish by hot-gluing a short cinnamon stick or a real pumpkin stem on top and tying a small twine bow around it for that boutique look.
Approximate cost: approximately $4–$9 (pumpkin plus one skein of chunky yarn).
10. The Velvet Fabric-Wrapped Pumpkin

Center a pumpkin on a square of velvet, gather the fabric up around it, and tie it off at the stem — no sewing, no glue, five minutes. The result looks like the $40 velvet pumpkins sold at high-end home stores, with soft folds that catch the light beautifully. This is my top recommendation for renters who insist they “aren’t crafty,” because there is genuinely no way to mess it up: lumpy gathers just look more luxurious.
Why it works for renters: it’s the fastest idea on this list and completely reversible — unwrap it and you have your fabric and your pumpkin back, untouched. The finished piece is elegant enough to live on your mantel or entryway table straight through Thanksgiving.
How to do it:
- Cut a square of velvet or velveteen about twice as wide as your pumpkin is tall. Rust, mustard, deep green, and plum all photograph richly.
- Set the pumpkin in the center of the fabric square, printed side down.
- Gather the fabric up around the pumpkin and secure it tightly at the stem with twine, a rubber band hidden under a ribbon, or a strip of the same fabric.
- Arrange the folds with your fingers until they fall evenly, then push the real stem (or a faux one) through the gathered opening and fluff the fabric collar around it.
Approximate cost: approximately $6–$12 (a fat quarter or half-yard of velvet plus twine; the pumpkin you were buying anyway).
11. The Mini-Pumpkin Topiary Tower
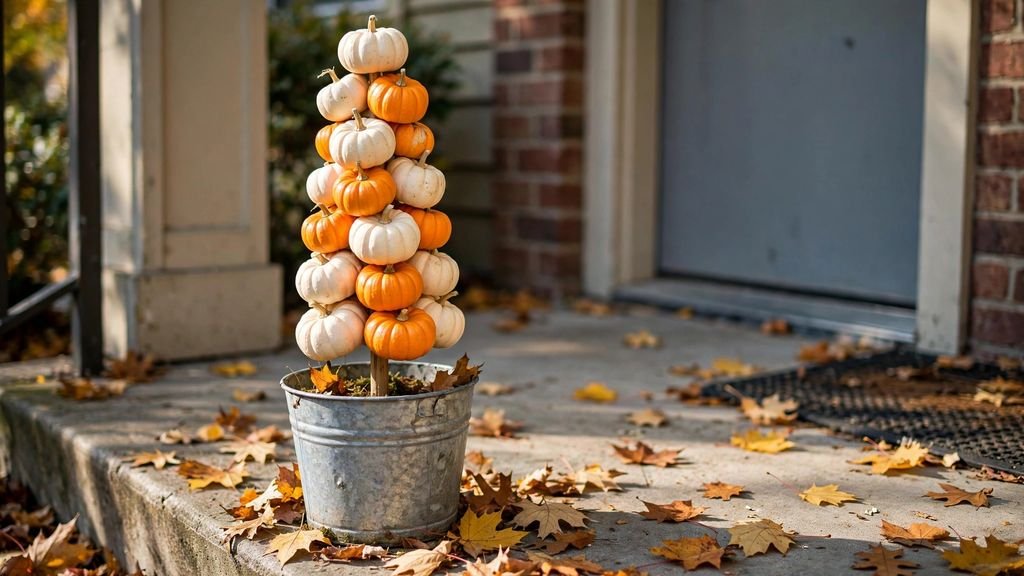
Skewer a dozen mini pumpkins onto a wooden dowel stuck in a weighted bucket, and you’ve built a three-foot tower that dominates any contest table. Height is the most underused weapon in pumpkin contests — every entry sits at table level, and then there’s yours, rising above them all like a fall topiary. Judges photograph tall entries. Tall entries get shared in the building group chat. You see where this is going.
Why it works for renters: it assembles in minutes, disassembles just as fast, and every component is reusable or compostable. It fits a doorstep, a balcony corner, or the strip of hallway your lease actually lets you decorate. Nothing is glued, nailed, or permanent.
How to do it:
- Fill a sturdy bucket or planter with crumpled newspaper or floral foam, then push a 3-foot wooden dowel firmly into the center so it stands straight.
- Starting with the largest mini pumpkins, skewer each one through its center onto the dowel, alternating orange and white for a classic look.
- Work upward with progressively smaller pumpkins, twisting each one so its prettiest face points outward.
- Crown the tower with the smallest pumpkin, tuck a little faux greenery or dried wheat around the base of the bucket, and set the whole thing where foot traffic can’t miss it.
Approximate cost: approximately $12–$20 (a bag of mini pumpkins, a dowel, and a bucket or planter you may already own).
12. The Never-Rots Foam Carve
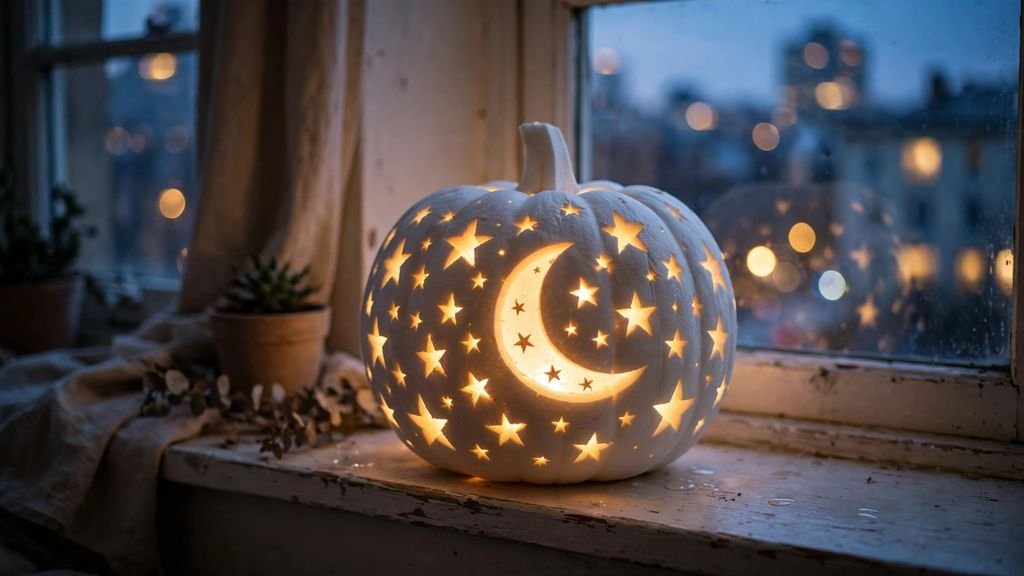
If your heart is set on a carved look, carve a foam craft pumpkin instead of a real one. Foam cuts like butter with a craft knife, holds crisp detail a real rind can’t, never rots, never smells, and drops zero slimy seeds on your rental kitchen counter. Poke a pattern of star holes, drop in a battery tea light, and you get the classic glowing jack-o’-lantern — one that still looks perfect on judging day and goes back in the closet for next October.
Why it works for renters: this solves every renter problem with carving at once. No rot means you can carve the weekend decorations go up instead of gambling on timing. No mess means your security deposit never enters the conversation. And battery lights mean you’re compliant with every lease fire clause I’ve ever read.
How to do it:
- Draw or trace your design onto the foam pumpkin with a marker — stars, moons, and geometric patterns are easier in foam than faces, and they glow beautifully.
- Cut along your lines with a sharp craft knife, using gentle sawing motions; foam offers almost no resistance, so let the blade do the work and keep fingers clear.
- Poke additional small holes with a wooden skewer for a starry-sky effect around your main design.
- Drop a battery-operated tea light or a short string of battery fairy lights inside, switch it on at dusk, and enjoy a carve that outlasts everyone else’s by weeks.
Approximate cost: approximately $10–$18 (foam craft pumpkin, battery tea light or fairy lights; the craft knife is standard kit).
Your Turn to Take the Trophy
Here’s the truth about pumpkin decorating contests in apartment buildings: most people enter the same carved pumpkin they’ve been making since childhood, and it starts sagging before the votes are counted. You don’t need to out-carve anyone. You need to out-think them — and as a renter, you have a built-in advantage, because every constraint of apartment life pushes you toward the techniques that actually win: no-carve designs that stay flawless all week, bold contrast that reads from across the courtyard, battery-powered glow that breaks no rules, and foam pumpkins you can refine and reuse year after year.
Pick one idea from this list that matches your evening — twenty minutes for the gold dip, an hour for the thumbtacks, a lazy afternoon for the pressed flowers. And here’s a practitioner tip most people miss: enter early. Get your pumpkin in place the day decorating weekend starts, because the entries neighbors see all week accumulate silent supporters long before anyone casts a vote. A great pumpkin that appears the morning of judging is already playing catch-up.
Give yourself permission to make the weird one, the pretty one, the one nobody else thought of. Contests aren’t won by the most effort; they’re won by the entry people remember when they pick up the ballot.
I’d love to see which one you choose — and which trophy ends up on your mantel. Please save this visual guide on Pinterest and share it with your fellow renters before decorating weekend, so your whole building brings its best game this October.

Amelia leads HavenlyStyle’s editorial vision with a passion for elegant interiors and practical home living. With years of experience in home décor and lifestyle content, she ensures every article is accurate, inspiring, and easy to follow. From timeless decorating ideas to the latest interior design trends, Amelia is committed to helping readers create beautiful, functional spaces while maintaining HavenlyStyle’s trusted and welcoming voice.