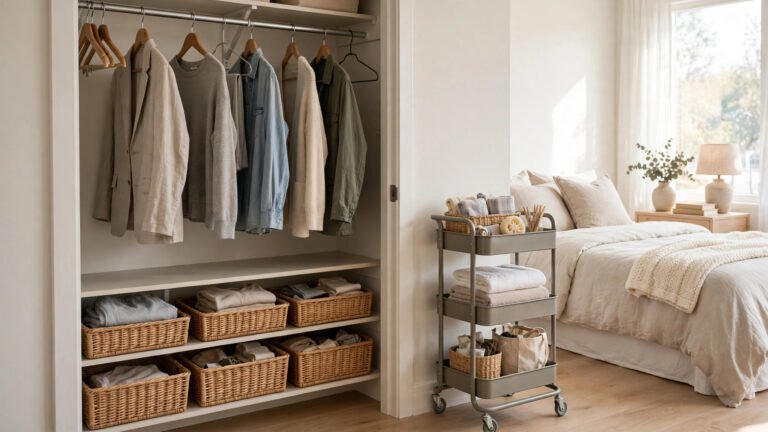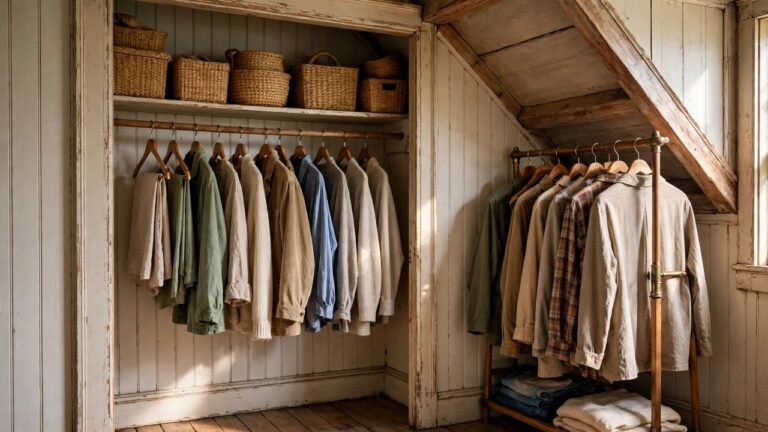
I’ve helped dozens of renters turn cramped rental closets into genuinely organized spaces, and nothing tests that work like the first week of January. The tree comes down, the garlands come off the mantel, the ornaments come off in handfuls — and suddenly your living room looks like a gift-wrap crime scene while your one small bedroom closet stares back at you. No garage. No attic. No basement. Just a coat closet that already holds your winter gear and a vague promise that you’ll “deal with it later.”
I get it, because I’ve watched the “later” happen year after year: ornaments tossed into a grocery bag where half of them shatter, light strings wadded into a knot that takes forty-five minutes to untangle next December, the artificial tree shoved behind a door where its branches bend into permanent weird angles. By next Christmas you’ve replaced half the decor and you’re buying storage boxes on top of it — the January money trap.
Here’s the truth I tell every renter: Christmas decor storage isn’t really about owning more space. It’s about owning a pack-down *system* — one where every decoration has an assigned container, every container has an assigned zone in your apartment, and the whole thing comes back out next December better than it went in. That’s what this post gives you: twelve ideas, ordered by impact, that I personally recommend to renters working with one closet, an under-bed gap, and a strict landlord who definitely does not want you drilling shelf brackets into the walls. Every idea fits small-space rental realities, every cost is approximate, and every system is reusable year after year.
Executive Summary
- Ornaments die in grocery bags; divided trays are the single biggest save. Stackable compartment boxes keep every bauble intact and let you see the whole collection at a glance next December.
- The artificial tree is your biggest space problem, and a garment bag solves it. Hung vertically on a closet rod, a compressed tree takes up closet-width space, not tree-width space.
- Light strings only tangle when you let them; wound reels stay tangle-free for eleven months. Ten minutes of winding in January saves forty-five minutes of untangling in December.
- Textiles are secretly enormous — vacuum bags shrink stockings, tree skirts, and throws to a fraction of their size so they slide under the bed instead of eating your closet.
- Zones beat piles. Under-bed space, the top shelf of the closet, and one stack of labeled bins by decoration type turn pack-down into a repeatable one-hour ritual.
- Labels and a phone photo are your future self’s best friend. Photograph each bin’s contents before the lid goes on, label the bin face, and next December’s setup day runs itself.
1. The Divided Ornament Tray Boxes
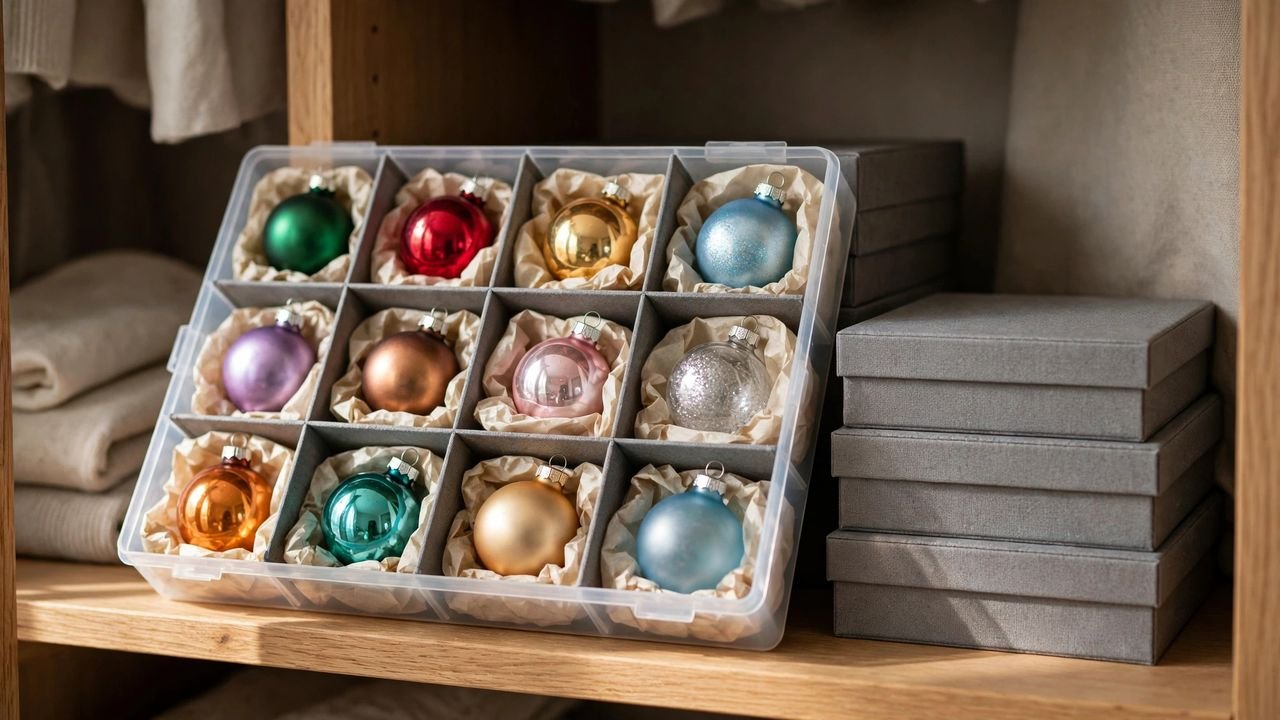
This is the move that saves actual money, and it’s the one I push first on every renter I advise. Ornaments are the most damage-prone part of your Christmas collection — thin glass, sentimental, irreplaceable in many cases — and they are also the thing most renters store worst: heaped into whatever box is handy, shifting and crushing for eleven months. Stackable divided boxes (the kind with removable cardboard or plastic dividers, sold as ornament organizers) give every bauble its own cell. Nothing touches anything else. The boxes stack neatly in a closet like drawers, and the removable dividers let you customize cell size for your biggest and smallest pieces.
Why it works for renters: These boxes are rectangular, shallow, and uniform — the three things that make them fit rental storage perfectly. They stack four or five high on a closet shelf, slide under most beds in pairs, and fit the narrow depth of apartment linen closets. No mounting, no drilling, no landlord involvement. And because the boxes protect the ornaments, you stop replacing broken glass every December.
How to do it:
- Sort ornaments by size before buying: measure your largest bauble and make sure the cells you choose clear it by at least half an inch.
- Layer a thin sheet of tissue paper inside each cell before the ornament goes in; it stops rattling and adds cushioning for the stack above.
- Nest smaller ornaments inside larger shatterproof ones only — glass inside glass is a shatter risk, not a space hack.
- Label the end of each box with what’s inside (“Glass reds + golds,” “Wooden + felt kid ornaments”) so next December you grab the right box first.
- Approximate cost: $12–$30 per box depending on size and divider quality; most renters need two to four.
2. The Garment-Bag Artificial Tree

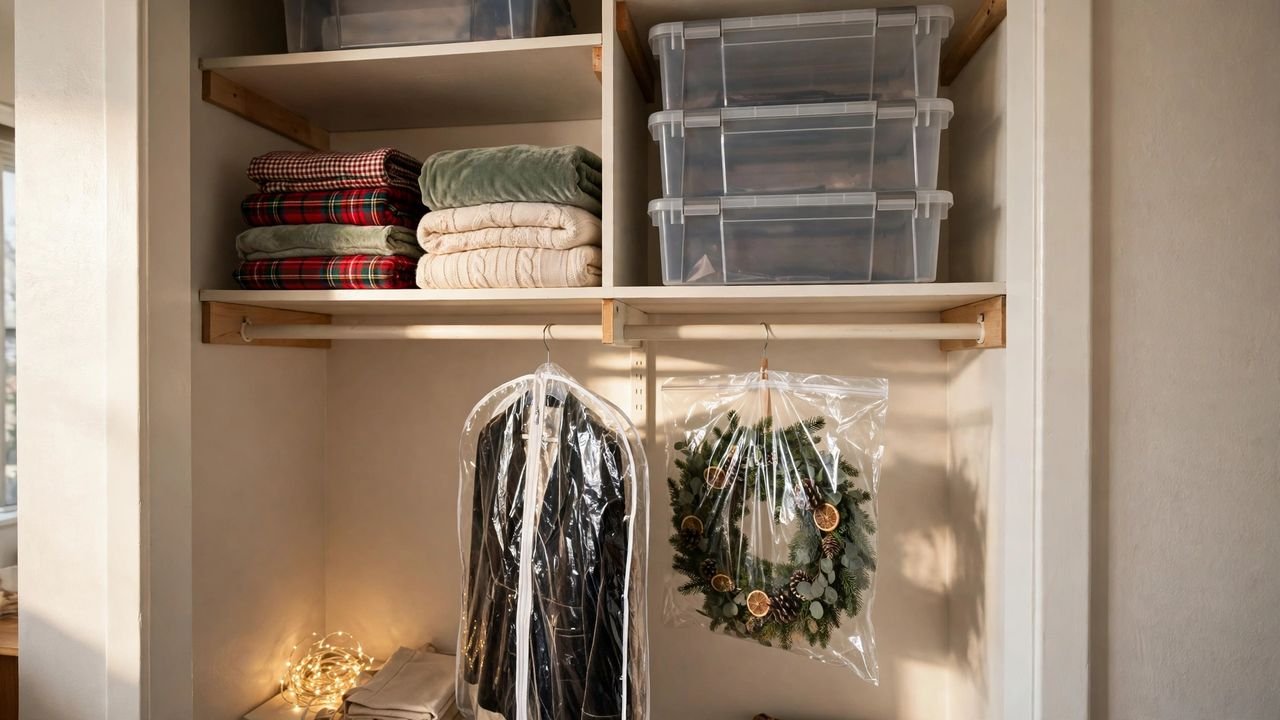
Here is the idea that gets the biggest gasp when I show it to a renter, because the artificial tree is everyone’s single biggest storage headache. A six-foot tree in its original box is a coffin-shaped object that fits nowhere in an apartment — too tall for the closet, too wide for behind the door, too awkward for under the bed. The renter fix: compress the tree vertically into a clear garment bag (the kind with a hanger hole at the top) and hang it from a closet rod like the world’s bushiest suit. Fold the branches inward, slide the tree — in two or three sections — into the bag, cinch the bottom, and hang it. It takes up roughly the width of two winter coats on the rod instead of four square feet of floor.
Why it works for renters: Closet rods are dead-vertical space you’re already paying rent for, and this turns that air into tree storage without any hardware. Nothing screws into anything. The tree stays dust-free inside the bag, the branches don’t get crushed under other boxes, and because it hangs vertically, the branches never develop the flat “pancake side” of a shoved-behind-the-door tree. When December comes, you lift it down, fluff it, and it’s a tree again — I’ve seen a full six-foot tree stored this way in a studio coat closet with room to spare.
How to do it:
- Take the tree down section by section, pressing each branch inward and slightly upward so the sections nest narrow.
- Slide each section into a clear garment bag — two tree sections fit most standard 48-inch bags, so buy two bags for a full tree.
- Tie the bottom of each bag with the built-in drawstring or a strip of fabric so dust can’t drift in over the year.
- Hang the bags on the closet rod with sturdy hangers at opposite ends of the closet so the weight is balanced.
- Approximate cost: $8–$20 for two or three clear garment bags.
3. The Cardboard-Reel Light Wind
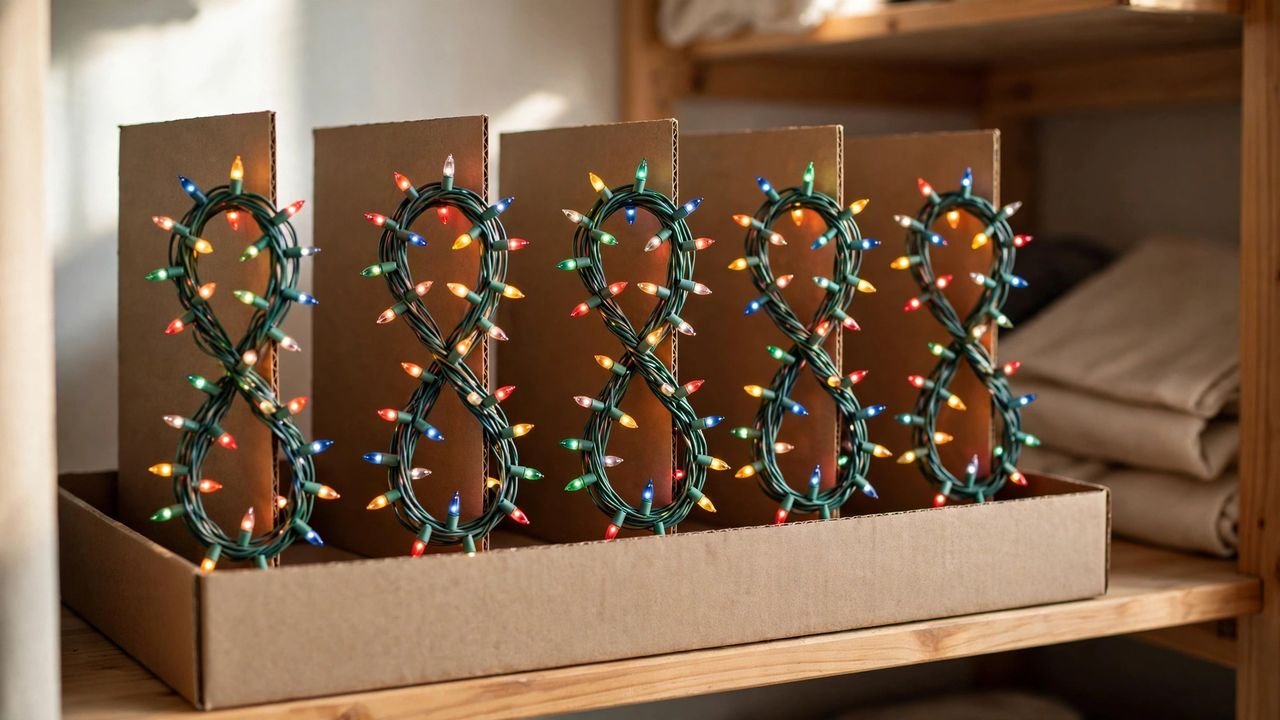
Ask any renter who’s done this wrong and they’ll describe the same scene: a forty-five-minute untangling session next December, a knot that tightens the more you work at it, and at least one string of lights that snaps in protest. Light strings tangle because they’re stored loose, and loose wire plus eleven months of shifting equals a braid. The fix takes ten minutes in January: wind each string around a flat cardboard rectangle (or a purpose-made cord reel) in a neat figure-eight, tuck the plug into the center of the wind, secure the coil with a rubber band or a twist of twine, and store the reels upright in a shallow box. Wind in a figure-eight — straight loops build in a twist that knots on the way out, while the figure-eight unwinds clean.
Why it works for renters: Cardboard is free — cut rectangles from the shipping boxes January inevitably brings — and the whole method needs zero purchased hardware if you don’t want it. Reels stack flat in a bin or stand in a row on a closet shelf, each one labeled with the string’s length and location (“25-ft living room window”). Next December you pull the reel, walk it to its spot, and unwind as you go. I’ve watched renters cut their tree-lighting time by more than half with nothing but cardboard and ten January minutes.
How to do it:
- Cut cardboard rectangles roughly 10 by 14 inches from a sturdy shipping box.
- Wind each string in a figure-eight around the rectangle, keeping light tension — never stretch the wire tight.
- Tuck the plug end into the middle of the coil and the socket end on the outside, then secure with a rubber band.
- Label each reel with masking tape: length, bulb color, and where it went (“white mini, mantel”).
- Approximate cost: $0–$12 — free with cardboard and rubber bands, or a few dollars for reusable cord reels.
4. The Vertical Wrapping-Paper Bin
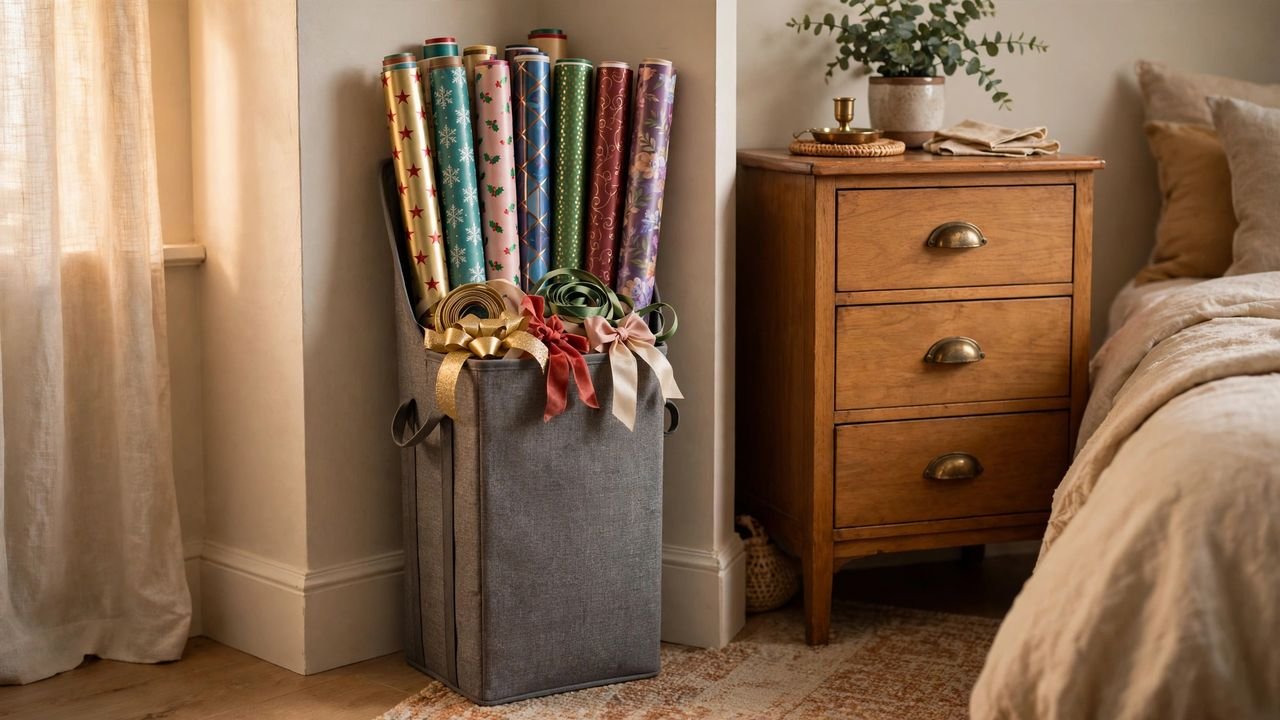
Wrapping paper is the decoration you forget is decoration until December 20th, when you need the roll and discover it bent, creased, and flattened under a pile of storage bins. Rolls store badly flat — anything laid on top dents the tube, and once the tube kinks the paper tears at the fold forever after. The renter solution is a tall vertical bin: an upright container (a tall laundry basket, a garment-box-turned-upright, or a purpose-made wrap organizer) that stands rolls on end like a quiver of arrows. Nothing ever rests on a roll, the tubes stay straight, and you can see every pattern at a glance next December.
Why it works for renters: The footprint is tiny — roughly a foot square of floor — so it tucks beside a dresser, in the back of a closet, or next to the laundry machine. Nothing mounts to walls. With a lidded tall bin, bows, ribbon spools, and gift tags ride on top of the rolls — the whole wrapping station in one grab-and-go container next December. I’ve put this bin in the awkward gap between a dresser and a wall in a studio — dead space that was collecting dust — and it worked perfectly.
How to do it:
- Choose a bin tall enough to stand your longest roll with at least two inches of clearance above it — measure before buying.
- Place the heaviest, widest rolls (kraft paper, thick boutique rolls) in the center and lighter ones around the edge so the bin can’t tip.
- Drop bows, ribbon spools, and a roll of tape in a small bag or cup on top of the rolls as a grab-and-go kit.
- Park the bin in a spot nothing ever stacks on — beside furniture, in a closet corner, or behind a door that opens against a wall.
- Approximate cost: $10–$25 for a tall vertical organizer, or free using a sturdy tall laundry basket you already own.
5. The Wreath-Bag Closet Hang
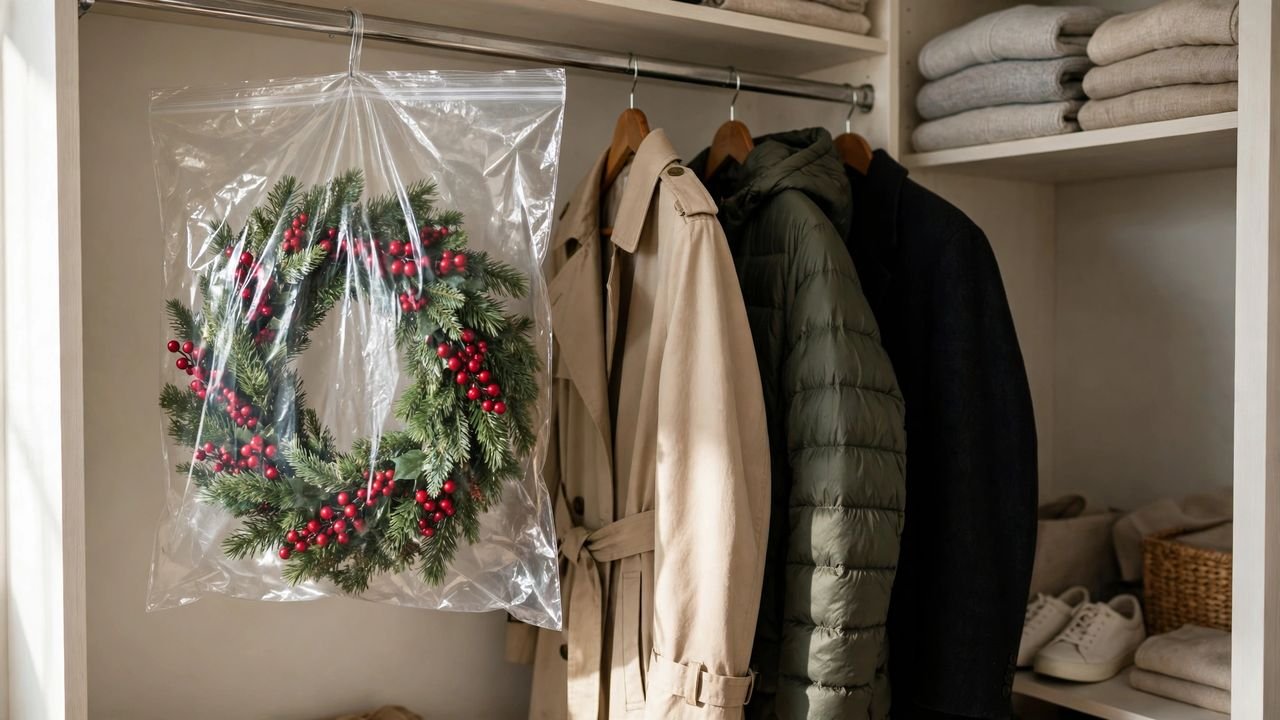
Wreaths are oddly fragile for something that spent a month outdoors in wind and rain. The branches and berries hold their shape against gravity when hanging, but the moment you lay a wreath flat and stack anything on it, the bottom side compresses permanently — next December it has a flat spot you can see from across the room. The renter fix is a clear wreath storage bag (round, zippered, with a built-in hanging loop) hung on a closet rod, a wall hook, or even the inside of the coat-closet door. Stored vertically, the wreath experiences zero pressure on any side, and the clear bag keeps dust off while letting you see exactly which wreath is which.
Why it works for renters: A hung wreath uses the vertical dead space of a closet that closets otherwise waste — the stretch of rod between coats, or the door’s interior. No drilling, since you hang from the existing rod or from an over-the-door hook. If you own two or three wreaths, they hang side by side like garments. Stuff a few sheets of crumpled tissue inside the bag so the wreath can’t shift and knock its neighbors when the closet door swings.
How to do it:
- Buy bags sized two inches wider than your widest wreath; squeezing a wreath into a tight bag bends branches the bag was meant to protect.
- Slide the wreath in, add crumpled tissue around the edges to immobilize it, and zip the bag closed.
- Hang the bag by its loop on the closet rod at the far end, or on an over-the-door hook inside the coat closet.
- If you have multiple wreaths, hang the lightest in front and the heaviest in back so weight stays balanced on the rod.
- Approximate cost: $6–$15 per bag, depending on size and whether you buy singles or multipacks.
6. The Vacuum-Bag Textile Squash
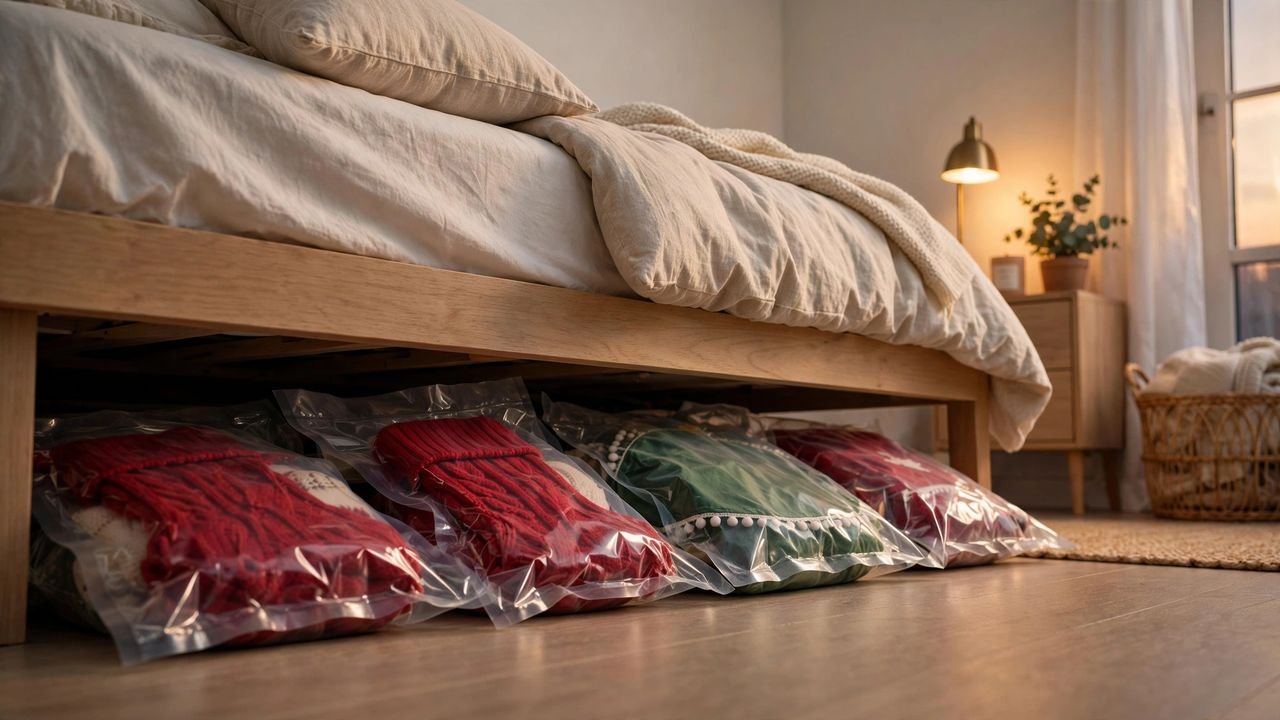
Here’s a storage fact most renters learn the expensive way: Christmas textiles are secretly enormous. The tree skirt, four stockings, two festive throws, the table runner, and the cloth napkins take up a genuinely shocking amount of closet space for things that are essentially flat. Vacuum storage bags compress all of it — socks, stockings, skirts, runners — to roughly a third of its volume. You load the fabric, roll or valve out the air, and a bag that was puffy enough to fill a closet shelf becomes a flat slab you can slide under the bed.
Why it works for renters: Under-bed space is the renter’s hidden storage room, and vacuum bags turn it into a flat, dustproof drawer for everything soft. Nothing mounts anywhere. The bags also protect fabric from the two things that ruin stored textiles: moisture and moths, since the air is out and the seal is tight. One caution: don’t vacuum-seal wired ribbon or stiff appliqué for a full year — they can take a permanent crease. Pack those pieces in a regular bag instead.
How to do it:
- Wash or freshen every textile before packing — storing eleven months of dust into a sealed bag is how musty smells happen.
- Fold, don’t stuff: fold each piece to a uniform rectangle so the sealed bag lies flat instead of lumpy.
- Seal the bag, then squeeze or valve out the air until the bag is rigid — a loose seal will re-inflate within weeks.
- Slide sealed bags under the bed in a single layer, or stack two deep on a closet shelf; label each bag with a strip of masking tape.
- Approximate cost: $10–$25 for a multipack of vacuum bags in mixed sizes.
7. The One-Bin-Per-Zone System
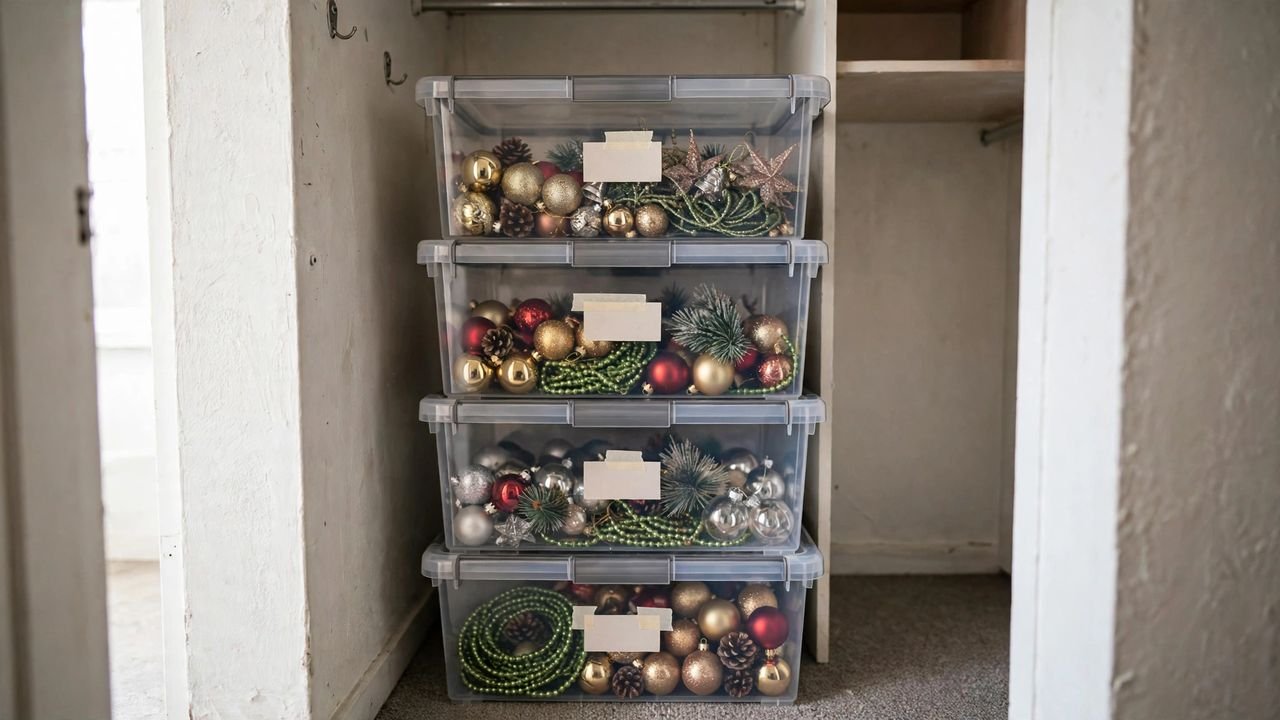
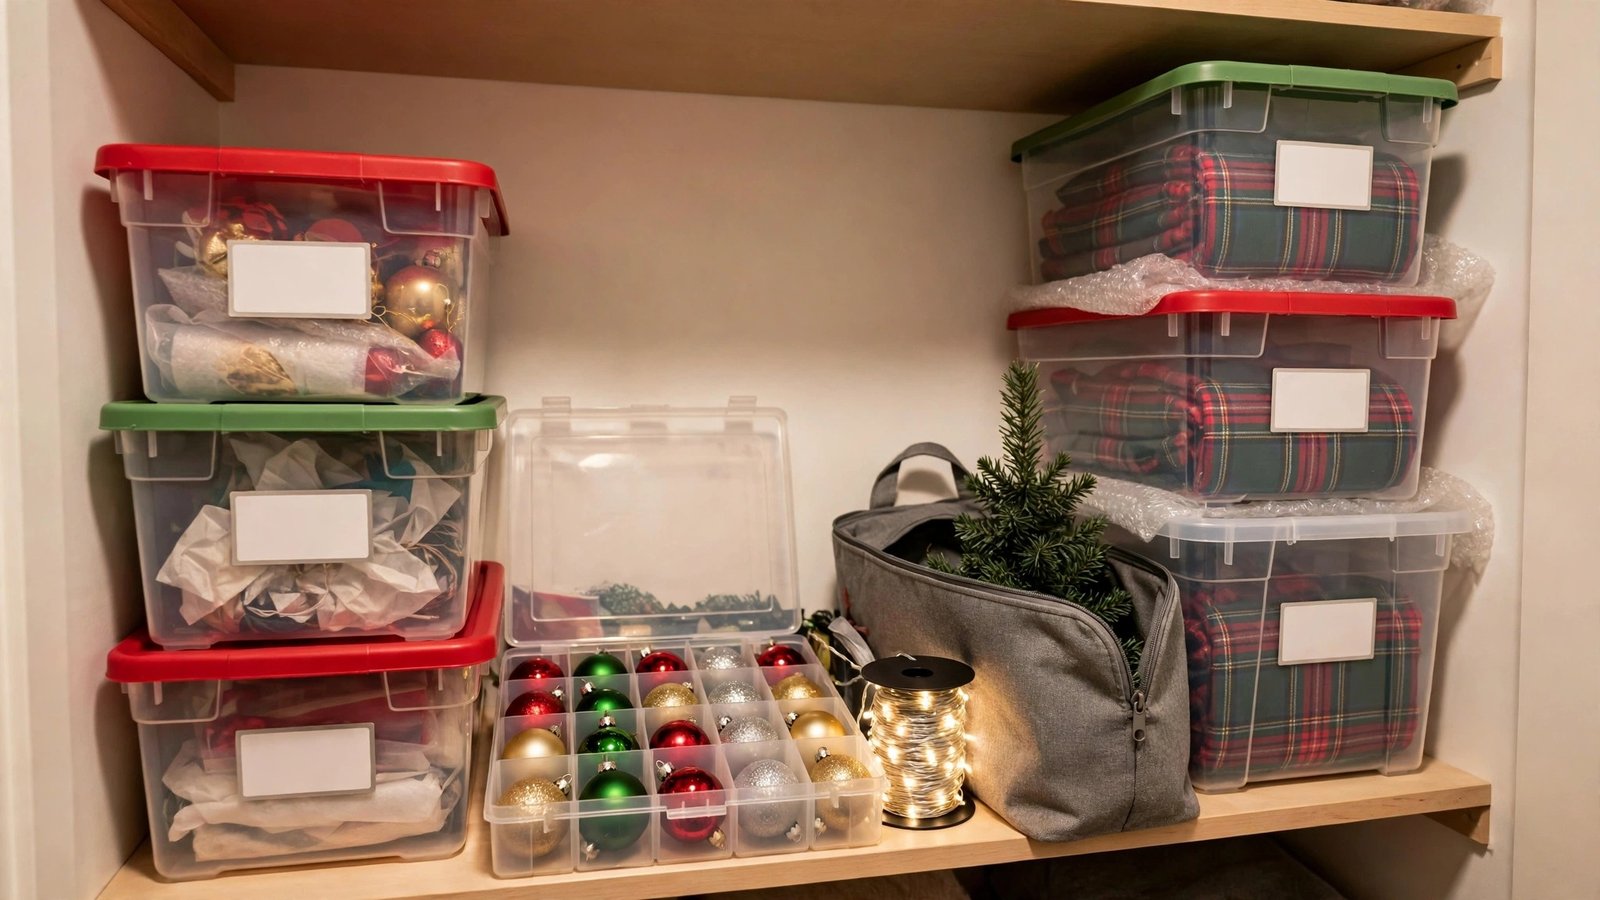
This is the idea that turns pack-down from a chore into a system, and it’s the one renters thank me for most often. Instead of sorting decor by type — all ornaments in one place, all lights in another — sort by *zone*: one bin for everything that goes on the tree, one for the mantel, one for the table, one for the porch. Stackable lidded bins, each labeled on the face with its zone, live together as a single tower in the closet. Next December, setup happens zone by zone — grab the tree bin, decorate the tree completely, move on — instead of opening six containers to find one mantel garland. It’s the difference between unpacking a kit and conducting an archaeological dig.
Why it works for renters: Zone bins match how apartments actually get decorated — one zone at a time, in whatever order the room allows — and a single tower of four to six bins fits the depth of a standard reach-in closet perfectly. Labels on the *face* of each bin (not the top, which gets buried in a stack) mean you can read the whole tower at a glance. Anything you buy next December goes into its zone bin in January, so the system never degrades — I’ve watched renters go from a three-hour teardown to under an hour.
How to do it:
- List your actual decoration zones before buying bins: tree, mantel, dining table, entryway, porch — most renters have four to six.
- Buy one stackable lidded bin per zone in the same size so they stack into a clean tower; clear bins let you see contents, opaque bins stack more discreetly.
- As you take decorations down, sort directly into the zone bin — never a “miscellaneous” pile, which is where systems die.
- Label the face of each bin with a label maker, masking tape, or chalk tags: the zone name in big letters.
- Approximate cost: $8–$20 per bin; most renters need four to six, for a total of roughly $35–$100.
8. The Padded Grid for Village Pieces

Ceramic Christmas villages and standalone figurines are the ornaments’ fragile cousins, except worse: they’re heavy, oddly shaped, and their tiny protruding bits — church steeples, lamppost arms, snowmen’s noses — snap off at the slightest knock. Loose in a box, they destroy each other. The fix is a padded grid: a divided box where each cell is individually wrapped in tissue or bubble wrap, so each piece is cushioned on all six sides. Wine-shipping boxes with cardboard dividers work beautifully for this and are often free from package stores; purpose-made collectible organizers with foam dividers work even better for serious collections.
Why it works for renters: Village pieces are heavy for their size, which makes them dangerous neighbors in a shared bin — a dropped box turns into ceramic shrapnel. Isolated in a grid, each piece rides out a bump alone. The boxes stack like any other storage container on a closet shelf, and the tissue wrapping doubles as dust protection. No hardware, no mounting, nothing to ask the landlord about. A quick phone photo of the open box is your reassembly map — next December you rebuild the village in minutes instead of puzzling over which house had the tall steeple.
How to do it:
- Wrap every piece in at least one layer of tissue paper, two for anything with protruding parts, before it goes in a cell.
- Place the heaviest pieces in the bottom layer or the bottom box of the stack, lightest on top.
- Fill any empty cells with crumpled tissue so nothing shifts when the box moves.
- Approximate cost: $0–$35 — free with a wine-shipping box and tissue, up to $35 for a foam-divider collectible case.
9. The Photo Inventory and Bin-Face Labels

Every renter I know has a version of this story: it’s next December, the closet holds five identical-looking bins, and you have no idea which one has the tree topper and which one has the wrapping paper you swore you bought on sale. The solution is embarrassingly simple and I recommend it with total seriousness: before each lid goes on in January, take a phone photo of the open bin’s contents, then label the bin’s face with what’s inside. The photo lives in a dedicated phone album called “Christmas storage” — searchable, backed up, always with you at the store when you wonder whether you already own gold ribbon.
Why it works for renters: Renters rarely have a garage shelf they can eyeball from across the room; bins live behind coats, under beds, and on top shelves where faces are all you can see. A label on the face plus a photo on your phone means you never open the wrong bin, never buy a duplicate, and never discover in December that last January’s “I’ll remember” didn’t survive eleven months. It costs nothing, takes ninety seconds per bin, and prevents more December frustration than any storage product on the market.
How to do it:
- Before closing each bin in January, photograph the open bin so the contents are clearly visible, flash on if the room is dim.
- Move all the photos into one phone album labeled clearly — “Christmas storage” — so they don’t dissolve into your camera roll.
- Label each bin’s face (the side that faces out in the stack) with a label maker, chalk tag, or masking tape: contents in plain words.
- When you buy new decor mid-December, photograph the receipt item next to the bin it belongs in so January-you knows where it goes.
- Approximate cost: $0–$10 — free with your phone and masking tape, a few dollars for a label maker or chalk tags.
10. The Under-Bed and Top-of-Closet Zones

Renters don’t lack storage; they lack noticed storage. Two zones in every apartment go underused: the flat stretch under the bed and the shelf above the closet rod. The under-bed gap (usually six to eight inches) is perfect for flat, shallow things — vacuum-sealed textiles, ornament trays in pairs, a low-profile bin of gift wrap. The top of the closet takes the lightest, least-frequently-needed bins: wrapping-paper vertical storage, the wreath bags, spare dividers.
Why it works for renters: Neither zone requires a single screw. Low-profile under-bed bins roll on existing floor space; the top closet shelf is already there, already yours. Assigning zones by the physics — heavy and fragile low (ornaments under the bed where they can’t fall far), light and bulky high (wreaths and paper on the top shelf) — also protects your decor: nothing heavy sits above the fragile stuff, and nothing you need in December requires a step stool at 11 p.m. One watch-out: measure the under-bed clearance before buying bins — a bin that’s a quarter inch too tall is useless.
How to do it:
- Measure your under-bed clearance at three points (head, middle, foot) and buy bins at least half an inch shorter than the lowest measurement.
- Assign by physics: flat and fragile under the bed, light and bulky on the top closet shelf, frequently-needed at eye level.
- Use bins with lids and wheels or smooth bottoms under the bed so they slide out without snagging the rug.
- Put a small label on the front face of every under-bed bin so you can identify it without pulling it all the way out.
- Approximate cost: $10–$25 per low-profile under-bed bin; the top-shelf zone usually needs nothing new.
11. The Coiled-Garland Tote
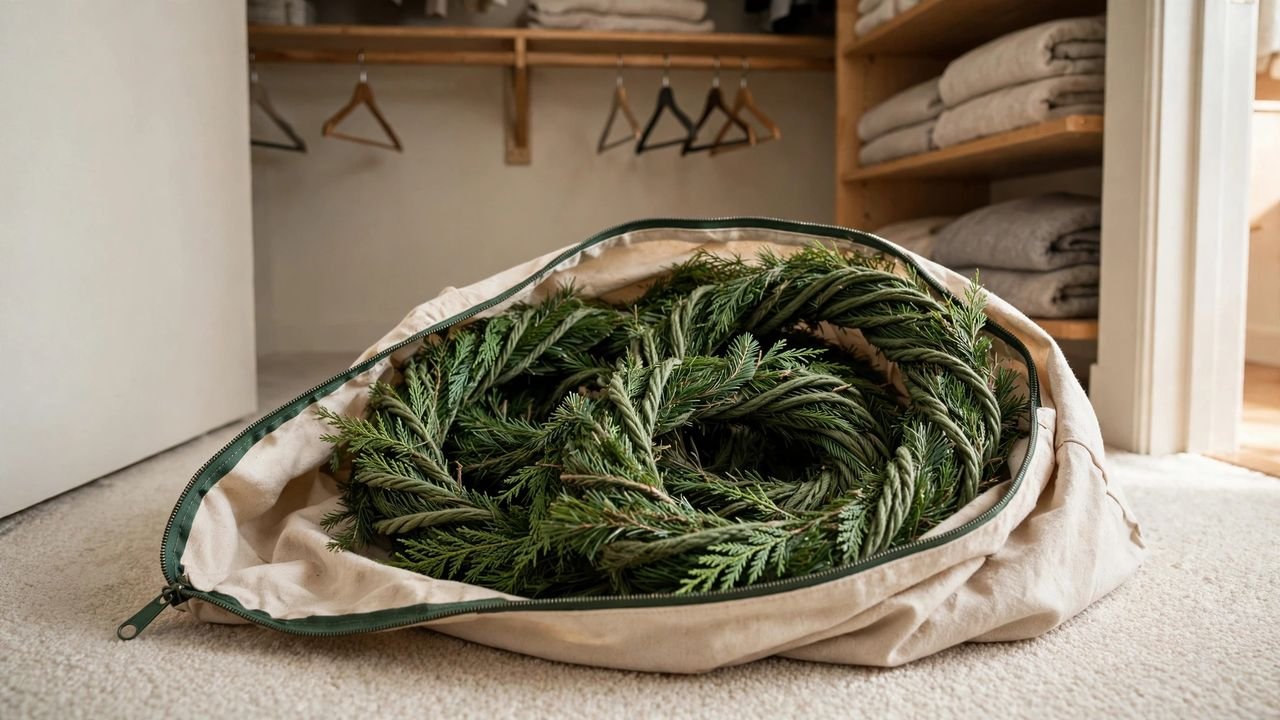
Garlands occupy an awkward middle ground: too long to box neatly, too bushy to hang, and their wire cores remember every bad position — coil a garland wrong and it develops permanent kinks that no amount of December fluffing fixes. The renter fix is a zippered tote bag (the soft-sided kind, roughly duffel-sized) with the garland coiled inside in one continuous loose spiral. One tote typically holds two to three standard nine-foot garlands. The soft sides don’t compress the branches, the zipper keeps dust out, and the tote slides onto a closet shelf or into the bottom of a wardrobe.
Why it works for renters: A coiled garland in a tote is a self-contained unit that fits anywhere a duffel bag fits — closet floors, under hanging clothes, the back of a coat closet. No hardware, no mounting, nothing to patch. The loose coil is the whole trick: because the wire core never folds sharply, the garland uncoils next December with its shape intact instead of looking like it lost a fight. Slip a dryer sheet into each tote — eleven months in a sealed bag can leave artificial greenery smelling plasticky.
How to do it:
- Start at one end of the garland and coil in wide, loose loops roughly two feet across, never folding the wire core sharply.
- Nest a second garland in the same tote by coiling it inside the first coil’s open center, working from the inside out.
- Lay a sheet of tissue between the two coils so branches don’t tangle across garlands.
- Zip the tote, label the face (“Garlands — mantel + stair”), and store it where nothing heavy will sit on it.
- Approximate cost: $8–$18 for a zippered tote bag in duffel size.
12. The January Teardown Ritual

The final idea isn’t a product — it’s a habit, and honestly it’s the one that makes all eleven others work. Every January, the week the tree comes down, run a single teardown ritual: take everything down in one session, pack each zone bin as you go, photograph and label as the lids close, run the one-in-one-out rule on anything you’re tempted to keep, and drop the donation box at the thrift store the same week. The one-in-one-out rule matters most: for every new decoration kept this season, one old one leaves — donated, not stored. Collections grow silently year after year, and in a rental, growth is the enemy. A stable collection in a stable system means next January’s teardown takes one hour, not one weekend.
Why it works for renters: Small apartments punish accumulation — one extra box of decor is a meaningful fraction of a closet. The ritual also has a deposit angle most renters miss: teardown day is when you discover the nail hole from the stocking hook, the tape residue on the window frame, the scuff where the tree stand sat. Catching all of it in January means you have eleven months to fix it calmly instead of discovering it during the move-out panic. I’ve seen renters save real deposit money with nothing but a January walkthrough and a twenty-dollar repair kit.
How to do it:
- Schedule teardown as one block — the same weekend the tree comes down — so packing happens while your memory of where everything went is fresh.
- Keep a “donate” box open the whole session and enforce one-in-one-out: one new item kept means one old item donated.
- Walk the apartment after teardown with a phone flashlight, photographing every hook hole, tape mark, and scuff for a calm repair list.
- Keep a small renter repair kit on hand — spackle, putty knife, touch-up paint or marker — and fix the January damage list within the month.
- Approximate cost: $0–$20 — the ritual itself is free; a basic repair kit runs about twenty dollars.
Conclusion
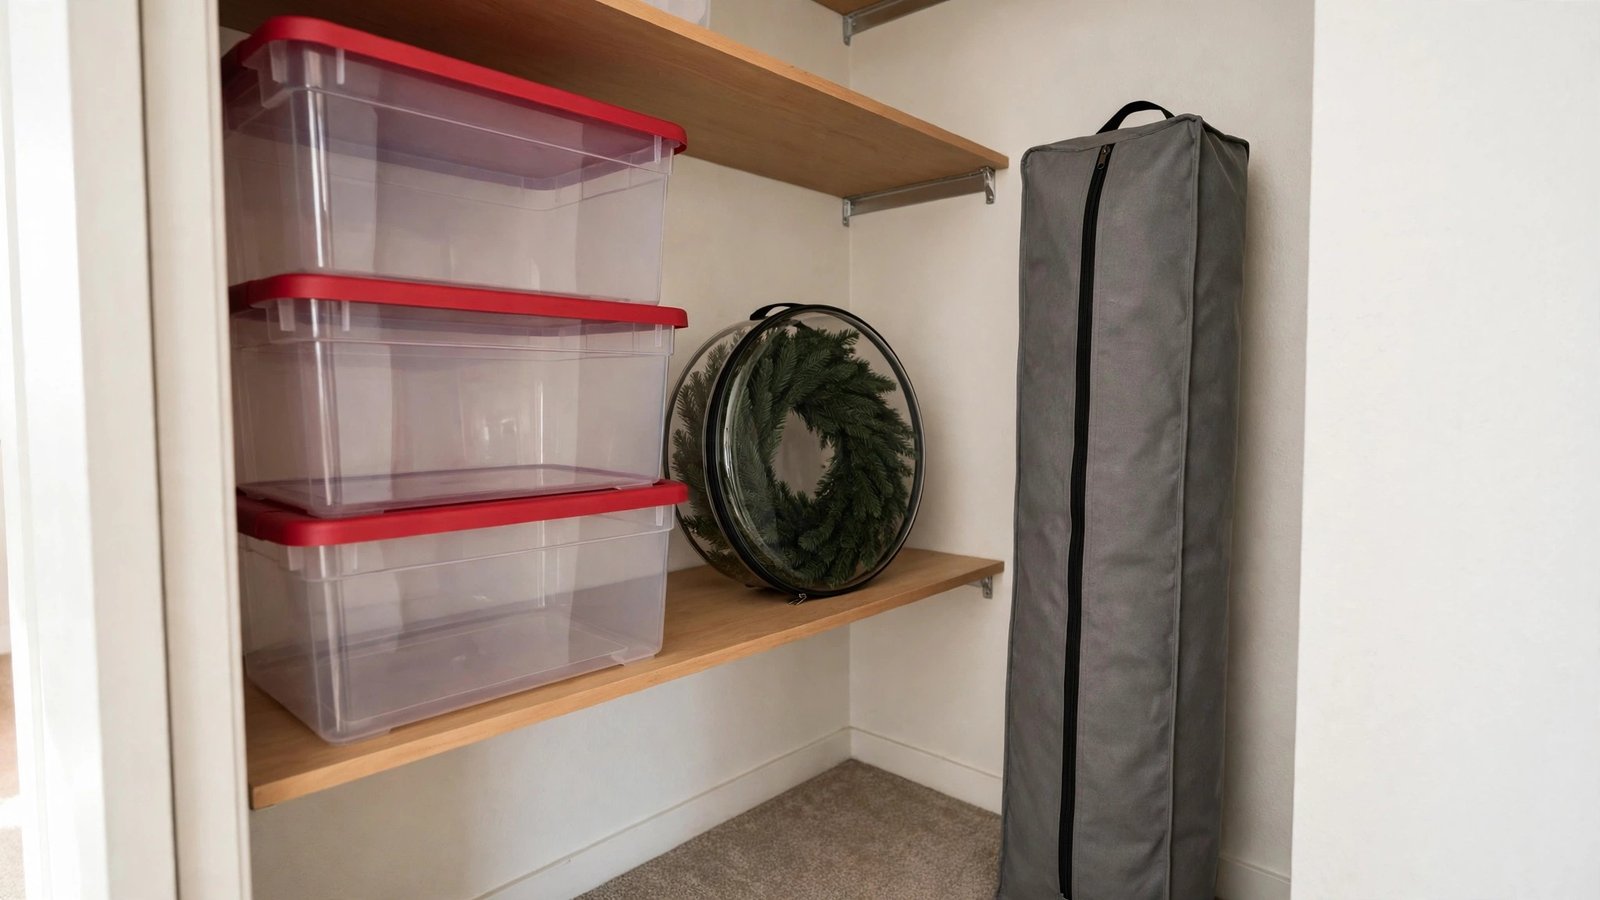
January doesn’t have to be the month your Christmas decorations go to die — not in a rental, not with one closet, not without a garage. I’ve watched renters go from grocery-bag carnage to a one-hour teardown ritual using exactly the system above: divided trays for the ornaments, a garment bag for the tree, wound reels for the lights, vacuum bags for the textiles, zone bins with labels and photos, and the dead spaces under the bed and above the rod doing the quiet heavy lifting.
Start with the three ideas that solve your biggest pain — for most renters that’s the ornament trays, the garment-bag tree, and the zone bins. A system grows fine one piece at a time. And when December rolls back around and your tree goes up in an afternoon with nothing broken, nothing tangled, and nothing missing, you’ll be glad January-you did the work. Please save this visual guide on Pinterest and pin it to your holiday planning board, so next year’s teardown is already handled before the last ornament comes down.

Amelia leads HavenlyStyle’s editorial vision with a passion for elegant interiors and practical home living. With years of experience in home décor and lifestyle content, she ensures every article is accurate, inspiring, and easy to follow. From timeless decorating ideas to the latest interior design trends, Amelia is committed to helping readers create beautiful, functional spaces while maintaining HavenlyStyle’s trusted and welcoming voice.